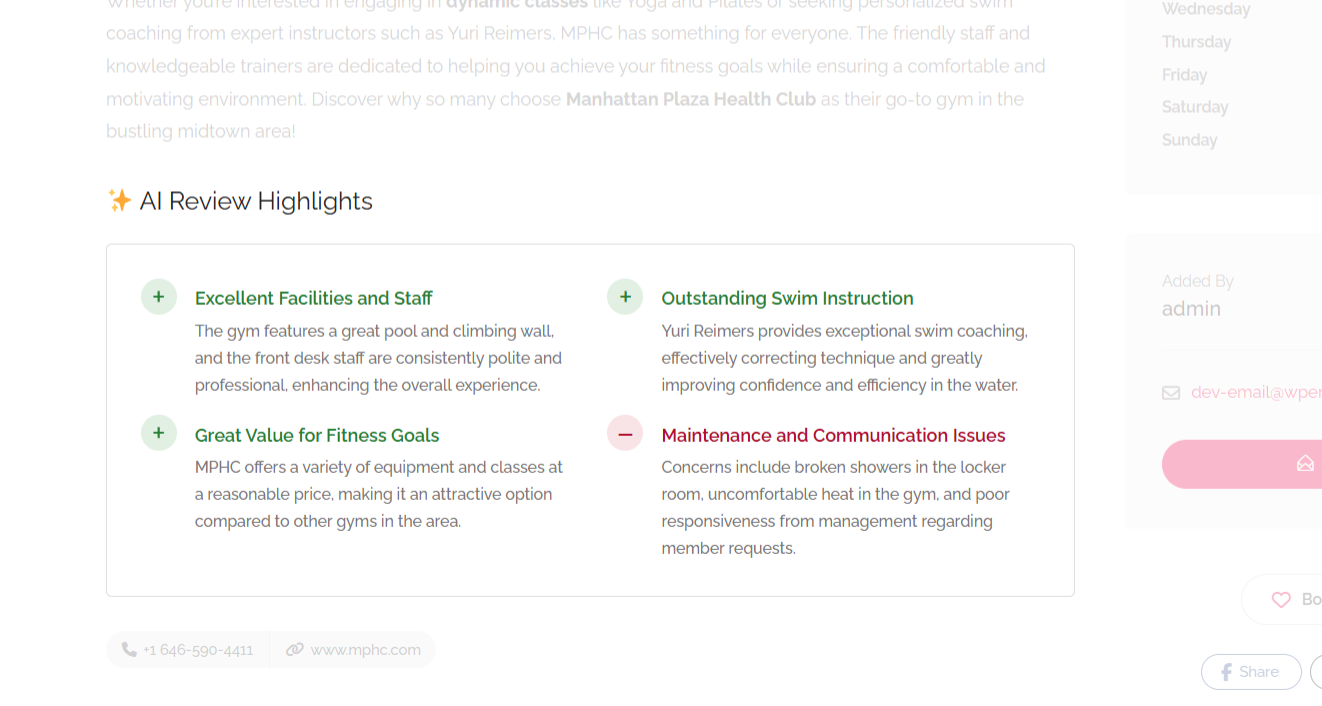
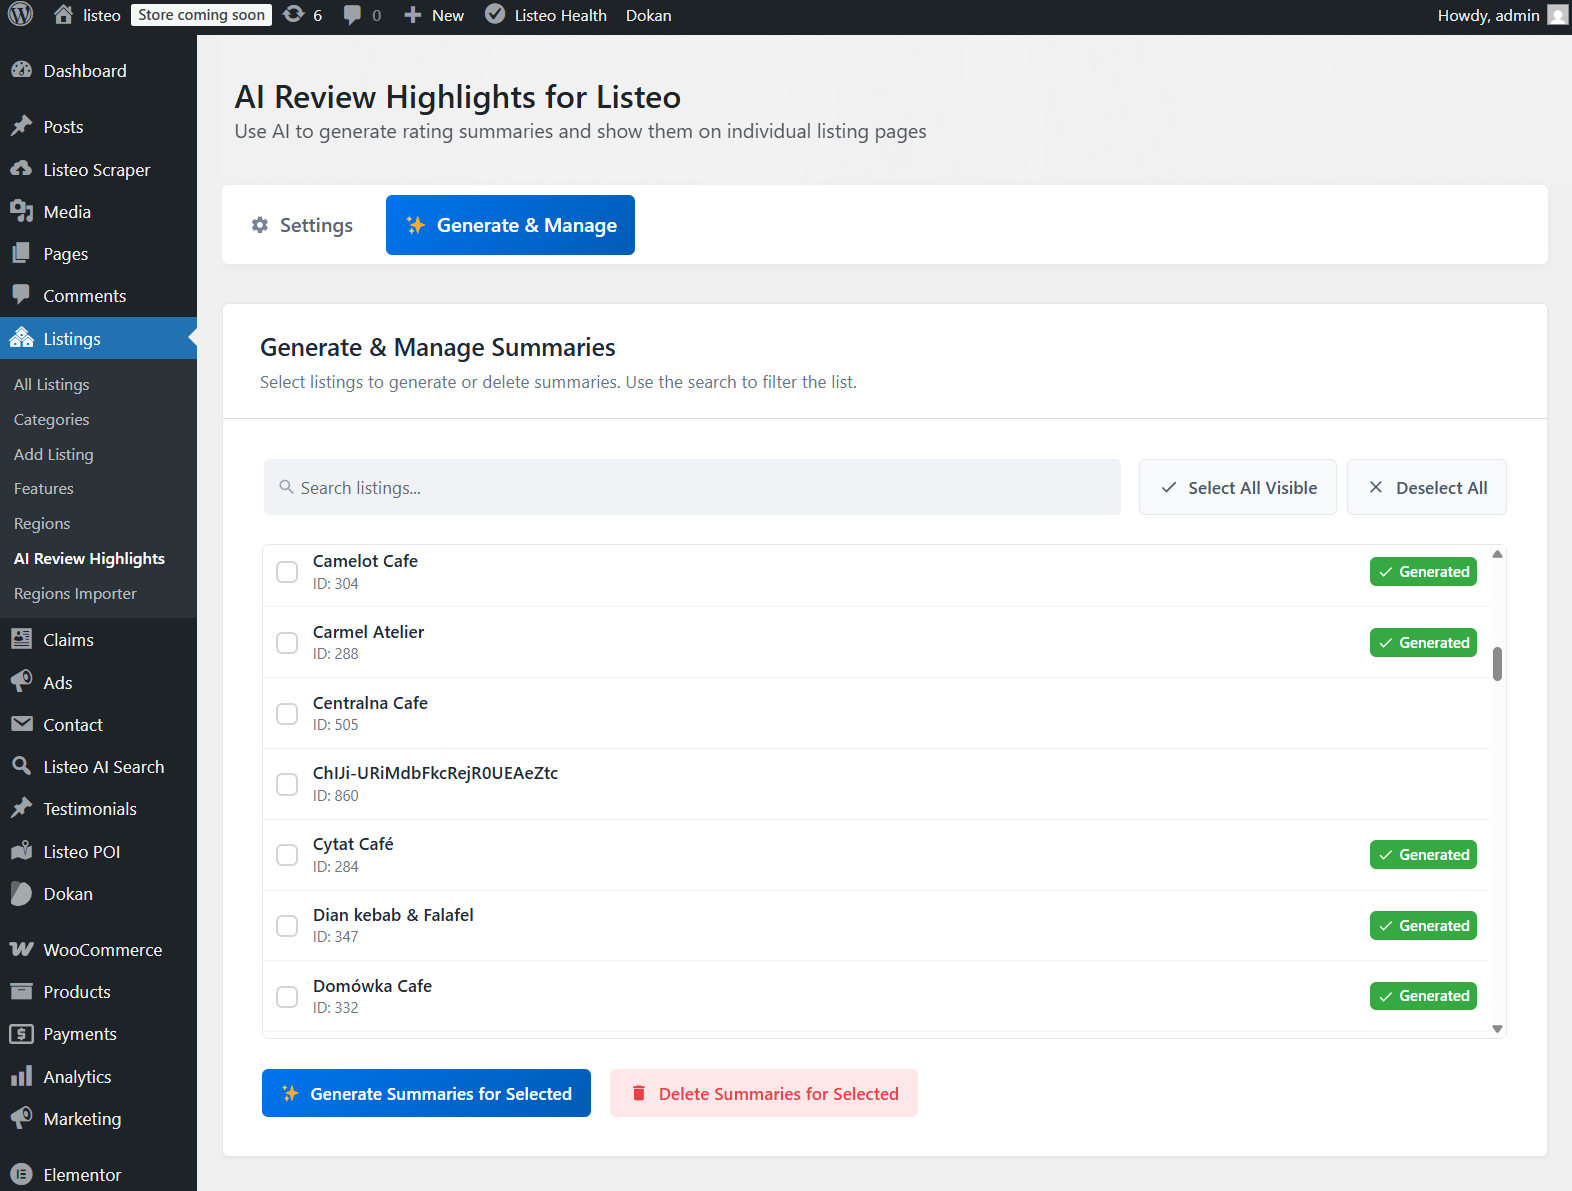
OpenAI or
  Gemini or Mistral AI. Users can search using everyday phrases instead of just keywords.
Try it yourself on our demo: https://listeo.pro/
Key Benefits:
✅ Natural Language: Users can search like they talk: cozy restaurant with outdoor seating.
✅ AI understands context and finds businesses that meet user needs.
✅ Analytics Insights: Track popular searches to understand your users better
✅ Natural Language: Users can search like they talk: cozy restaurant with outdoor seating.
✅ AI understands context and finds businesses that meet user needs.
✅ Analytics Insights: Track popular searches to understand your users better
| What Users Search For | Standard WordPress Search | Listeo AI Search |
|---|---|---|
|
romantic dinner spot
|
❌ No — “romantic” rarely appears in restaurant listings | ✅ Finds fine dining, intimate cafes, date-night restaurants |
|
dog grooming services
Pet care needs
|
⚠️ Maybe — only if exact words “dog grooming” appear | ✅ Finds pet salons, mobile groomers, veterinary services |
|
kids birthday party venue
|
❌ No — exact phrase not in venue descriptions | ✅ Shows party halls, entertainment centers, kid-friendly venues |
The plugin creates a vector database by turning each listing into an embedding – a unique numerical representation capturing its meaning. User queries get converted the same way, then matched mathematically to find the closest results.
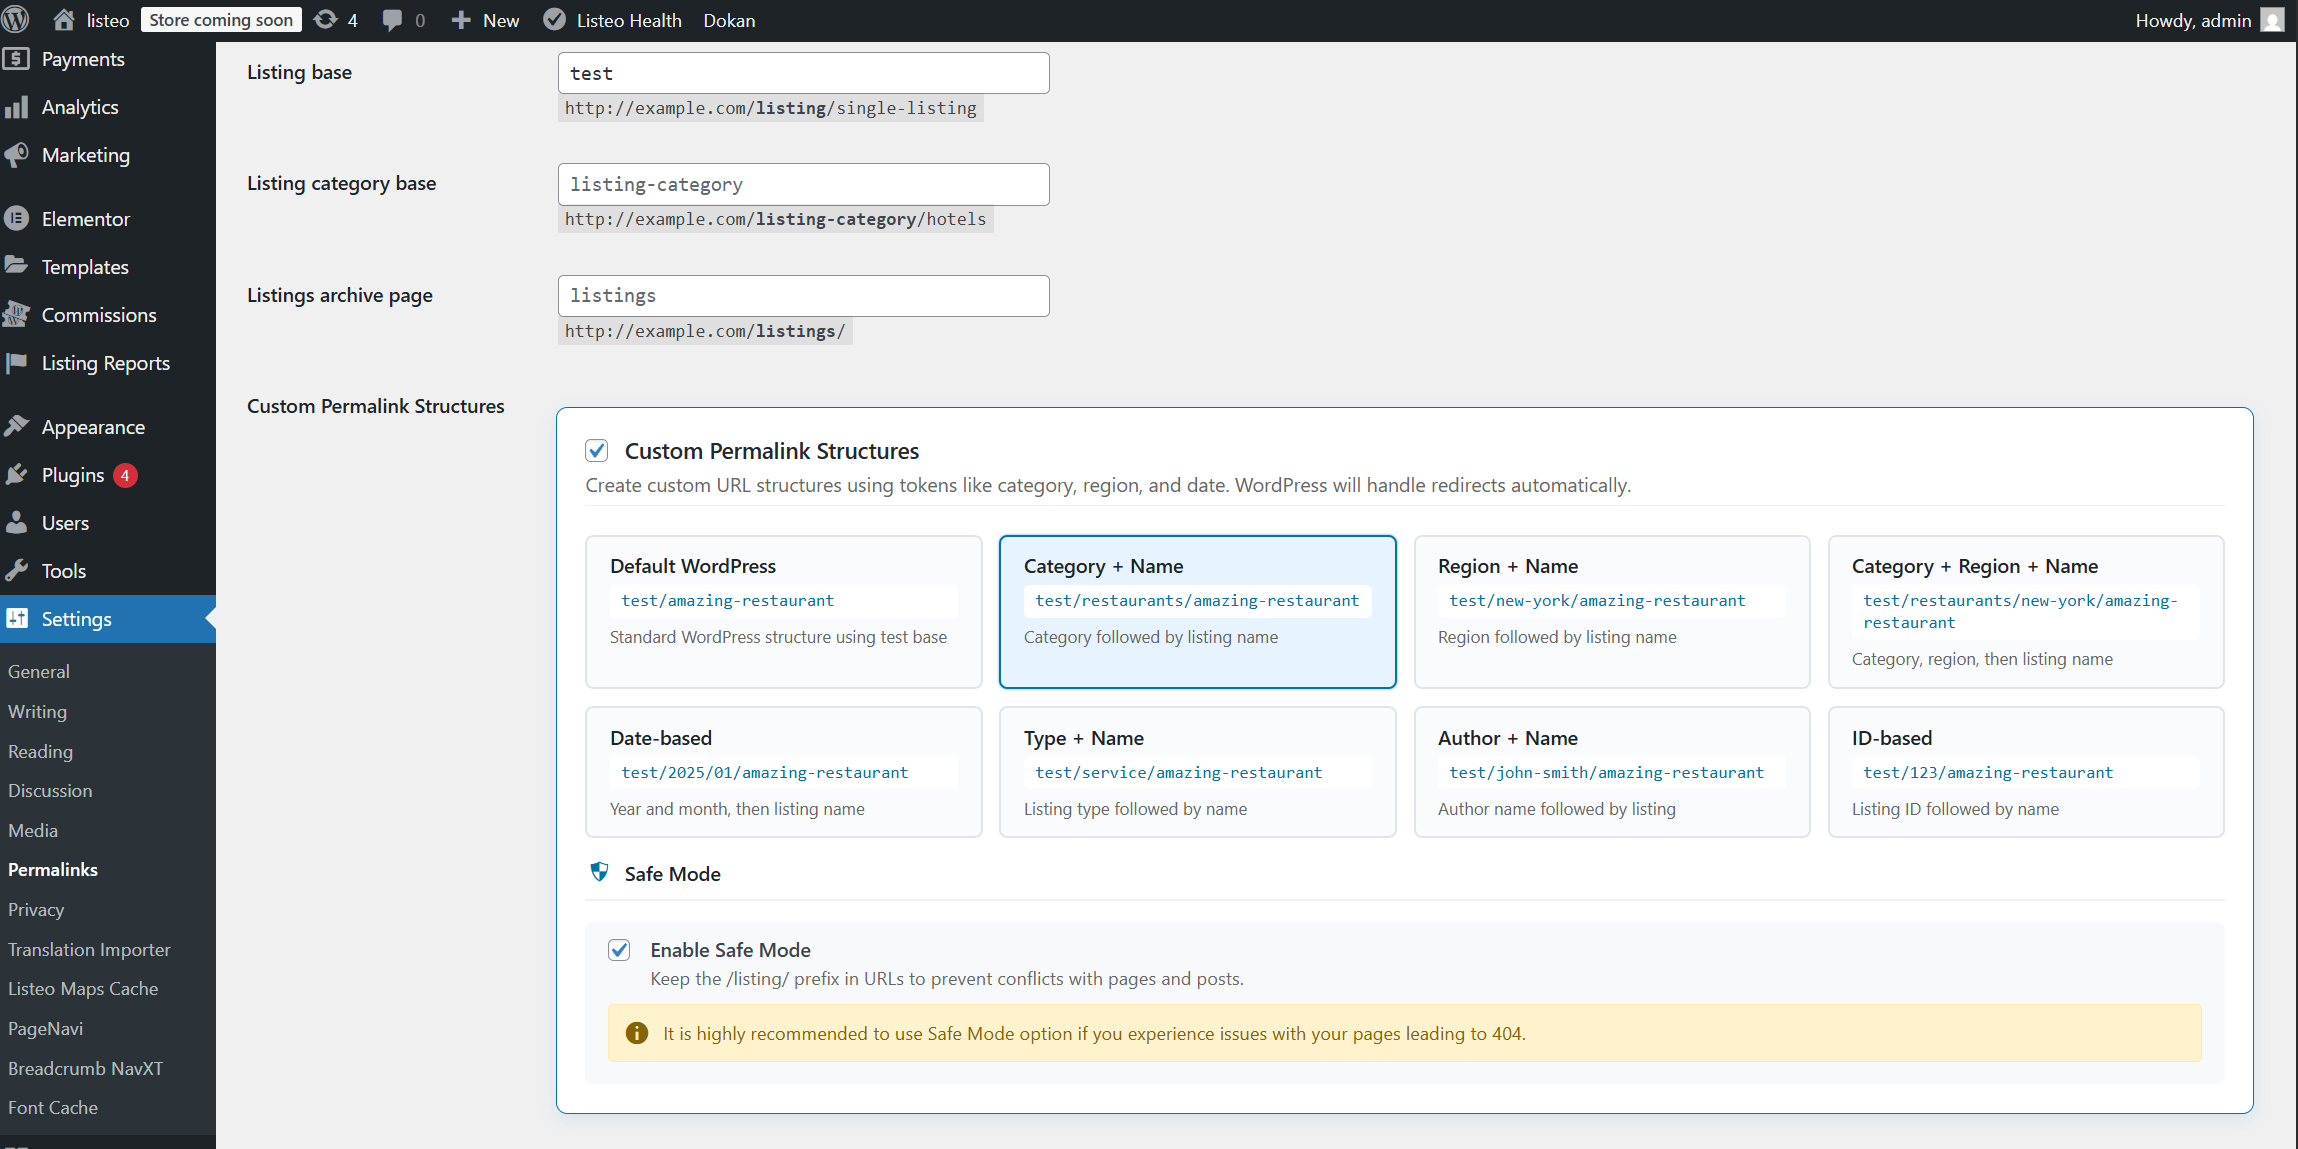
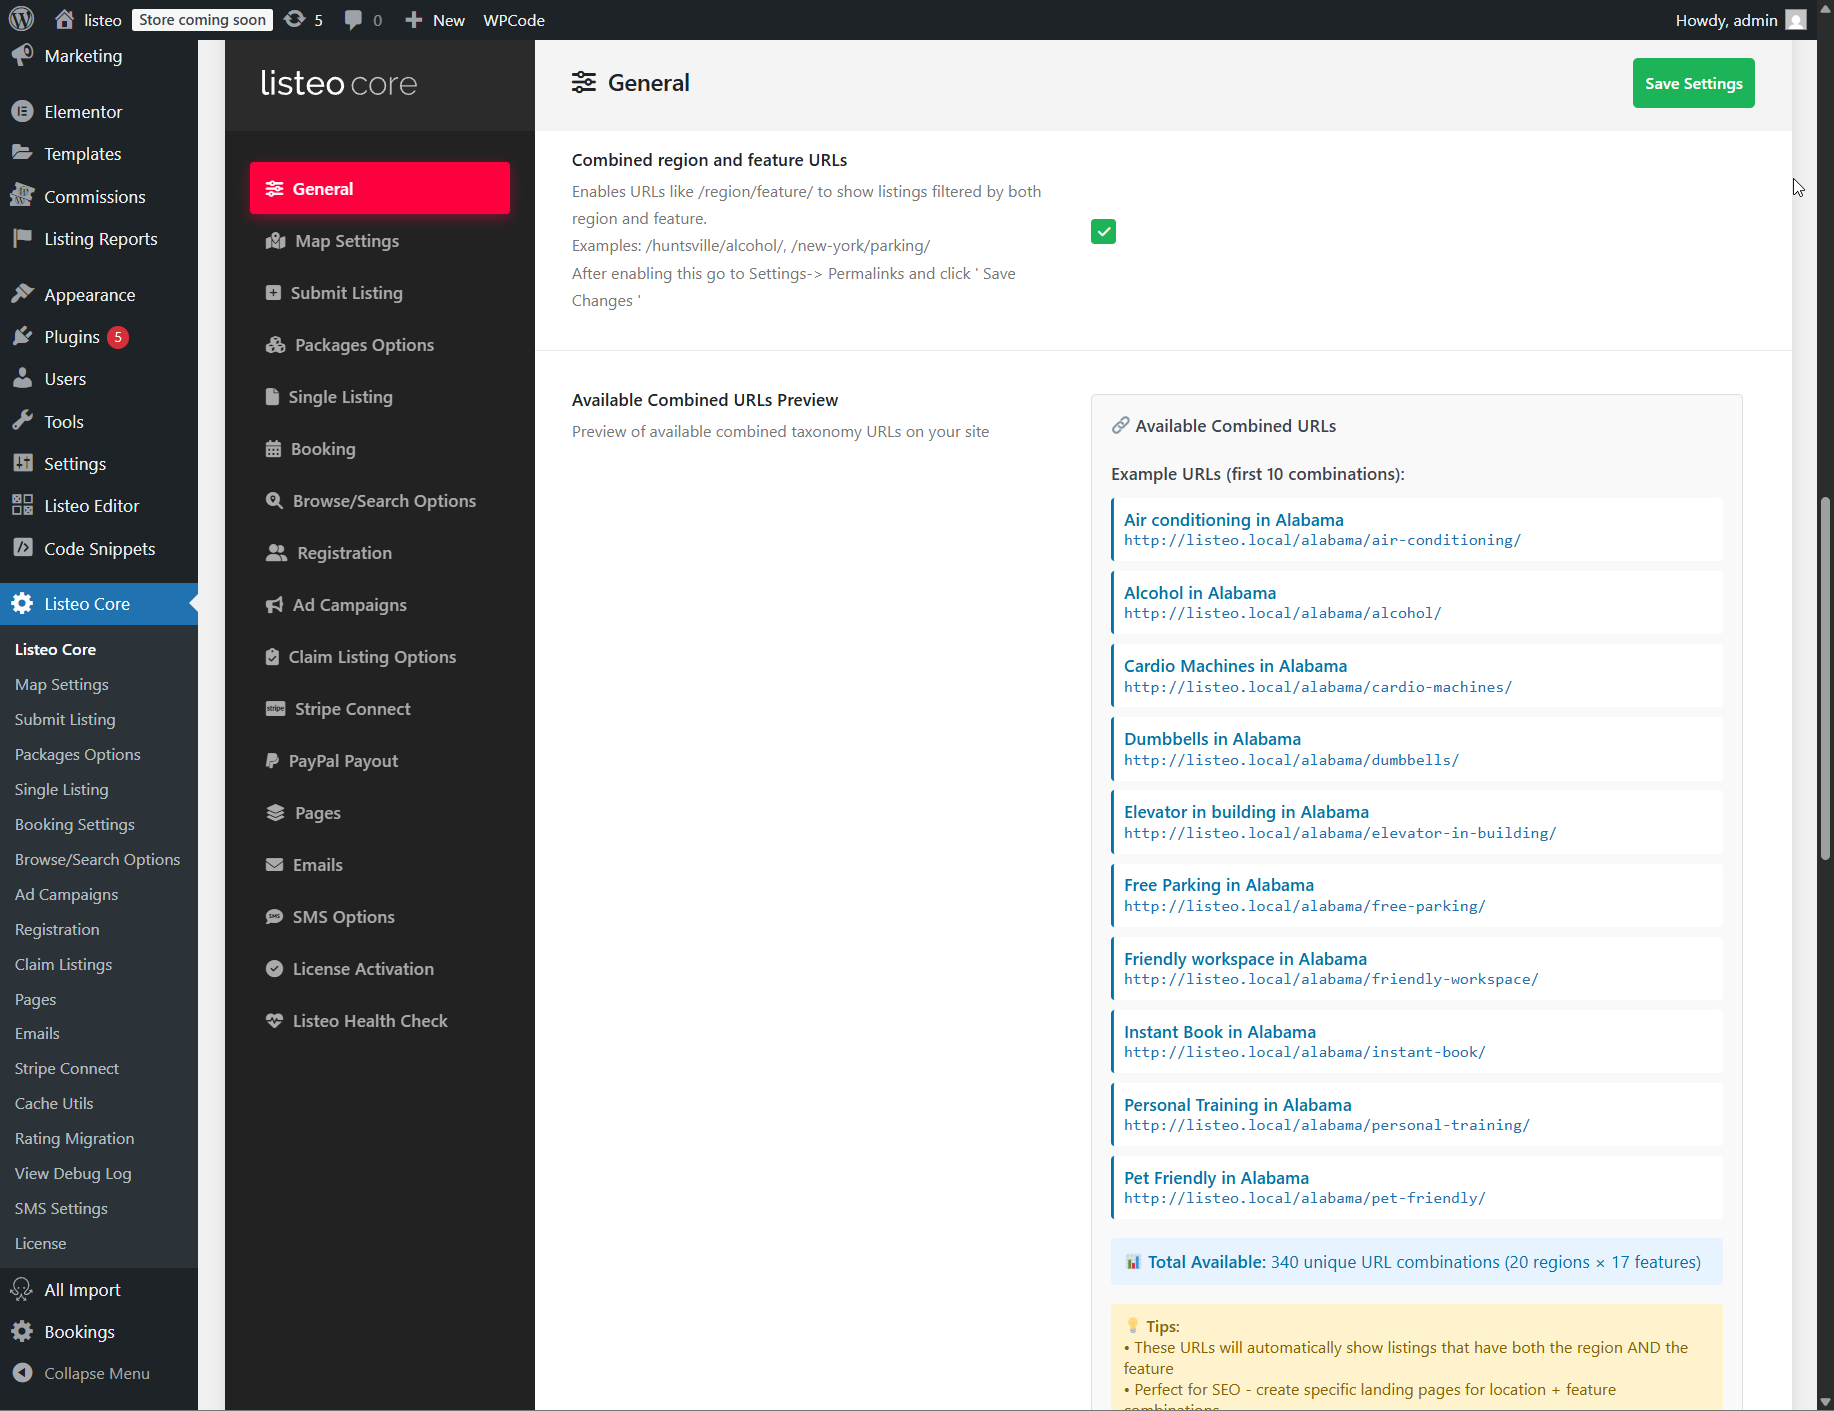
⚙️Installation
Plugin is automatically installed with Listeo. However if you can’t see it or have older theme version you can download it manually:
- Go to https://purethemes.net/license/ and download AI Chat & Search plugin
You’ll need purchase key: How to find my license key?
- Install and activate ai-chat-search.zip in WP Dashboard → Plugin → Add New
Configuration
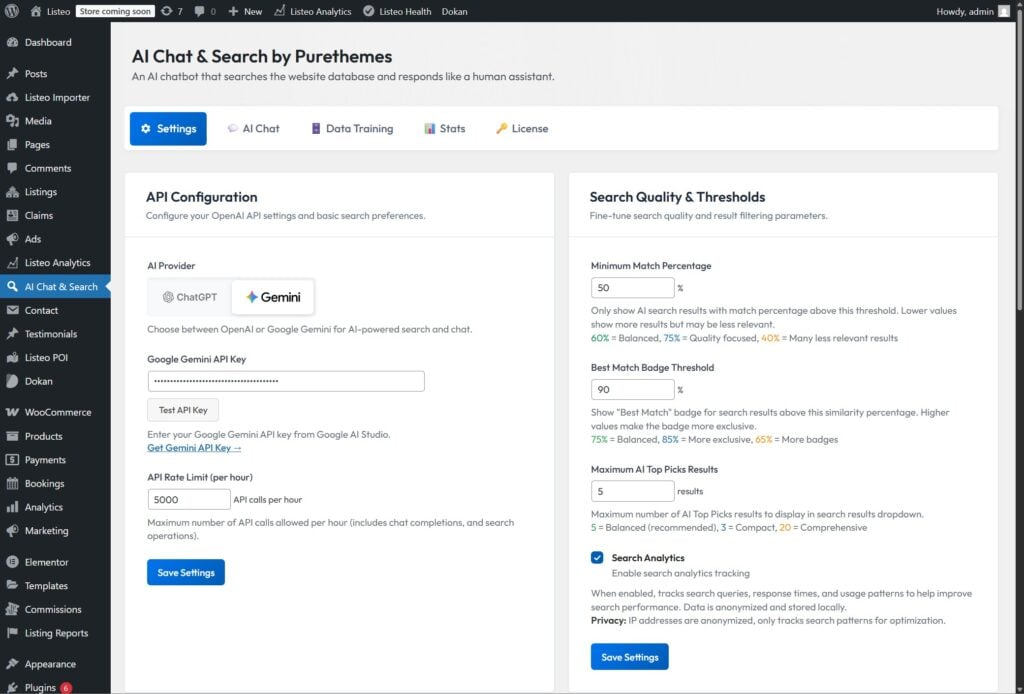
- Navigate to AI Chat & Search in your WordPress sidebar.
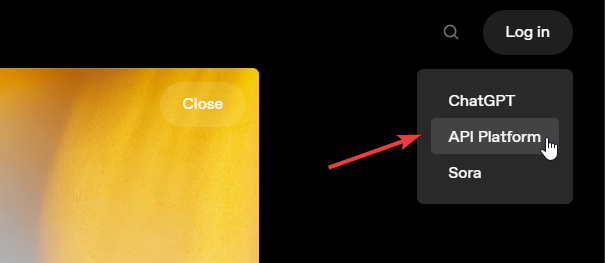
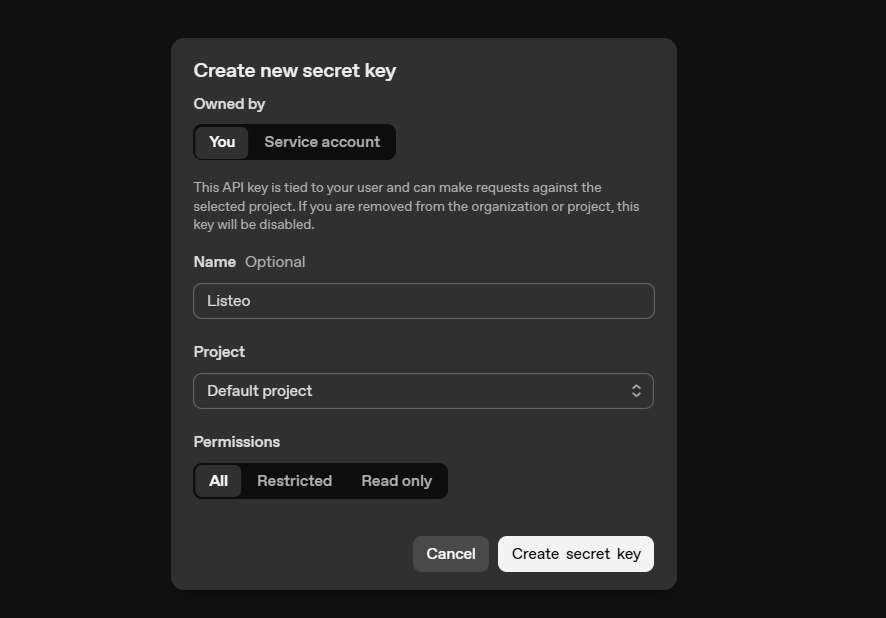
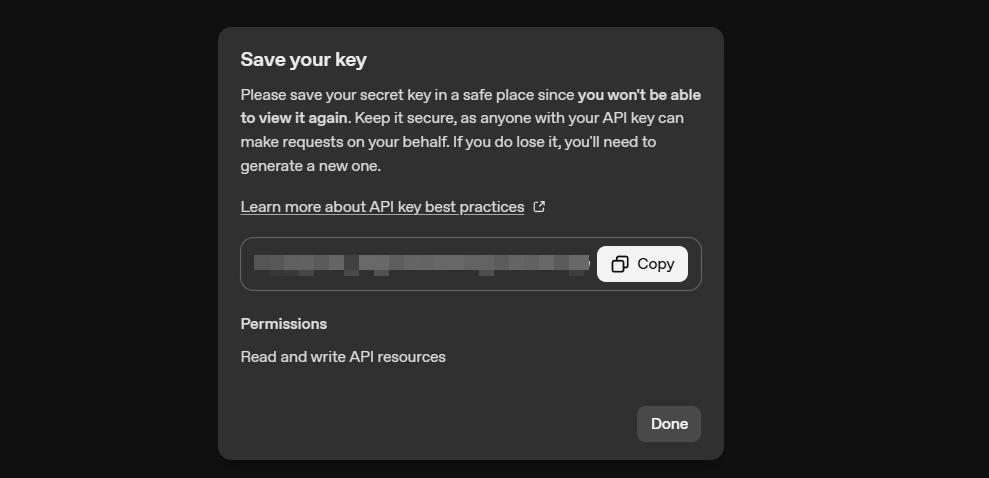
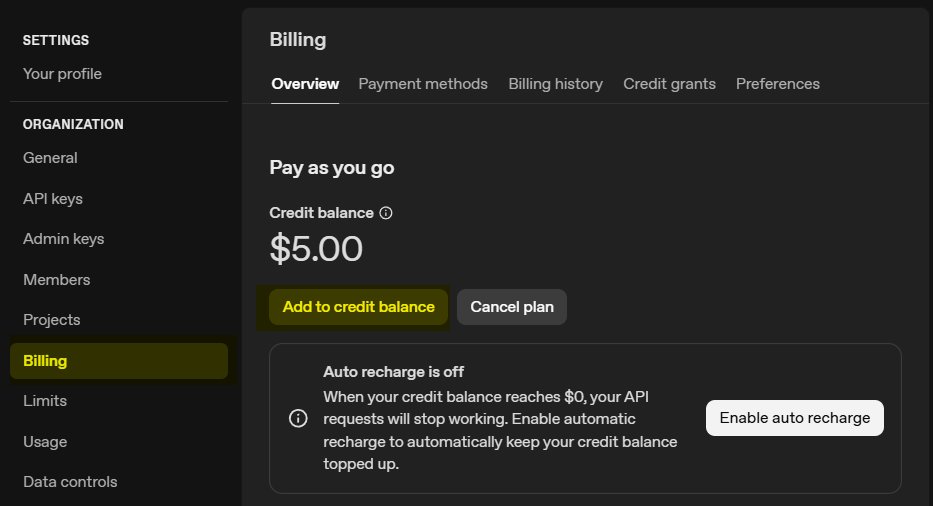
Add your Open AI api or Gemini or Mistral AI key and configure plugin to your needs.
How to create Open AI API key? →
How to create Gemini API key? →
How to create Mistral API key? →
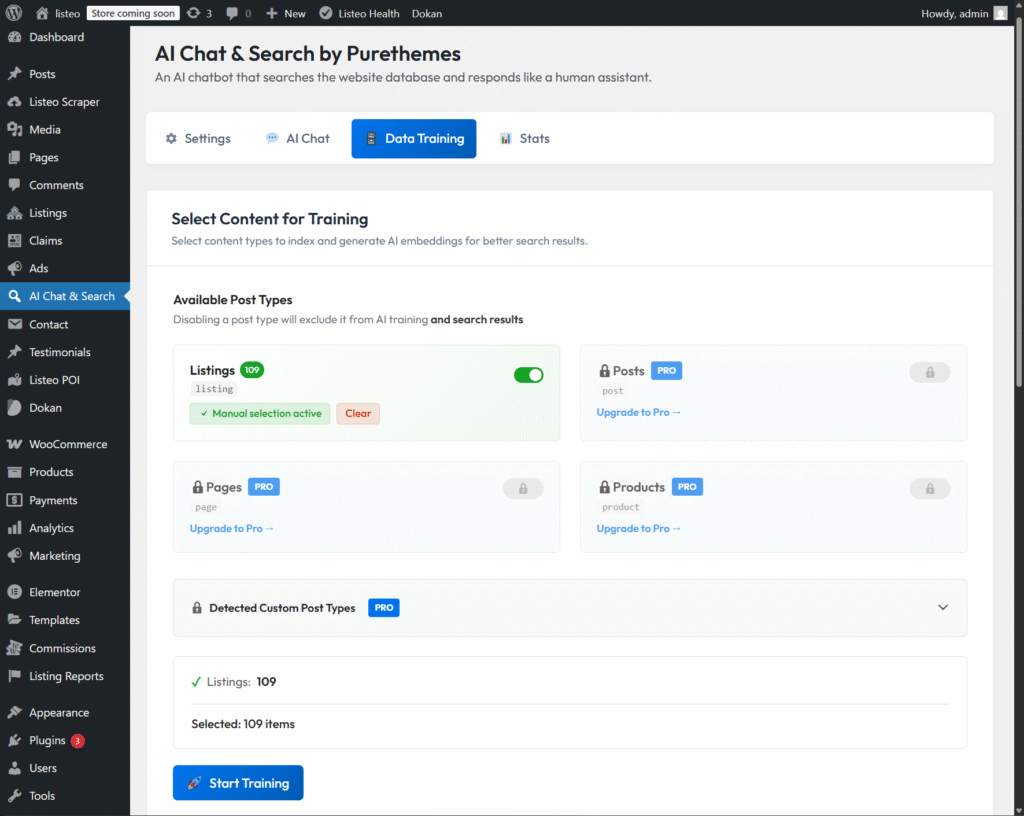
- Then go to Data Training tab and click “🚀 Start Training“.
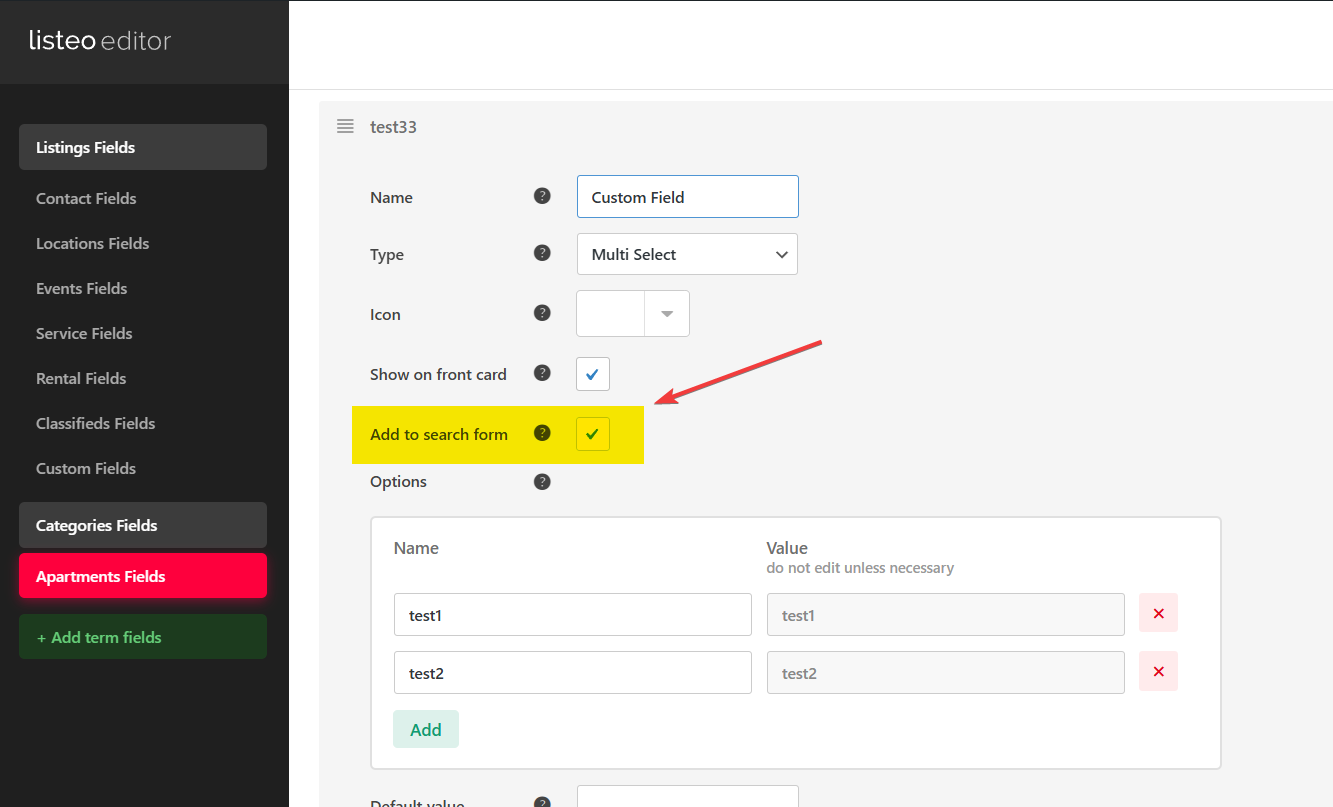
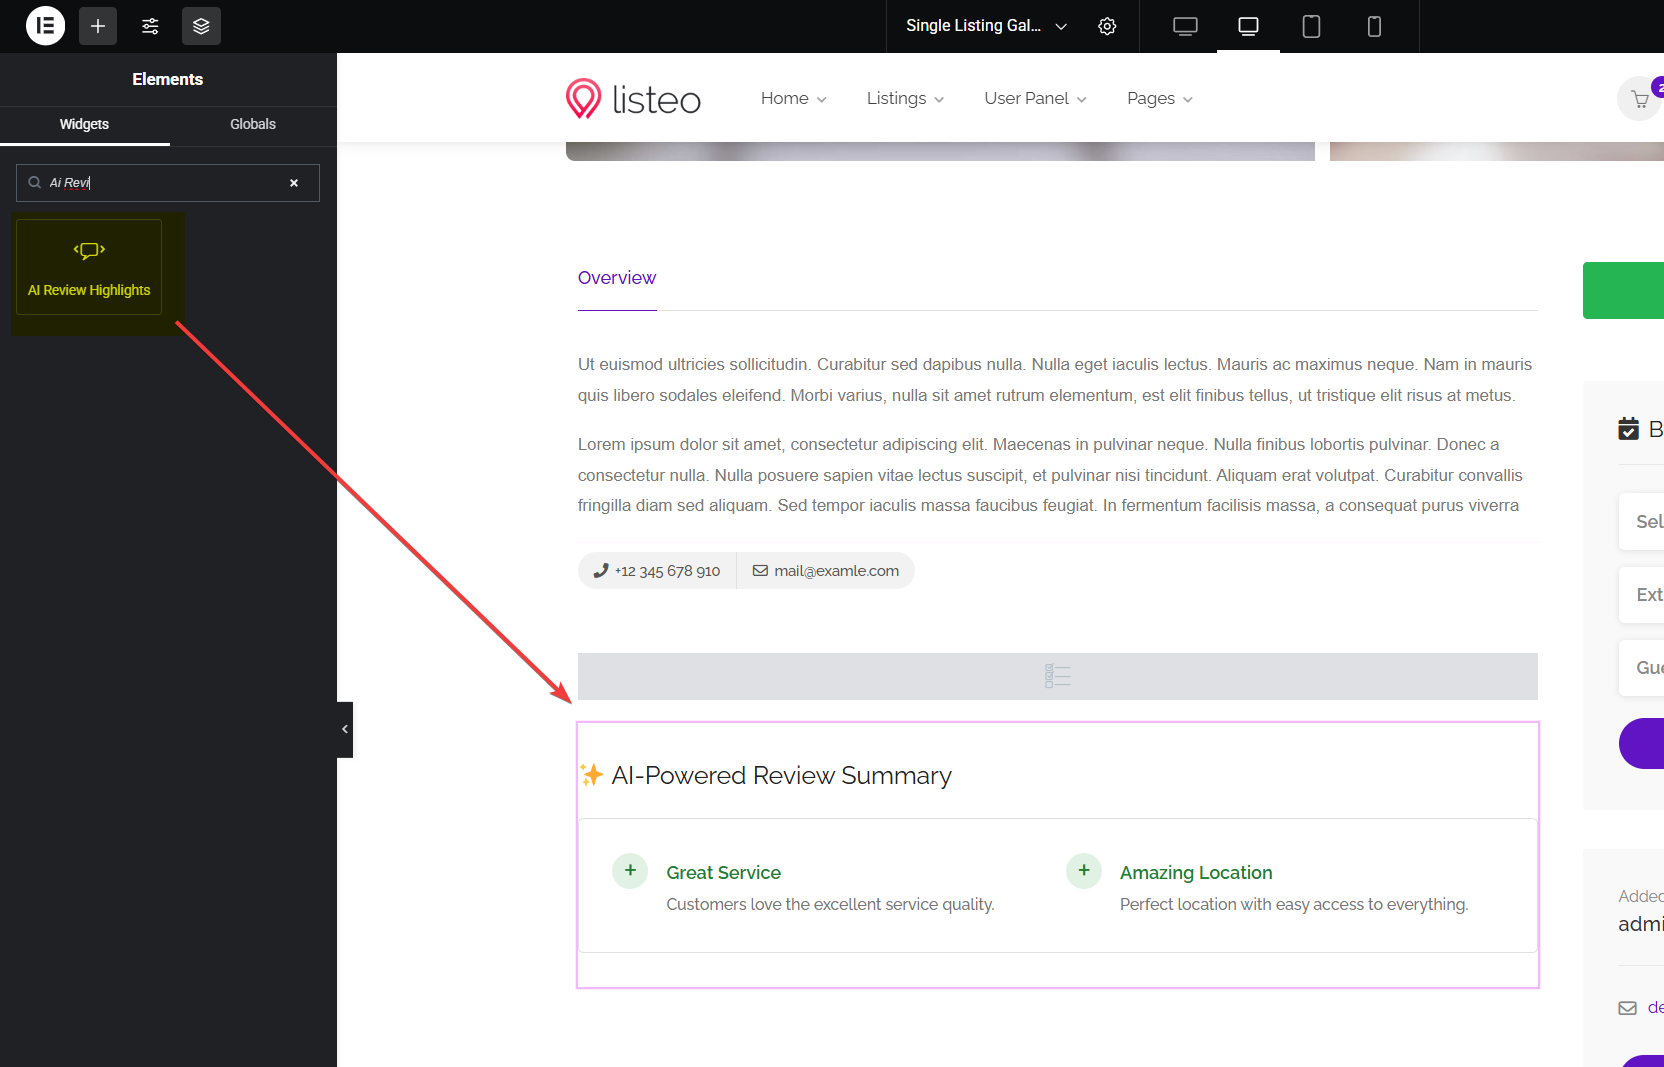
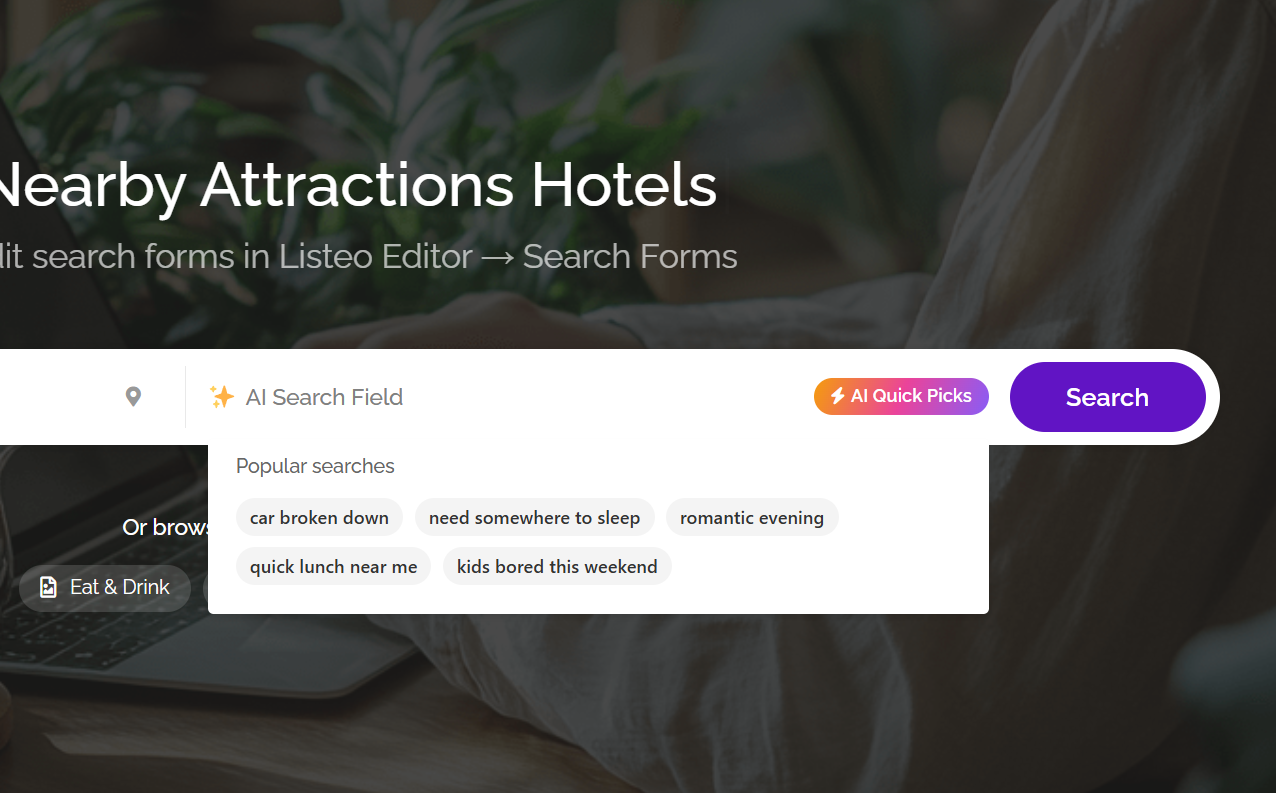
- Once database is ready go to Listeo Editor → Search Forms and add “AI Field” to your search forms
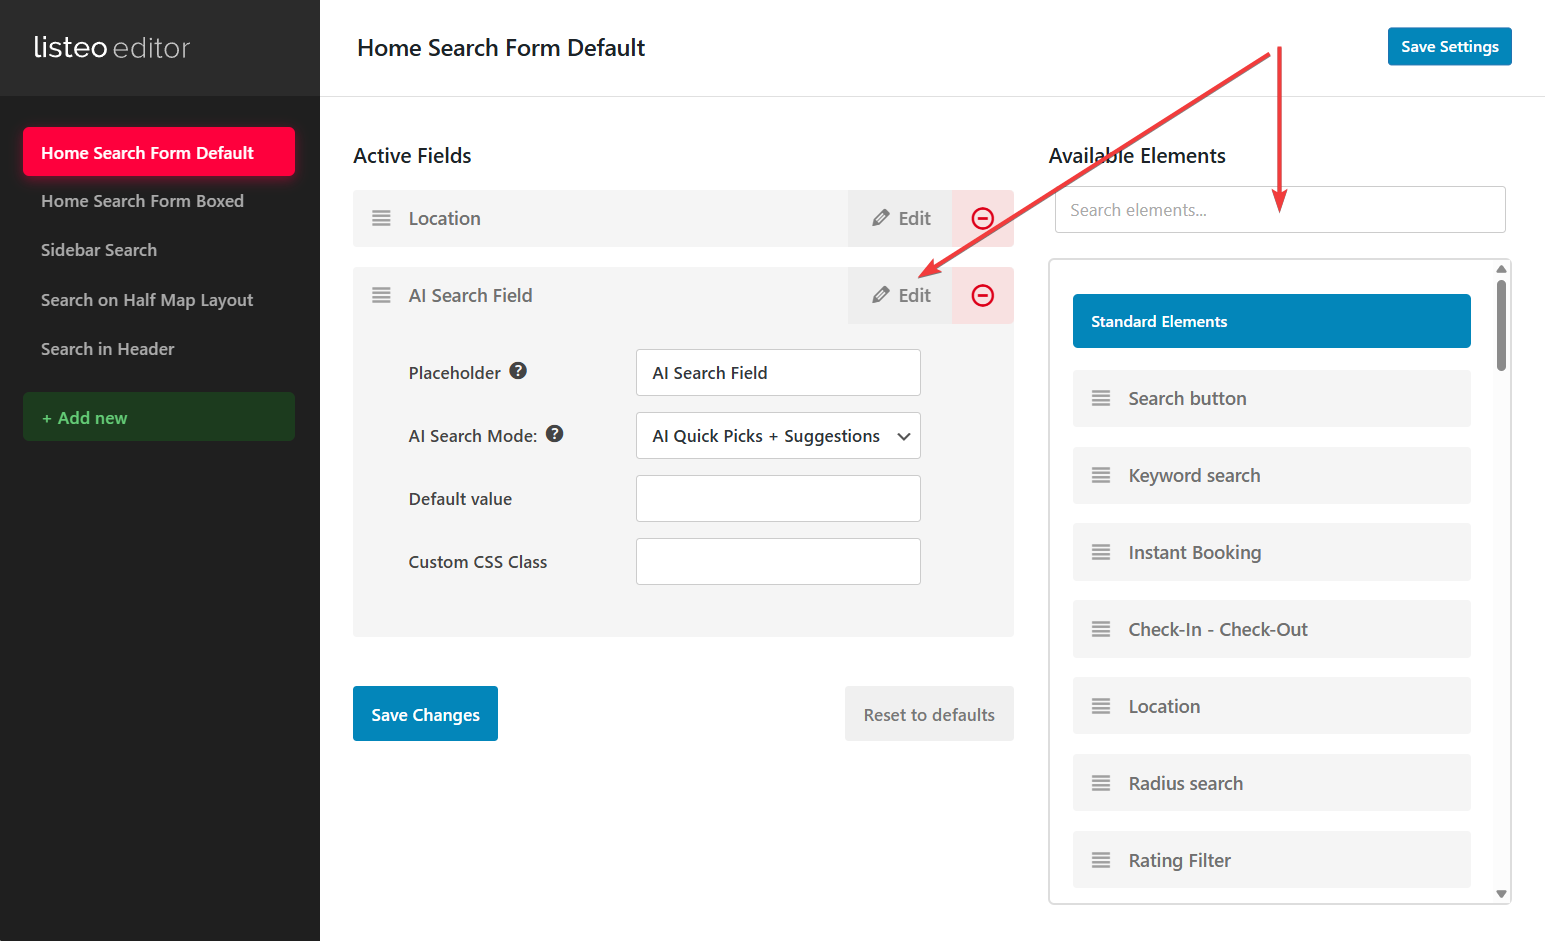
- and that’s it 🙂 “AI Quick Picks” allow visitor to quickly get best 3 matching listings , it’s optional setting.
- Statistics tab – comprehensive analytics and insights + chat history in pro version if you use AI chatbot

- It is recommended to set “Best Match” as a default sorting method – with this setting listings with highest match score will be first.
Listeo Core → Browse/Search Options→ By default sort listings by


FAQ
-
I see not enough or no search results at all
-
Why search results are decent but not perfect?
-
What does 'Minimum Match Percentage' control?
-
Should I enable 'Query Expansion'?
-
What data is processed to OpenAI/Gemini/Mistral in AI Search?