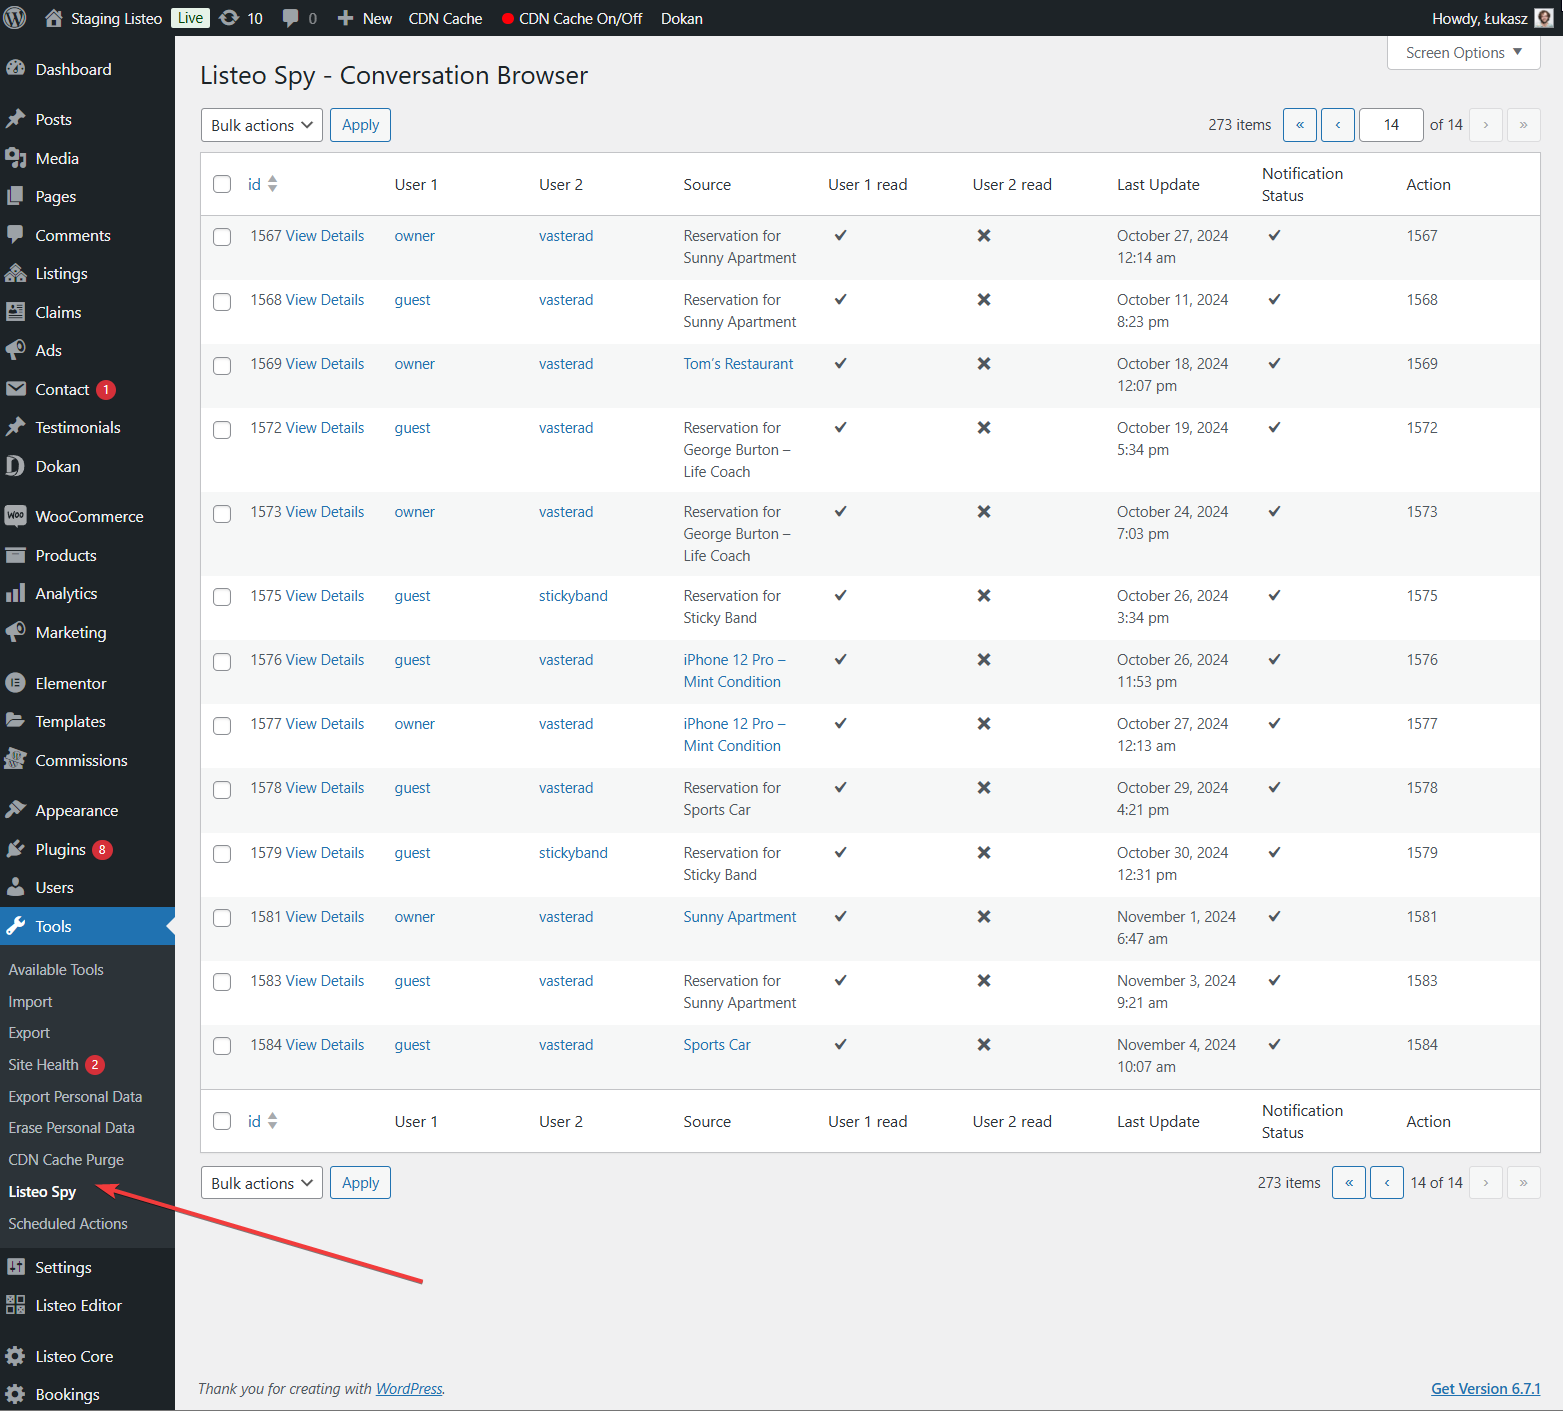
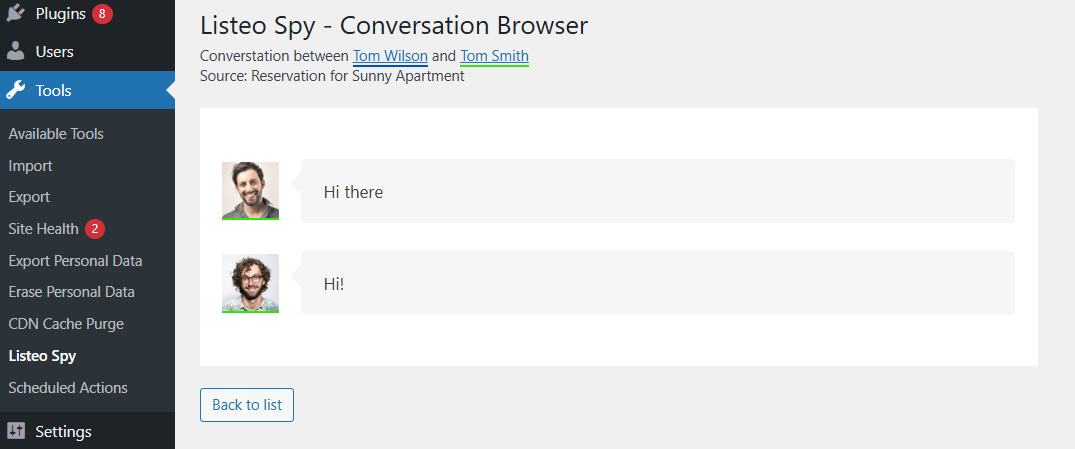
Author Archive

Job Alerts

Job Alerts

With the Job Alerts plugin, registered users on your site can create job alerts based on searches (by keyword, location keyword, category) delivered by email daily, weekly or fortnightly.

Installation

To install this plugin, please refer to the guide here: https://wordpress.org/support/article/managing-plugins/#installing-plugins

Setup

To get this plugin working, create a page and call it something like “My Alerts”. Inside the page content, add the shortcode:

[job_alerts]

This will house the page where users set up and manage their alerts.

Once you set up your page, you can head to WP-admin > Job Manager > Settings > Job Alerts to configure the plugin’s settings.

  • Account Required – Configure requiring an account to create job alerts.
  • Brand Color – Customize link and button colors used in emails and shortcodes.
  • Alert Form Fields – Select which fields users can set up alerts for.
  • Alert Email Content – Customize email text with dynamic tags like {alert_name}, {jobs}, {alert_next_date}, {alert_expiry}, and {display_name}.
  • Alert Duration – Set expiration period for user alerts in days.
  • Alert matches – Enable “Send alerts with matches only” to send emails only when jobs match.
  • Alerts Page ID – Select the page containing the [job_alerts] shortcode.

Using Job Alerts

Creating an Alert

When visitors search for jobs on the page with the [jobs] shortcode, they see an ‘Add Alert’ link. Clicking this opens a modal to set email, frequency, and confirm subscription.

Receiving E-mails

Subscribers receive regular emails per their schedule. Emails contain new jobs only – those posted since the last email for that alert.

Managing Alerts

The my alerts page lists alerts and allows editing or adding new ones. Unregistered users see alerts for their email address via magic token verification.

Site Admin

Alerts can be moderated on the Job Manager -> Job Alerts screen. The alert_frequency field accepts values: daily, weekly, fortnightly, and monthly.

How Alerts Are Sent

Once created or enabled, a WordPress cron event is scheduled. When triggered, the alert sends and another cron is scheduled. This repeats while active.

Troubleshooting

“Add Alert” link is not displaying

Ensure you followed setup instructions and added a page with the [job_alerts] shortcode before the link displays.

Ensuring cron jobs are triggered for low traffic sites

WP Cron jobs trigger on user or bot visits. For more reliable triggering, consider setting up a real cron job.

Emails aren’t getting sent

Ensure WP cron is enabled in wp-config.php. Check for and remove or set to false: define('DISABLE_WP_CRON', true);
WP Job Manager core plugin snippets

Job Fields

Prefill the company logo field

add_filter('submit_job_form_fields', 'dm_prefill_company_logo');
function dm_prefill_company_logo( $fields ) {
  $fields['company']['company_logo']['value'] = 'full_url_to_the_logo';
  return $fields;
}

Mandatory fields

add_filter( 'submit_job_form_fields', 'custom_submit_job_form_fields' , 11);
function custom_submit_job_form_fields( $fields ) {
    $fields['job']['job_location']['required'] = true;
    $fields['job']['job_tags']['required'] = true;
    return $fields;
}

Prefill application email

add_filter('submit_job_form_fields_get_user_data', 'aas_prefill_application_field');
function aas_prefill_application_field( $fields ) {
  $fields['job']['application']['value'] = '[email protected]';
  return $fields;
}

Remove a field from the job submission page

add_filter( 'submit_job_form_fields', 'custom_submit_job_form_fields_dm' );
function custom_submit_job_form_fields_dm( $fields ) {
    unset($fields['job']['job_tags']);
    return $fields;
}

Remove all company details from the job submission page

add_filter( 'submit_job_form_fields', 'gma_custom_submit_job_form_fields' );
function gma_custom_submit_job_form_fields( $fields ) {
    unset($fields['company']['company_name']);
    unset($fields['company']['company_website']);
    unset($fields['company']['company_tagline']);
    unset($fields['company']['company_video']);
    unset($fields['company']['company_twitter']);
    unset($fields['company']['company_logo']);
    return $fields;
}

Change the default Job Type

add_filter( 'submit_job_form_fields', 'submit_job_form_fields_job_type_default' , 11);
function submit_job_form_fields_job_type_default( $fields ) {
    $fields['job']['job_type']['default'] = 'volunteer';
    return $fields;
}

Prefill the Locations field

add_filter('submit_job_form_fields', 'bk_prefill_jobs_location');
function bk_prefill_jobs_location( $fields ) {
  $fields['job']['job_location']['value'] = 'Granite Falls, WA';
  return $fields;
}

Redirects

Use alternative login page

add_filter( 'login_url', 'my_login_page', 10, 2 );
function my_login_page( $login_url, $redirect ) {
    return home_url( '/my-custom-login-page/?redirect_to=' . $redirect );
}

Redirect to Job Dashboard after job submission

add_filter( 'job_manager_job_submitted', function() {
    if ( wp_redirect( job_manager_get_permalink( 'job_dashboard' ) ) ) {
	    exit;
	  }
}, 20 );

Job Listings

Sort using custom field

function change_listing_args( $query_args ) {
	if ( ! empty( $query_args['orderby']['menu_order'] ) ) {
		$query_args['meta_key'] = '';
		$query_args['orderby']  = array_merge(
			array_splice( $query_args['orderby'], 0, 1 ),
			[ 'meta_value_num' => 'ASC' ],
			$query_args['orderby']
		);
	}
	return $query_args;
}
add_filter( 'get_job_listings_query_args', 'change_listing_args' );

Disable Job Schema

add_filter( 'wpjm_output_job_listing_structured_data', '__return_false' );

Enable excerpts in Job Listing descriptions

function add_excerpt_support_for_jobs() {
 add_post_type_support( 'job_listing', 'excerpt' );
}
add_action( 'init', 'add_excerpt_support_for_jobs' );

Search

Make custom meta field searchable

function my_wpjm_meta_key_dm() {
    global $wpdb, $job_manager_keyword;
    $searchable_meta_keys[] = '_my_meta_field';
    return $searchable_meta_keys;
}
add_filter('job_listing_searchable_meta_keys', 'my_wpjm_meta_key_dm');

WP Admin

Remove “Listing Expires” column from Job Dashboard

add_filter( 'job_manager_job_dashboard_columns', 'remove_expires_column' ); 
function remove_expires_column( $columns ) {
    unset( $columns['expires'] );
    return $columns;
}

Geocoding / Geolocation

Disable Geolocation

add_filter( 'job_manager_geolocation_enabled', '__return_false' );

Other

Enable comments on job listings

add_filter( 'register_post_type_job_listing', 'register_post_type_job_listing_enable_comments' );
function register_post_type_job_listing_enable_comments( $post_type ) {
	$post_type['supports'][] = 'comments';
	return $post_type;
}

Tutorial: Importing Job Listings With WP All Import Pro

Note: All code examples and 3rd party plugin suggestions are provided for reference only. Support does not include assistance with modifying code or 3rd party plugins.

WP All Import Pro enables importing posts and custom post types like job listings using CSV and XML files. The Pro version is required for importing custom fields used by WPJM.

Preparing Your CSV File

Consider including these columns:

  • Job Title
  • Job Description
  • Job Location
  • Job Application (email or URL)
  • Company Name
  • Company Tagline
  • Company Website Address
  • Company Twitter Handle
  • Company Logo URL
  • Company Video URL
  • Job Type

Importing Your CSV File

Access the All Import section and select “New Import.” Upload your CSV file and choose to create new Jobs. Once uploaded successfully, review the preview.

In step 3, map CSV columns to job fields. Map post title and content to job title and description respectively.

Custom Field Mappings:

  • Job Location -> _job_location
  • Job Application -> _job_application
  • Company Name -> _company_name
  • Company Tagline -> _company_tagline
  • Company Website -> _company_website
  • Company Twitter -> _company_twitter
  • Company Logo -> _company_image
  • Company Video -> _company_video

Map job type and categories in the taxonomies section, then set a unique identifier and complete the import.

Tutorial: Changing the resume post_name/permalink

To make resume permalinks unique, the slug has a random string prepended. You can customise this via a filter and custom function added to your theme functions.php file. This code example below shows the code used:

add_filter( 'submit_resume_form_save_resume_data', 'custom_submit_resume_form_save_resume_data', 10, 5 );

function custom_submit_resume_form_save_resume_data( $data, $post_title, $post_content, $status, $values ) {
	// No random prefix - just use post title as the permalink/slug
	$data['post_name'] = sanitize_title( $post_title );
	
	// This line appends the location of the user
	$data['post_name'] .= '-' . sanitize_title( $values['resume_fields']['candidate_location'] );
	
	return $data;
}

Comment out the parts you don’t want appearing in your resume permalinks.

Resume Manager: Changing the permalink base

Resumes default to the permalink ‘resume’. So, for example, a resume may have the following URL: http://yoursite.com/resume/john-xyz

To change that to something else, e.g. ‘cv’, you can add the following code using the Code Snippets plugin.

function change_resume_slug( $args ) {
  $args['rewrite']['slug'] = _x( 'cv', 'Resume permalink - resave permalinks after changing this', 'wp_job_manager_resumes' );
  return $args;
}

add_filter( 'register_post_type_resume', 'change_resume_slug' );

AI Chatbot 🤖

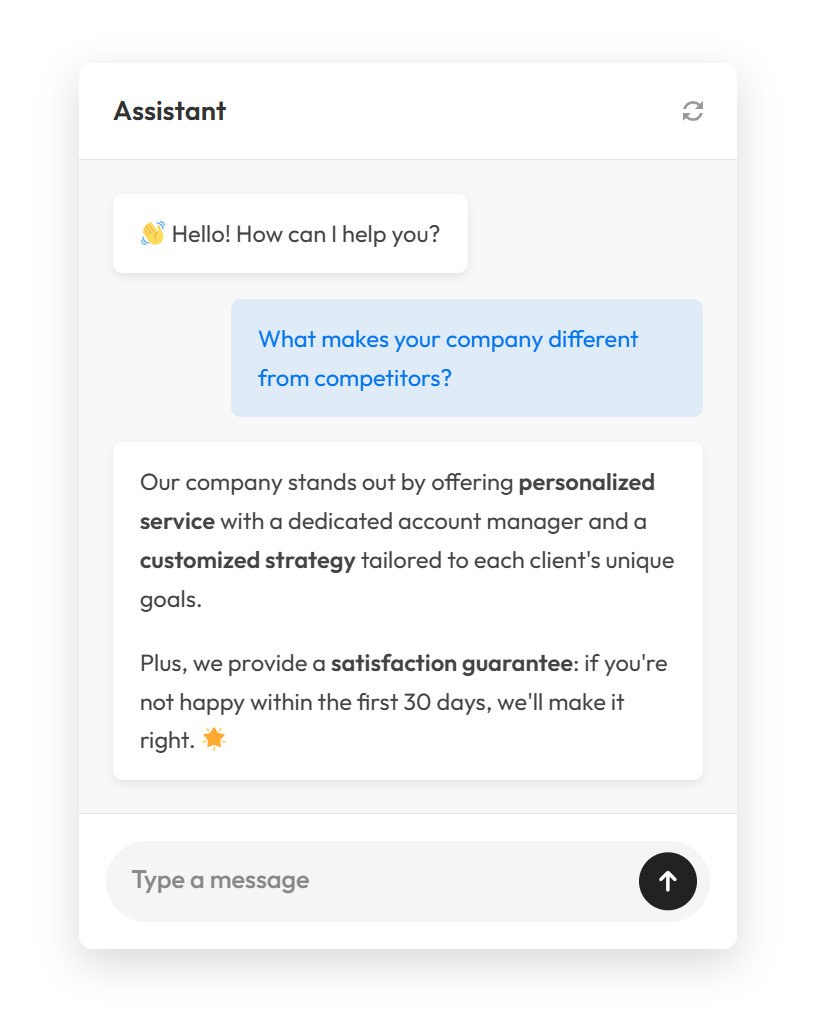
WorkScout’s AI Assistant brings ChatGPT-powered search to your site.

The AI combines semantic understanding with real-time database search allowing AI answer questions about your website based on custom instructions or all pages.


⚙️Installation

  1. Go to https://purethemes.net/license/ and download  AI Chat & Search plugin
    You’ll need purchase key: How to find my license key?
  2. Install and activate ai-chat-search.zip in WP Dashboard → Plugin → Add New 

Configuration

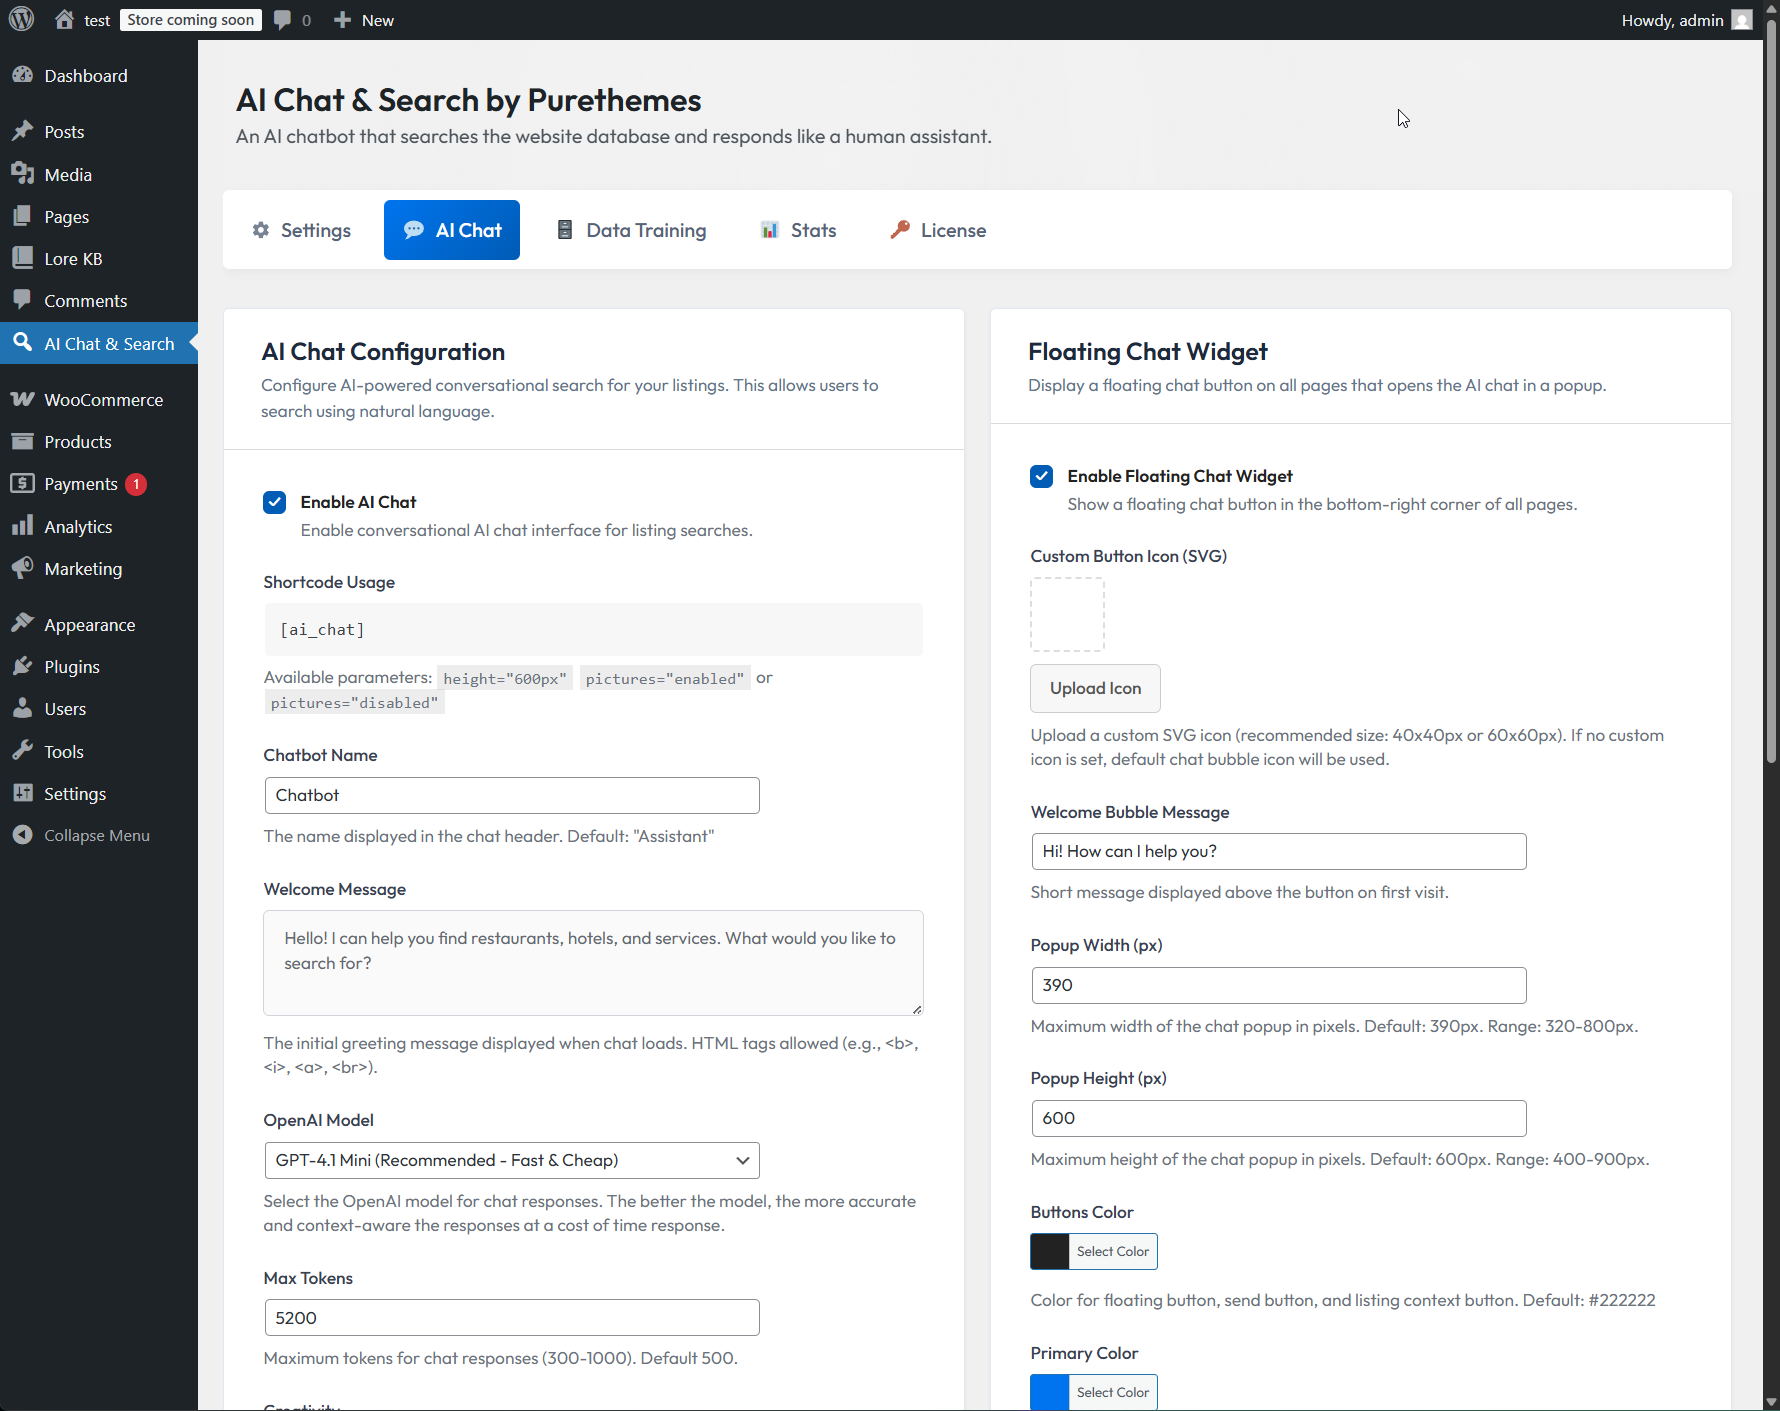
  1. Navigate to AI Chat & Search in your WordPress sidebar.
    Add your Open AI api key in Settings tab and configure plugin to your needs.
    How to create Open AI API key? →

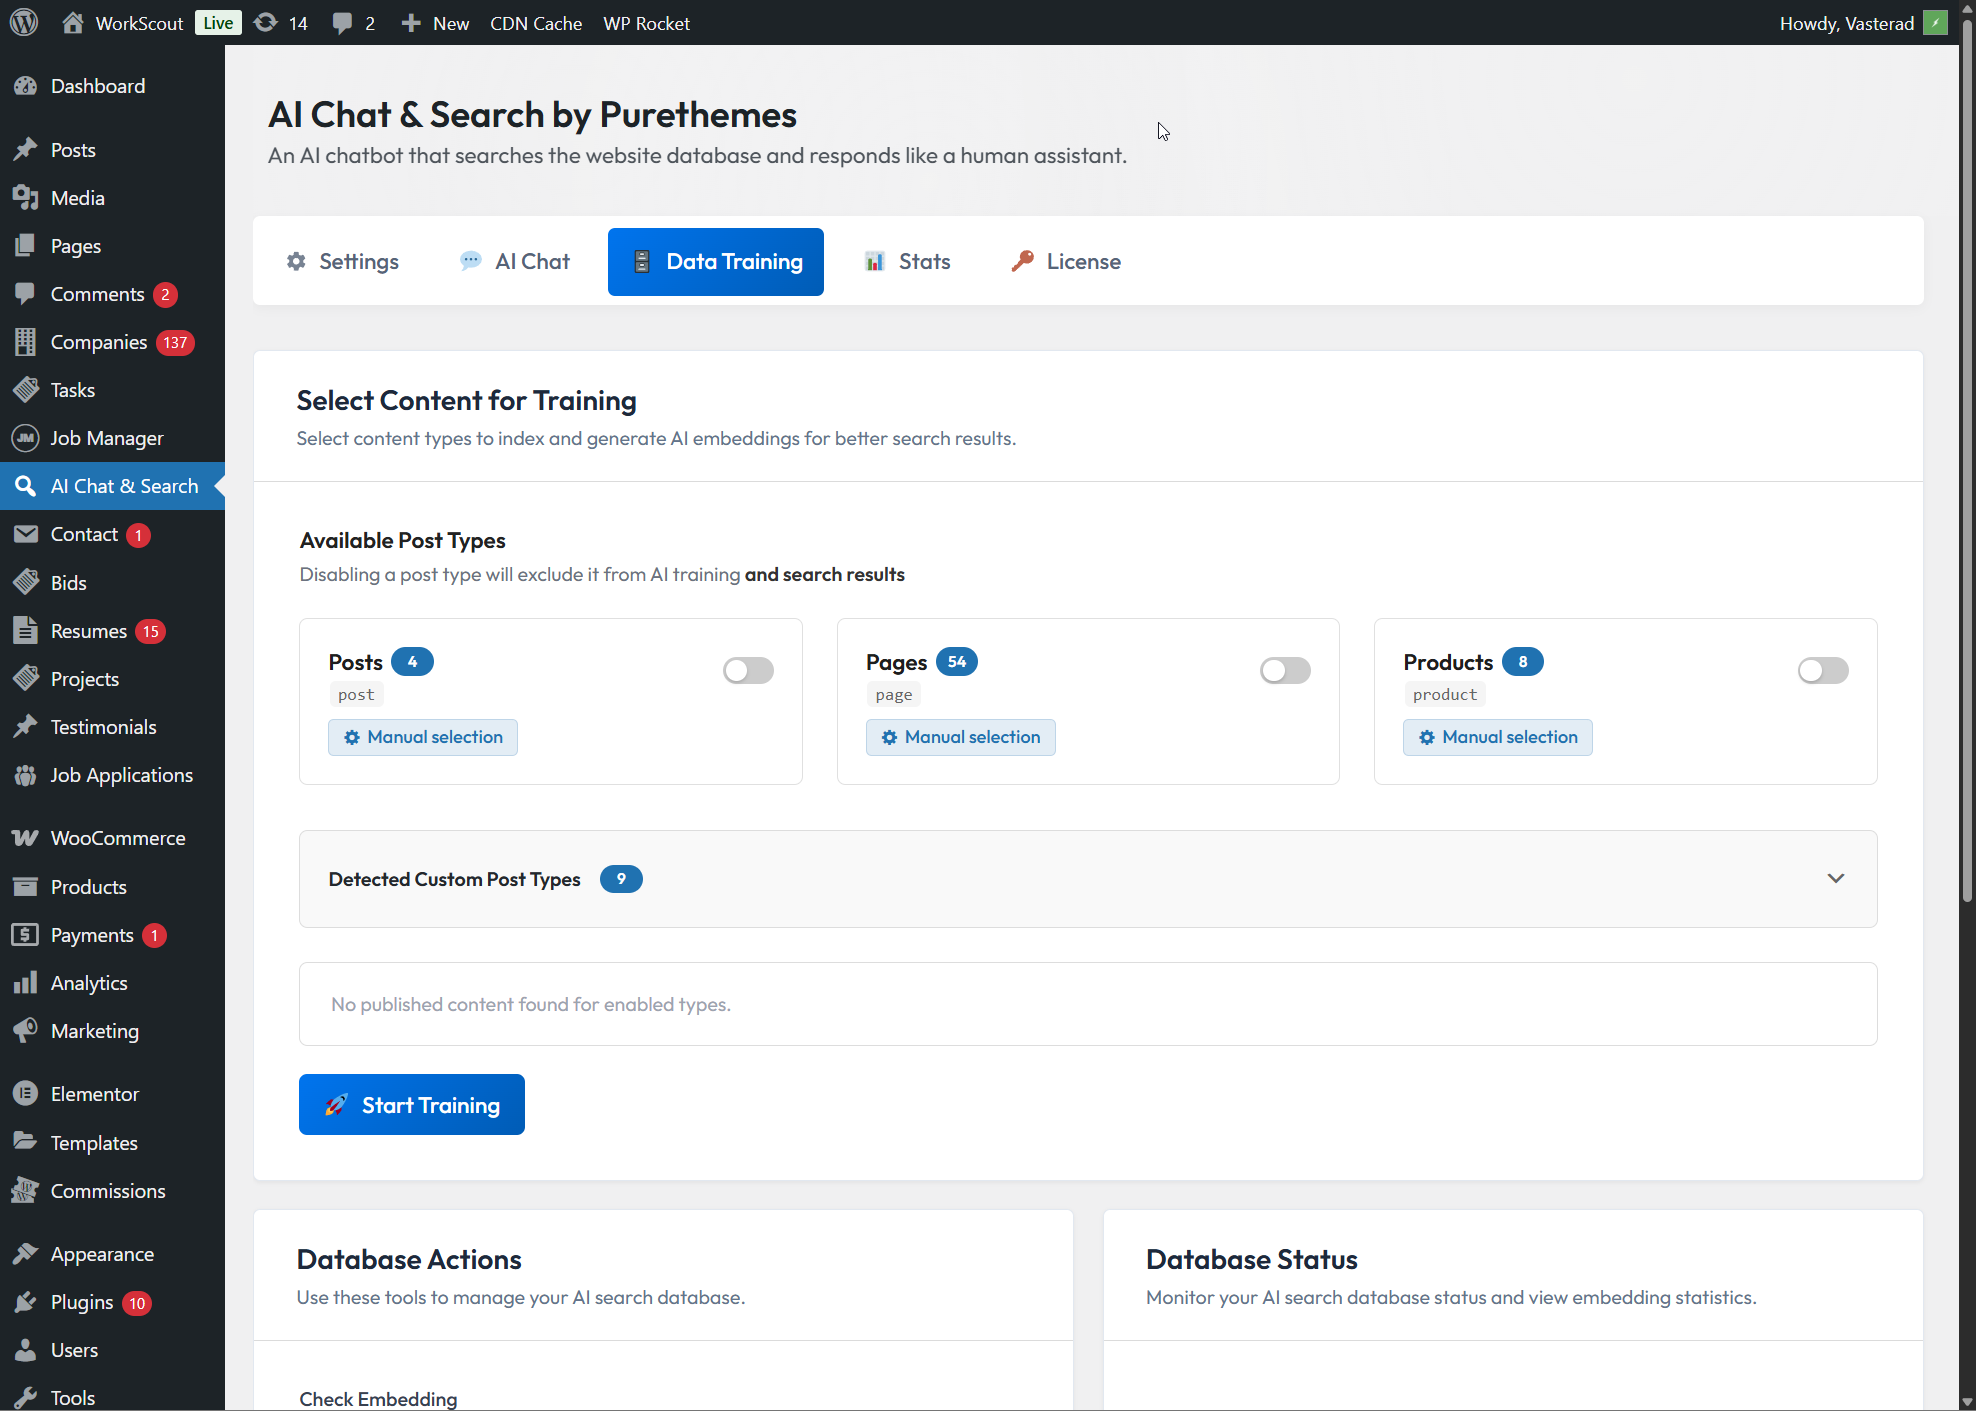
  2. Then go to Data Training tab and click “🚀 Start Training“.
    If you don’t want the chatbot to search your site content, skip data training and uncheck “Posts” and “Pages”. It will then respond only using your Custom System Prompt (see FAQ).
    ⚠️ We suggest using “Manual Selection” before training pages and posts to avoid indexing outdated or junk pages.
    [/lore_alert_message]

Features

Feature Free Pro
Search analytics
Website-specific answers
(based on system prompt)
Chat history ✅ Access to chat stats & conversation history
Posts & pages search ✅ AI can search through content from posts and pages ✅ AI can search through content from posts and pages
WooCommerce products ✅ Search products
✅ Filter by price, stock, sale, rating
Custom post types ✅ Search through custom post types

Pricing: https://purethemes.net/ai-chat-search-pro/


FAQ

  • 🤖 Improving chatbot replies with a Custom System Prompt

    You can add specific instructions about your website’s focus, target audience, or special features to help the AI provide more relevant and personalized answers to your visitors.

    Example:

    IMPORTANT:
    – This website provides information about our business services, products, and updates. We help visitors understand what we offer and how to contact us.
    – If users ask how to contact us, explain that they can use the “Contact” page to send a message, call us, or email.
    – Paid services or products can be highlighted when relevant.

    CONTACT INFO:
    – If someone asks how to reach us, provide [email protected] and phone +1 123 345 789. – Our business hours are 9am–5pm Monday to Friday.

    Another example:
    If your website is multilingual, instruct the AI to translate user queries before searching your content.

    CRITICAL: If the user query is in another language, translate it to English before searching. For example: French: ‘comment puis-je acheter un produit?’ → translate to ‘how can I buy a product?’

    To improve the AI chatbot’s replies to generic questions like “recommend a service” or “what can I buy”, give it context about your website.

    IMPORTANT: This website provides information about our business services and products. When asked generic questions like “what do you recommend” or “what can I buy,” search for relevant services, products, or resources available on our site.

    In general, prompting is an art — the quality of an AI’s answer depends on the instructions. Too many examples can confuse the model, but too few can give poor results.

    If a user asks for “good” product or “best service”, the AI may automatically apply a quality or rating filter. If items have no ratings, it might return no results. That’s why you should add instructions like:
    “Don’t apply a rating filter unless the user explicitly asks for it.”

  • 🔍 How AI searches through site content?

  • 💰 How much does it cost in OpenAI API fees?

  • ⏱️ Why answer isn't instant like at chatgpt.com?

  • 📄 Can I add PDF files to training data?

  • ✅ What are the plugin's pros and limitations?

How to create Open AI API key?

  1. Create an OpenAI Account

    Go to https://openai.com
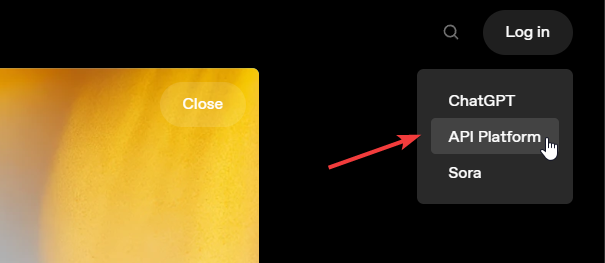
    – Click the “Log In” button (top right corner) and select API Platform.
    – Register using your email, Google, or Microsoft account.

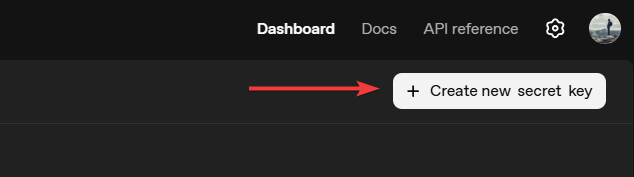
    After signing up, navigate to API Keys https://platform.openai.com/api-keys
    – Click the “Create new secret key” button.
    – This begins the setup process for your API key.

  2. Generate Your API Key
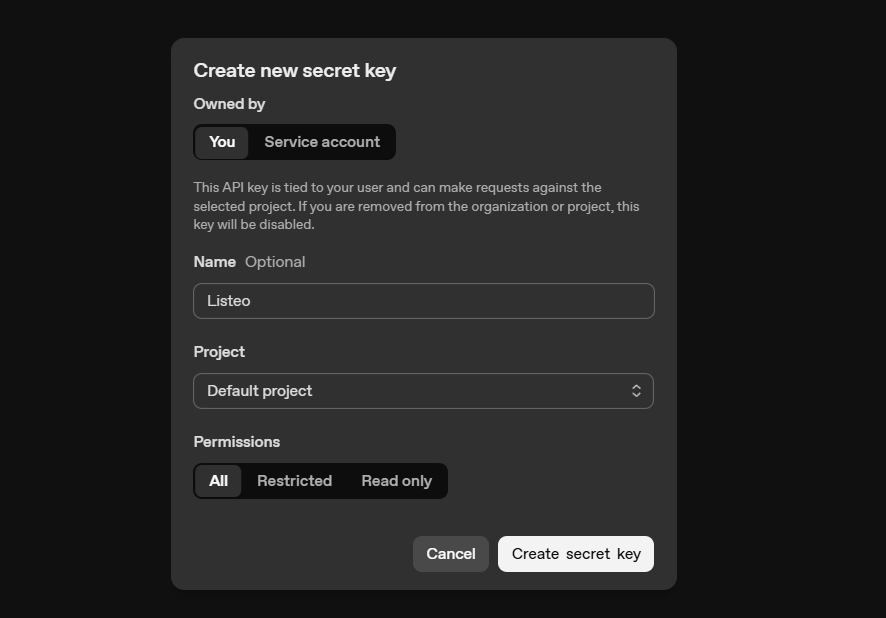
    In the “Create new secret key” dialog:
    – Enter a name for your key (e.g., demo API key) to identify it later.
    – Choose the project (default is fine unless you have multiple projects).
    – Click “Create secret key”
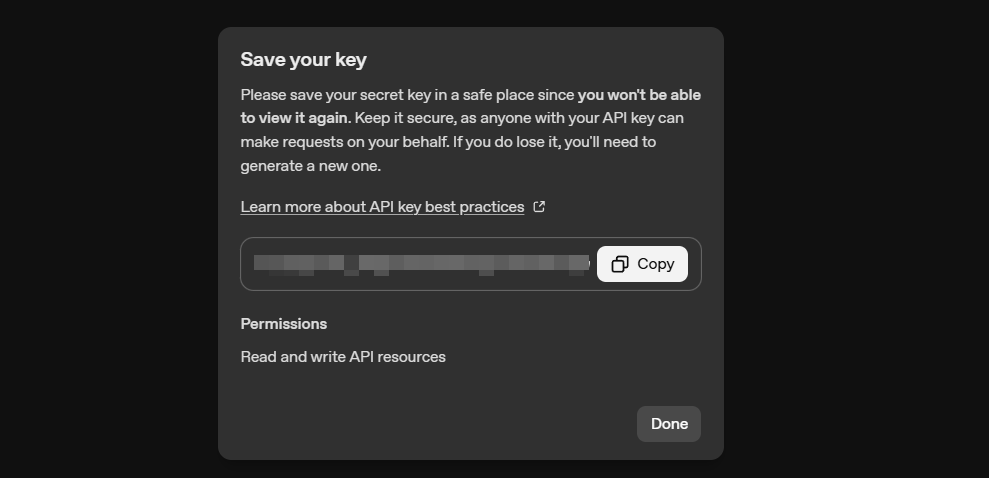
    Your new key will be shown only once — copy it immediately.
    This key is what you’ll use in our data scraper and other tools that are coming soon

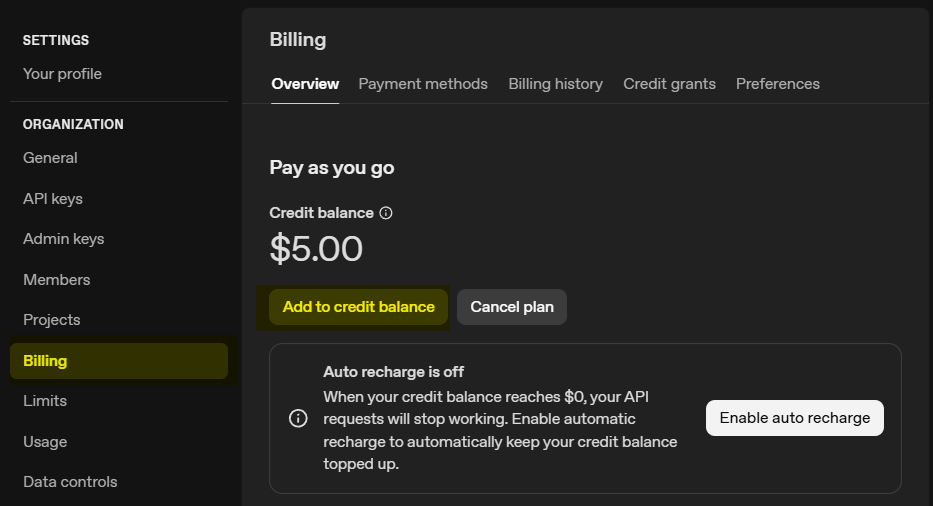
  3. Top up balance

    Minimal amount is $5 – rest assured it $5 will lasts forver in case  AI features for WorkScout 😉

    Go to Billing and click Add credits to balance

AI Review Highlights

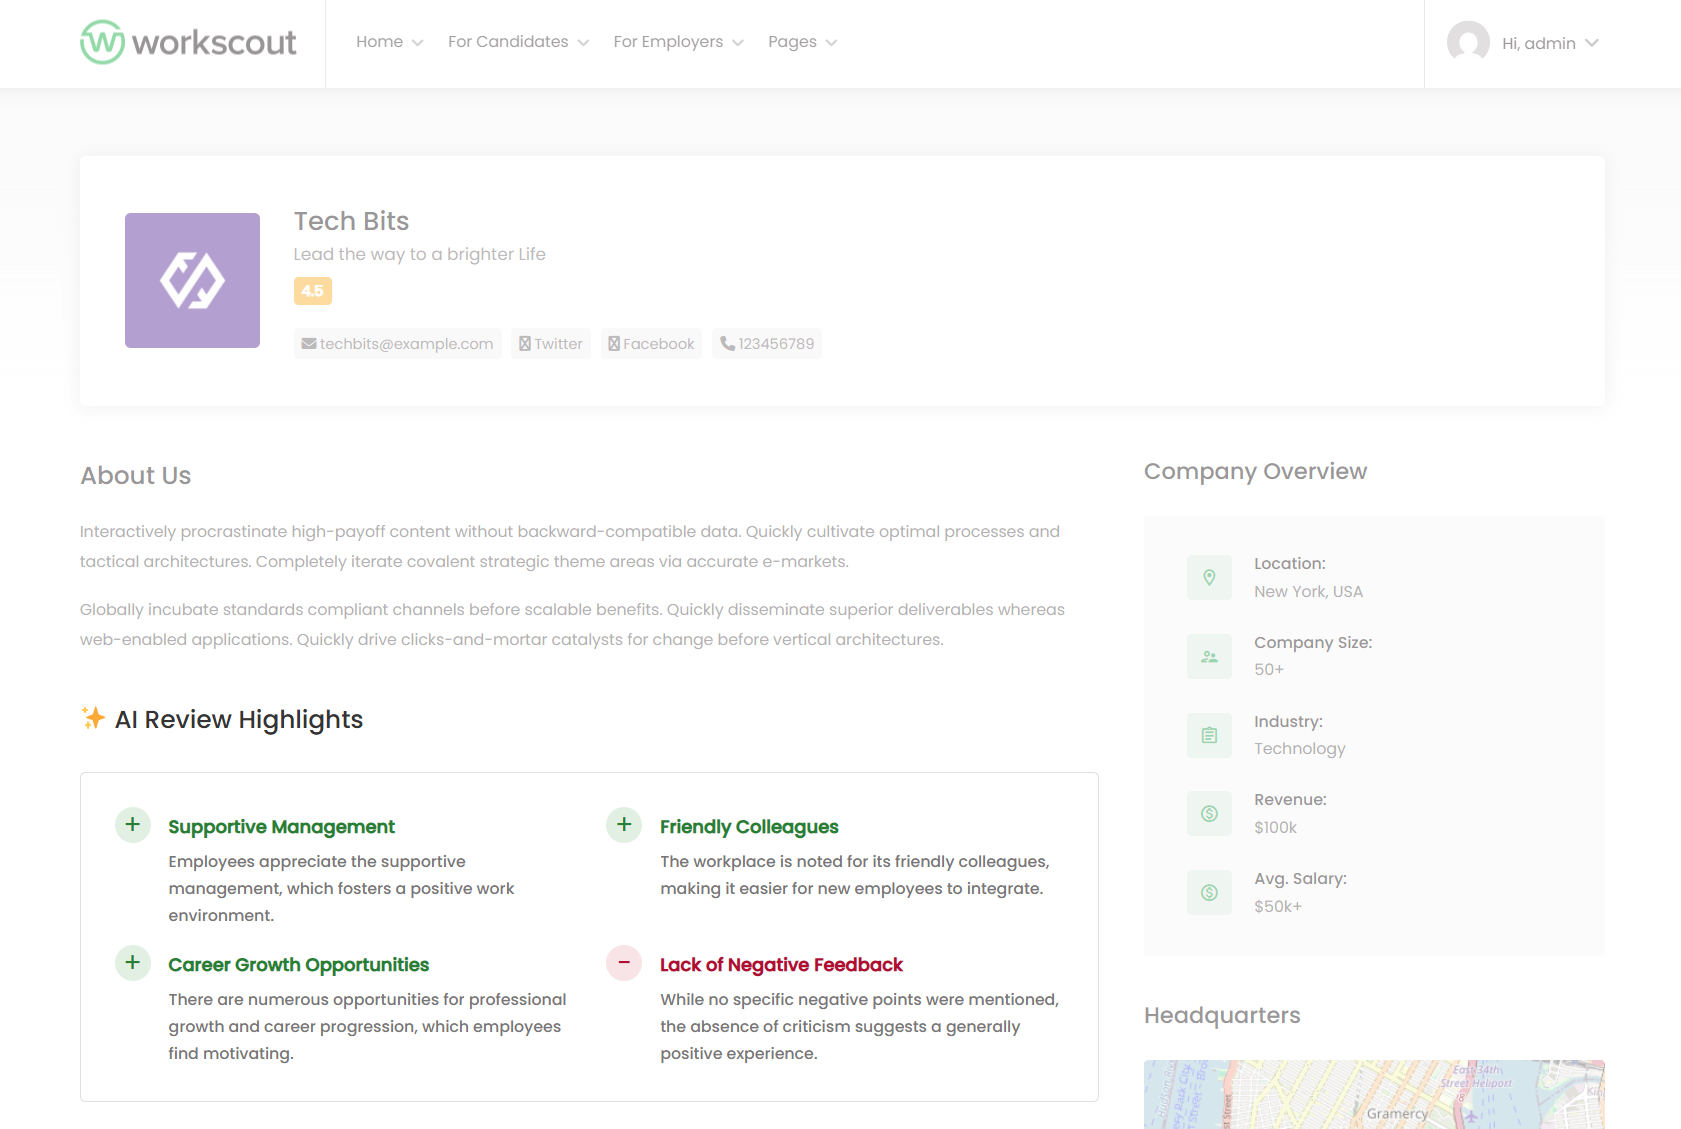
AI Review Highlights plugin reads reviews for resumes (freelancer profiles) and companies and uses AI to generate clear summaries of the most common pros and cons.

Visitors get a quick overview instead of scrolling through reviews.

How to use?

  1. Go to https://purethemes.net/license/ and download AI Review Highlights for WorkScout plugin
    You’ll need purchase key: How to find my license key?
  2. Upload ai-review-highlights-for-workscout.zip in WP Dashboard → Plugin → Add New and install & activate.
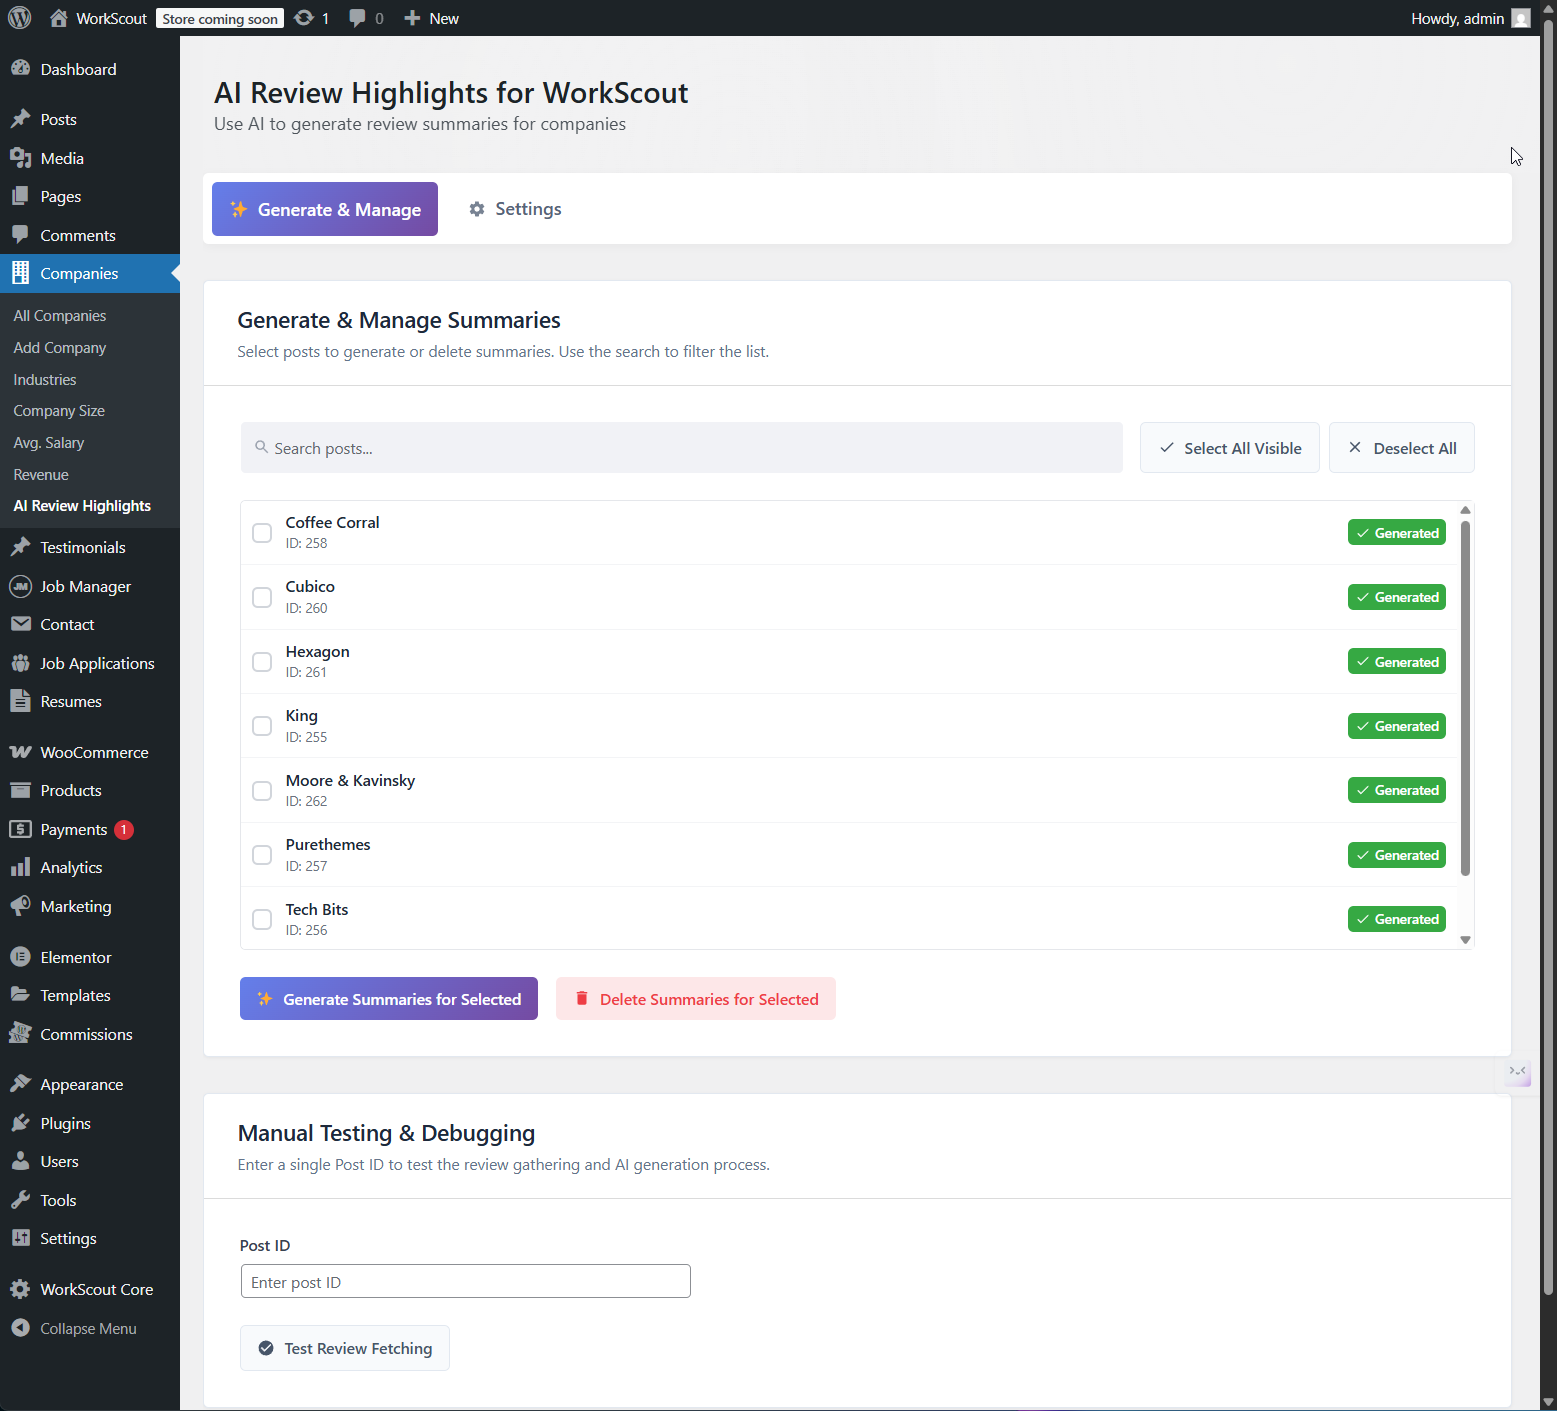
  3. You will see AI Review Highlights in two places:
    1. Companies → AI Reviews Highlights
    2. Resumes → AI Reviews Highlights

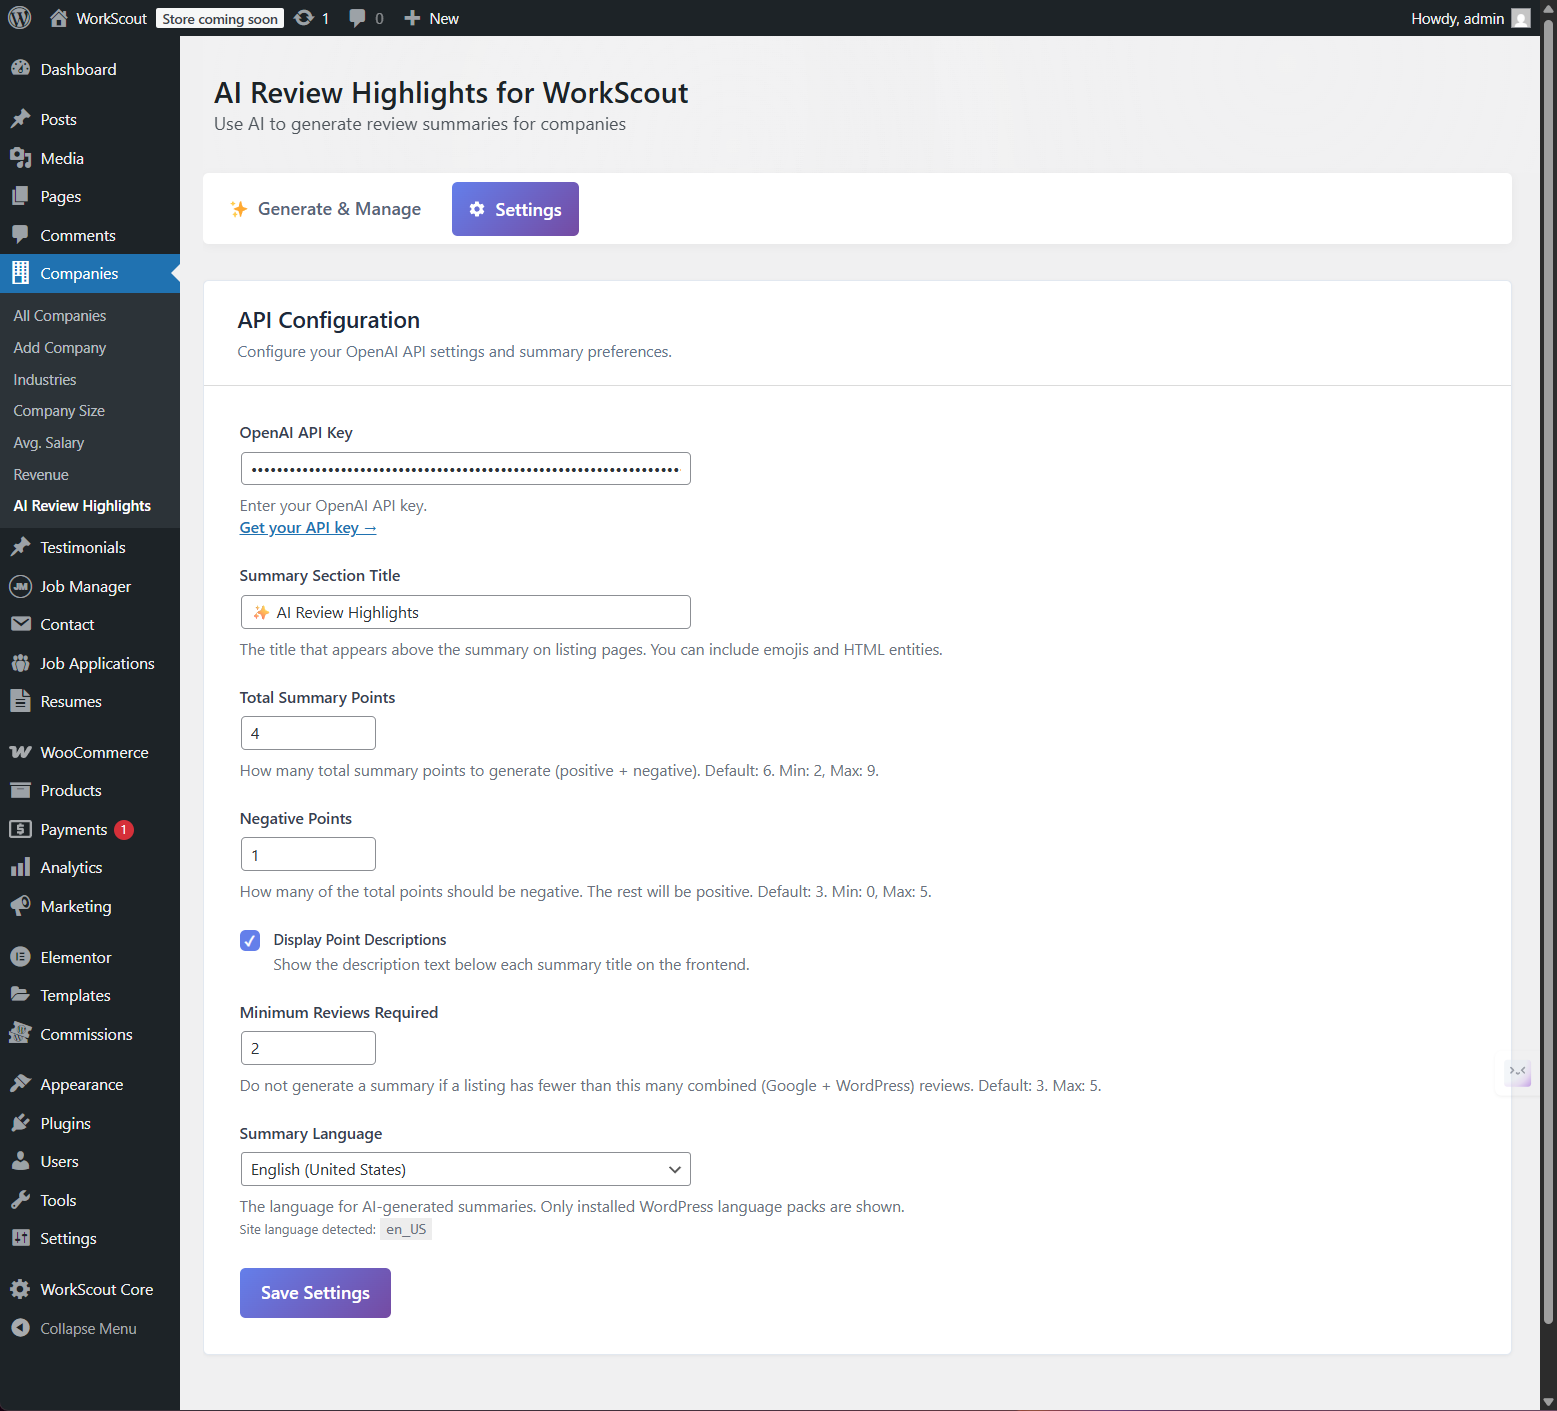
  4. Before use, you need to visit Settings where you can configure plugin to your needs and add your Open AI api key
    How to create Open AI API key? →

AI Hiring Assistant


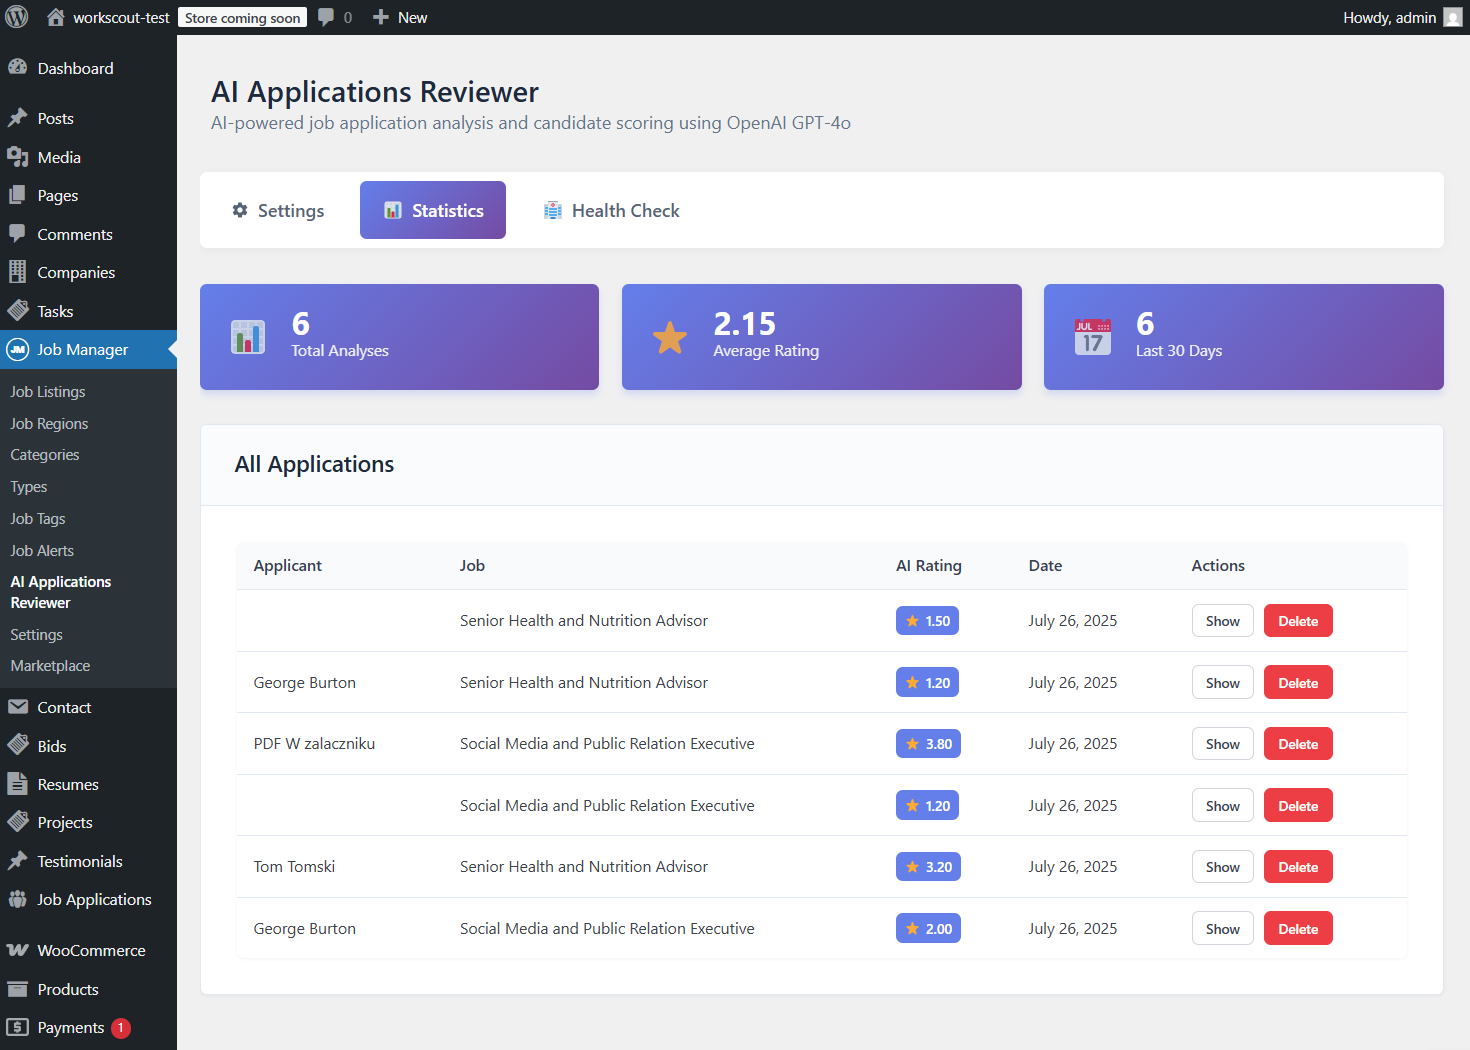
AI Hiring Assistant analyzes job applications with AI to rate candidate fit. Works in tandem with WP Job Manager Applications.

Key features:
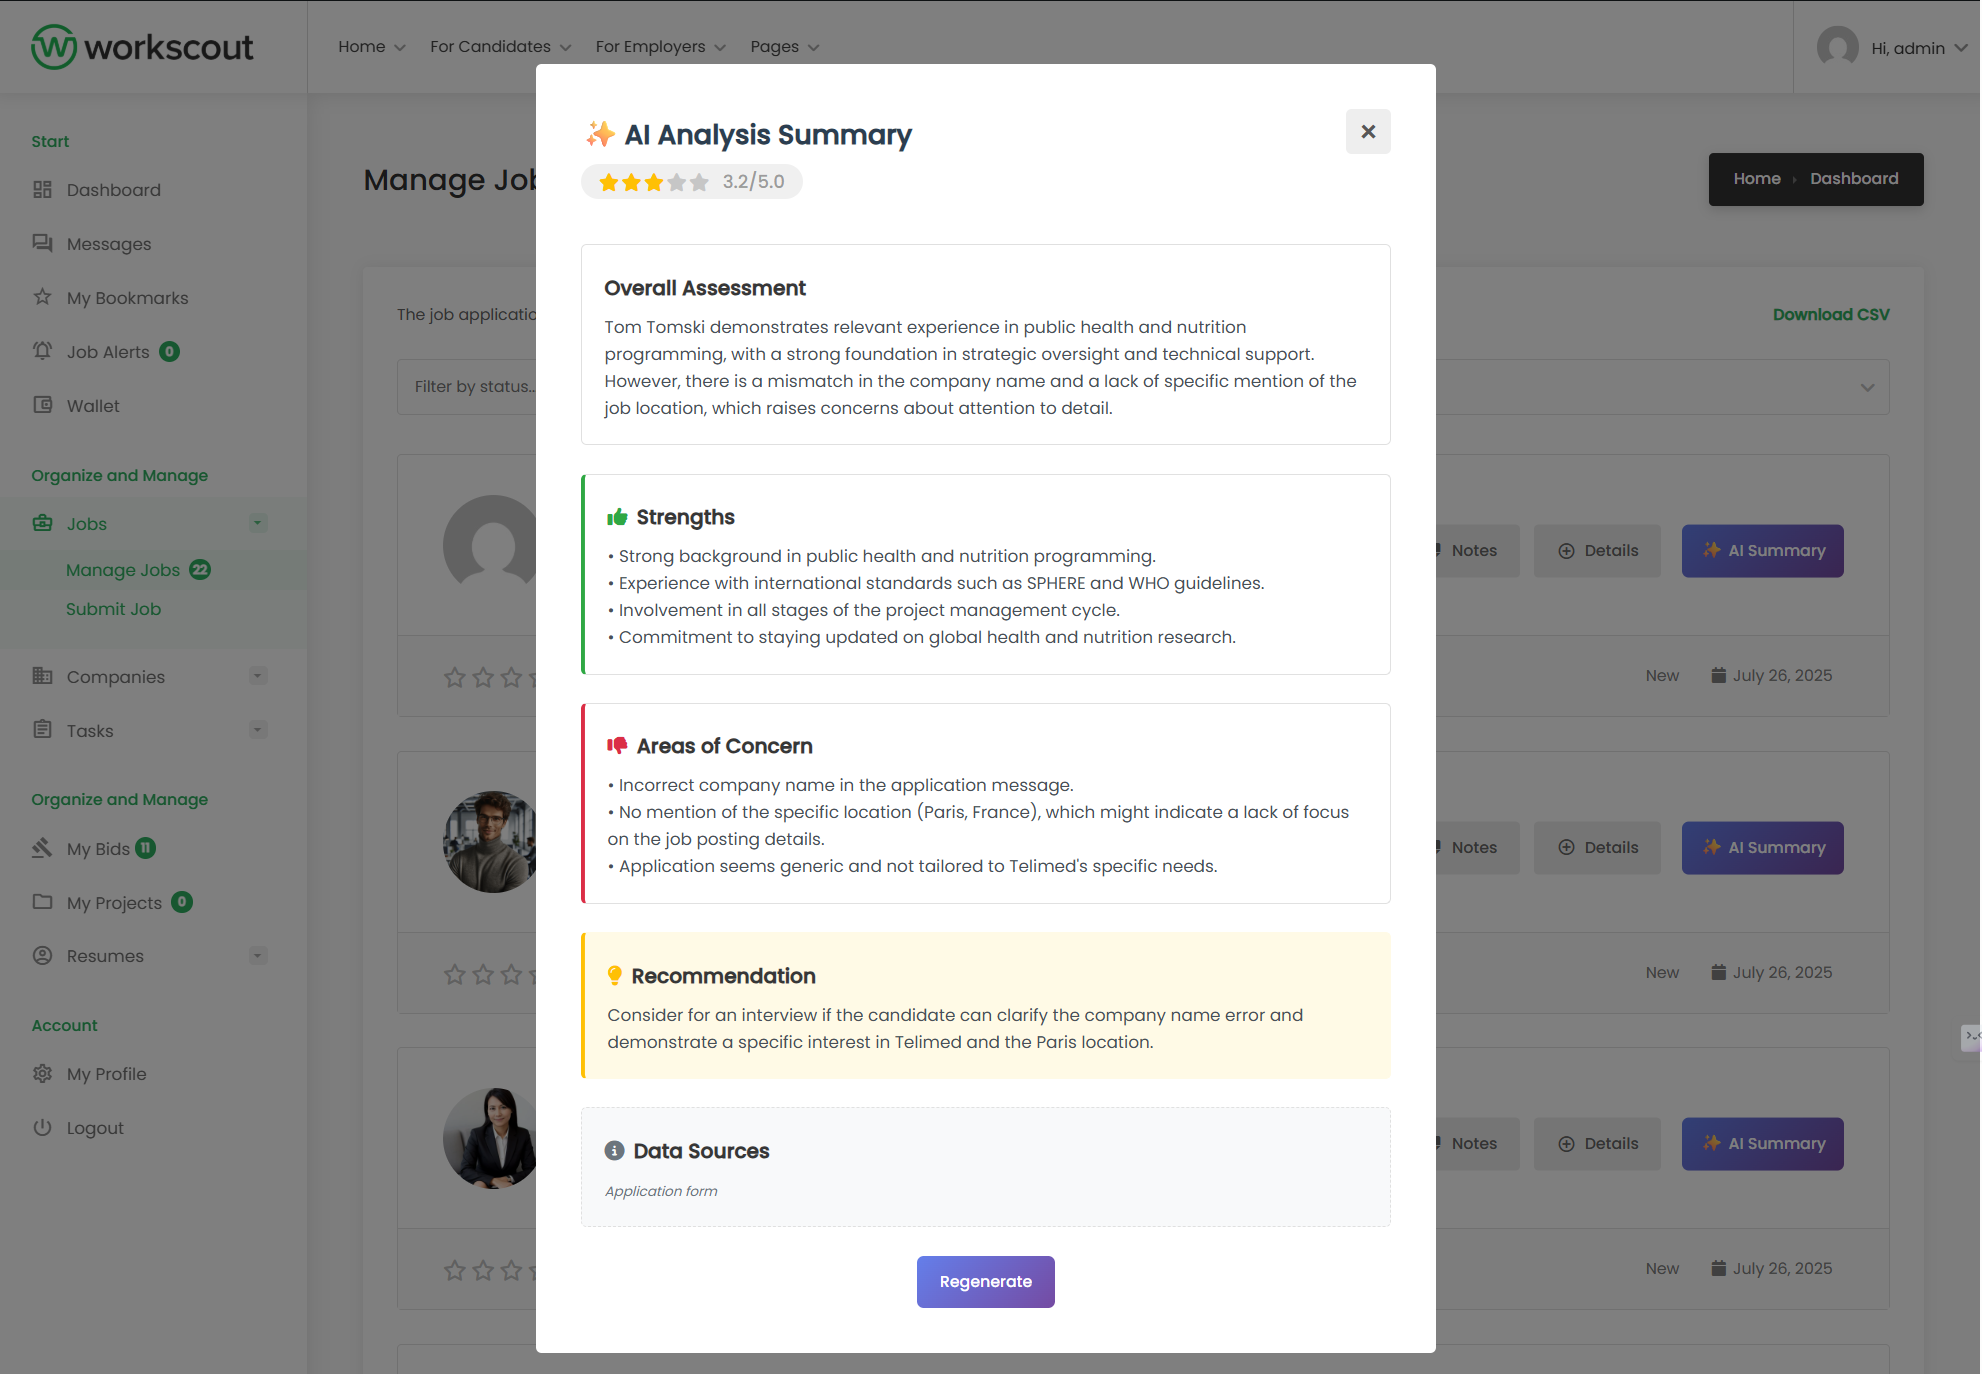
1. Analyses the job description and the candidate’s full application (name, email, message, resume, even PDF content)
2. Evaluates how well the candidate fits the job using Open AI API
3. Scores candidate based on: skill match, relevant experience, communication clarity, cultural fit signals
4. Returns a clear report with:
a.  1–5 rating
b. a short summary
c. strengths (pros)
d. weaknesses (cons)
e. a hiring recommendation


How to use?

  1. Go to https://purethemes.net/license/ and download AI Hiring Assistant plugin
    You’ll need purchase key: How to find my license key?

  2. Upload zip in WP Dashboard → Plugin → Add New and install & activate.
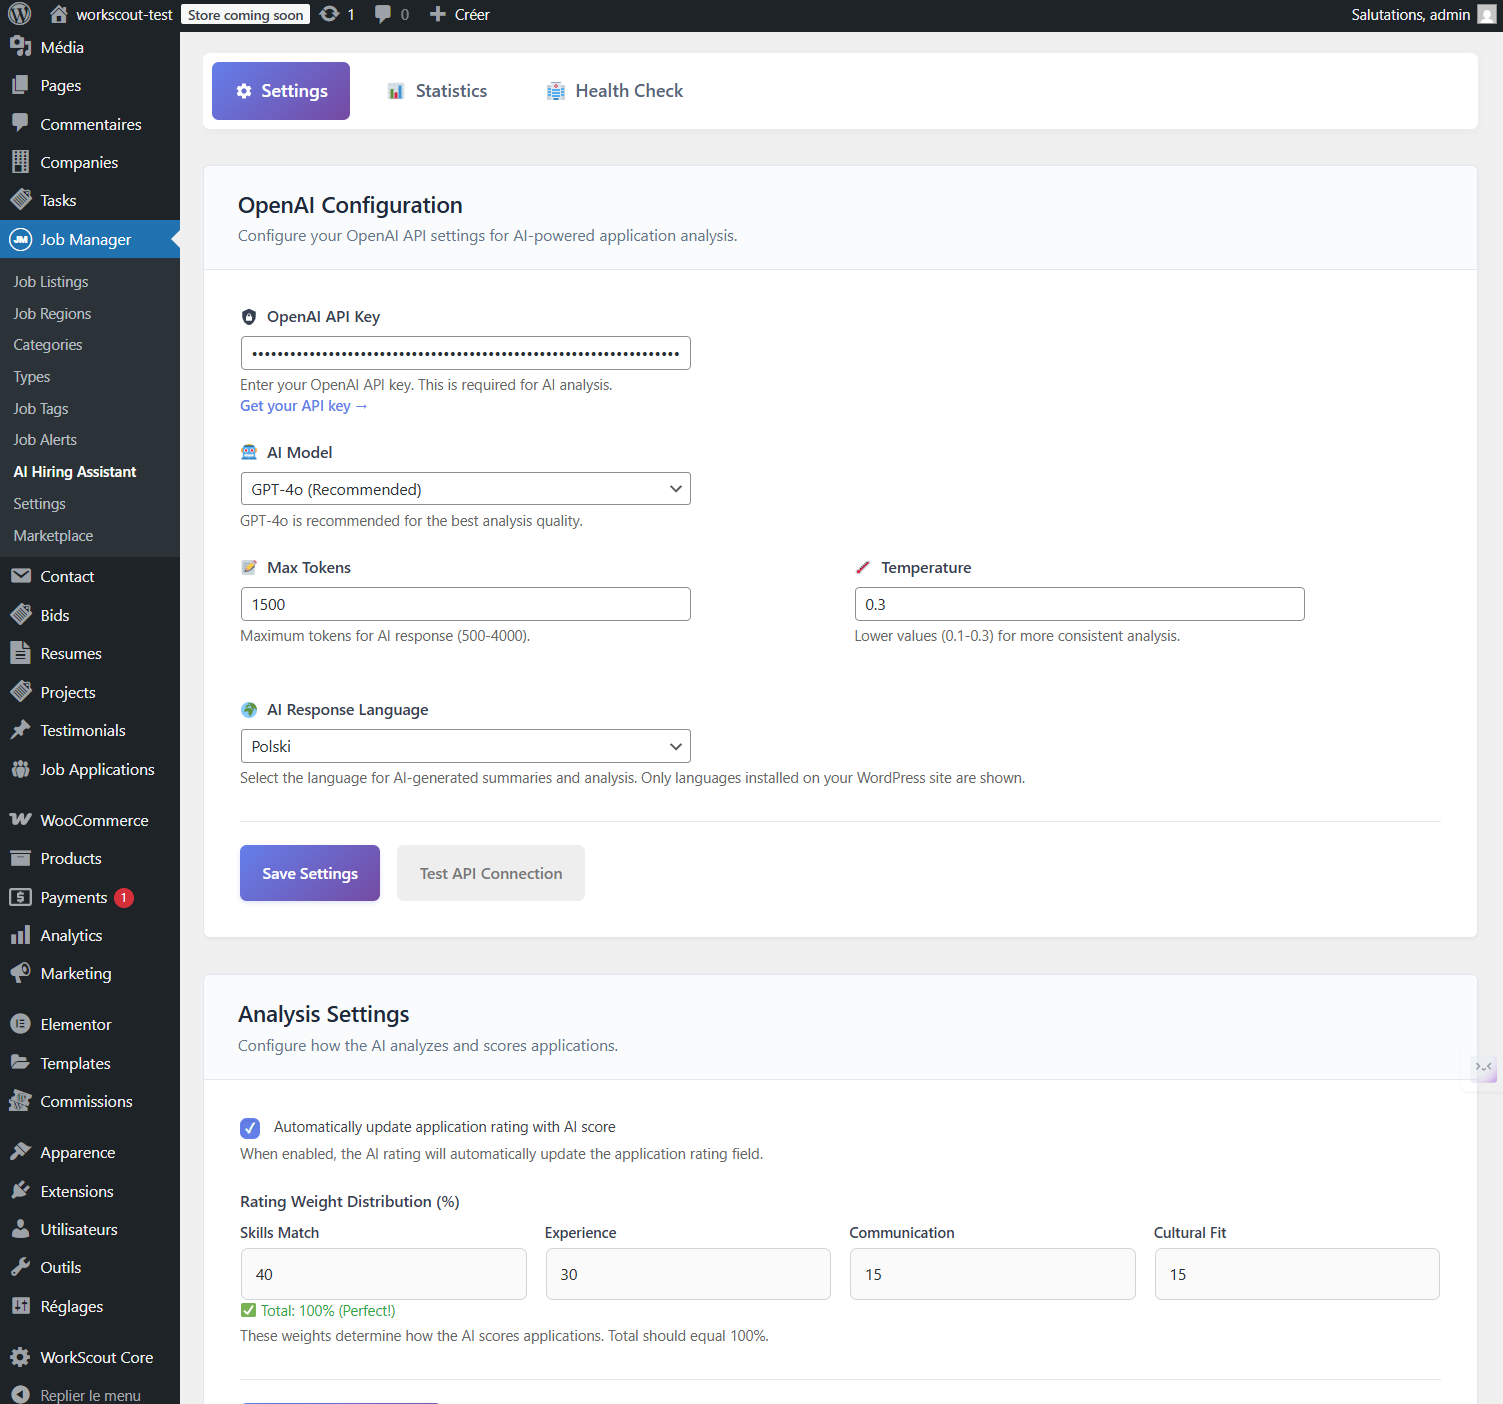
  3. Go to WP Job Manager → AI Hiring Assistant in your WordPress sidebar go directly to Settings.
    Add your Open AI api key
    How to create Open AI API key? →


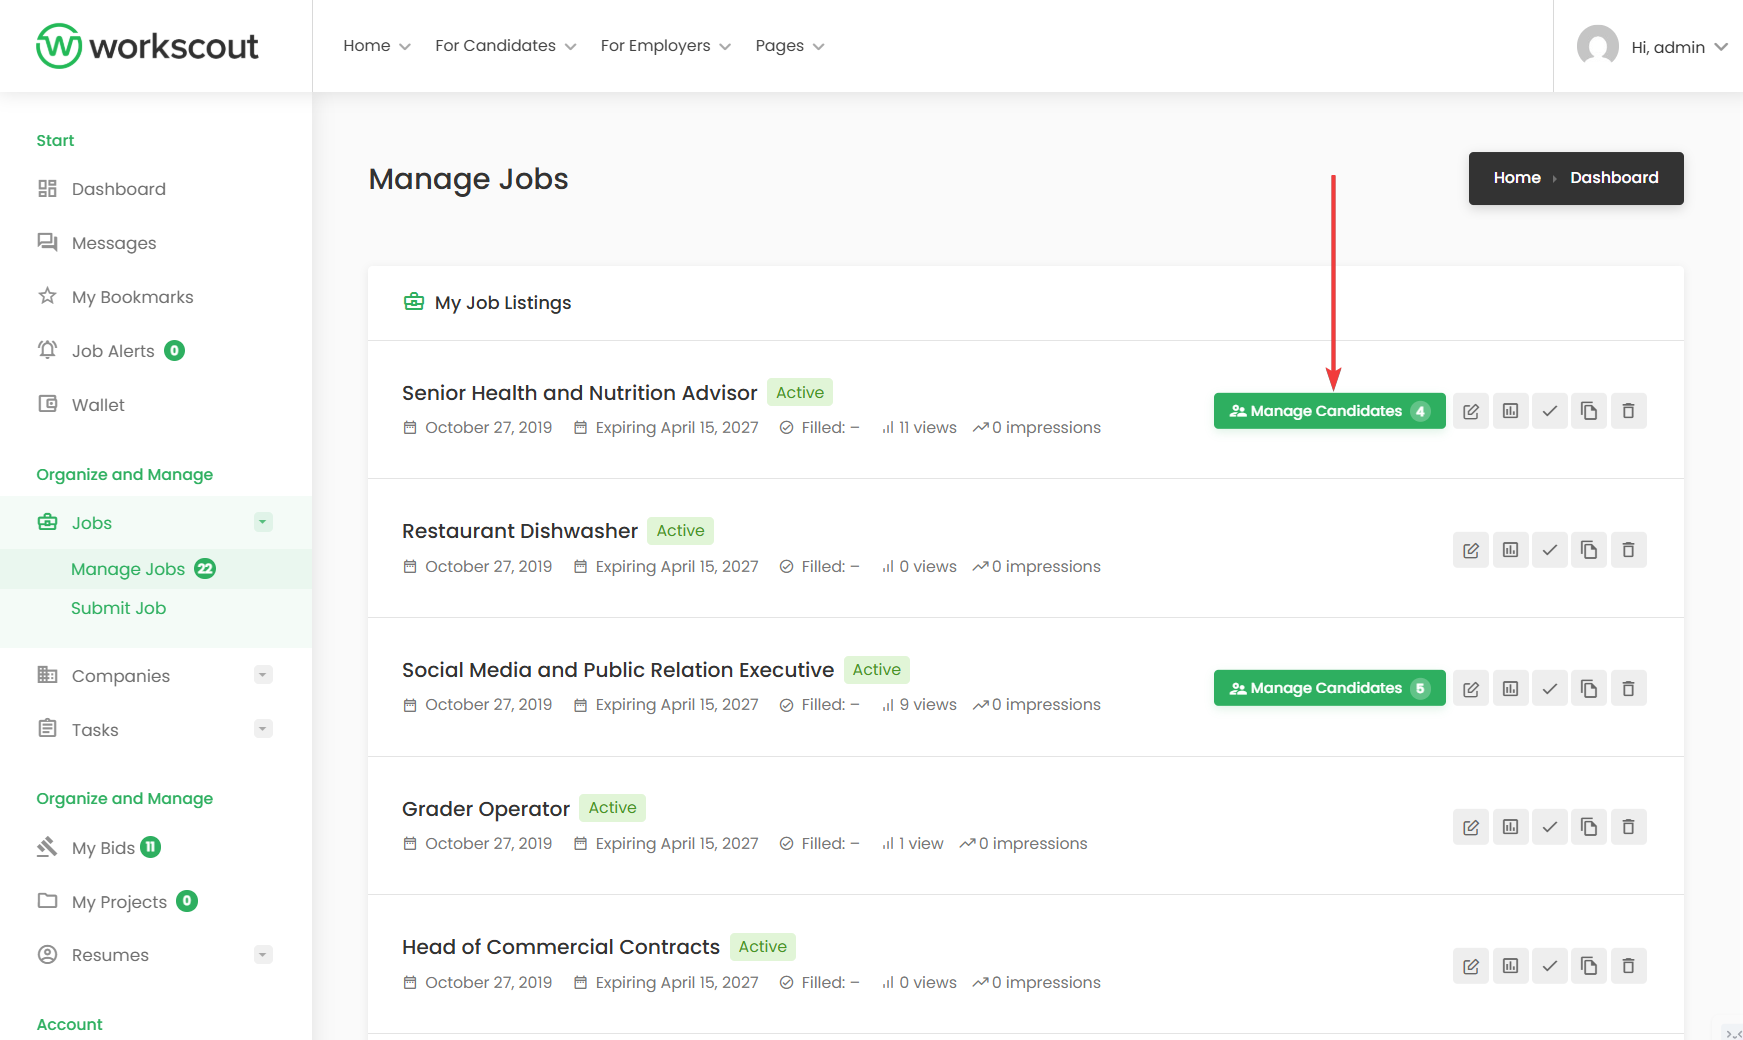
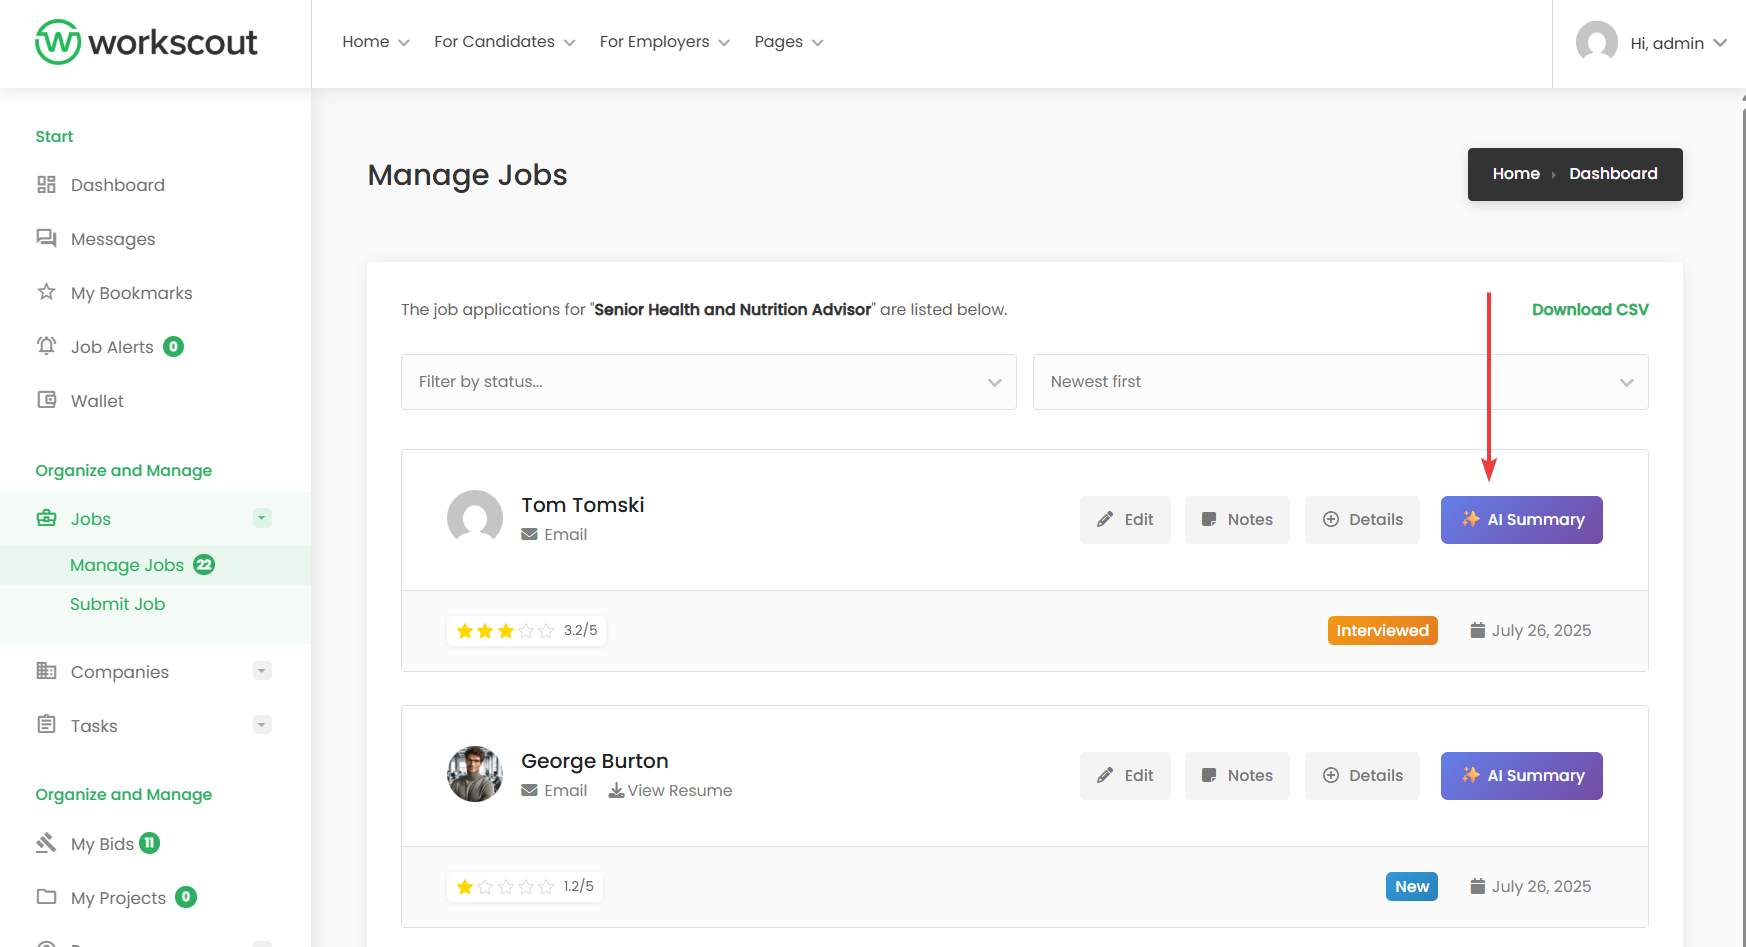
  4. Now all employers will see “AI Summary” button in “Manage Candidates” page. Once clicked a report will be generated and displayed

  5. As an site admin you can check stats under “Statistics” tab