Author Archive

Fixing regions filter on Resumes page

If you are using plugin Regions for WP Job Manager you’ll notice the Region filter doesn’t work on Resumes page. For some reason the functionality exists but is not enabled for resumes (please note this is 3rd party plugin, not our code)
To fix it you need to go to Plugins → Plugin Editor, find on list in “Select plugin to edit” the “Regions for WP Job Manager“, it will automatically open first file to edit which is wp-job-manager-locations.php, scroll down to line 92:

You’ll see lines we have to uncomment, all you need to do is to remove the // from the beginning of each line.

After that save the changes and it will work.
 

How to solve problems with AJAX login?

If you’re trying to use Ajax login on Listeo and you get stuck on message ‘Sending user info, please wait…‘, first check if you have any cache/optimizations plugins active on your site. If you do, try to disable them to see if that help. If it does, you might need to change some settings in those plugins as they might have to aggressive optimization for this feature to work.

The issue is often connected with custom mod_security rules. Some hosting providers block login requests from non standard paths, so try to contact your hosting provider and ask them about it.

And last but not least, you may experience this issue on nginx server, in that case, add the following lines to /etc/nginx/nginx.conf

fastcgi_temp_file_write_size 10m;
fastcgi_busy_buffers_size 512k;
fastcgi_buffer_size 512k;
fastcgi_buffers 16 512k;
client_max_body_size 50m;
proxy_buffer_size 16k;
proxy_busy_buffers_size 16k;

if that won’t help, check if you have Nginx Content caching enabled, you might need to disable that to fix that problem

Editing Job Submission Fields

There are three main methods to customise job fields in WP Job Manager.

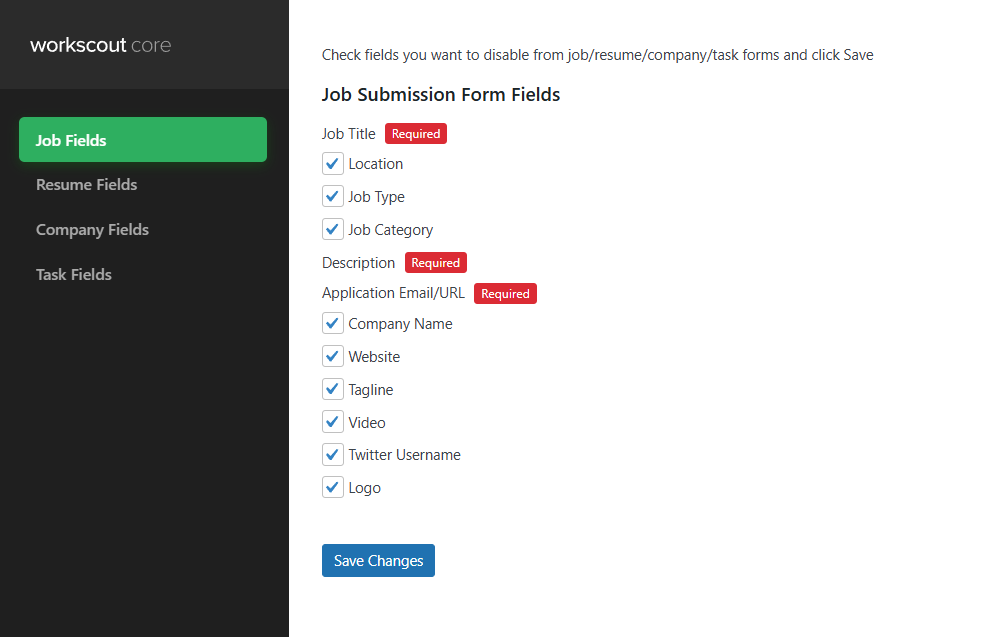
1. Basic adjustment by Enabling / Disabling fields WorkScout Core → Form Fields Visibility → Job Fields
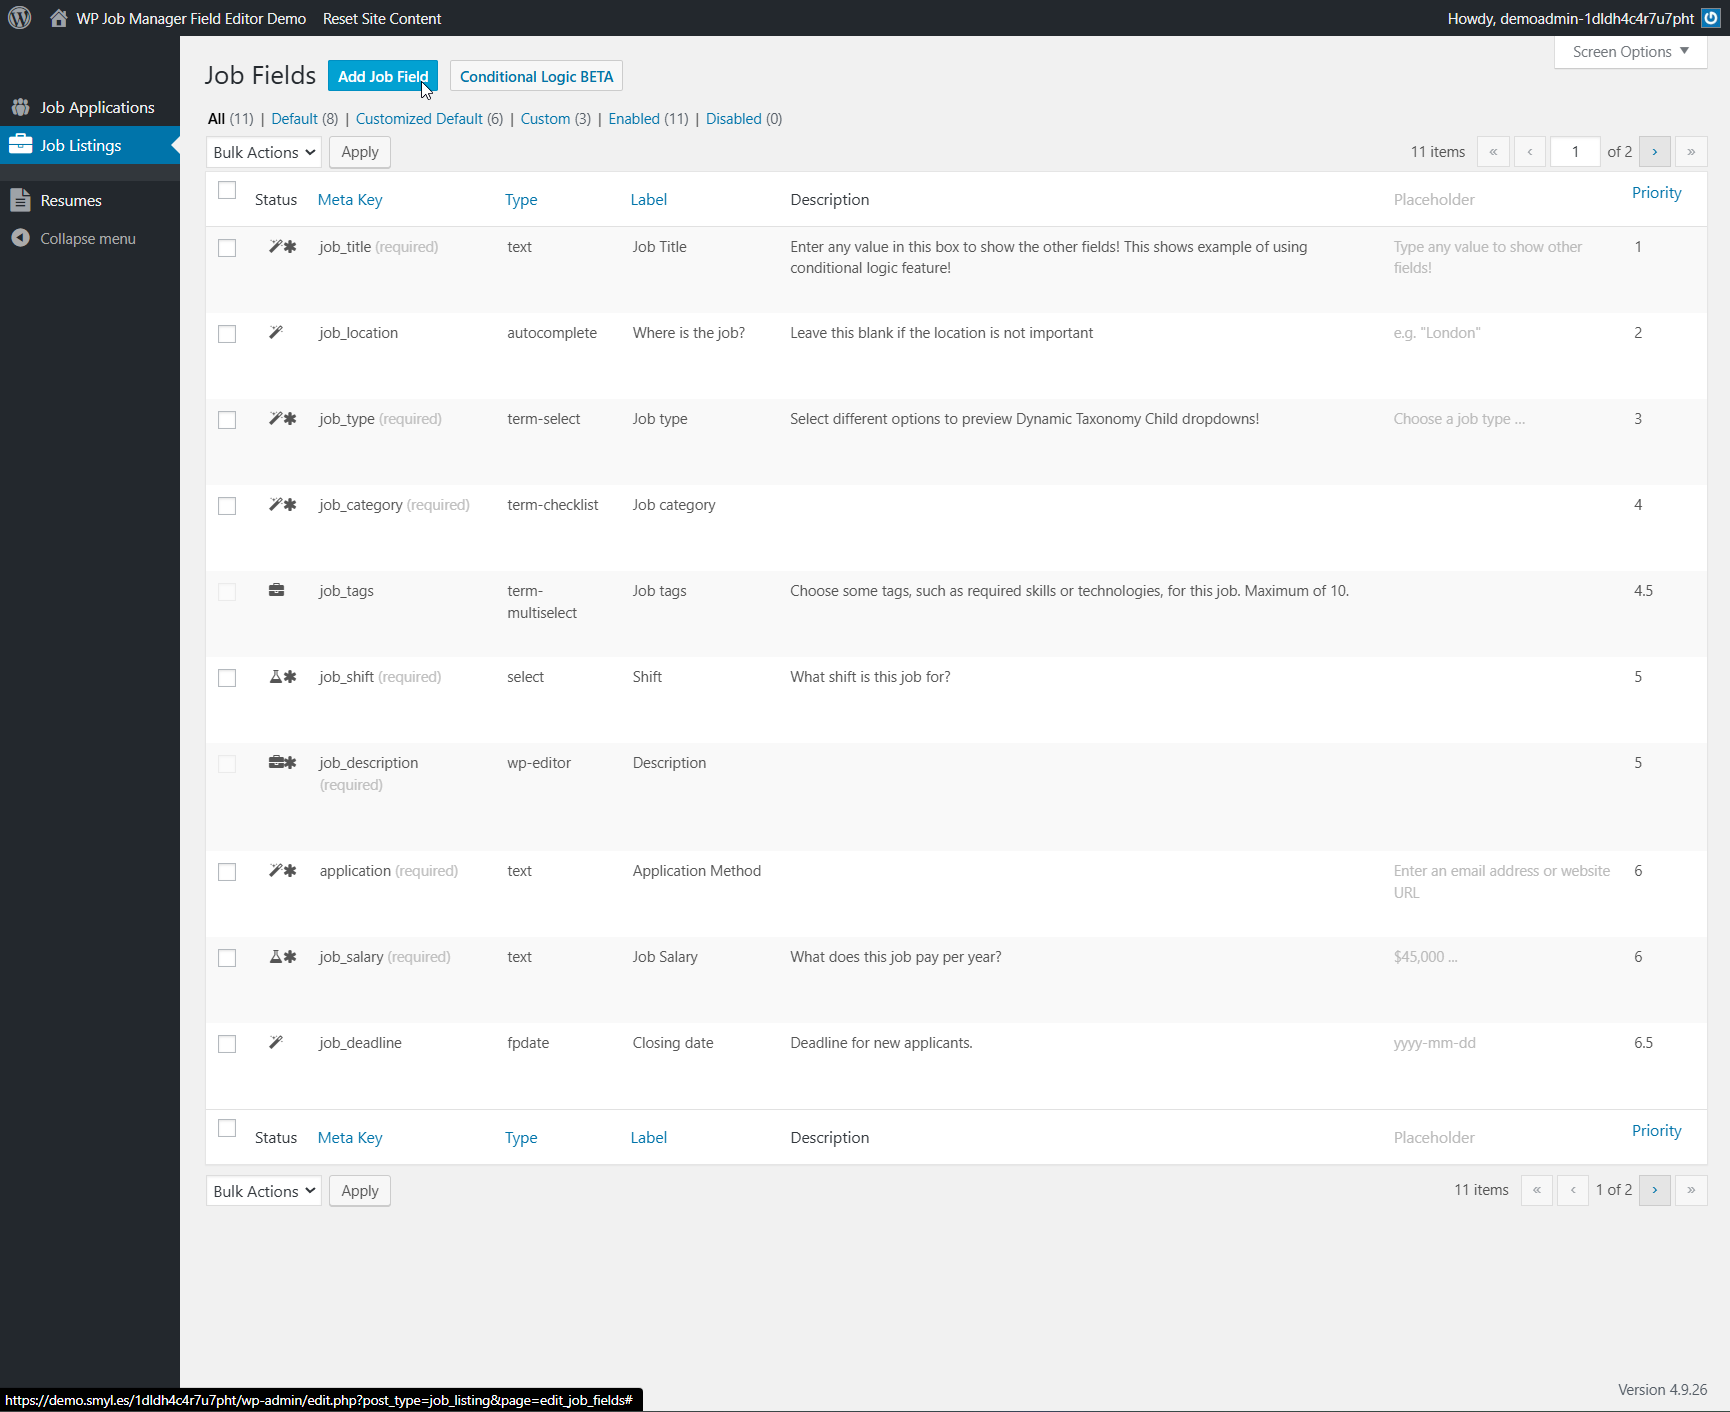
2. Thrid party plugin such as https://plugins.smyl.es/wp-job-manager-field-editor/
3. Through functions.php snippets


Enabling / Disabling Fields

Basic changes can be done in WorkScout Core → Form Fields Visibility → Job Fields where you can enable or disable fields you want.

For text changes from english to english use plugin such as the Say What Plugin. If you’d like to translate fields to other language than english please refer to article: Translating theme and plugins →


Drag & Drop Editor

Use a 3rd party plugin such as https://plugins.smyl.es/wp-job-manager-field-editor/ which has a UI for field editing.


Editing fields on the frontend using PHP snippet

Editing job submission fields is possible via the submit_job_form_fields filter. Adding some code will allow you to edit various fields, or add new ones.

See the below example which demonstrates how to change a field’s label:

// Add your own function to filter the fields
add_filter( 'submit_job_form_fields', 'custom_submit_job_form_fields' );

// This is your function which takes the fields, modifies them, and returns them
// You can see the fields which can be changed here: https://github.com/mikejolley/WP-Job-Manager/blob/master/includes/forms/class-wp-job-manager-form-submit-job.php
function custom_submit_job_form_fields( $fields ) {

// Here we target one of the job fields (job_title) and change it's label
 $fields['job']['job_title']['label'] = "Custom Label";

// And return the modified fields
 return $fields;
}

View the full list of core fields in this file: https://github.com/mikejolley/WP-Job-Manager/blob/master/includes/forms/class-wp-job-manager-form-submit-job.php


Editing fields in admin

Fields in admin are of similar structure and can be edited using the ‘job_manager_job_listing_data_fields’ filter. Each field takes a label, placeholder, type and description arguments.

See the below example which demonstrates how to change a field’s placeholder:
 // Add your own function to filter the fields
 add_filter( 'job_manager_job_listing_data_fields', 'custom_job_manager_job_listing_data_fields' );

// This is your function which takes the fields, modifies them, and returns them
 // You can see the fields which can be changed here: https://github.com/mikejolley/WP-Job-Manager/blob/master/includes/admin/class-wp-job-manager-writepanels.php
 function custom_job_manager_job_listing_data_fields( $fields ) {

// Here we target one of the job fields (location) and change it's placeholder
 $fields['_job_location']['placeholder'] = "Custom placeholder";

// And return the modified fields
 return $fields;
 }

View the full list of core fields in this file: https://github.com/mikejolley/WP-Job-Manager/blob/master/includes/admin/class-wp-job-manager-writepanels.php

Customizing Templates

Workscout Core has separated folder for all the templates that are used to display single listings and listings archives. Those templates  files can be overridden via your theme if you want to customise them. To override a template, move it to yourtheme/workscout-core/, keeping the path within ‘templates’ intact.

So for example, you’d like to change the registration form. To do that, copy file wp-content/plugins/workscout-core/templates/account/registration-form.php to wp-content/themes/yourtheme/workscout-core/account/registration-form.php and you can customise the file as you need. It will be used instead of the core template file. This also supports child themes, so you can put that file directly to your child theme.\

Single job template is in workscout/template-parts/single-job.php
if you want to modify it and put in child theme the path will be workscout-child/template-parts/single-job.php

Please note, if these files are updated in the core plugin, you may need to update your custom version in the future to maintain compatibility. Therefore it is advised to only override the template files you need to customise.

Customizing Dashboard Menu

WorkScout offers a front-end dashboard for user, where they can manage their jobs, resume, messages and profile info.

The dashboard page has sidebar menu that helps navigate, some elements in that menu are automatically created based on settings in WPJM, so for example if you have set Submit Job page in the Job Listings 🠖 Settings 🠖 Pages, theme will automatically link that page in Dashboard Page menu for Employer.

However, you can assign your own links to Candidate/Employer menu.
Go to Appearance 🠖 Menus you can create there a new menu, and assign that menu to the one of dashboard locations, this could be Employer Dashboard Menu or Candidate Dashboard Menu.

Radius Search

How it works? If someone types keyword/location field, and  select a distance value, the address will be geocoded to latitude and longitude and all properties that are in the selected radius of that point are returned in search results.

If you want to enable Radius Search in your theme, you need to create another Google Maps API Key without any key or domain restrictions. This key will be used on server side geocoding and it won’t be public.

How to get Google API Key?

Once you created new API Key, paste it to WorkScout Core → Map Settings → Gooogle Maps API key for server side geocoding


How does search by location works?

There are two ways the ‘location’ field in search can work. The presence of Google Maps API key for server side geocoding in Listeo Core determines which one is used.

  1. If the API key is added the address typed in ‘location’ field is geocoded to latitude and longitude and all properties that are in the selected radius of that point are returned in search results. The radius  value can be set by default in Listeo Core options (it’s 50km by default). Related articles: Radius search → 
  2. If there’s no API key added the search is strictly text based, the text typed by user is compared to the content of property, property title, and every custom field attached to property to find matching results.

Job Statistics

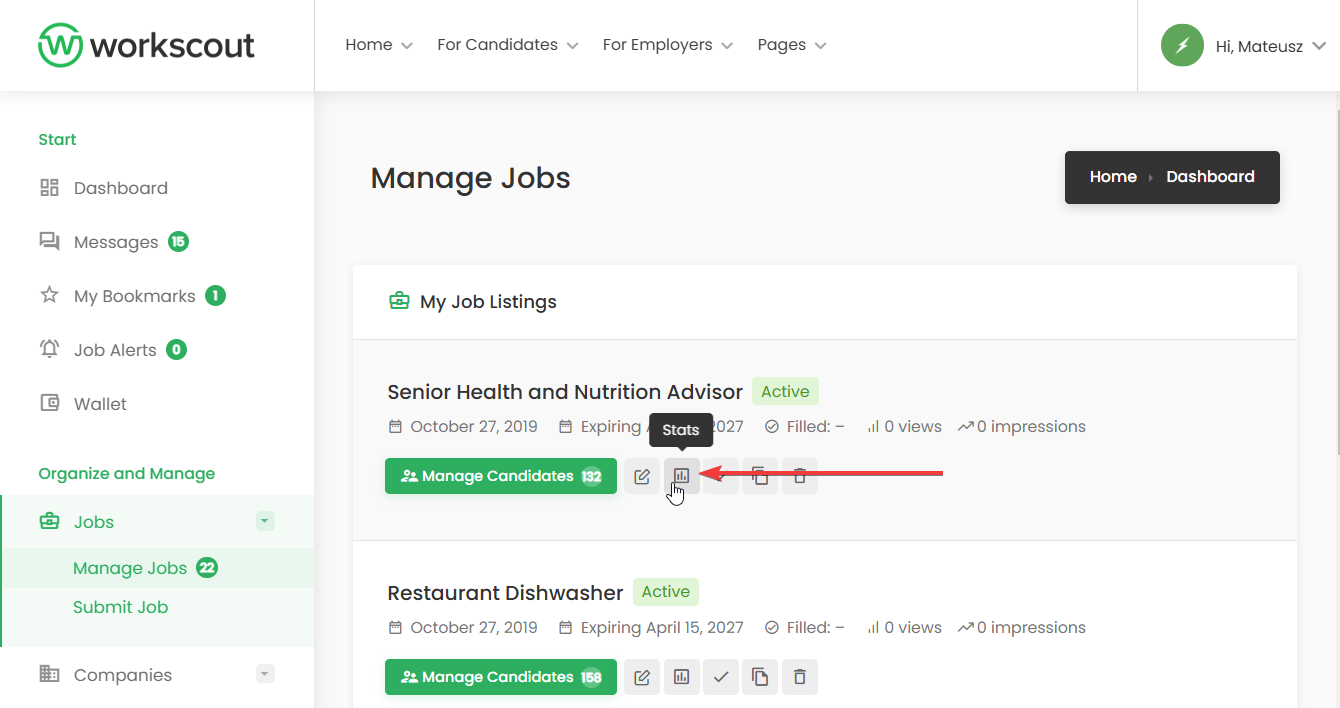
Employers and site owners can open a detailed overlay for each job listing. The analytics data includes page views and unique visits to the job page, interest indicators like clicks on the apply button, and search impressions (how many times the listing has appeared on the site among job search results).

Search impressions are dynamic and only counted when a listing is scrolled into view on the visitor’s screen.

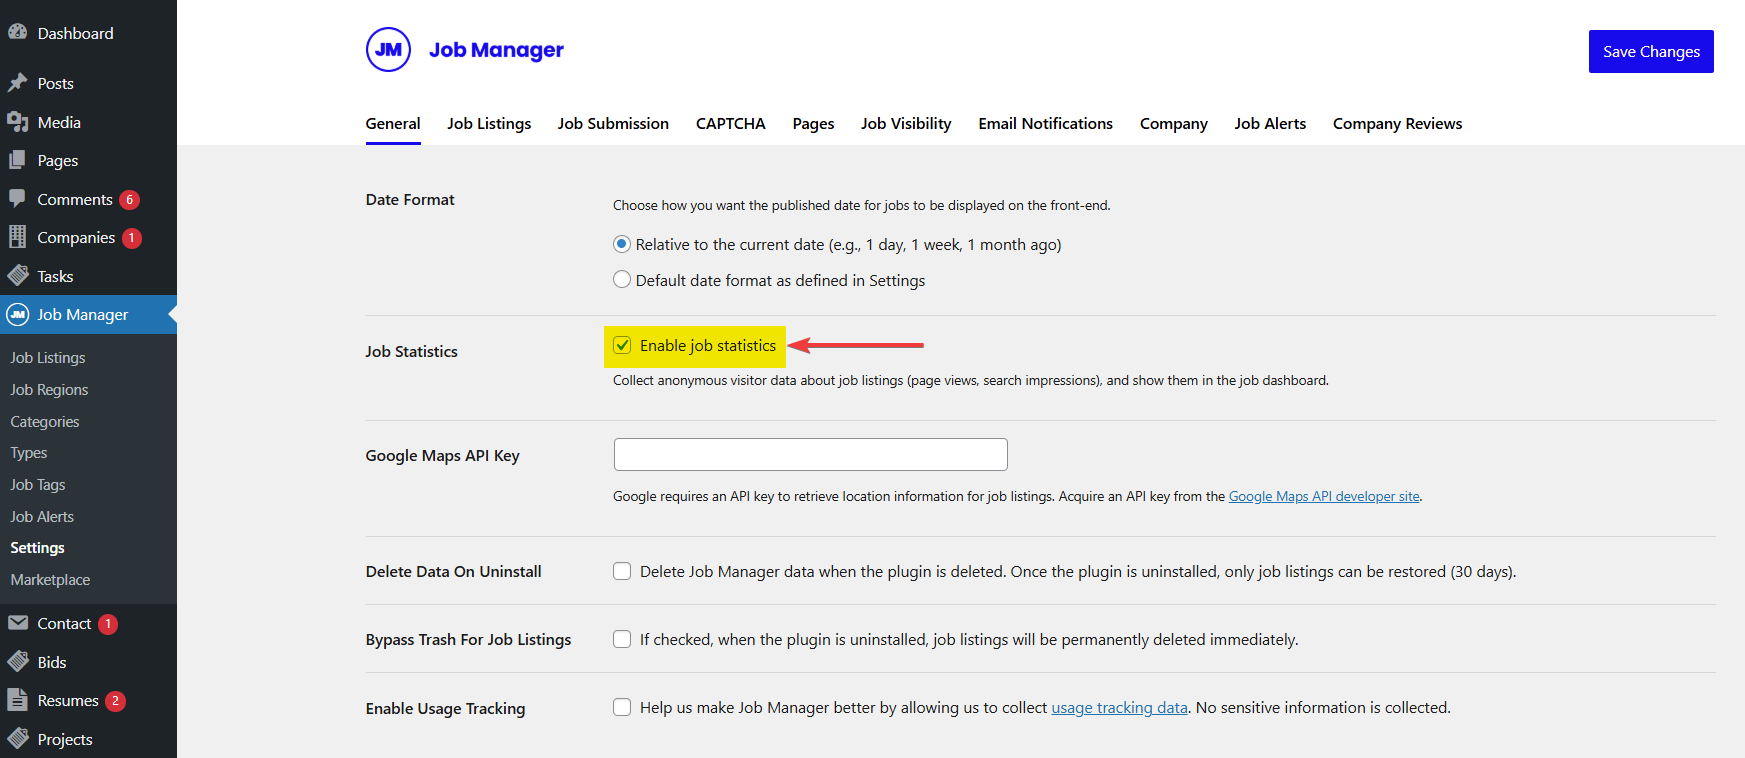
To enable statistics go to Job Manager → General →  Enable Job Statistics

Once enabled your users will be able to check stats for their jobs in their dashboard

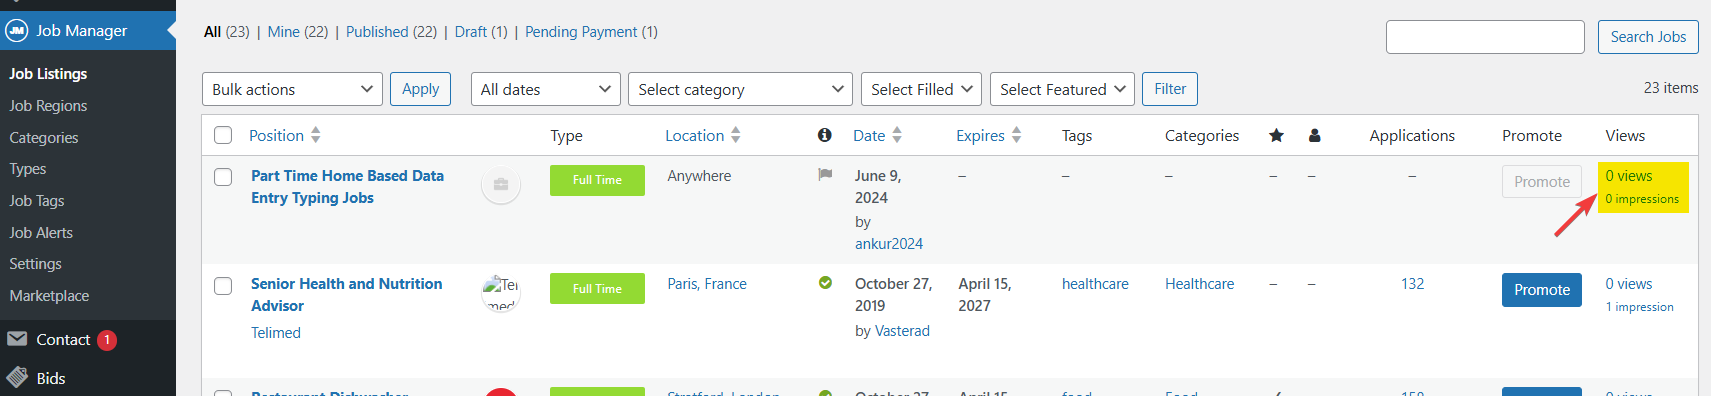
as a site admin you can browse stats for every listing in WordPress Dashboard by clicking on “Views”

How to add PHP snippets?

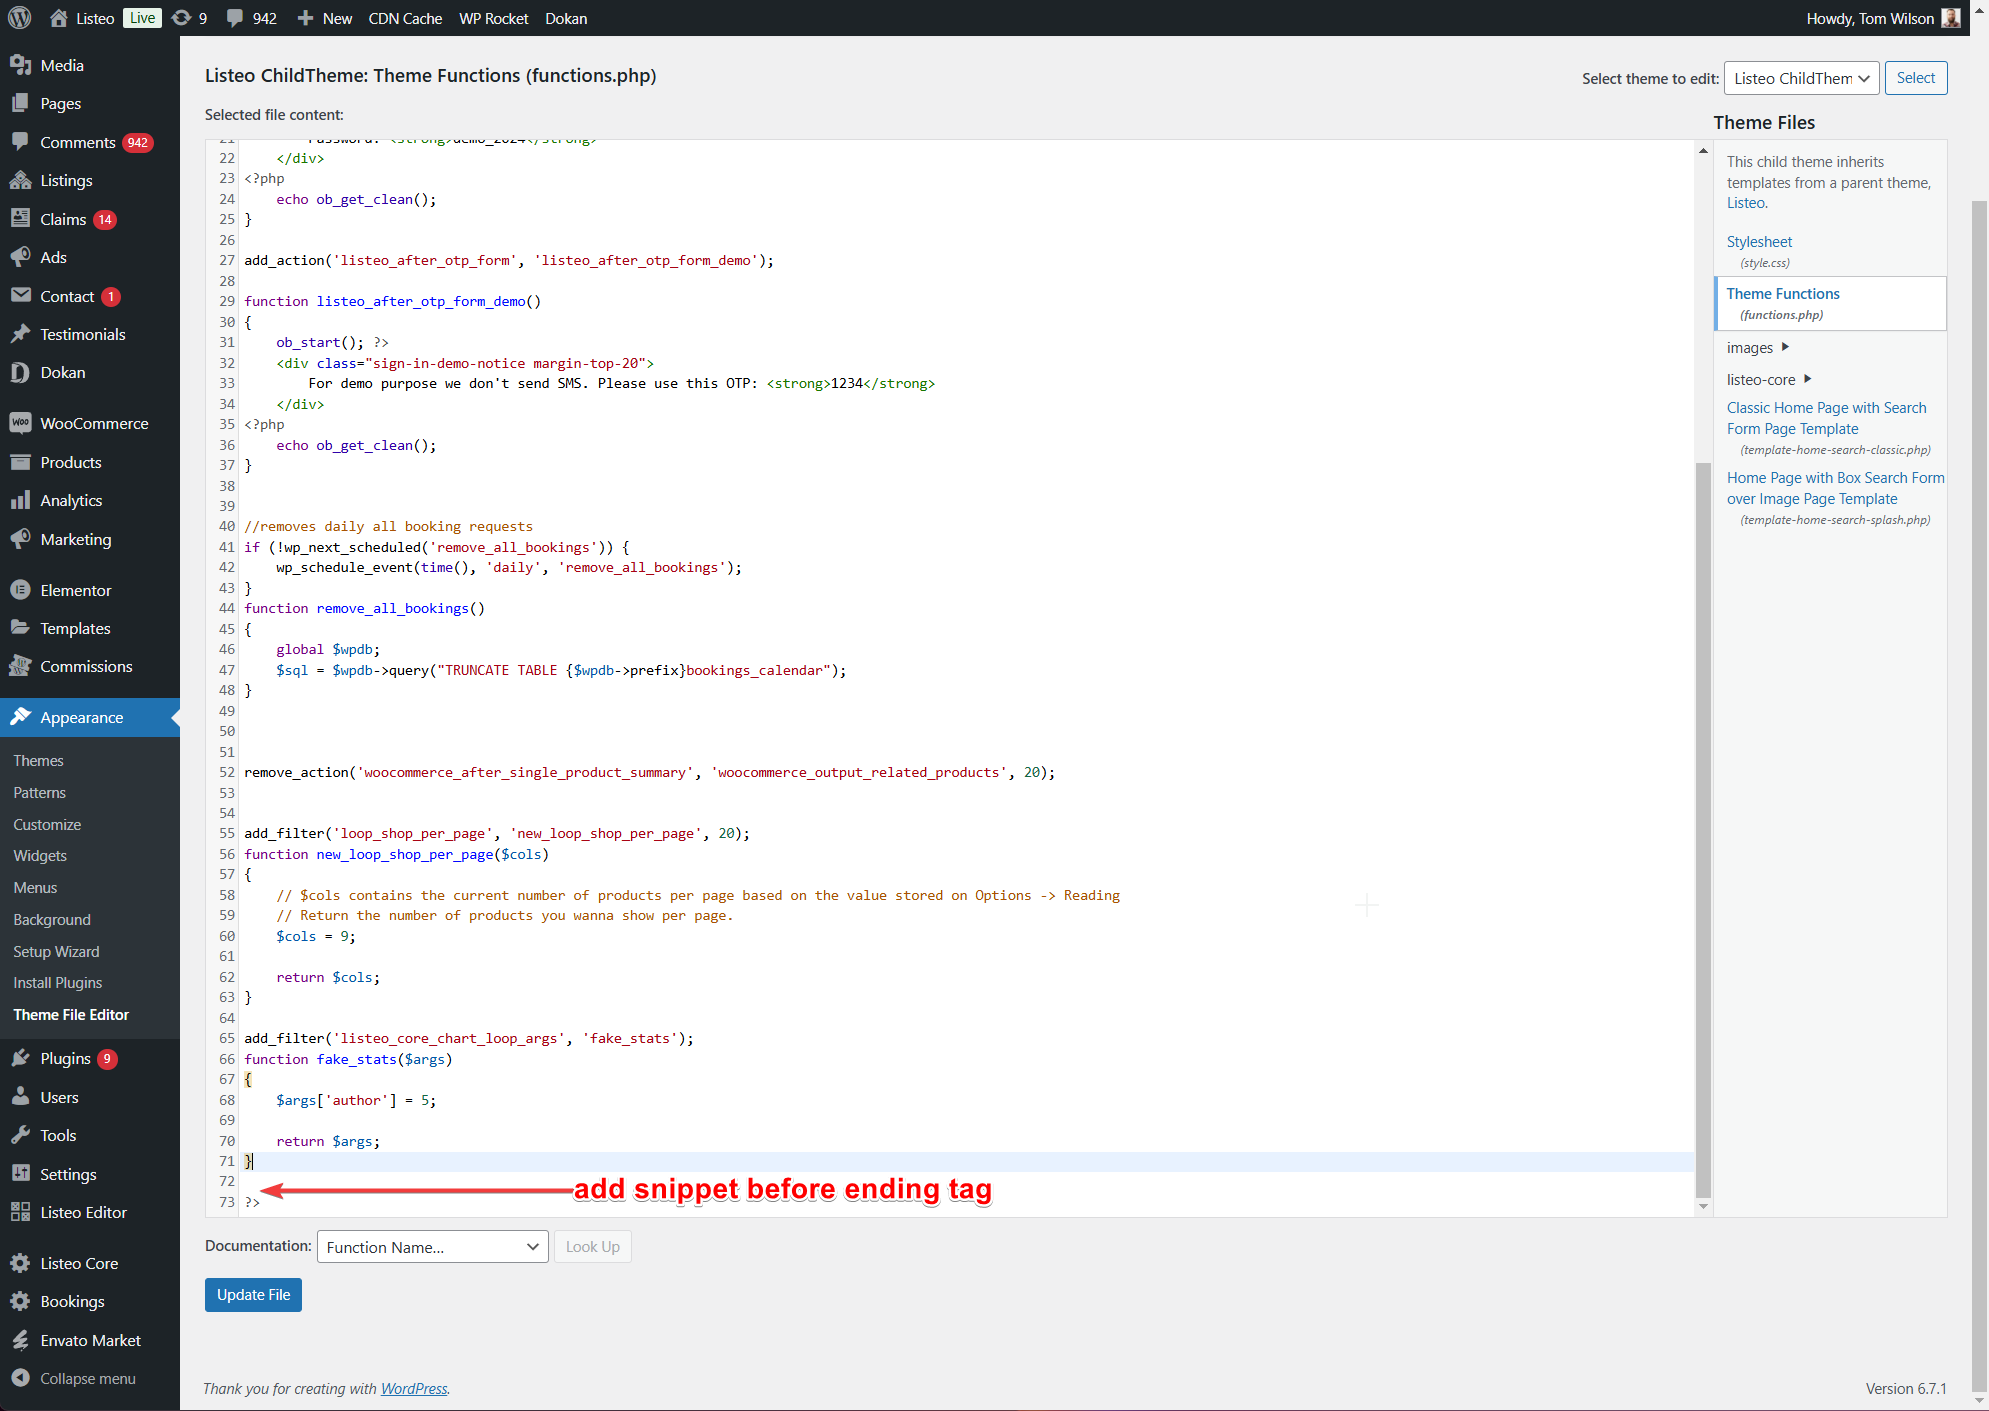
You can add code into your functions.php file in child-theme or use WP Code plugin


function.php method

Appearance → Theme File Editor and select Theme Functions file in sidebar. Use child-theme otherwise snippet will be overwritten/lost after update.


WPCode plugin method

WPCode – Insert Headers and Footers + Custom Code Snippets – WordPress Code Manager

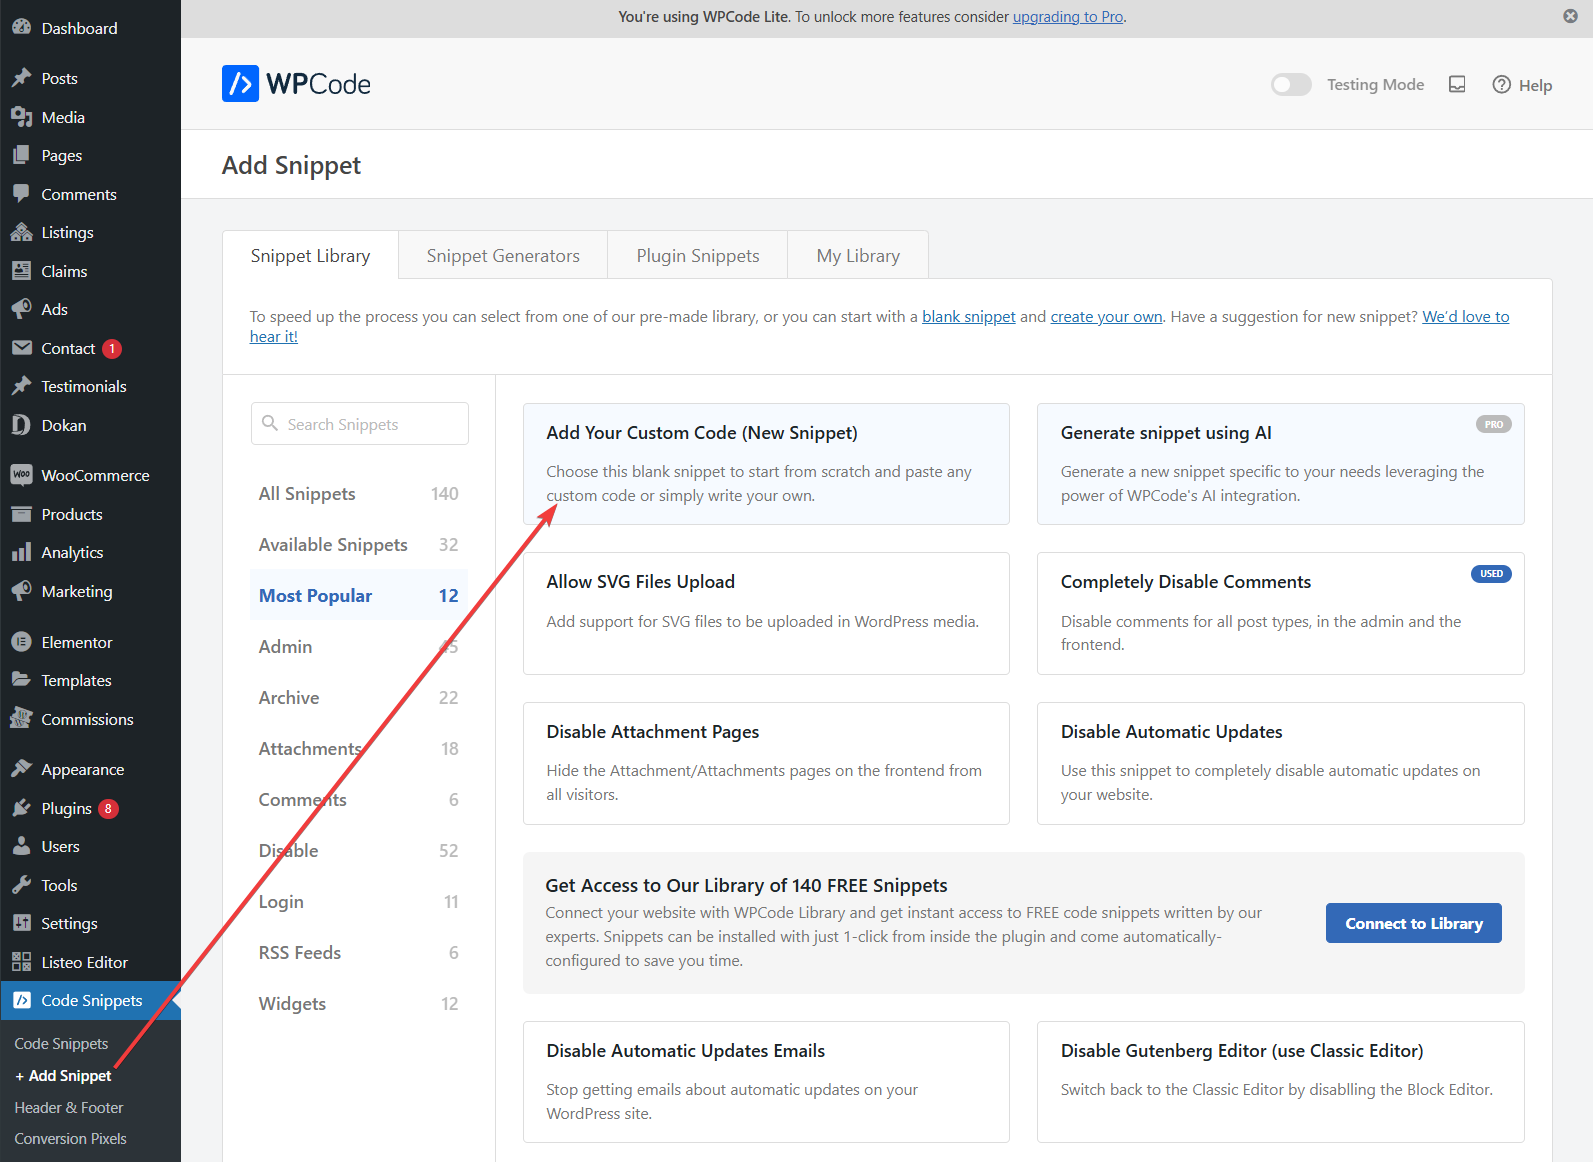
WP Code will be more suitable for most cases. Head over to WP Code, select Add Snippet and Add Your Custom Code (New Snippet)

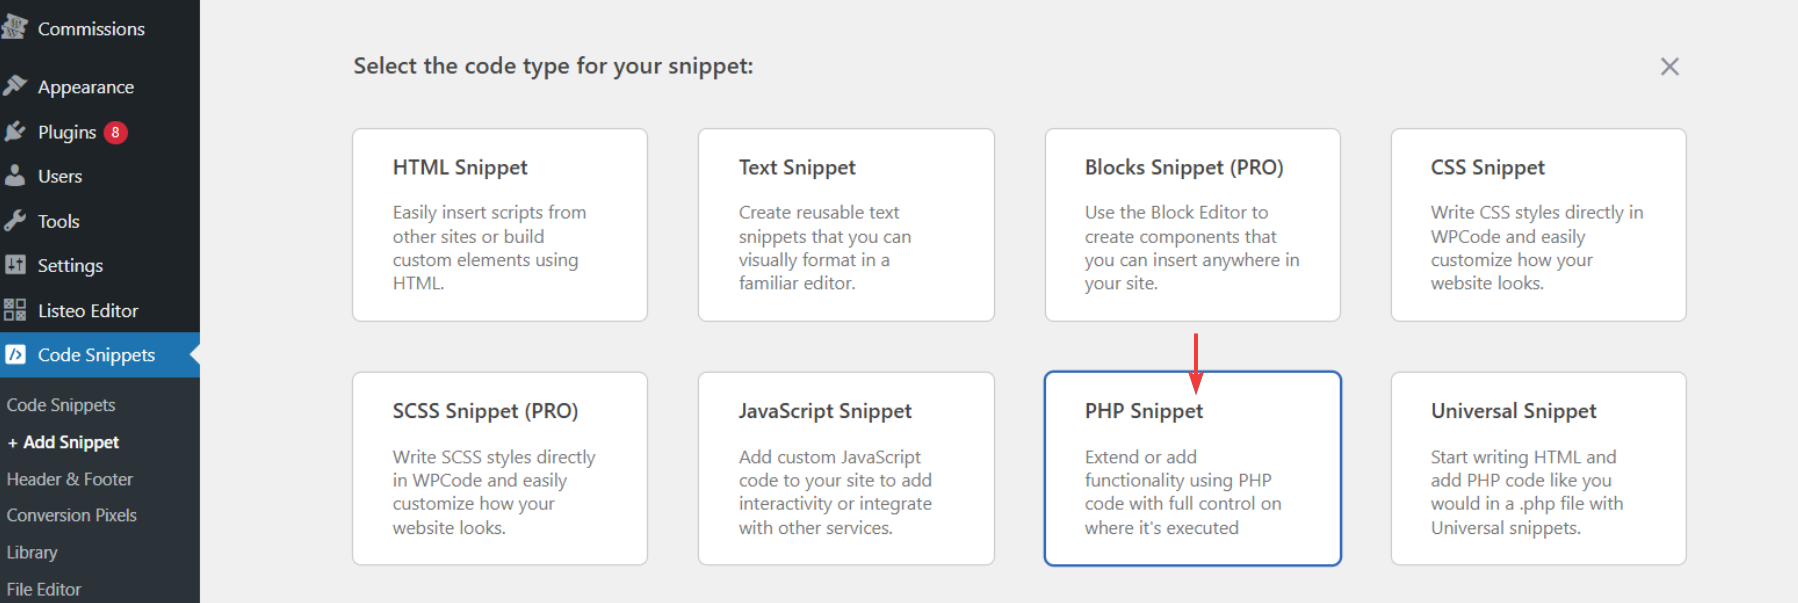
In next step choose PHP Snippet

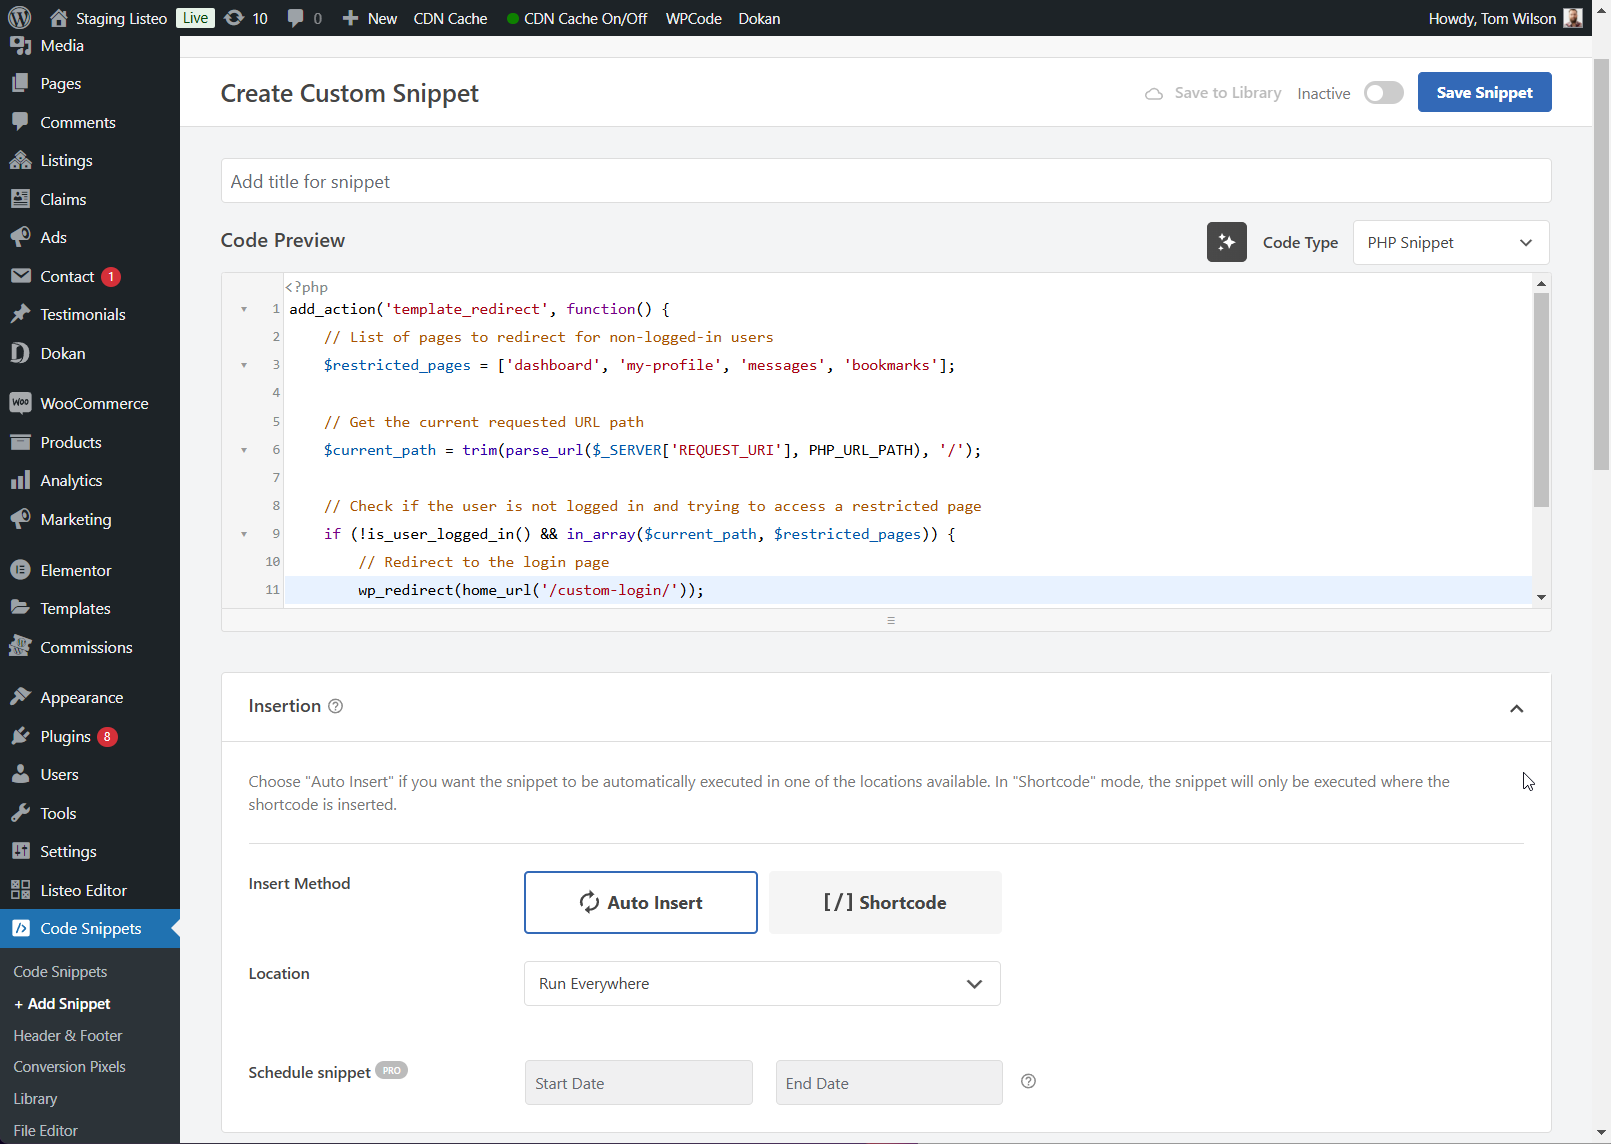
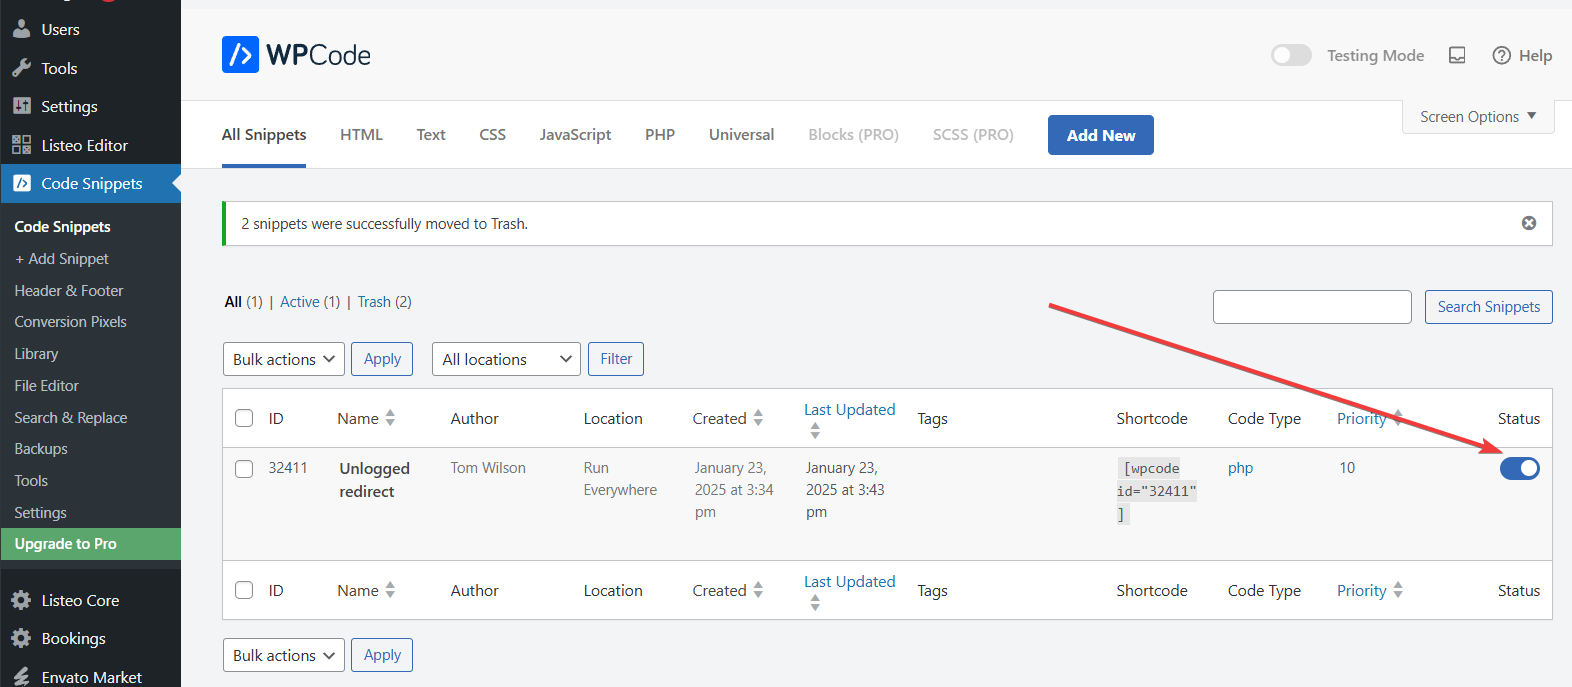
Paste snippet, toggle “inactive” to “active” button near Save button and Save

Done. Make sure it’s activated

User Login / Registration

All registration options are simplified and you’ll find them in WorkScout Core → Registration Options. You can also set up recaptcha there.

Also don’t forget to enable registration in  Settings → General → Membership → Anyone can register.

Related article: How to enable social login?