Author Archive

Commissions and Wallet

How payment system for micro jobs between employer and freelancer work in WorkScout?

Each order is tracked in WordPress Dashboard → Commissions, showing how much to transfer to the listing owner. As the admin, you receive payments from employers on behalf of freelancers unless you configure Stripe Split Payments.

Related article – Stripe Split Payments: https://docs.purethemes.net/WorkScout/knowledge-base/stripe-split-payments-support/

As an site administrator you can take fee from each micro job.
For an example: If an employer posts a micro job like “WordPress Theme Installation” for $100 and hires a freelancer, a commission e.g. 10% fee ($10) goes to you. The remaining $90 is paid to the freelancer upon completion of the job/service.

You can set commissions rate in Dashboard → WorkScout Core → Projects and Wallets 
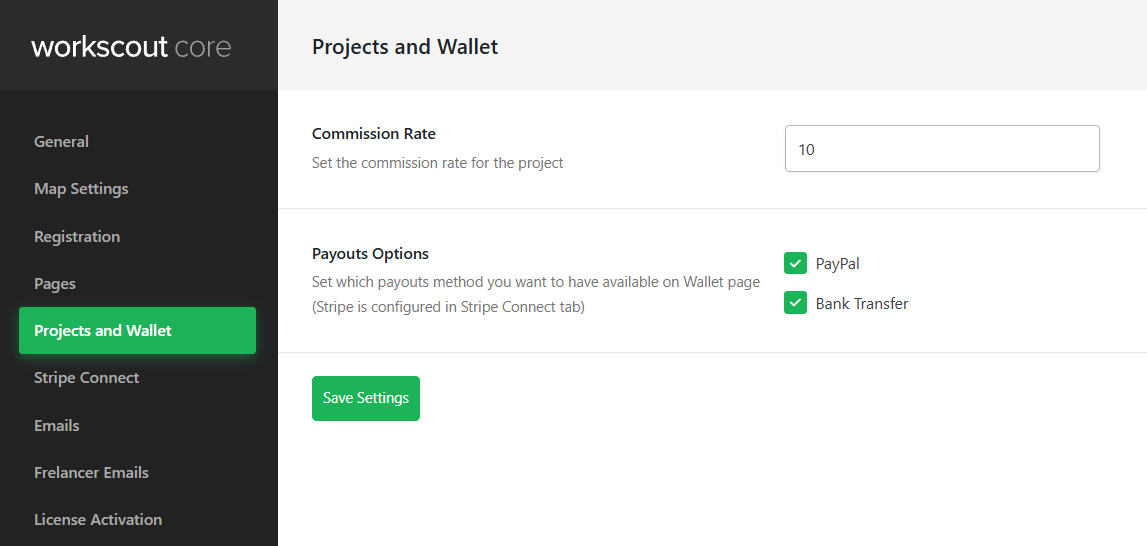

Payouts can be managed in Dashboard → Commissions.
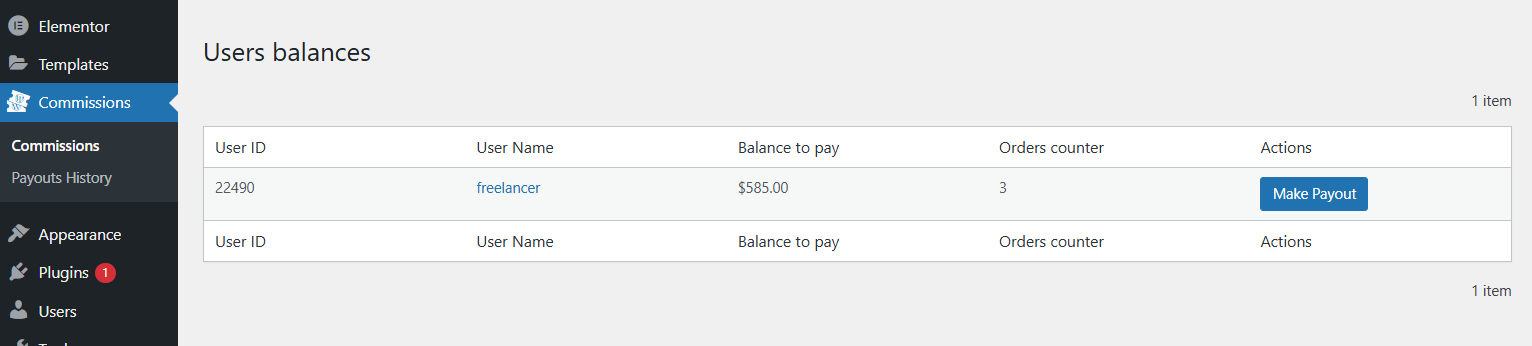
By clicking “Make Payout” button you will be redirected to the page with unpaid orders summary. After making payout orders you will be redirected to next page with payout summary/withdrawal details. All orders will be marked as “processed” in listing owner’s “Wallet” page and his “Withdrawable Balance” counter will be reset.

You browse payouts history and check details of each payout in Commissions → Payouts History

Payment method chosen by listing owner will be visible above commissions table. Money transfer has to be done manually by the site administrator.


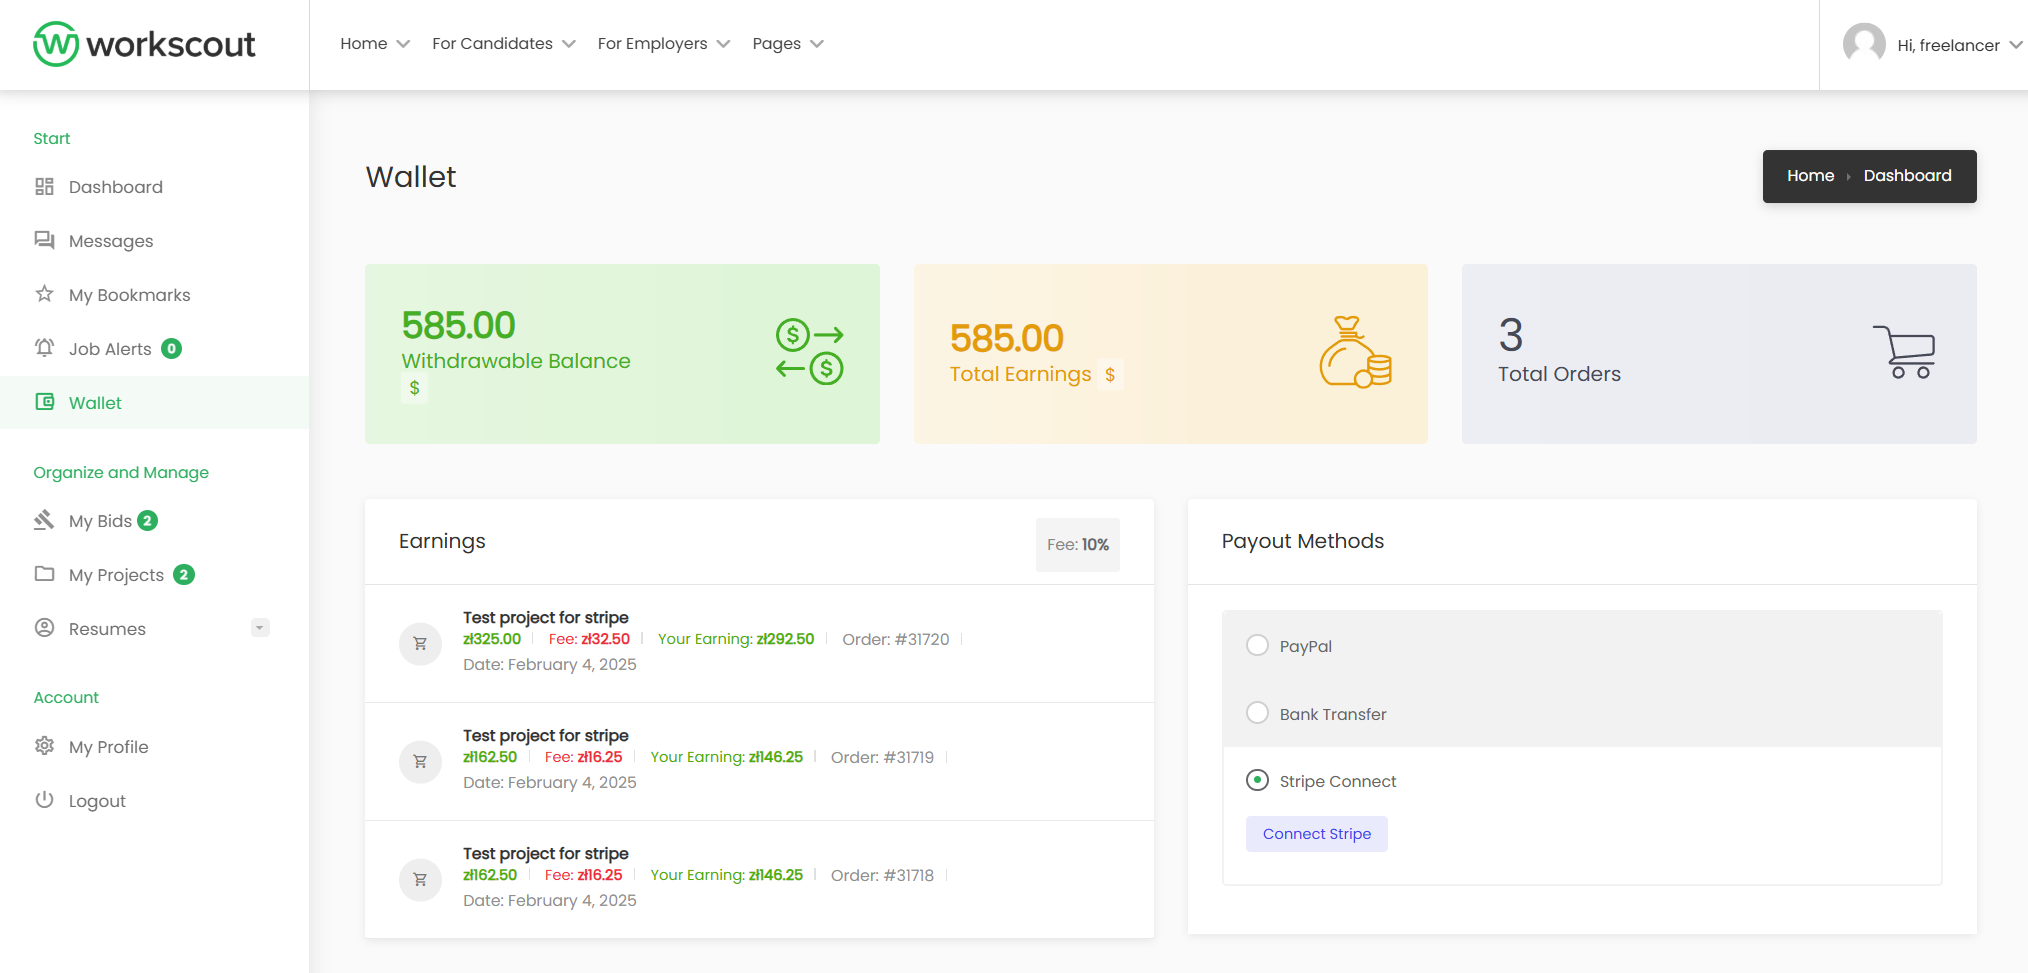
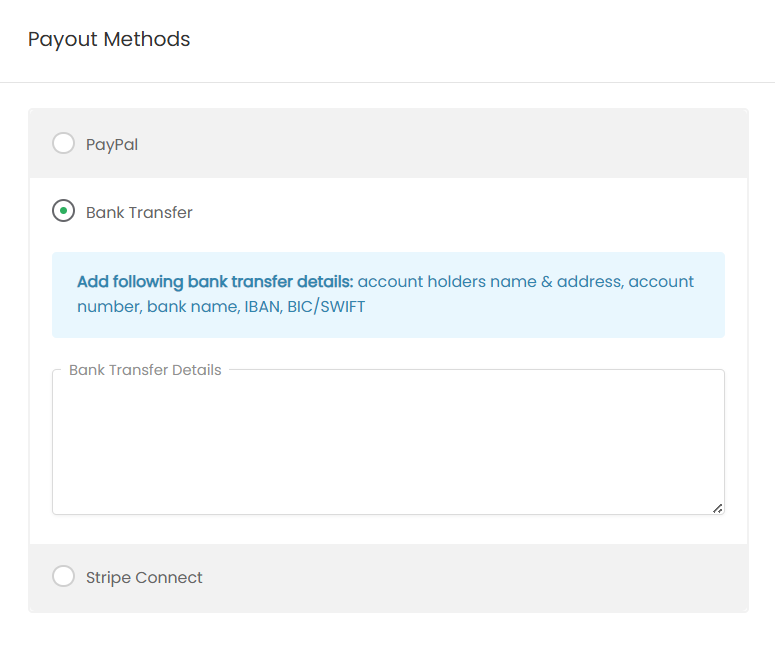
Freelancers have an additional “Wallet” page in the dashboard where they can check summary of their earnings from micro jobs, payouts history and set payout method.
If you don’t see “Wallet” page make sure it’s created with [wallet] shortcode and assigned in WorkScout Core → Pages.
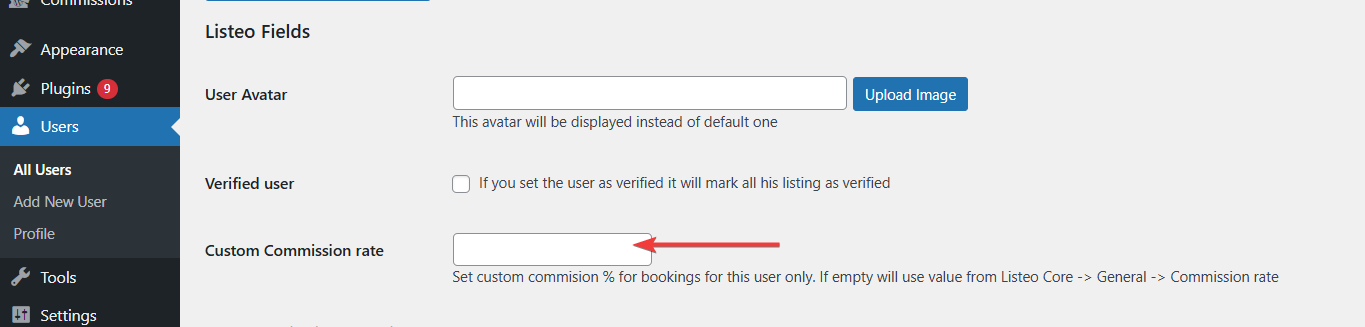
Custom Commission

You can individually modify commission for each user by editing user details in WordPress Admin → Users
Login & Register Form Fields Editor

WorkScout offers drag&drop field editor for login and registration page. In this article we’ll present how to add custom field to registration form.

Adding custom fields to registration form


Step 1

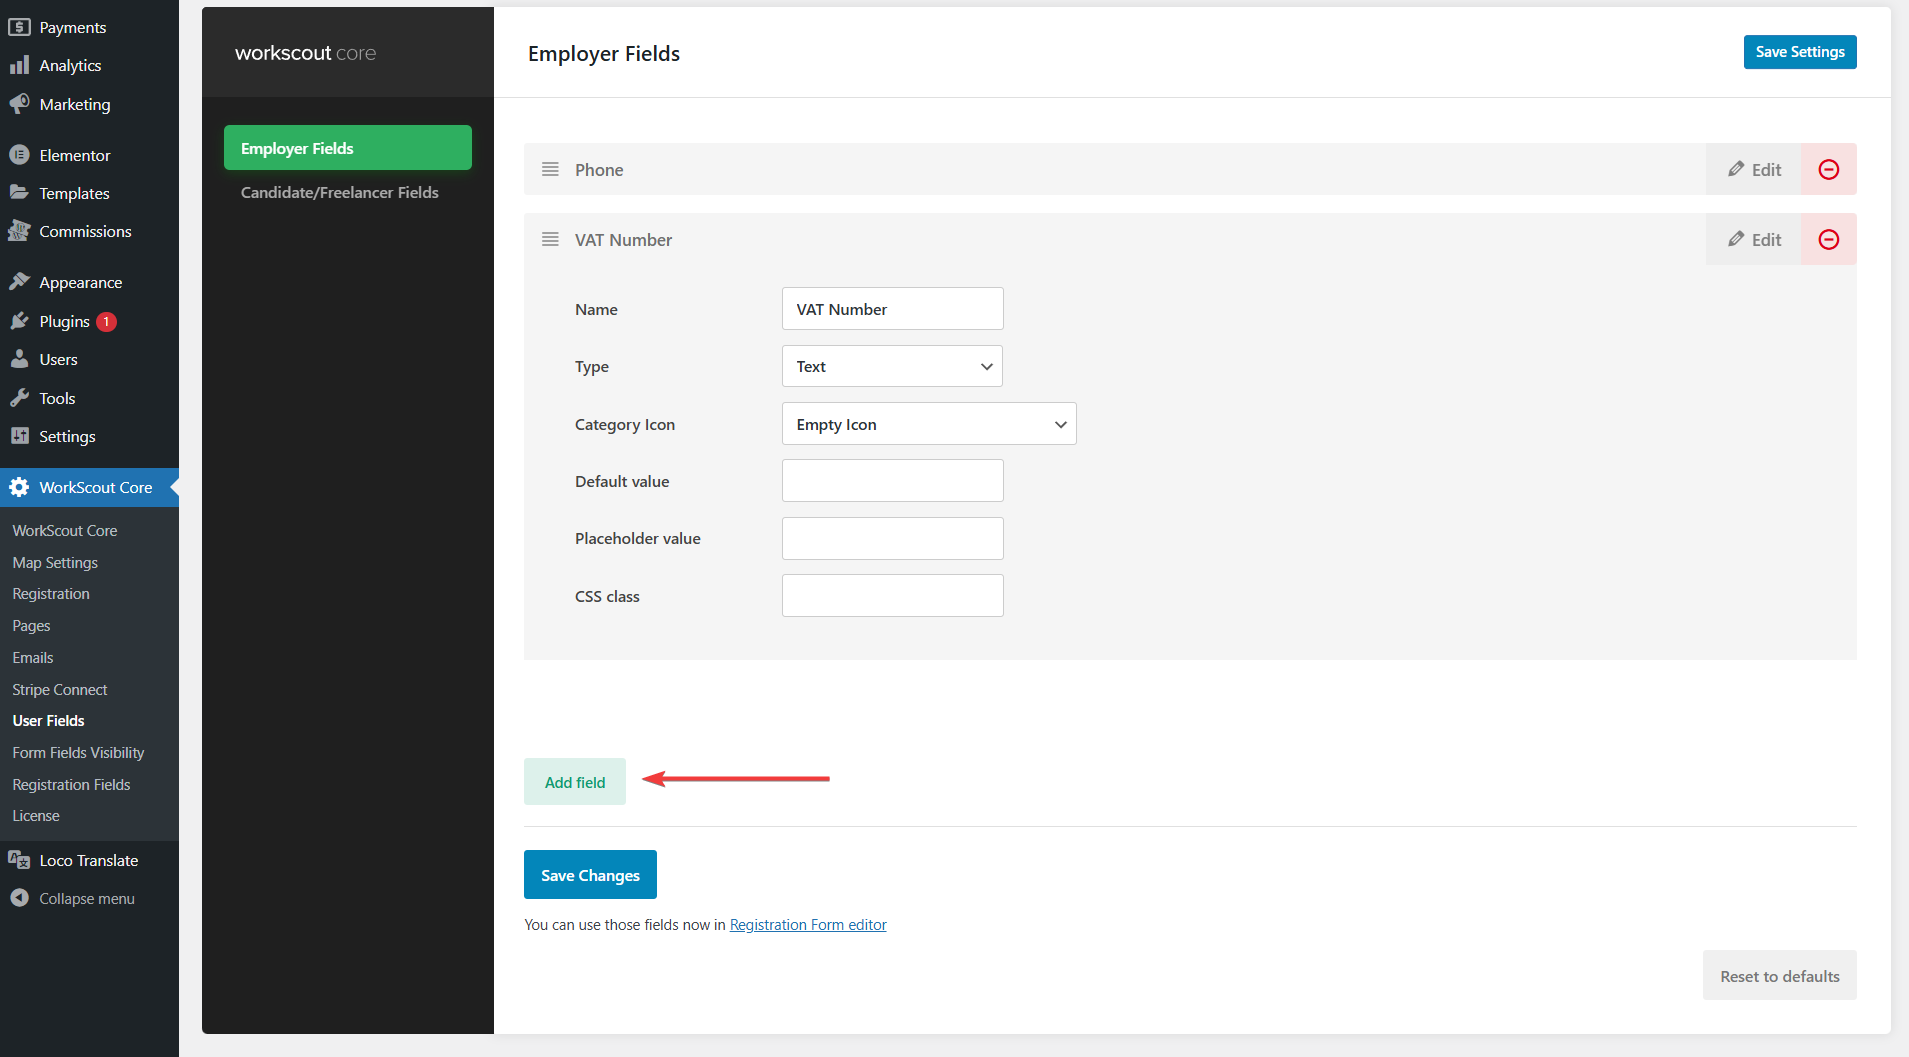
First you have to create custom field. Go to WorkScout Core → User Fields. There are two tabs for Candidate and Employer as you can set those fields separately for each role.

For this guide purpose we will add VAT Number field for employers.

Click the green button Add field, type a name and click OK, you will see box with new field and options for that field. You can switch Type of this field to dropdown, radio, checkbox or even file upload field. You can add icon aswell.

Fields you will create are automatically added to My profile page in dashboard.


Step 2

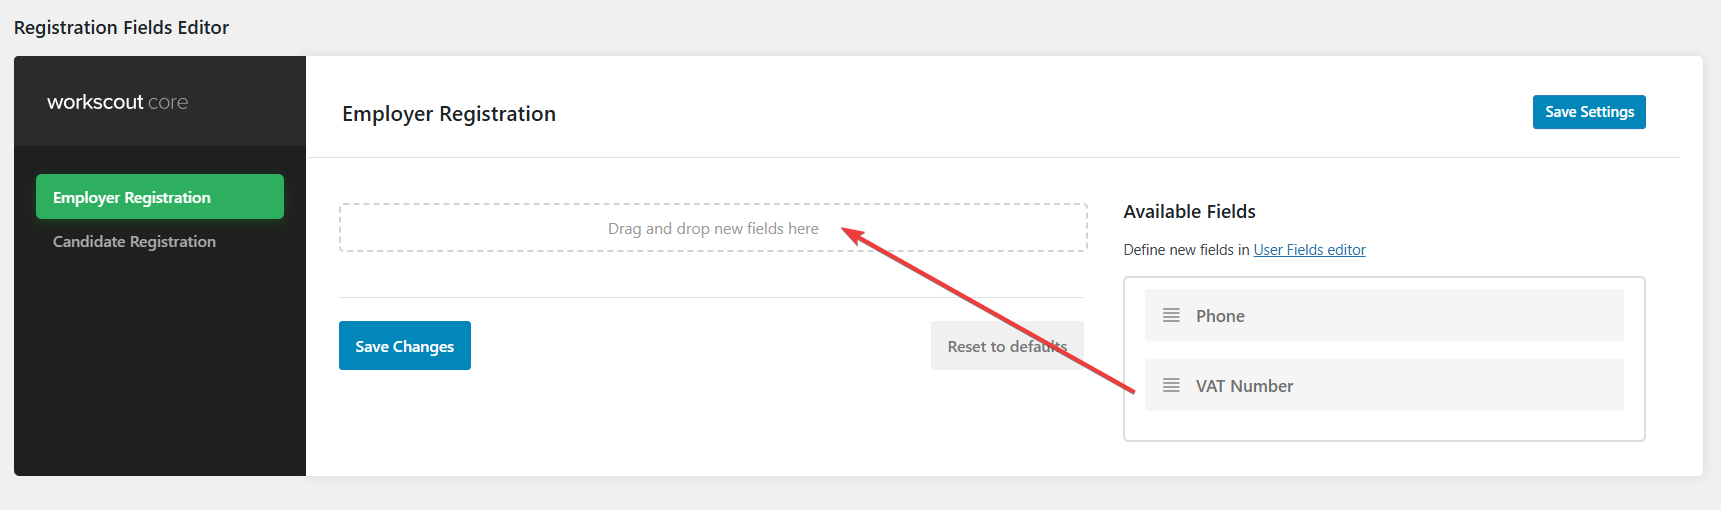
When you are ready click Save Changes and  go to WorkScout Core → Registration Fields. Here you will see the field you’ve just created in the Available Fields section in the right side, you can simply drag&drop it to the fields area, and save.

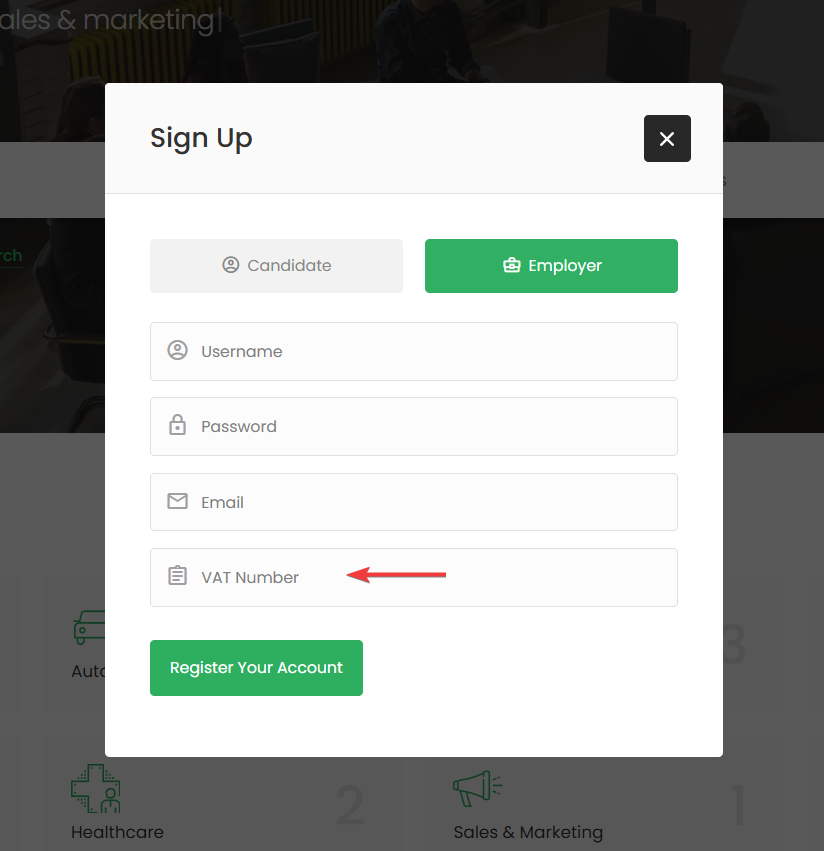
That way this field will be now added to your registration form. You can change the label or set a new icon for that field.


The field you created will also be visible in WordPress Admin  Users. For example, if you add a file upload field, you can download the file by going to Users, clicking “Edit” on the user you want to access, and finding the field with the attachment.

Editing Company Submission Fields

There are three main methods to customise  company submission fields in WP Job Manager.

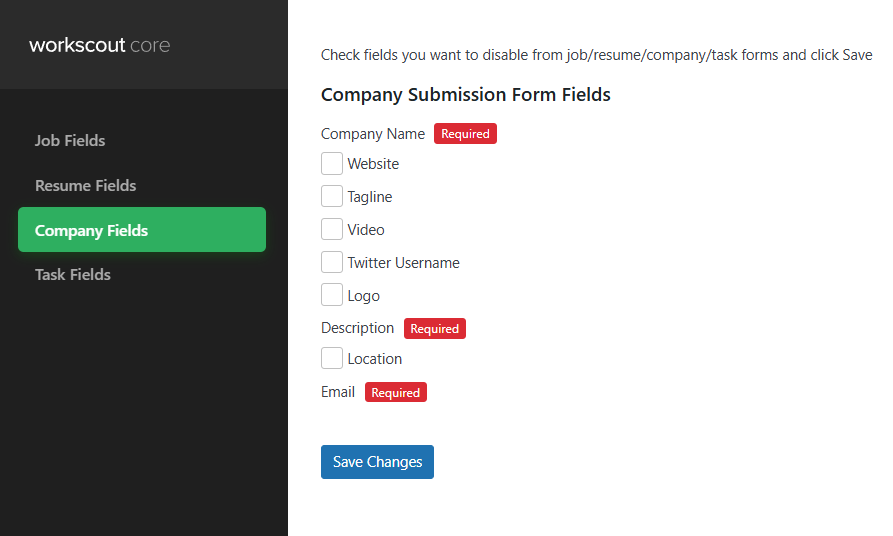
1. Basic adjustment by Enabling / Disabling fields WorkScout Core → Form Fields Visibility → Company Fields
2. Thrid party plugin such as https://plugins.smyl.es/wp-job-manager-field-editor/

Basic changes can be done in WorkScout Core → Form Fields Visibility → Company Fields where you can enable or disable fields you want in company submit form.

For text changes from english to english use plugin such as the Say What Plugin. If you’d like to translate fields to other language than english please refer to article: Translating theme and plugins →

How to export element from one home version to another?

If you would like to export for example search form banner (or any other section) from Home 3 to Home 1 here’s how to do it.

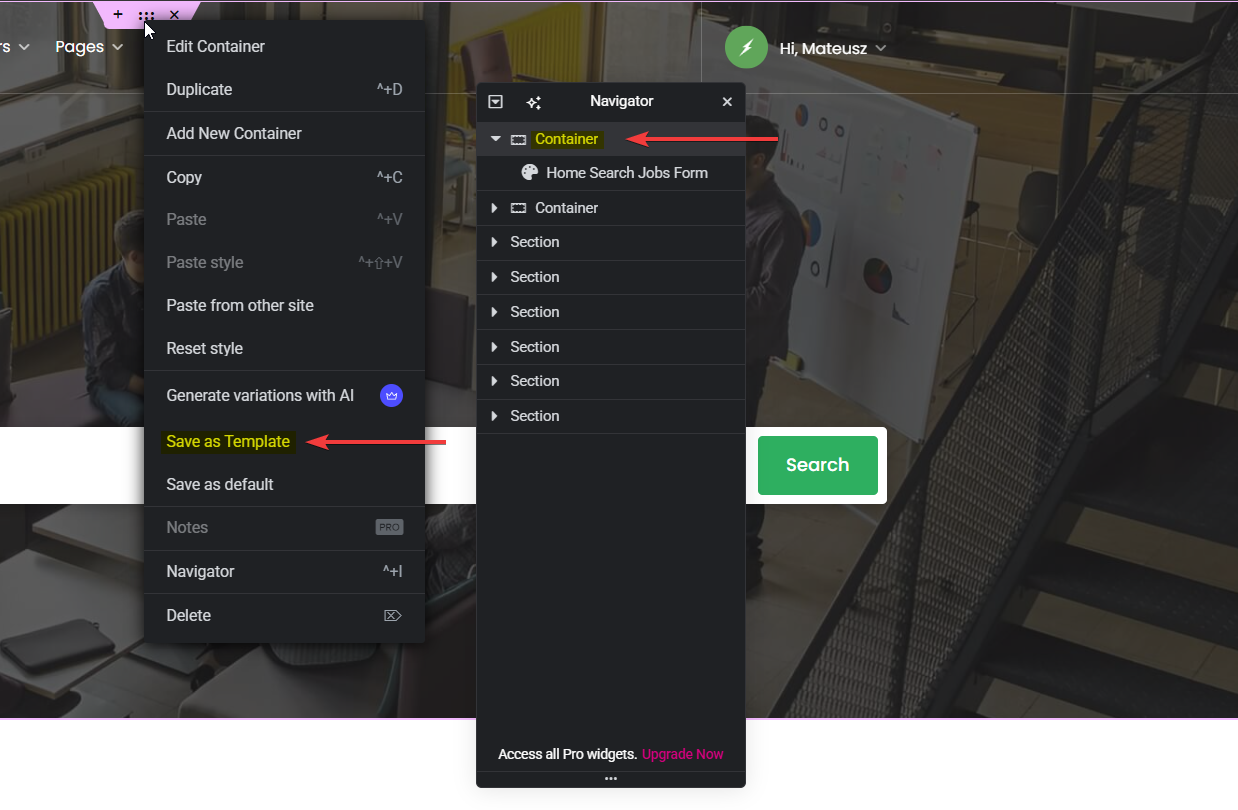
Open homepage version you want to export. Right click on section/container you wish to export and click “Save as template

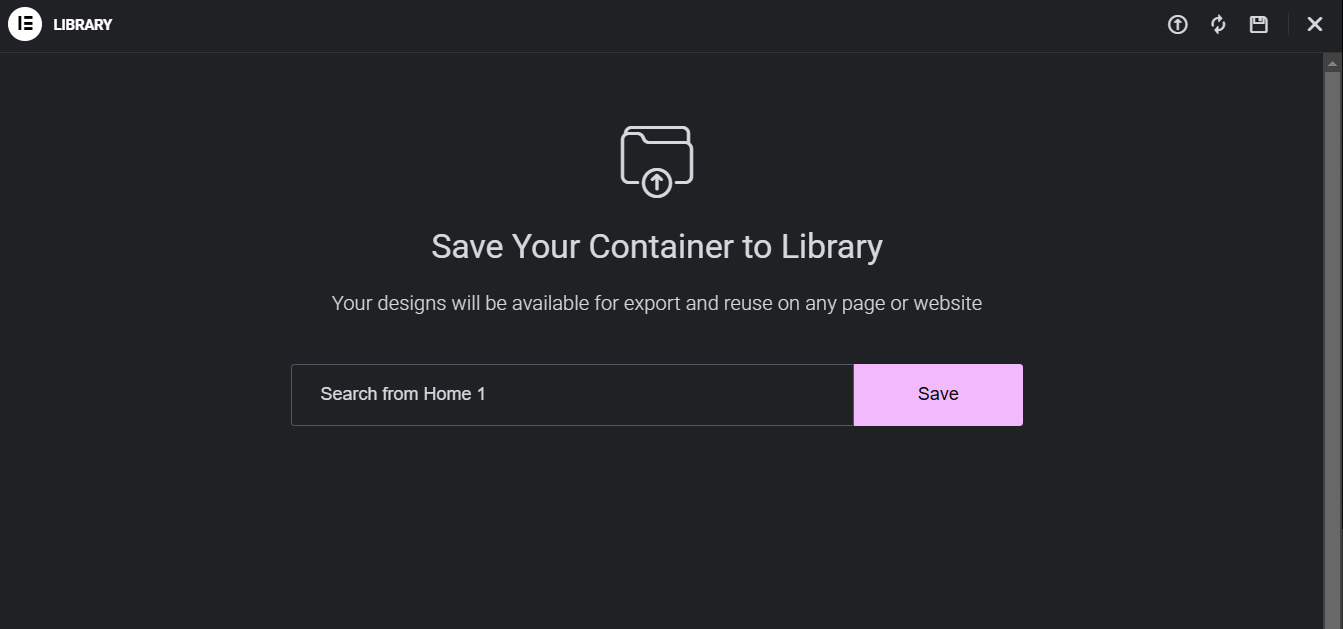
Name it and click Save

Then open homepage where you want to import that section. Scroll to the bottom and click “Add Template” (middle button)

Click “My Templates“, find template you saved and click “Isert

Setting up WooCommerce Payment Gateways

To charge users for paid packages you can use default WooCommerce payment gateways for or install additional from WooCommerce Processors & Gateways →

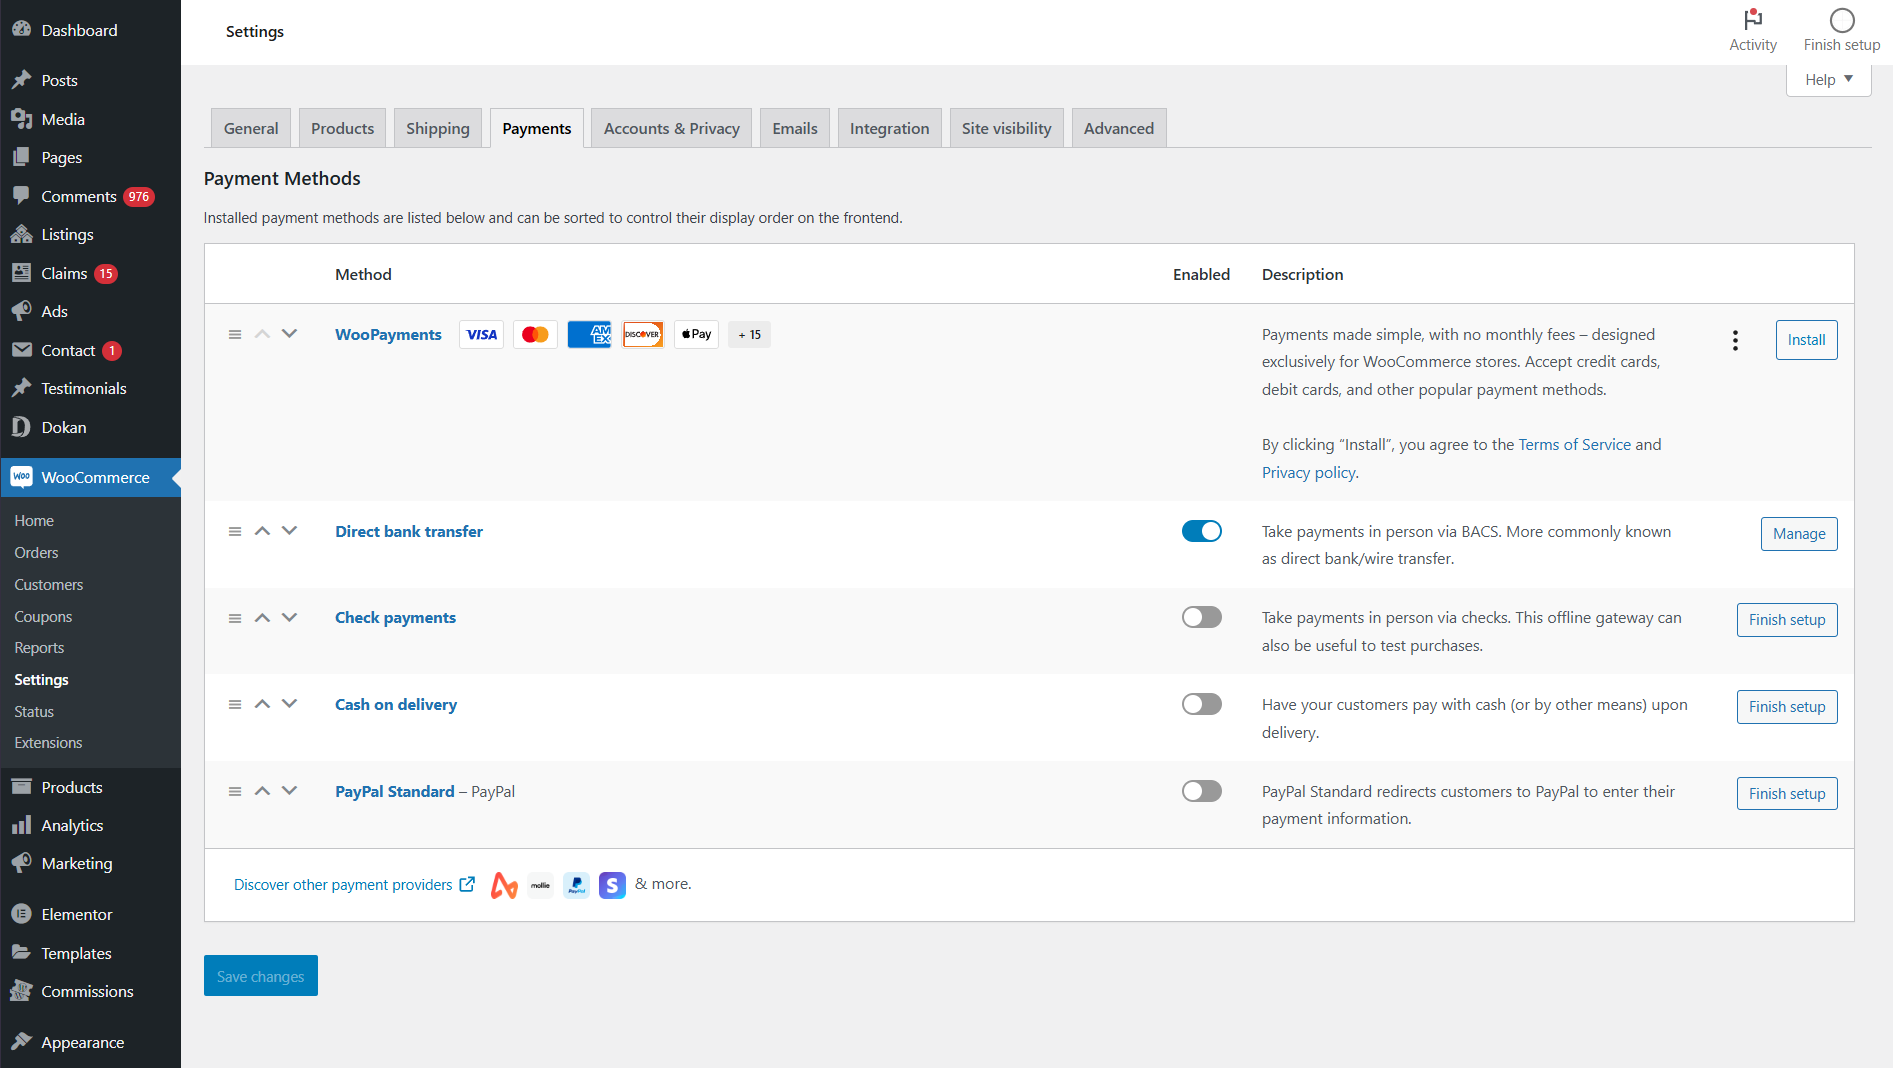
  1. Go to WooCommerce Settings: In your WordPress admin dashboard, navigate to WooCommerceSettings.
  2. Select the Payments Tab: Click on the Payments tab to view the available payment gateways.
  3. Enable Payment Gateways: You will see a list of available payment gateways. Toggle the switch to enable the ones you want to use (e.g., PayPal, Stripe).
  4. Configure Payment Gateways: Click on the Manage or Finish Setup button next to each payment gateway to configure its settings, such as API keys and other necessary information.
  5. Save Changes: After configuring the payment gateways, make sure to save your changes.


Split Payments

Automatic split payments among the freelancer, the hiring user, and the site admin (if you set a commission) can only be achieved with Stripe.

Stripe Split Payments Support


How to automatically geolocate visitor?

If you’d like to automatically geolocate visitors you need to enable WorkScout Core → Map Settings → Automatically locate users on page load

You can use this feature along with radius search to display jobs nearby user location in search results.

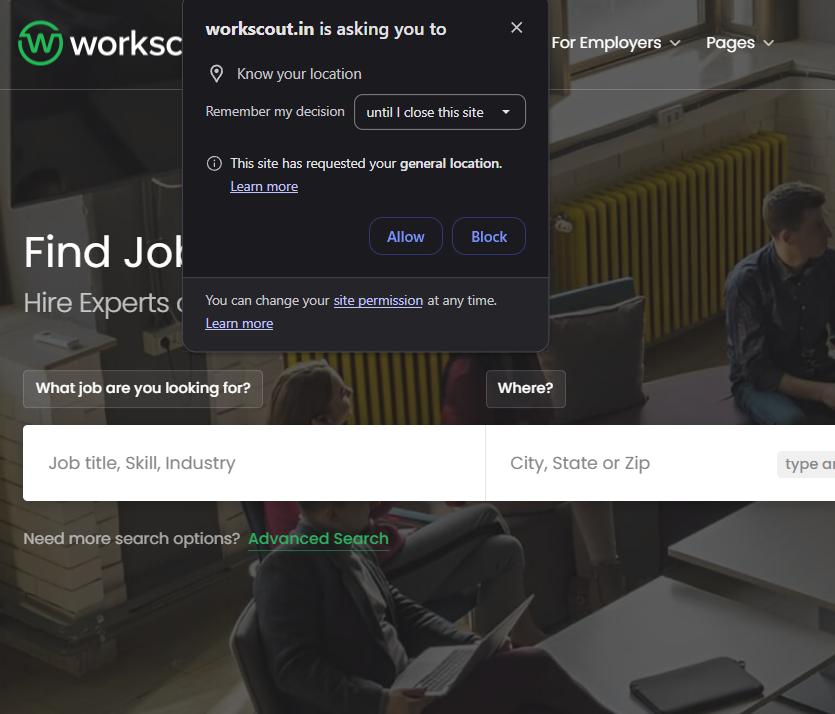
Keep in mind that due to privacy user will see a pop-up (check screenshot below) with browser permission request asking the user if they want to share their location with your website.

Skip checkout for free packages/products

To skip checkout for free packages/products use PHP snippet below.

How to add PHP snippets?

// Skip checkout for free products and automatically complete the order
add_action('template_redirect', 'skip_checkout_for_free_products');

function skip_checkout_for_free_products() {
    // Only proceed if we're on the cart or checkout page, and not the order-received page
    if ((is_cart() || is_checkout()) && !is_wc_endpoint_url('order-received')) {
        // Get the cart total
        $cart_total = WC()->cart->get_total('edit');

        // Check if the cart contains only free products (total is 0)
        if ($cart_total == 0) {
            // Create an order with free products
            $order = wc_create_order();

            // Add the products in the cart to the order
            foreach (WC()->cart->get_cart() as $cart_item_key => $cart_item) {
                $order->add_product($cart_item['data'], $cart_item['quantity']);
            }

            // Calculate the order totals
            $order->calculate_totals();

            // Mark the order as completed
            $order->set_status('completed');
            $order->save();

            // Empty the cart
            WC()->cart->empty_cart();

            // Redirect to the order received page (thank you page)
            wp_redirect($order->get_checkout_order_received_url());
            exit;
        }
    }
}

// Automatically mark orders containing only free products as "completed"
add_action('woocommerce_checkout_order_processed', 'auto_complete_order_for_free_products', 10, 1);

function auto_complete_order_for_free_products($order_id) {
    // Get the order object
    $order = wc_get_order($order_id);

    // Flag to check if all items are free
    $all_items_free = true;

    // Loop through each item in the order
    foreach ($order->get_items() as $item) {
        if ($item->get_total() > 0) {
            // If any item has a price greater than 0, set the flag to false
            $all_items_free = false;
            break;
        }
    }

    // If all products are free, mark the order as completed
    if ($all_items_free) {
        $order->update_status('completed');
    }
}

Theme Custom Development

  1. For the most reliable service with the best quality, albeit at a higher cost, we suggest checking out codeable.io
  2. If you’re looking for a more budget-friendly option without compromising on quality, consider wpkraken.io. They offer competitive rates while maintaining a high standard of work.

PureThemes offers site setups services. Service includes installing theme, adjusting typography, configuring homepage, uploading stock photos if needed – and other things described on according to package on pricing page you visited. It doesn’t include copywriting and adding functionalities that theme does not have by default.

Region filter does not work for resumes

If you are using plugin Regions for WP Job Manager you’ll notice the Region filter doesn’t work on Resumes page. For some reason the functionality exists but is not enabled for resumes (please note this is 3rd party plugin, not our code)
To fix it you need to go to Plugins → Plugin Editor, find on list in “Select plugin to edit” the “Regions for WP Job Manager“, it will automatically open first file to edit which is wp-job-manager-locations.php, scroll down to line 92:

You’ll see lines we have to uncomment, all you need to do is to remove the // from the beginning of each line.

After that save the changes and it will work.