Author Archive

Require an active job package to view resumes

This tutorial applies to users running both Job Manager Resumes and WC Paid Listings and lets you restrict access to the resumes portion of your site to users with an active job package only.

How to add PHP snippets?


Add a snippet

Use code snippet below into theme functions.php file, or even better, with a plugin such as Code Snippets.

// Hook into user_has_cap filter. This assumes you have setup resumes to require the capability 'has_active_job_package'
add_filter( 'user_has_cap', 'has_active_job_package_capability_check', 10, 3 );

/**
* has_active_job_package_capability_check()
*
* Filter on the current_user_can() function.
*
* @param array $allcaps All the capabilities of the user
* @param array $cap [0] Required capability
* @param array $args [0] Requested capability
* [1] User ID
* [2] Associated object ID
*/
function has_active_job_package_capability_check( $allcaps, $cap, $args ) {
// Only interested in has_active_job_package
if ( empty( $cap[0] ) || $cap[0] !== 'has_active_job_package' || ! function_exists( 'wc_paid_listings_get_user_packages' ) ) {
return $allcaps;
}

$user_id = $args[1];
$packages = wc_paid_listings_get_user_packages( $user_id, 'job_listing' );

// Has active package
if ( is_array( $packages ) && sizeof( $packages ) > 0 ) {
$allcaps[ $cap[0] ] = true;
}

return $allcaps;
}

What does it do? When WordPress checks if the user has the correct capability to view resumes, it checks the users packages. If they have a package, they are given the capability dynamically.


Configure Resume Access

The next step is to configure resumes for capability based access. Go to Resumes → Settings → Resume Visibility and for each permission enter ‘has_active_job_package’.
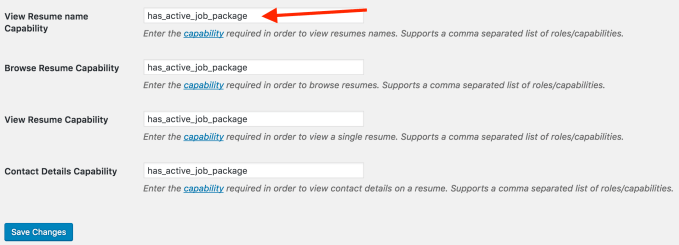
Update Resume Visibility


Employer and Candidate User Roles

Employer Role

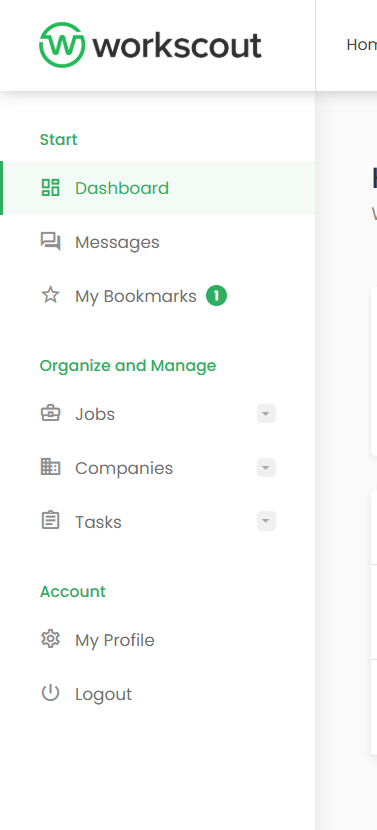
Employers can create and manage their job listings / tasks via the Jobs Dashboard, where they can view, edit, mark as filled, or delete their posts. Only the logged-in employer can see their own listings.

If you need to customize the capabilities of the ’employer’ role, you’ll need to use a plugin such as User Role Editor.


Candidate Role

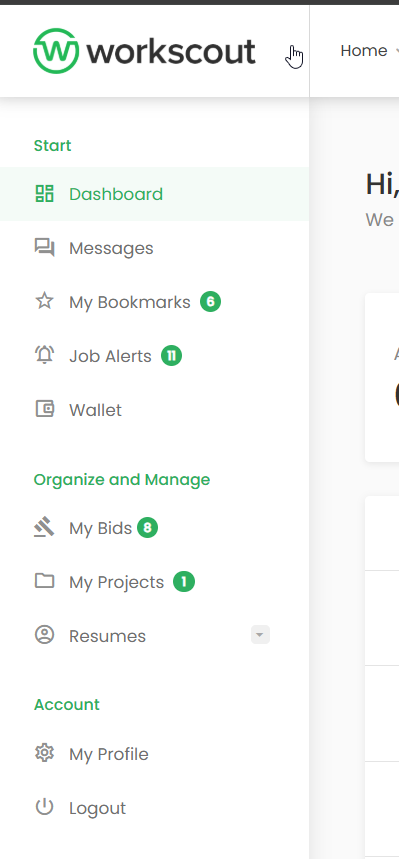
Candidates get access to a personal Candidate Dashboard, where they can manage their resumes / freelancer profiles.


Disabling Employer or Candidate user role.

If you’d like to disable one or both user roles go to: WorkScout Core  → Registration → Hide Role field in Registration Form

Then set default role in Settings → General → New User Default Role

Google Job Search Integration

WorkScout supports job posting structured data which makes your job postings eligible to appear in a special user experience in Google Search results.

This feature brings many benefits like increasing chances of discovery and conversion of your website.


What it does?

It includes the proper schema for making your job listings compatible with the Google Job Search requirements, but it doesn’t automatically submit your jobs to Google. Google will eventually crawl your site and find the jobs without any action on your part, similar to what it does with sitemaps. If you like, you can try using a SEO plugin to help you with automatic submission of your jobs to Google to speed up the process. Any questions about this would need to be directed to the support for that plugin.

You can use the Google Search Console to check that there aren’t any issues with your site’s structured data.

Documentation on fixing structured data issues is here, if anything shows up when you check.

Jobs Shortcode References

You can use Elementor to handle this without using shortcodes but if you’re WordPress purist 🙂 you can use several shortcodes to display jobs and forms. These are listed below.

An important note for all shortcodes: Ensure they are not wrapped with any tags when adding them to your posts/pages. To check this, view the page content in ‘html’ mode and remove any formatting surrounding the shortcodes. This will prevent styling issues.

The [jobs] shortcode outputs a list of your jobs

An example of the jobs shortcode

This shortcode takes the following arguments:

  • per_page – Defaults to the ‘per page’ option in settings. This controls how many jobs get listed per page.
  • orderby – Defaults to ‘featured’. Supports title, ID, name, date, modified, rand, featured, and rand_featured (random but keeps featured at top).
  • order – Defaults to ‘desc’. Can be set to ‘asc’ or ‘desc’ to choose the sorting direction.
  • show_filters – shows native WP Job Manager filters above the job list but it’s recommended to disable them using show_filters="false"
  • show_pagination – Defaults to false. Enable this to show numbered pagination instead of the ‘load more jobs’ link.
  • show_categories – Defaults to true when categories are enabled. If enabled, the filters will also show a dropdown letting the user choose a job category to filter by.
  • categories – Comma separate slugs to limit the jobs to certain categories. This option overrides ‘show_categories’ if both are set.
  • job_types – Comma separate slugs to limit the jobs to certain job types.
  • selected_job_types – Comma separate slugs to select by default.
  • location – Enter a location keyword to search by default.
  • keywords – Enter a keyword to search by default.
  • featured – Set to true to show only featured jobs, false to show no featured jobs, or leave out entirely to show both (featured first).
  • filled – Set to true to show only filled jobs, false to show no filled jobs, or leave out entirely to respect the default settings.
  • post_status – Set to ‘publish’ to display active jobs, set to ‘expired’ to show expired jobs.

If the URL of the page contains a query string and location or keywords is set, the values in the query string will populate the location and keywords fields instead of the above options.

Examples

Show 12 of the most recent jobs without filters and pagination:
[jobs per_page="12" show_filters="false"]

Show 20 jobs at a time, ordered by title, with categories disabled:
[jobs per_page="20" orderby="title" show_categories=false]

Theme Visual Options

Visual theme options are available customizer. Click “Customize” button in WordPress top bar to access settings.

Browse through options on the left and adjust them to your needs:

Appearance → Customize → Identity

Setting Description Options
Site Title Set the title of your site.
Tagline Set the tagline for your site.
Logo Image Upload and set a logo for your site.
Mobile Logo / Logo for Transparent Header If your logo is not readable on a transparent header, you can use a different one.
Logo Image Max Height Set the image height for the retina version if the logo appears too big.
Mobile Logo Image Max Height Set the max image height for the mobile version if the logo appears too big.
Site Icon Small icon displayed in the browser tab.


Appearance → Customize → Header Options

Setting Description Options
Make Header Full-Width Enable/disable full-width header. ON / OFF
Slim Mobile Menu Enable/disable slim header. ON / OFF
Login/Sign Up Buttons in Header Enable/disable Login/Sign Up buttons in the header. ON / OFF
User Page Button in Header Enable/disable the link to the User Page in the header. ON / OFF
Sticky Header Enable/disable sticky header. ON / OFF


Appearance → Customize Site → Jobs Options → Jobs Lists Options

Setting Title (Primary) Alternative Titles (for Search) Description Options
Jobs Page Layout Job Page View, Job Listing Layout, Page Template (Jobs), Job Archive Layout Choose the layout for the Jobs page. Classic / Split page with map on right / Split page with job view on right
Jobs List Layout Job Display Style, Job Presentation, Listing Format, Job View Select how jobs should be displayed. Grid / List
Show Taxonomies Description on Archives Category Description Visibility, Taxonomy Info Display, Show Job Category Details Set to ON to show category title and description. ON / OFF
Jobs Counter on Browse Jobs Page Job Count Display, Hide Titlebar with Count, Remove Job Counter Set to OFF to show default titlebar. ON / OFF
Show Job Types Below Title Job Type Placement, Job Category Under Title, Display Job Type Below Displays job types below the title instead of floating on the right. ON / OFF
Jobs Header Image Job Archive Header, Job Page Banner, Jobs Listing Image Used on the Job archive page. Set an image for the header (should be 1920px wide). Upload Image Button
Transparent Header on Jobs Page Clear Header (Jobs), See-Through Header, No Background Header Enable transparent header on the Browse Jobs page. ON / OFF
Hide Titlebar on Jobs Page Remove Job Page Title, Hide Job Title Bar, No Title on Jobs Set to ON to hide the titlebar on the Browse Jobs page. ON / OFF
Default Company Logo Placeholder Logo, Generic Company Image, Fallback Company Logo Used if no logo is uploaded by the user. Upload Image Button
Job Meta Information on Jobs List Job Details Display, Listing Information, Show Job Metadata, Job Snippet Content Select which elements to display. Company, Location, Rate, Salary, WP Job Manager Salary Field, Date Created, Deadline, Expires
Hide Job Listing Excerpt on Jobs List Remove Job Description Snippet, Shorten Job Summary, Hide Job Excerpt Used on job lists. ON / OFF
Jobs Archive Order By Job Sorting, Job Order, Listing Sort Options, Sort Jobs By Choose how jobs should be sorted. By title / Post ID / Post name / By date / By last modified / Random / Random with featured jobs on top
Jobs Archive Order Sorting Direction, Order Type (Jobs), Job Listing Direction Descending order from highest to lowest values (e.g., 3, 2, 1; C, B, A). –
Jobs Archive Number of Listings Jobs Per Page, Number of Jobs Displayed, Job Pagination, Listings per Page Set the number of job listings displayed per page.

Appearance → Customize → Jobs Options → Single Job Options

Setting Description Options
Single Job Sidebar Side Choose the sidebar position for single job pages. Right Sidebar / Left Sidebar
Job Overview Elements to Display Select which details to show on a single job post. ID, Date Posted, Expiration Date, Application Deadline, Location, Job Title, Hours, Rate, Salary, WP Job Manager Salary Field
Share Buttons on Single Job Select social media platforms for job sharing. Facebook, X, Pinterest, LinkedIn
Enable Related / Similar Jobs on Single Job Enable or disable related jobs display. ON / OFF
Show Related / Similar Jobs Based On Set how jobs will be related. Same Category / Same Company
Enable Map on Single Job Enable or disable the job location map. ON / OFF
Default Map Zoom Level Set a zoom level between 1 and 17. 1 – 17


Appearance → Customize → Footer Options

Setting Description Options
Footer Logo Image Upload a logo for the footer top area. Upload Image Button
Copyrights Text Set the copyright text displayed in the footer.
Footer Widgets Layout The total width of the footer is 12 columns. Configure the layout by assigning column numbers to each widget area.
Stats Counter Display various counters in the footer. Counter 1 / Counter 2 / “Add New” Counter
Social Icons Add social media icons to the footer.


Appearance → Customize Site → Map Options

Setting Description Options
Enable map on Jobs page Enable or disable the map on the Jobs page. ON / OFF
Use all jobs map If enabled, the map will show all jobs instead of only the filtered/searched ones. ON / OFF
Enable map on Resumes page Enable or disable the map on the Resumes page. ON / OFF
Use all resumes map If enabled, the map will show all resumes instead of only the filtered/searched ones. ON / OFF
Map height Set the default map height. Default: 450px
Map Marker color Set the default marker color. Default: Green
Use Job Type color for markers color Enable or disable job type-based marker colors. ON / OFF
Group nearby markers in clusters Enable or disable clustering for nearby markers. ON / OFF
Autofit all job markers on map Automatically fit all job markers within the map view. ON / OFF
Default zoom level Set the default zoom level. 10
Map type (only Google Maps) Set the type of map displayed. ROADMAP
Set zoom with scrollwheel Enable or disable zooming with the scroll wheel (disabled by default to prevent scrolling issues). ON / OFF

Mobile Menu Customization

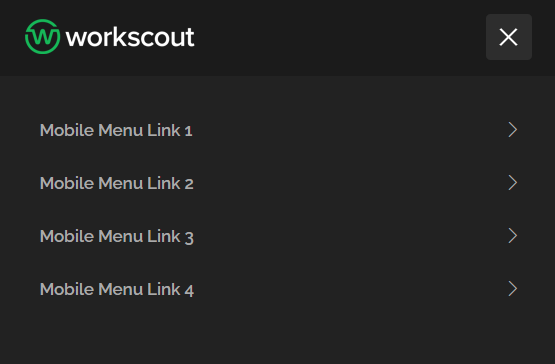
Listeo offers customizable mobile menu. You can create separated menu list that will be displayed only on mobile devices and add custom widgets in menu panel.


Custom menu list for mobile devices

Go to Appearance → Menus then create new menu list and click “Mobile Menu” checkbox


Widgets in menu panel

Go to Appearance → Widgets and add new widget for

How to add newsletter sign up form in footer?

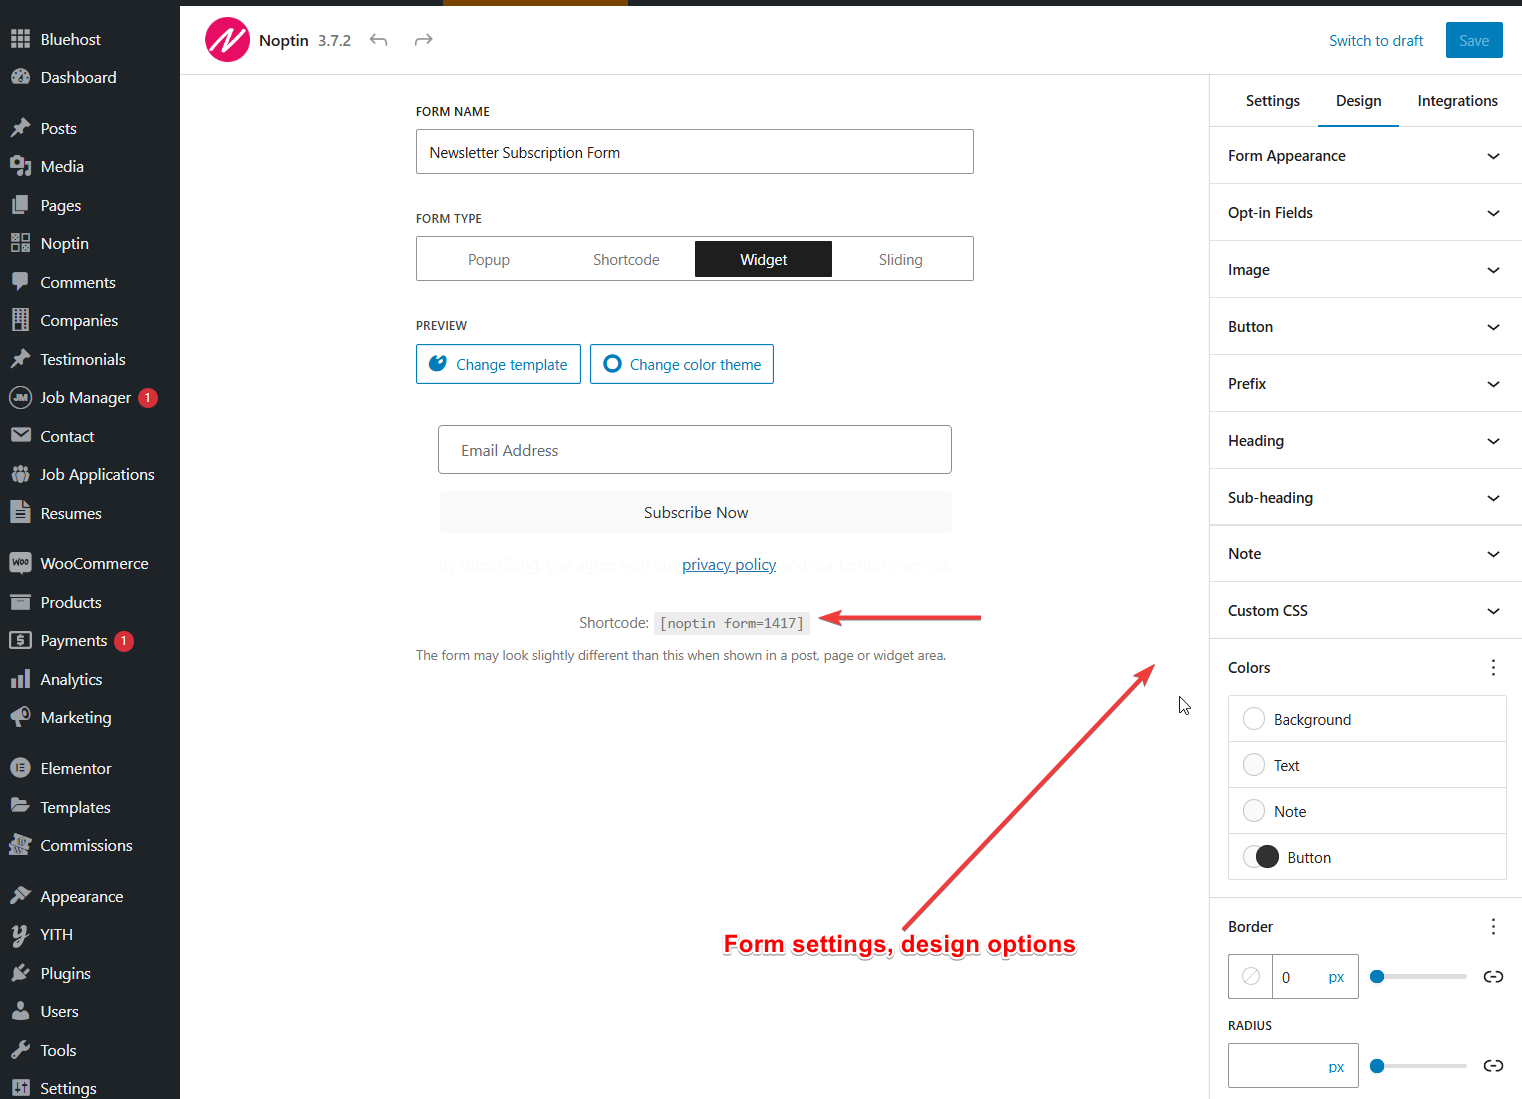
Please install Simple Newsletter Plugin – Noptin

Simple Newsletter Plugin – Noptin

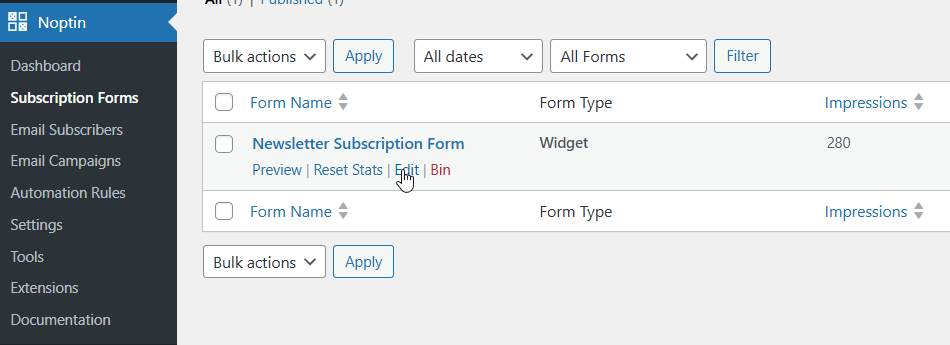
Create new or edit existing newsletter form

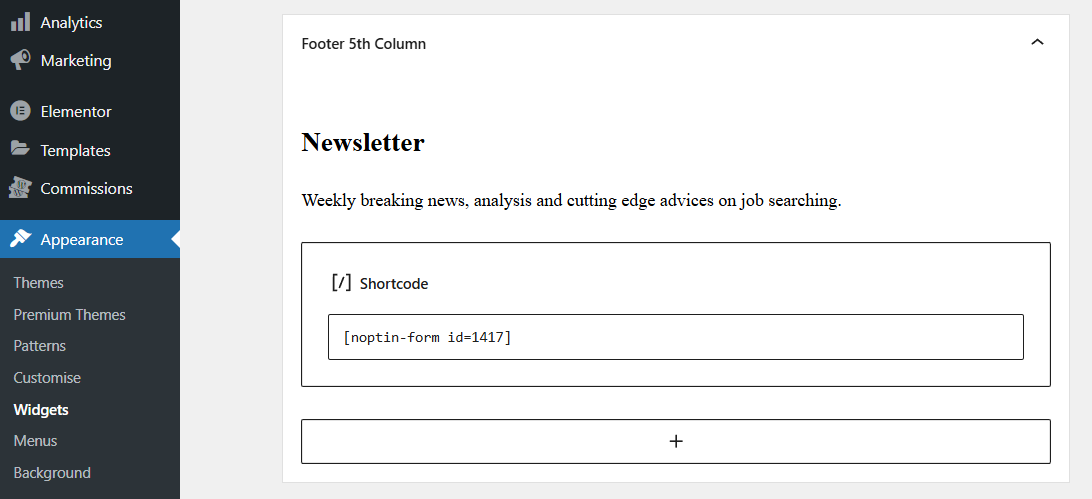
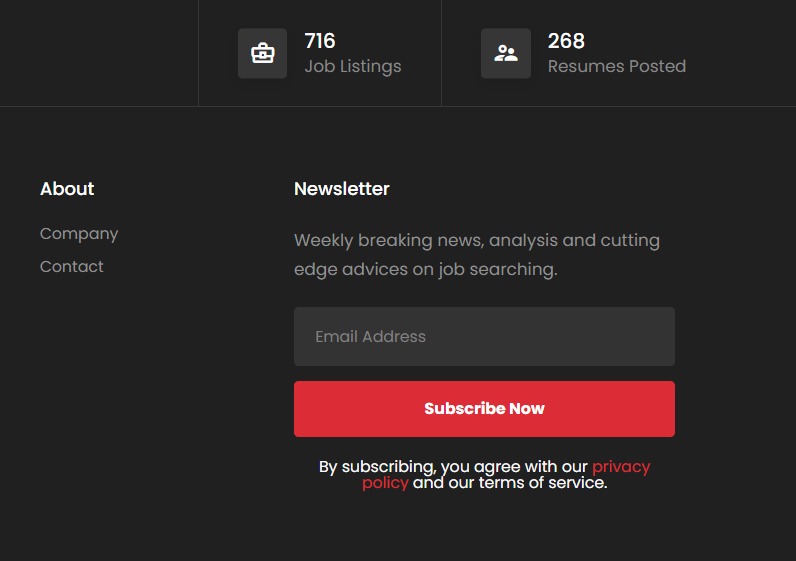
and then add its widget to the footer 5th column:

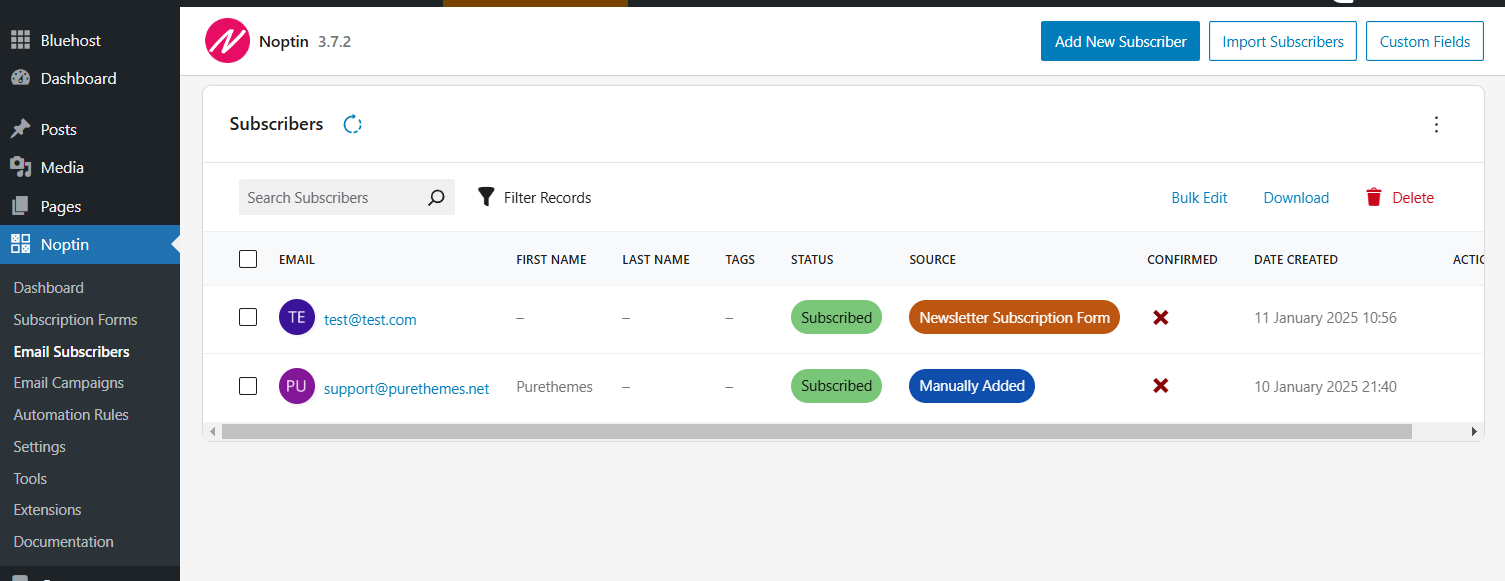
You can check new subscribers in Email Subscribers tab

Noptin have also paid  (unfortunately) addons for Mailchimp, ConvertKit, Campaign Monitor, ActiveCampaign, AWeber, Constant Contact, GetResponse, HubSpot, Klaviyo, Sendgrid, Sendlane, Sendy and many more.


Applicants & Editing Job Application form

With the Applications plugin, candidates can apply to jobs using a form and employers can view the applications on their job dashboard.

Intended Usage

This plugin can be used in two ways:

  1. If you offer job listing submissions on the frontend, you can use this plugin to have applications come in and be visible on the employers job dashboard.
  2. If you list your own jobs, you can have applications come in and be visible in the admin dashboard.

Settings

The plugin can be configured from Job Applications → Settings.

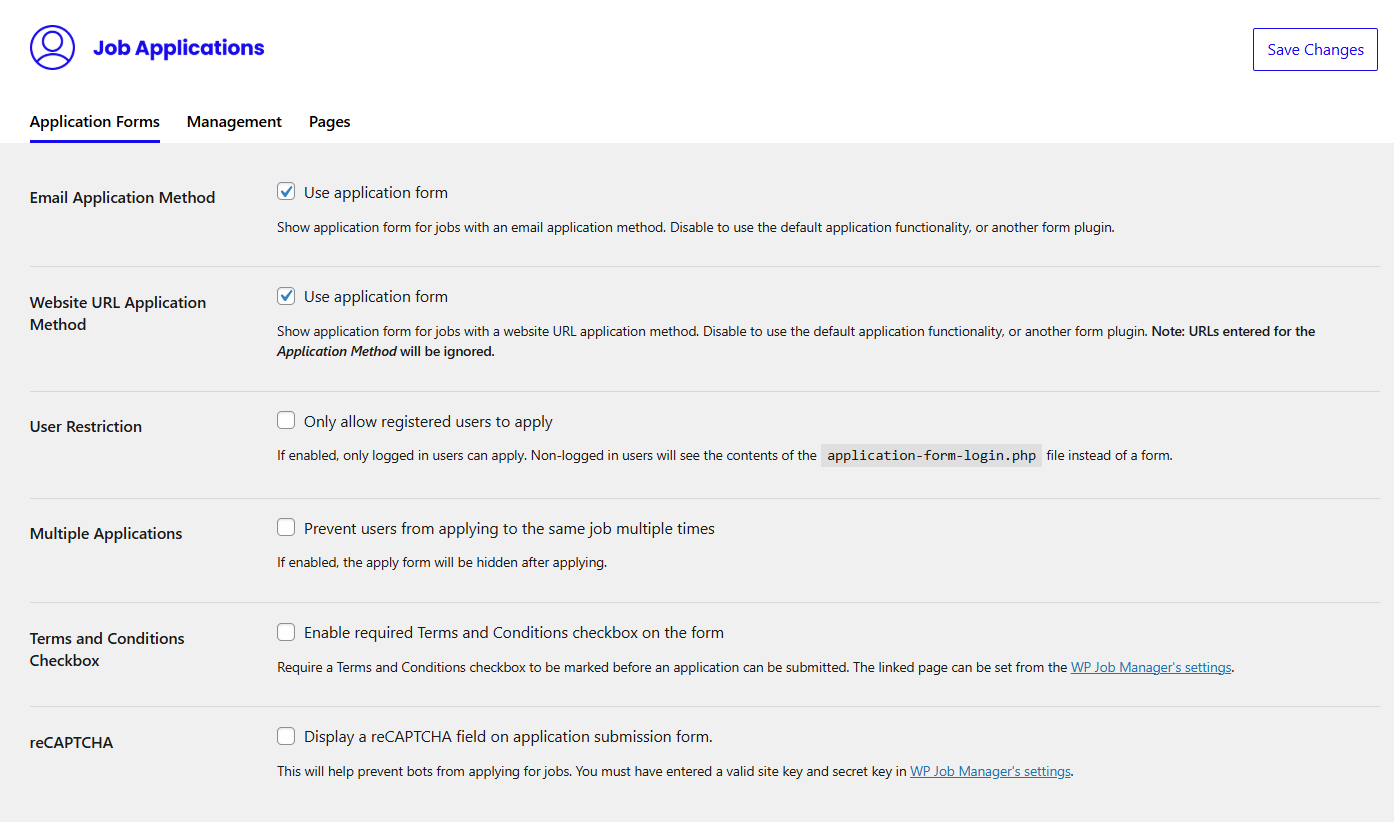
The following settings are found on the Application Forms tab:

  • Email Application method – Use application form – When enabled, this setting will display the job application form for jobs setup with an email address for applications.
  • Website URL Application method – Use application form – When enabled, this setting will display the job application form for jobs setup with a URL for applications.
  • User Restriction – Only allow registered users to apply – The form will not show to guests until they login.
  • Multiple Applications – Prevent users from applying to the same job multiple times – If enabled, once a logged in user has applied they will no longer be able to see the application form for the same job.
  • ReCAPTCHA – This will help prevent bots from applying for jobs. You must have entered a valid site key and secret key in WP Job Manager’s settings.

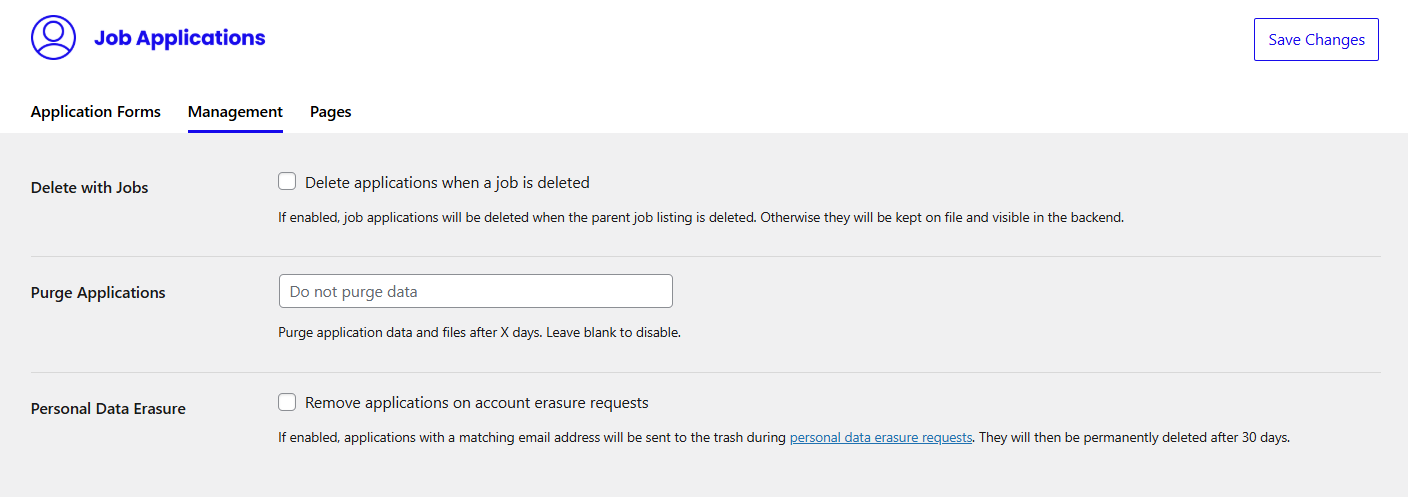
The following settings are found on the Management tab:

  • Delete with Jobs – Delete applications when a job is deleted – If enabled, job applications will be deleted when the parent job listing is deleted. Otherwise, they will be kept on file and visible in the backend.
  • Purge Applications – Enter a number to purge all applications after that many days.
  • Personal Data Erasure – If enabled, applications with a matching email address will be sent to the trash during personal data erasure requests (Tools > Erase Personal Data). They will then be permanently deleted after 30 days.

The Job Application Form

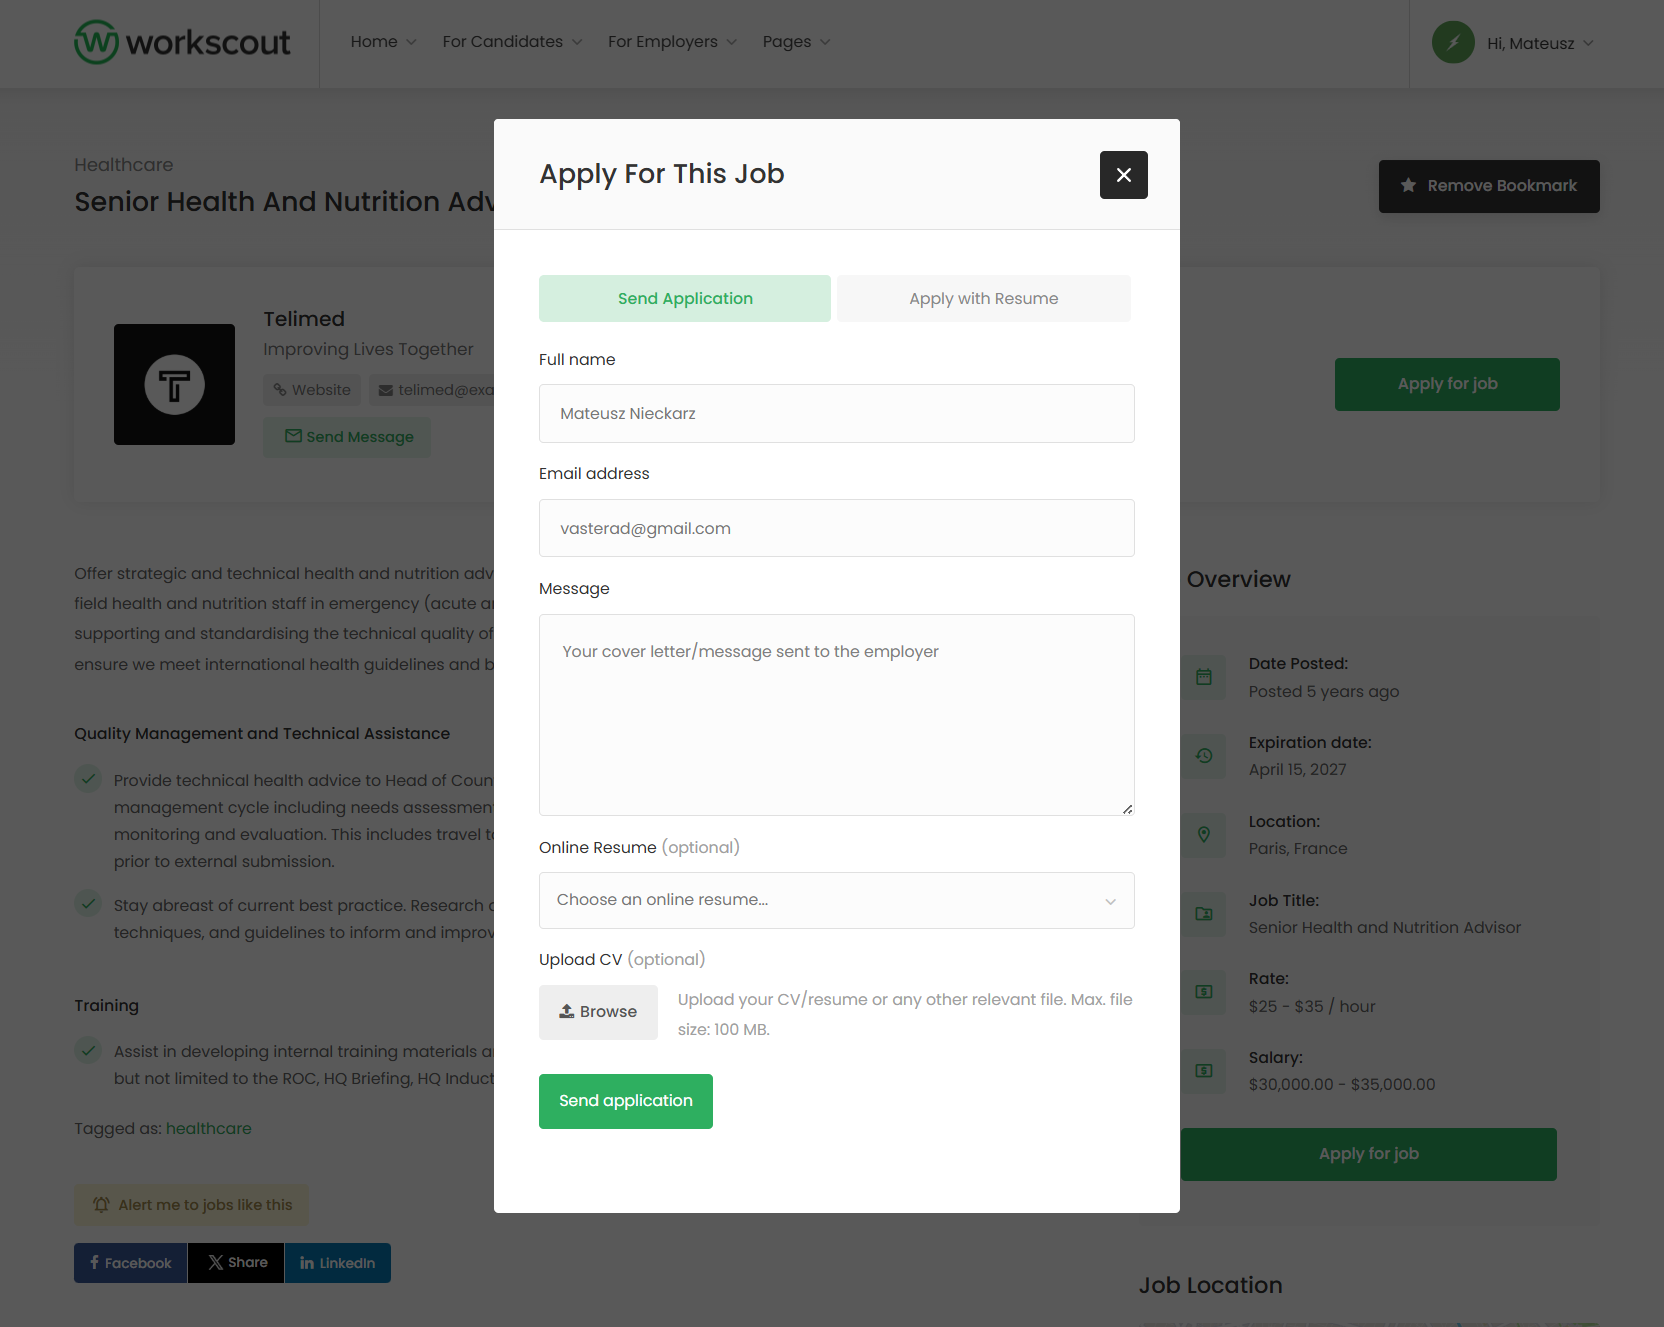
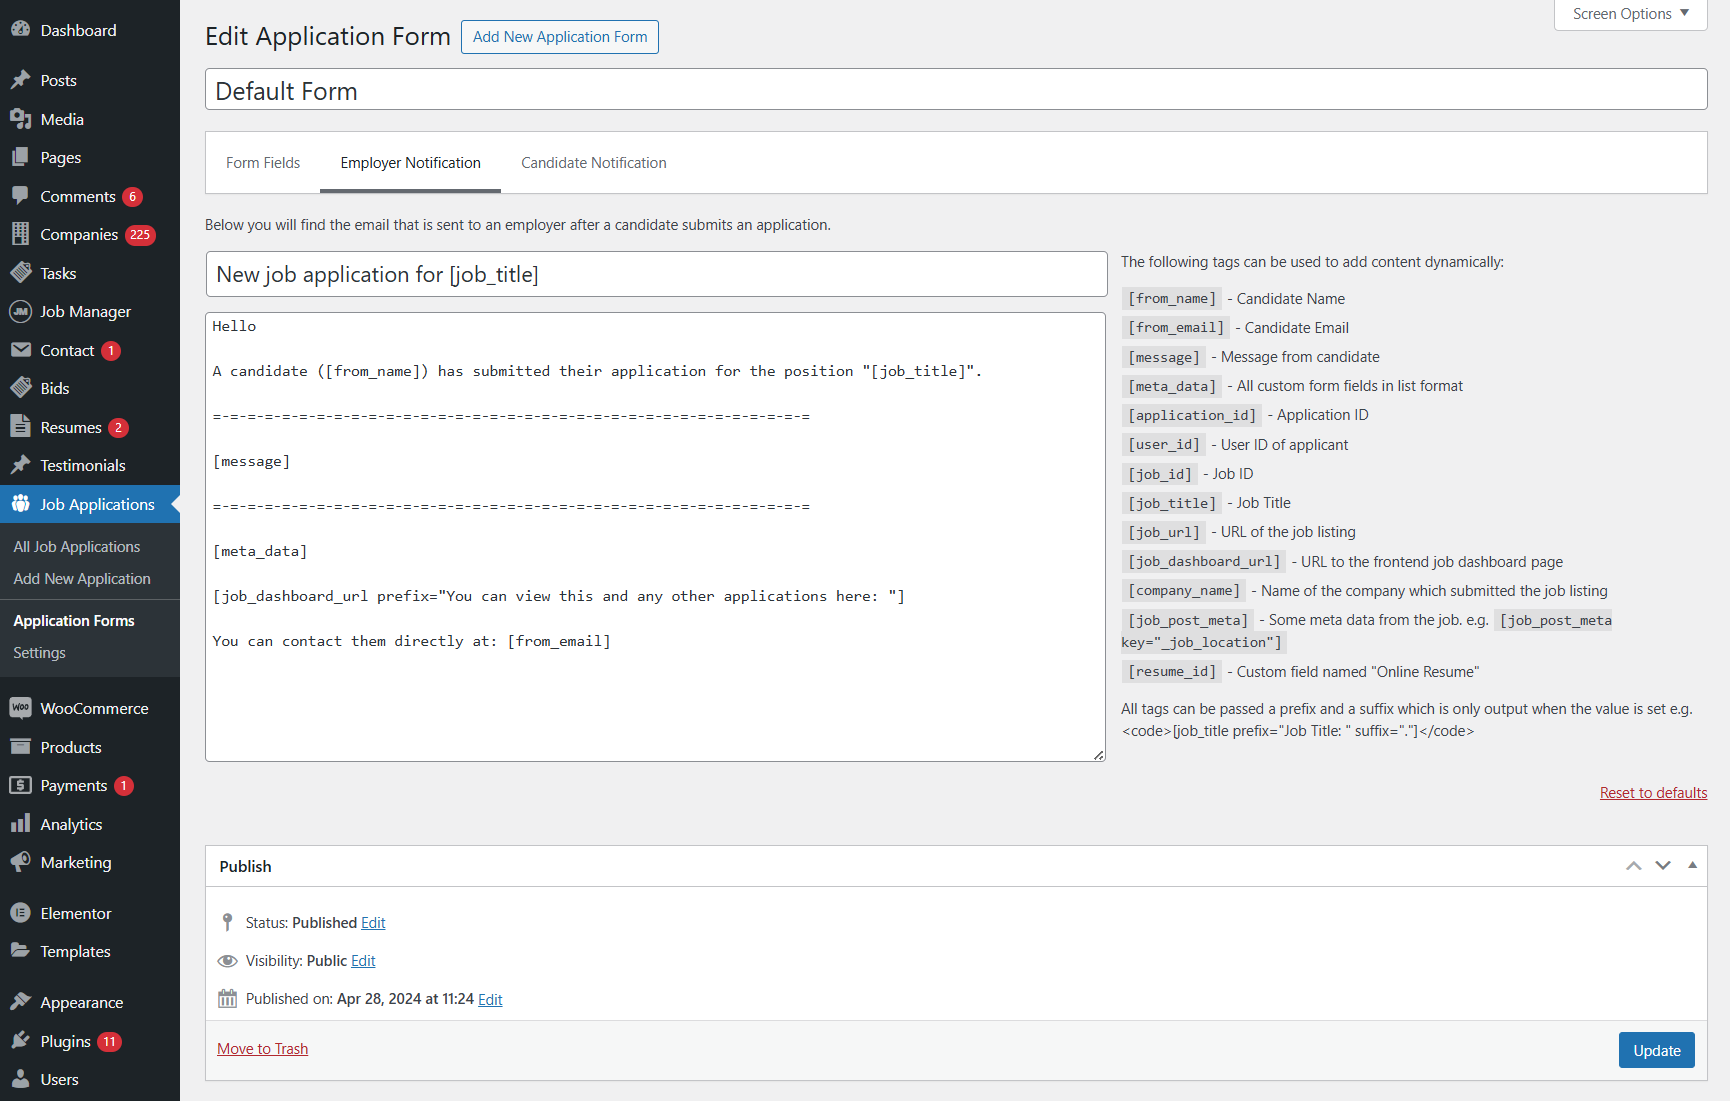
If enabled, the job application form will be displayed instead of the usual email/website links. The default form looks like this:

When the application form is submitted, an application will be saved to your database. If the job application method is ’email’, the employer will also receive an email notification.

Once an Application’s status has been set to “Hired”, the message “This position has been filled” will appear on the job listing.

Note: You can also add the shortcode [job_apply id=”X”] to a page to display only the application form for a particular job listing. Substitute the X with the ID of the job for which you wish to have the application form.


Customising the Job Application Form

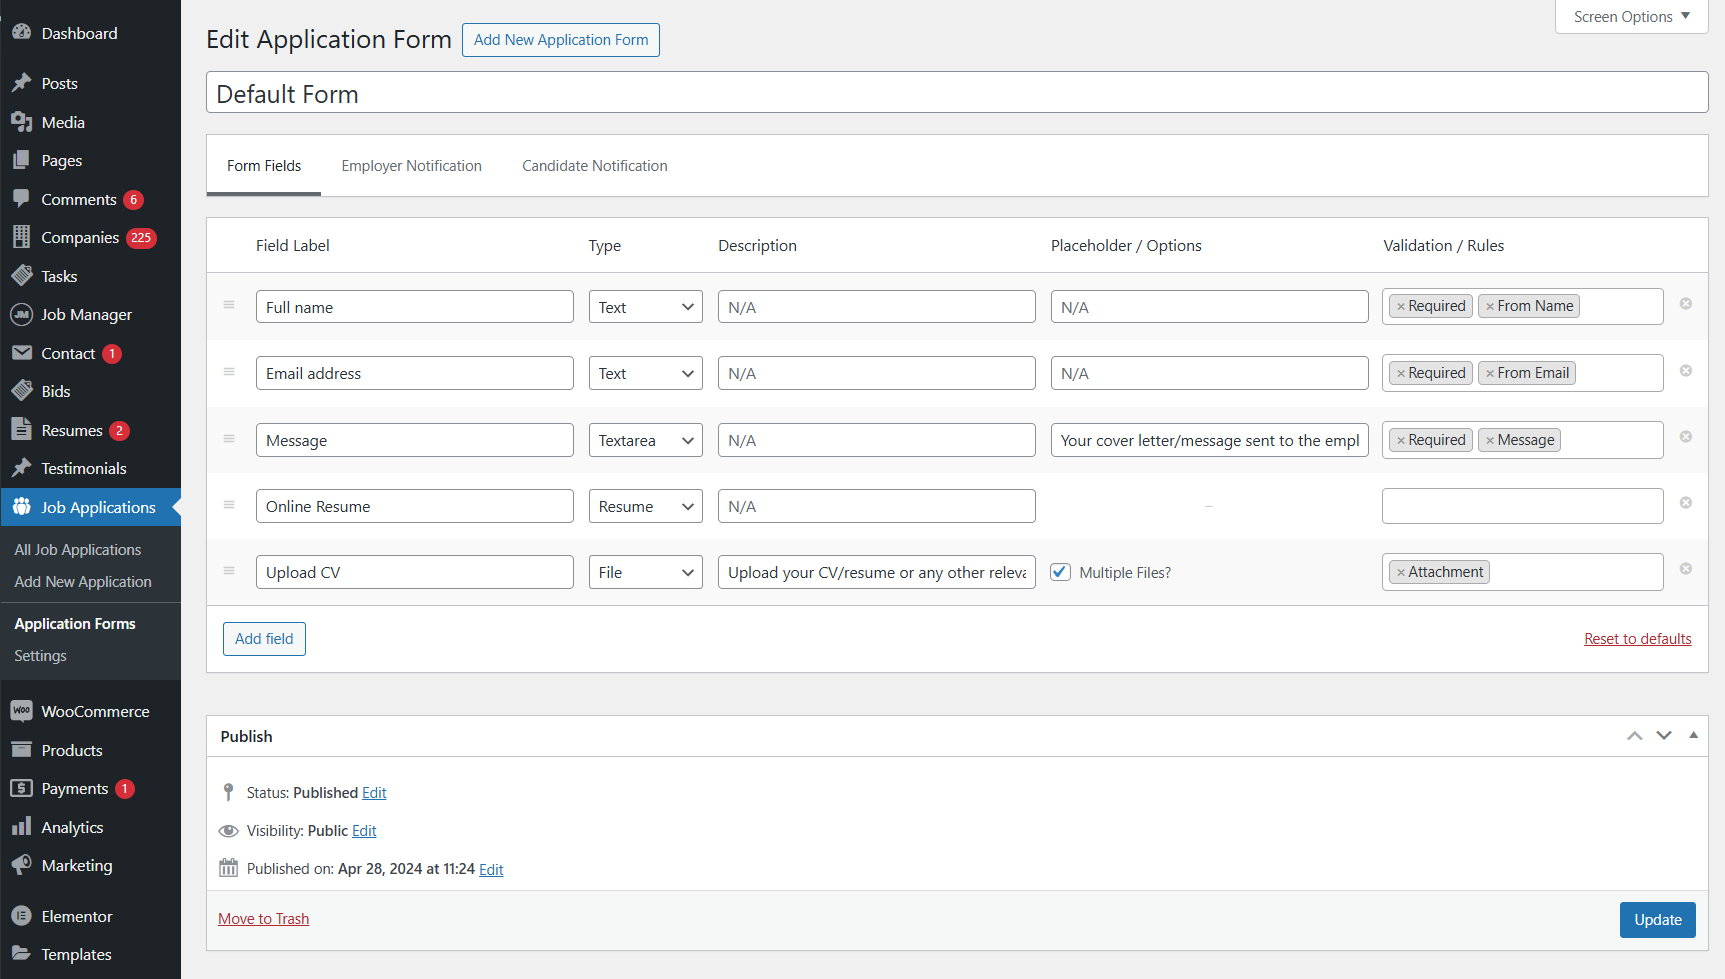
Version 2.0 of the plugin comes with a form editor where you can customise the form. Simply go to Job Applications → Application Form to see the form editor.

From here you can add, remove, edit, and re-order form fields. Available field types are:

  • Text
  • Textarea
  • File
  • Select
  • Multiselect
  • Checkbox
  • Resume
  • Output content
  • Date

Validation Rules

You can add the following validation rules to your application form fields:

  • Validation
    • Required – Makes the field required, so the form cannot be submitted if the field is empty.
    • Email – Force the field to only accept a valid email address.
    • Numeric – Force the field to only accept a numeric input.
  • Data Handling
    • From Name – Use this field as the ‘From name’ in the application email (can only be used once).
    • From Email – Use this field as the ‘From email’ in the application email (can only be used once).
    • Message – Use this field as the main content of the application email (can only be used once).
    • Attachment – (For file uploads) Include these file(s) as an attachment on the application email.

The plugin does not have support for conditional fields. If you need that, you can use an alternative form provider that does offer this feature.


Customising the Employer & Candidate Notifications

From the form editor page, you will also notice 2 tabs at the top to customise the notifications. By default, only an employer notification is sent, but if you add content to the candidate notification, candidates will be notified too.

The top field will be the subject line of the email, whist the bottom textarea field will be the email contents. The right side of the page shows which dynamic tags you can insert into your message + subject. These will be substituted for real data at the time of sending.


Viewing applications via the job_dashboard shortcode

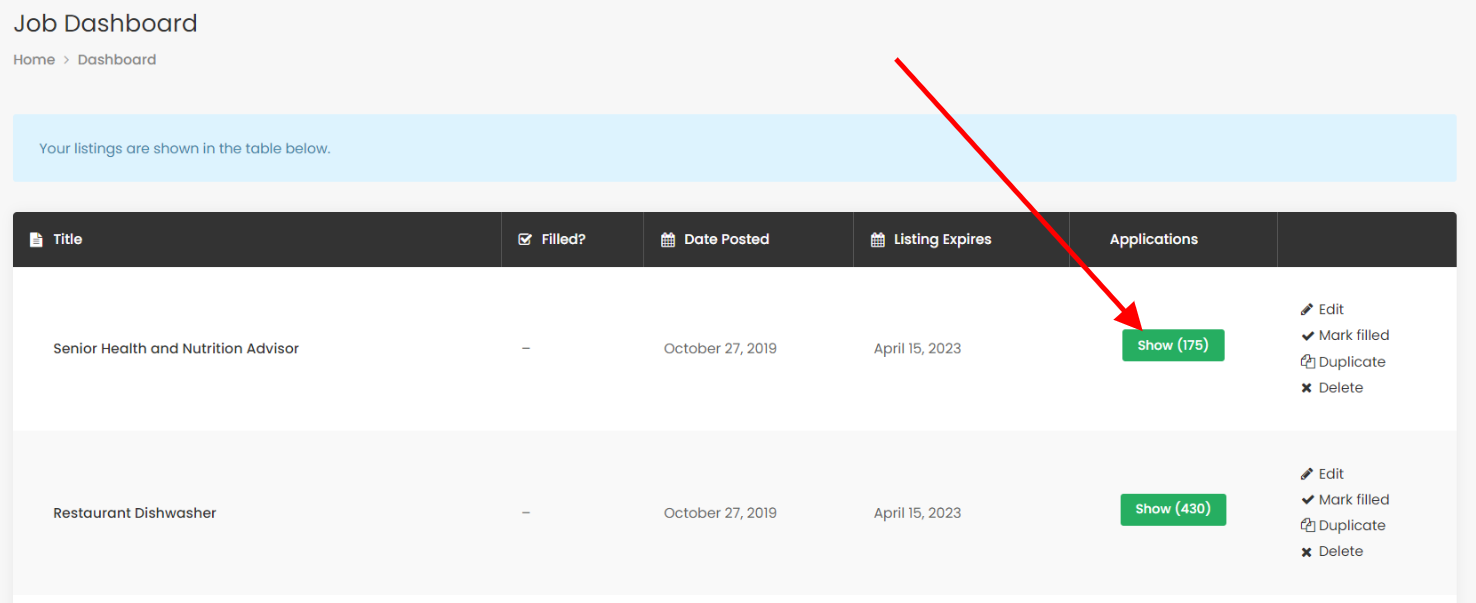
When the applications extension is installed, a new column will be shown when viewing the job dashboard on the frontend:

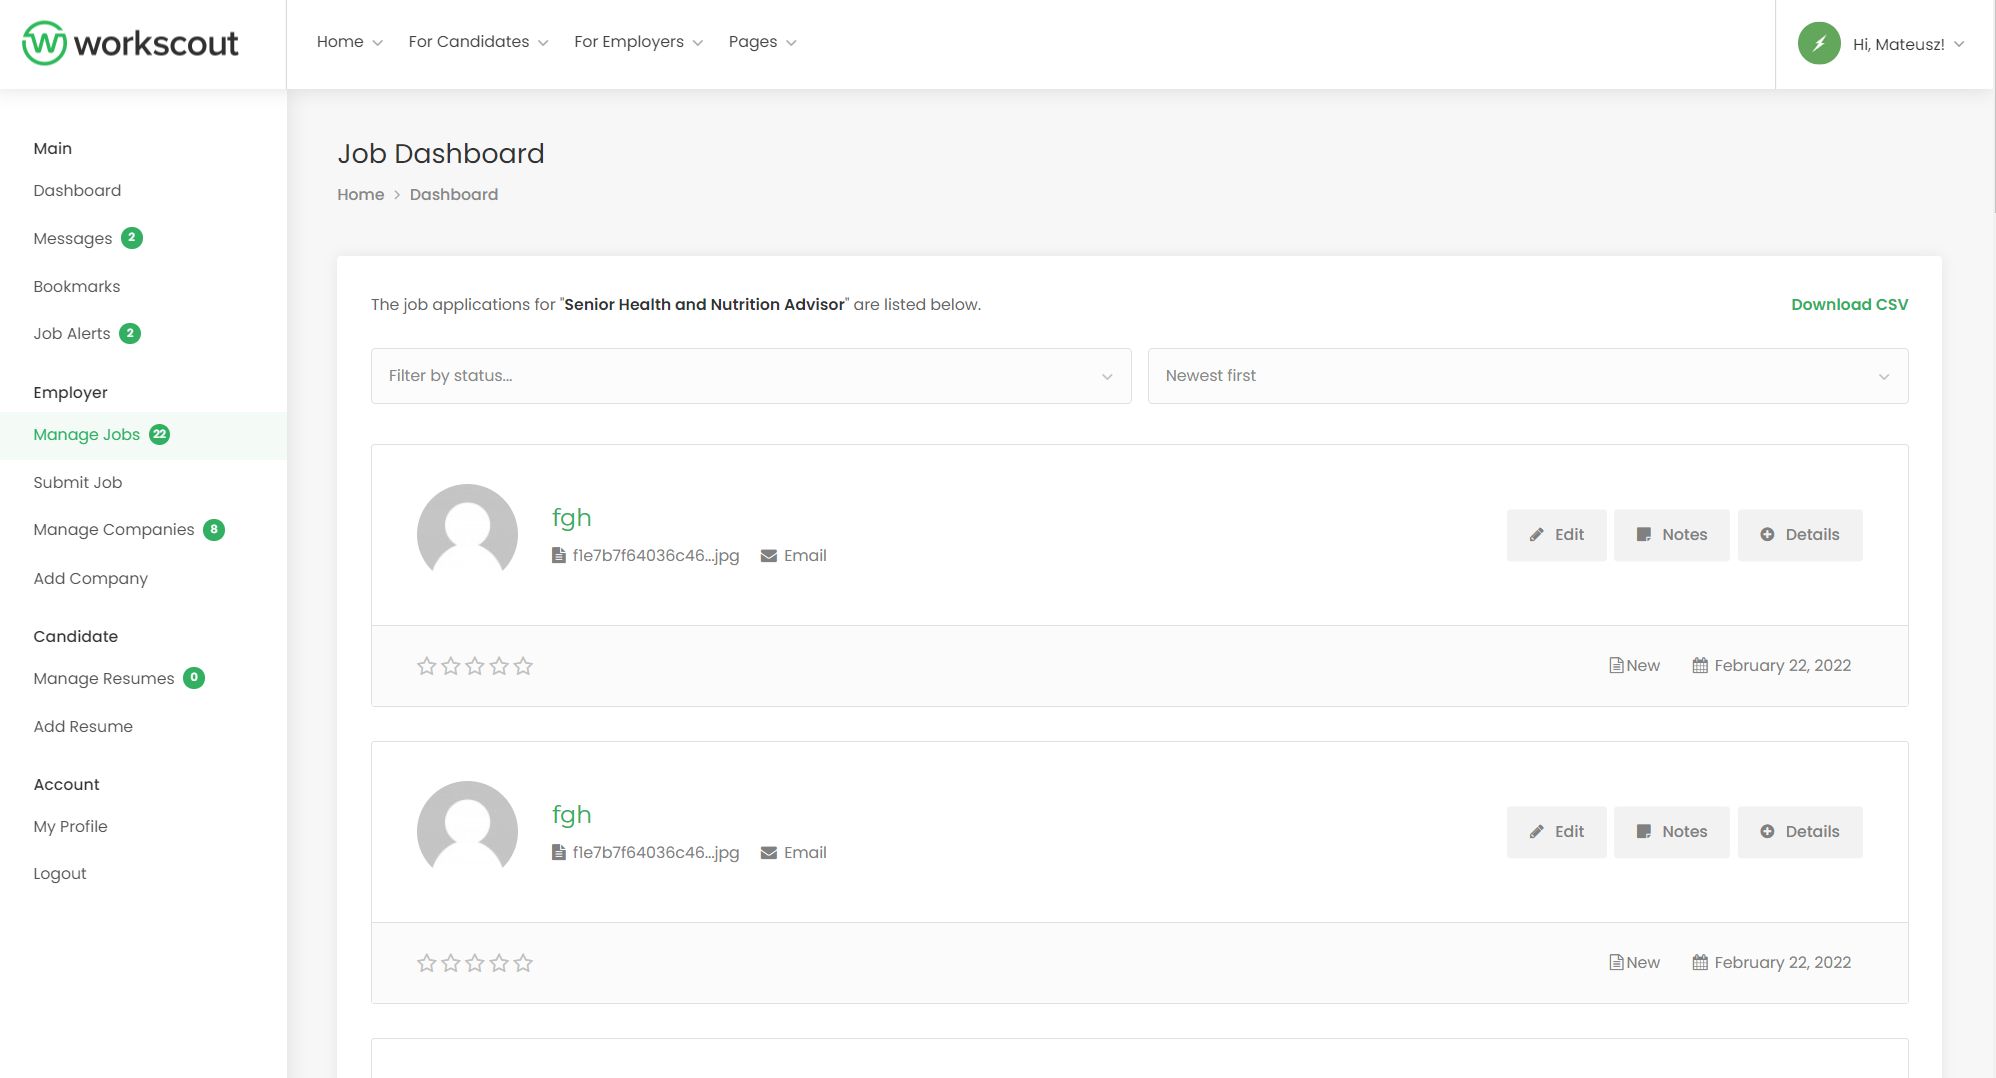
This will show the number of applications per job listing. Clicking the number (when there are applications) will reveal the application list:

Above the applications you can choose to filter by status. Statuses include:

  • New
  • Interviewed
  • Offer extended
  • Hired
  • Archived

You can also choose to sort the applications by date, name or rating.


Downloading Application Data

When viewing all applications for a job listing in the Job Dashboard, you can click on “Download CSV” at the top of the page, to download a CSV file containing all the application data for that job listing.

If you need to download data for all applications on the site, you can export an XML file of all Job Applications via Tools > Export.


Viewing applications via the admin dashboard

In the WordPress admin dashboard you’ll see a new section called Job Applications. Going here, as an admin user, you’ll see all applications:

2014-06-29 at 14.27

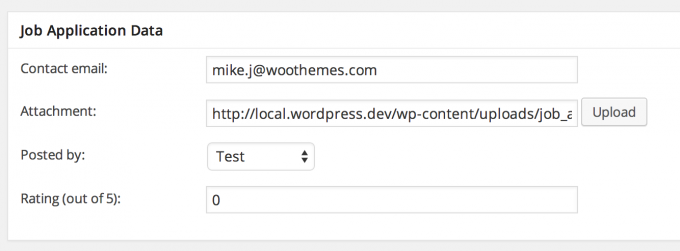
These can be filtered by job and filtered/sorted like the frontend view. If you click to view an application you’ll be able to edit:

2014-06-29 at 14.29

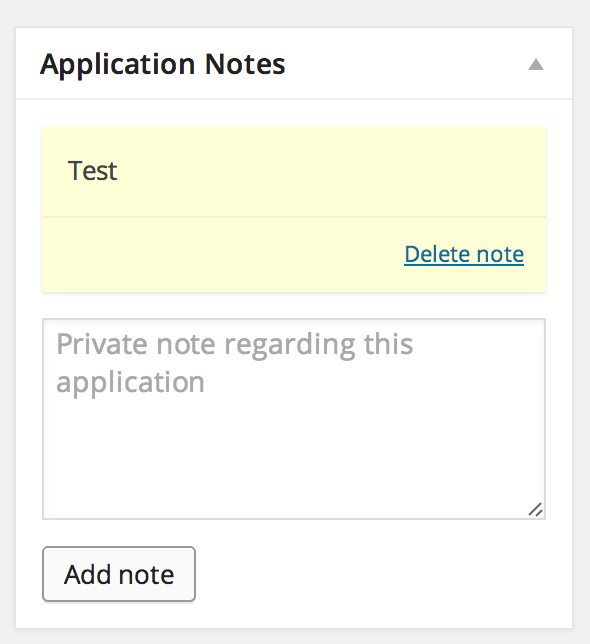
And you’ll be able to add notes:

2014-06-29 at 14.30


Past Applications

You can also allow candidates to view their past applications by adding the [past_applications] shortcode to a page. If you use the Resume Manager add-on, you’ll most likely want to add the shortcode to the Candidate Dashboard page that is created during that plugin’s setup, but it can be added to any page.