Author Archive

How to update theme and plugins?

Important!
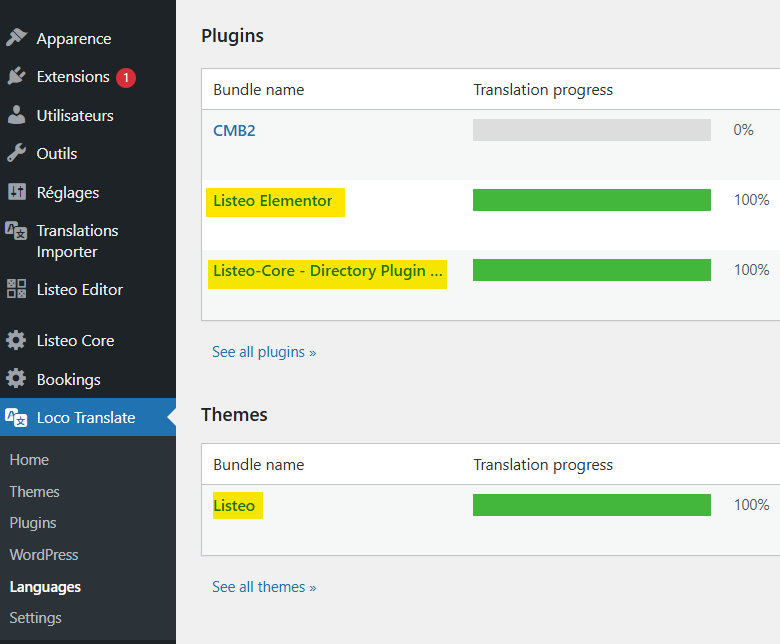
1. Make sure you updated also plugins (Listeo Core, Listeo Editor, and Listeo Elementor)
2. Clear your website’s cache and hosting cache after the update

It’s recommended to configure Envato Market auto-updates plugin. It’s installed automatically with theme and you’ll find in your WordPress Dashboard → Envato Market


Theme & Plugins Update

Go to your downloads section on ThemeForest http://themeforest.net/downloads and download theme (Installable WordPress file only) – it will be the lastest version.

  1. Update Theme

    Recommended method: Upload a .zip file with the new theme version through WordPress, just like you would when installing a new theme in Appearance → Themes → Add New Theme. Then, confirm that you want to update the theme.

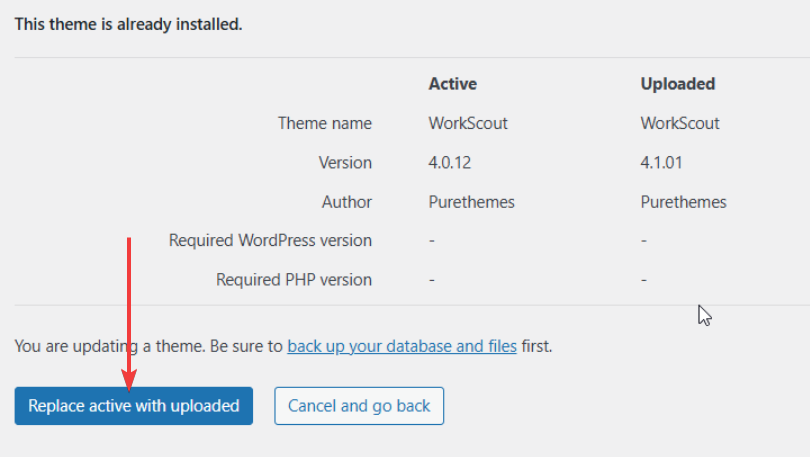
    Don’t forget these important steps:
    1. Update the plugins too (Listeo Core, Listeo Editor, and Listeo Elementor)
    2. Clear your website’s cache after the update

  2. Update Plugins

    After uploading new version of theme you also have to update plugins. You will see a list of plugins that require update in Appearance → Install Plugins.

You won’t loose any content or settings, but if you’ve made any customizations to source files they will be lost, so please use Child Themes http://codex.wordpress.org/Child_Themes to modify theme .php files. 😉

Translation Importer

If you would like to change some texts from english to english please check this article:
How to change some texts/words?

Already installed translation and you’d like to edit existing translation?
How to edit translation?

Ready-made translations

Listeo is pre-translated into 40+ languages and verified by native speakers, ready to use:

  • bn_BD বাংলা (বাংলাদেশ)
  • bs_BA Bosanski (Bosna i Hercegovina)
  • cy Cymraeg (Cymru)
  • cs_CZ Čeština (Česko)
  • da_DK Dansk (Danmark)
  • de_DE Deutsch (Deutschland)
  • de_AT Deutsch (Österreich)
  • el Ελληνικά (Ελλάδα)
  • et_EE Eesti (Eesti)
  • es_ES Español (España)
  • es_MX Español (México)
  • fa_IR فارسی (ایران)
  • fa_AF فارسی (افغانستان)
  • fr_FR Français (France)
  • fr_CA Français (Canada)
  • he_IL עברית (ישראל)
  • hi_IN हिन्दी (भारत)
  • hr Hrvatski (Hrvatska)
  • hu_HU Magyar (Magyarország)
  • id_ID Bahasa Indonesia (Indonesia)
  • it_IT Italiano (Italia)
  • ja 日本語 (日本)
  • ka_GE ქართული (საქართველო)
  • ko_KR 한국어 (대한민국)
  • lb_LU Lëtzebuergesch (Lëtzebuerg)
  • lt_LT Lietuvių (Lietuva)
  • lv Latviešu (Latvija)
  • nl_NL Nederlands (Nederland)
  • nl_BE Nederlands (België)
  • pl_PL Polski (Polska)
  • pt_PT Português (Portugal)
  • pt_BR Português (Brasil)
  • ro_RO Română (România)
  • sq Shqip (Shqipëria)
  • sr_RS Srpski (Srbija)
  • sk_SK Slovenčina (Slovensko)
  • sl_SI Slovenščina (Slovenija)
  • sv_SE Svenska (Sverige)
  • ta_IN தமிழ் (இந்தியா)
  • tr_TR Türkçe (Türkiye)
  • uk Українська (Україна)
  • vi Tiếng Việt (Việt Nam)
  • zh_CN 简体中文 (中国)
  • zh_TW 繁體中文 (台灣)
  • zh_HK 繁體中文 (香港)

If your language is not on the list simply send us a message and we will generate language files for you within few hours:
Request Missing Language →

Each translation is generated using the OpenAI. The translations are very accurate and natural. You’ll likely need to adjust only a few words or phrases – if any. 🙂


How to install ready to use translation?

  1. Navigate to Dashboard → Settings → Translation Importer
  2. Select your language and click “Download and Install” and that’s it, done!

  3. Important! Add translated URL titles in Settings → Permalinks for Listings base – otherwise listing pages might lead to 404 error page.

    e.g for Spanish
    http://example.com/listing/single-listing
    http://example.com/listado/single-listing

  4. How to edit translation? →

Don’t forget to translate

Dashboard page titles via WordPress page editor:

Set calendar language in Listeo Core → General

and widget titles in Appearance → Widgets

Texts on homepages have to be translated in Elementor (click Edit with Elementor on WordPress toolbar).


Multi-Language Support

If you’d like to enable language switcher on your website we recommend TranslatePress. Free version offers 1 additional language, Pro version – unlimited.

For TranslatePress users we create Chrome browser extension (this is not WordPress plugin!) that helps to translate your website quickly and effective with help of GPT:  https//purethemes.net/trp-ai-translator.zip


How to edit translation?

  1. To do that, install Loco Translate, then go to Loco Translate → Languages and select either the Listeo theme or the Listeo Core + Listeo Elementor plugins (translations are split between them).
  2. Before editing strings in the Listeo theme, you need to relocate the translation files. To do this, go to the “Relocate” tab in Loco and select languages/loco/themes/ as the directory where the translation file will be stored and click Move files

    Why?
    Because the files need to be saved in a safe location where WordPress won’t delete them during updates.


Creating Google Maps API Key

All new created websites are required by Google to use an API key to access the Google Maps API services.


Do I need to Google API key?

You need Google API key if you would like to use Google Maps, Google Autocomplete and radius search feature in our theme. Otherwise it’s not necessary and you can use OpenStreetMap or other providers.


Step 1: Create New Project

Go to Google Developer console and create new projec: click “Select Project” then “New Project”

Select a name for your API key and click “Create”


Step 2: Generate API Key

Click “APIs & Services”

Then select “Credentials” tab, click on “Create Credentials”

You’ll see generated API key. Copy and save it. You will need it later.


Step 3: Configure API Key

After generating the key, simply click on it to access its configuration options.

You need to restrict key to domain by checking “Websites” under application restriction section.

If you’re creating API key for radius search functionality, please check Step 6 first

Afterward, select the “Add” option and input your domain in the correct format. Please remember to enclose your domain with asterisks (*) at both the beginning and end (after / slash). This step is crucial as it ensures access to the API key for all subdomains and subpages.

Here’s an example of the correct format (without a dot before the domain)*listeo.pro/*

To make sure key will be working we suggest adding it in multiple formats:
*example.com/*
https://example.com/*
https//*.example.com


Step 4: Enable APIs for your project

Important!

To use APIs you have to enable billing which can be done separately (see Usage and Billing) or when obtaining your API key. The initial $200 of monthly usage is free, and you’re unlikely to surpass this limit.

Charges are based on actual usage, and you can monitor rates and spending in your Google Cloud Platform Console. Set daily quotas to prevent unexpected spikes and configure billing alerts to receive email notifications for customizable charge thresholds.

Open menu button in top left corner, click “More Options” then scroll down to Google Maps Platform and select Overview

Click “Enable APIS”

To make sure that all required APIs are enabled head over to APIs & Services, select “Enabled” filter and check if Places API, Maps JavaScript API and Geocoding API are enabled (you should see “DISABLE” sign which means they are enabled).


Step 5: Add API Key in Listeo Core

Go to Listeo Core → Map Settings and paste your API key in “Google Maps API Key” field.


Step 6: API key for radius search and Google Reviews

Radius search functionality requires key restricted to your server’s IP. To generate such key skip the first step in this tutorial. Instead, follow steps 2 through 3, but when you reach step 3, do not restrict the key to your domain. This key will be exclusively utilized on the backend and will not be visible to anyone.

For Google Reviews add key in: Listeo Core → Single Listing → Google Reviews
For Radius Search: Listeo Core → Map Settings → Server-side Geocoding & Radius Search

You will find your server’s IP in Listeo Core.


Click here to read how search by location works →


Step 7: Set a Google API quota limit to avoid unexpected billing.

https://developers.google.com/maps/billing-and-pricing/manage-costs#set-caps
✅ SELECT the API in the drop-down menu (All Google Maps Platform APIs).
✅ SET requests/map loads/elements per day parameter according to what you are willing to pay each month.
✅ Click SAVE and repeat this process for any API you want to use.

Please set these limits to stay charge-free:
✅ Geocoding API → 320 requests per day
✅ Maps JavaScript API → 320 map loads per day
✅ Places API → 50 requests per day

Choosing Map Provider

Google Maps API pricing got you down? You can use alternatives like OpenStreetMaps, MapBox, Bing Maps, Thunderforest or HERE maps.

What’s more Listeo supprorts also location autocomplete feature powered by OpenStreetMap which means that you don’t need to use Google API even for this.  It’s exclusive to Listeo – not found in other themes!  We took care to develop it with best UX/UI practices and it works as good as Google’s autocomplete.

An example of map and location autocomplete field powered by OpenStreetMap:

Please note that OpenStreetMap location address suggestions work only on “type and hit enter”.  OpenStreetMap usage policy doesn’t allow generating address propositions on each key press (like Google does).  That would generate too many requests per second and could overload their servers. Technically it’s possible but OSM foundation shares their api for free so we wanted to respect their usage policy.

An example of map and location autocomplete field powered by Google Maps:


You will find all map settings in Listeo Core → Map Settings:


Listeo Core → Map Settings

Setting Name Option/Details
Search Restrictions & Behavior
Restrict search results to one country country restriction, geographic limitation, regional search bounds, country-specific filtering, national boundaries, location constraints, geo-fencing, territory limits, single-country mode, regional lock, search area restriction, country code filter Put symbol of country you want to restrict your results to (eg. uk for United Kingdom). Leave empty to search whole world. text
Enable Map Bounds Search viewport search, visible area filtering, map boundary detection, dynamic search area, drag to search, zoom-based filtering, visible region search, map viewport filtering, bounding box search, current view search, spatial filtering, map interaction search Search listings within current map view when dragging/zooming the map checkbox
Default: ON
Automatically locate users on page load auto-detect location, HTML5 geolocation, browser location, GPS detection, automatic positioning, user location detection, geo-positioning, current position, location autodetect, find my location, geolocation API, HTTPS requirement, permission-based location You need to be on HTTPS, this uses html5 geolocation feature checkbox
Default: OFF
Map Configuration
Listings map center point default map center, initial map position, map starting point, default coordinates, center latitude longitude, map origin, initial viewport, default focus point, map centering, geographic center, starting coordinates Write latitude and longitude separated by comma, for example -34.397,150.644 text
Default: 29.577712,-45.629483
Autofit all markers on map auto-zoom to markers, fit bounds, automatic viewport adjustment, show all pins, marker clustering view, zoom to fit all, bounds adjustment, marker viewport, automatic map bounds, fit all locations, dynamic zoom level Disable checkbox to set the zoom of map manually checkbox
Default: ON

Demo Content Import

Listeo comes with  an excellent setup wizard that will automatically import demo data.

Instructions for importing demo content in the Listeo WordPress theme to quickly set up pages, listings, menus, and theme settings.

You should see Setup Wizard page immediately after activating Listeo, if you don’t or you’ve skipped it, you can find it in Appearance Setup Wizard.

It’s pretty basic, you just need to confirm each step, the wizard will install and activate all required plugins, import all the content, and set basic options. There are few things you need to do manually after. Note: pictures that comes with demo content might be blurred, you will replace them with own pictures anyway.


Setting Logo

The logo can be set in Appearance → Customize → Site Identity.


Theme Visual Settings

Appearance → Customize

Theme Visual Options


Translating Theme

Translation Importer

Theme Installation

There are two ways to install theme

Getting started guide explaining how to install and activate the Listeo WordPress theme via the dashboard or FTP as the first step before setup and demo import

Method 1: Upload through WordPress

  1. Download the “Installable WordPress file only” you’ll find it here
  2. Navigate to  Appearance → Themes → Add New → Upload.
  3. Follow the instructions on the screen, select the downloaded theme folder (“listeo.zip”).
  4. Hit Install Now and the theme will be uploaded and installed.

Once the theme is uploaded, you need to activate it. Go to  Appearance → Themes and activate Listeo.


Method 2: Upload through FTP

  1. Extract the “listeo.zip”
  2. Open up your FTP manager and connect to your hosting
  3. Browse to wp-content/themes
  4. Upload the Listeo theme folder.
  5. Log Into WordPress and go to Appearance – Themes
  6. Find the Listeo and click activate

Next step

Demo Content Import