To enable user registration on your page, please first enable it in your WordPress: Settings → General → Membership – and check the “Anyone can register” option.
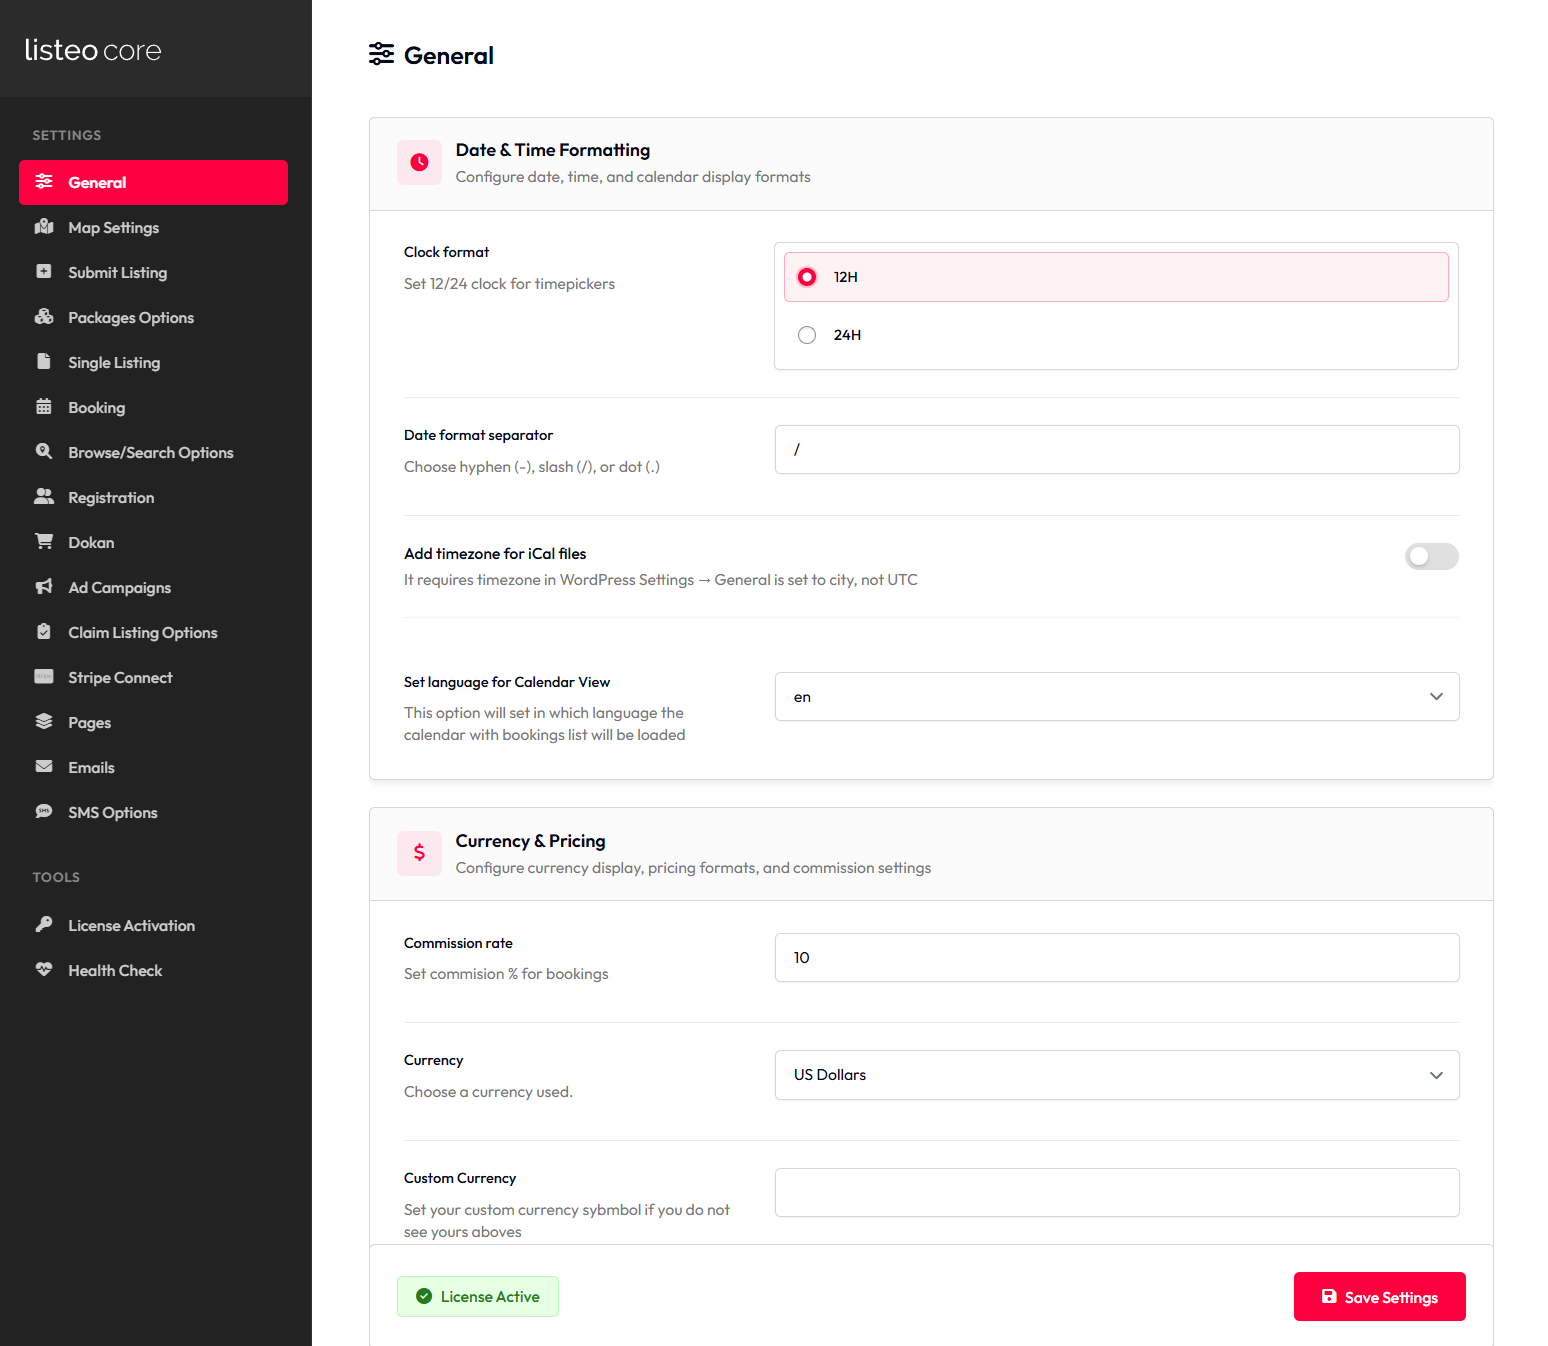
Once you enabled registration on your website create you can configure registration page in Listeo Core → Registration
Enabling Spam Protection
Social Login
https://wordpress.org/plugins/wordpress-social-login/
Shortcodes
You can use following shortcodes to display login/register form in different palces
[listeo_login_form]– displays both login and register in a tabs[listeo_login]– only login form[listeo_registration]– only register forms
Redirecting to custom login page
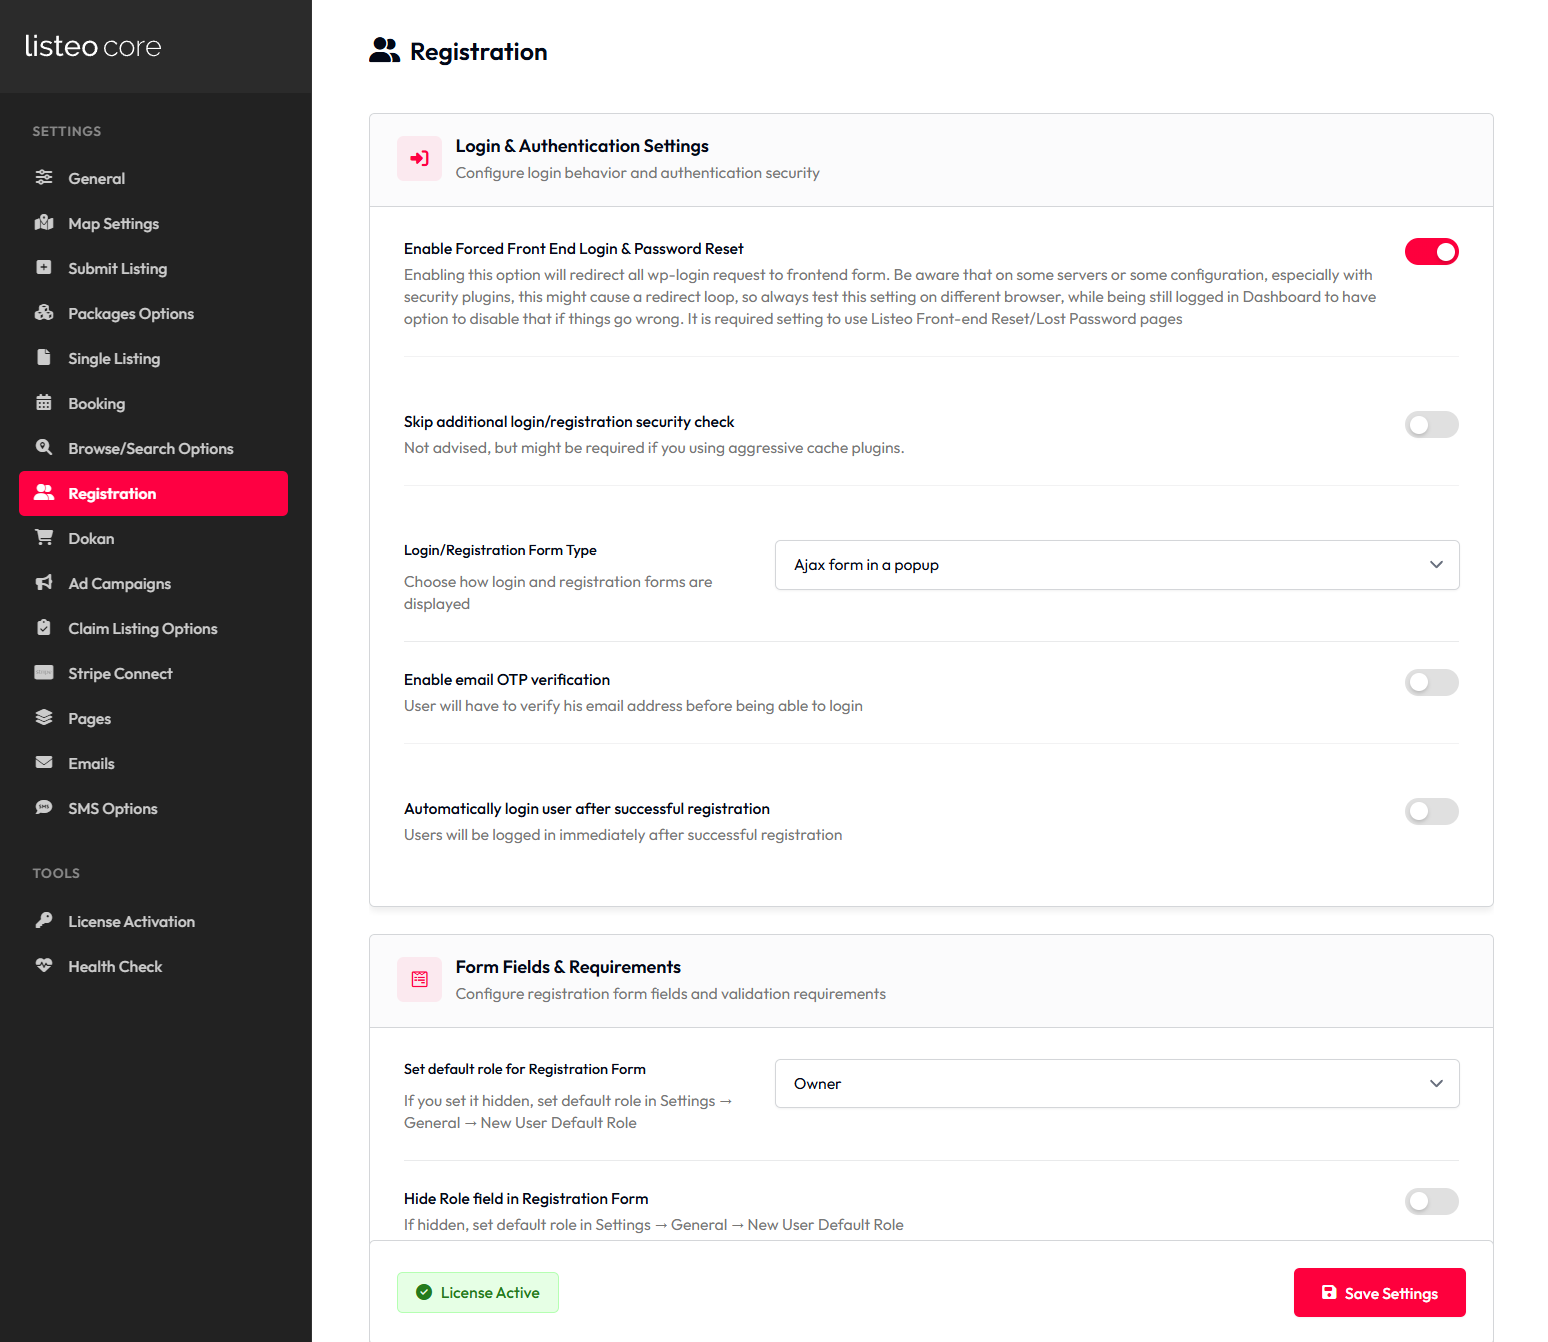
👤 Listeo Core → Registration
| Setting Name | Option/Details |
|---|---|
| Login & Authentication Settings | |
| Enable Forced Front End Login & Password Reset | Force users to use frontend login/reset forms checkbox |
| Skip additional login/registration security check | Disable extra security validation checkbox |
| Login/Registration Form Type | Choose form display method select Options: Ajax form in a popup, Separate page Default: Ajax form in a popup |
| Enable email OTP verification | Require email verification via OTP checkbox |
| Automatically login user after successful registration | Auto-login users after registration checkbox |
| Form Fields & Requirements | |
| Set default role for Registration Form | Default user role for new registrations select Options: Owner, Guest Default: Guest |
| Hide Role field in Registration Form | Remove role selection from registration form checkbox |
| Hide Username field in Registration Form | Remove username field from registration checkbox |
| If username is hidden use full email as user login | Use email address as login when username is hidden checkbox |
| Display First and Last name fields in registration form | Show name fields in registration checkbox |
| Make First and Last name fields required | Require name fields in registration checkbox |
| Add Password pickup field to registration form | Include password field in registration checkbox |
| Add additional password strength requirement | Enforce strong password requirements checkbox |
| Security & Privacy | |
| Enable Privacy Policy link in registration form | Show privacy policy link during registration checkbox |
| Require terms and conditions approval in registration form | Mandatory T&C acceptance checkbox |
| Terms and conditions page | Select page containing terms and conditions select Options: All WordPress pages |
| Enable CAPTCHA on registration form | Add CAPTCHA protection to registration checkbox |
| Enable CAPTCHA on reviews form | Add CAPTCHA protection to reviews checkbox |
| CAPTCHA Configuration | |
| Captcha version | Choose CAPTCHA service select Options: reCAPTCHA V2 checkbox, reCAPTCHA V3, hCaptcha, Cloudflare Turnstile Default: reCAPTCHA V2 |
| reCAPTCHA v2 Site Key | Google reCAPTCHA v2 site key text |
| reCAPTCHA v2 Secret Key | Google reCAPTCHA v2 secret key text |
| reCAPTCHA v3 Site Key | Google reCAPTCHA v3 site key text |
| reCAPTCHA v3 Secret Key | Google reCAPTCHA v3 secret key text |
| hCaptcha Site Key | hCaptcha service site key text |
| hCaptcha Secret Key | hCaptcha service secret key text |
| Cloudflare Turnstile Site Key | Cloudflare Turnstile site key text |
| Cloudflare Turnstile Secret Key | Cloudflare Turnstile secret key text |
| User Account Management | |
| Allow user to change his role in “My Account” page | Enable role switching in user account settings checkbox |
| Redirect Settings | |
| Owner redirect after registration to page | Page to redirect owners after registration select Options: All WordPress pages |
| Owner redirect after login to page | Page to redirect owners after login select Options: All WordPress pages |
| Guest redirect after registration to page | Page to redirect guests after registration select Options: All WordPress pages |
| Guest redirect after login to page | Page to redirect guests after login select Options: All WordPress pages |