
WorkScout offers support for Stripe Connect that allows you to automatically split the payment for a micro jobs and send part of the payment to the freelancer and part (commission) to you as a site owner. Stripe Connect is a service provider for marketplace payment solutions.
This requires having the official WooCommerce Stripe Payment Gateway installed and configured, only the payments made by this gateway will be split.
With Stripe you can accept Visa, MasterCard, American Express, Discover, JCB, and Diners Club cards or even Bitcoin and is supported in 47 countries
With a Stripe Connect, you create a platform to which freelancers can signup and “connect” and that helps you automate payments and simplifies the usage of your site.
How it works
You have to enable your Connect Platform in Stripe dashboard. After properly configuring both Stripe and WordPress according to instructions below, the Wallet page will have an option “Connect to Stripe“.
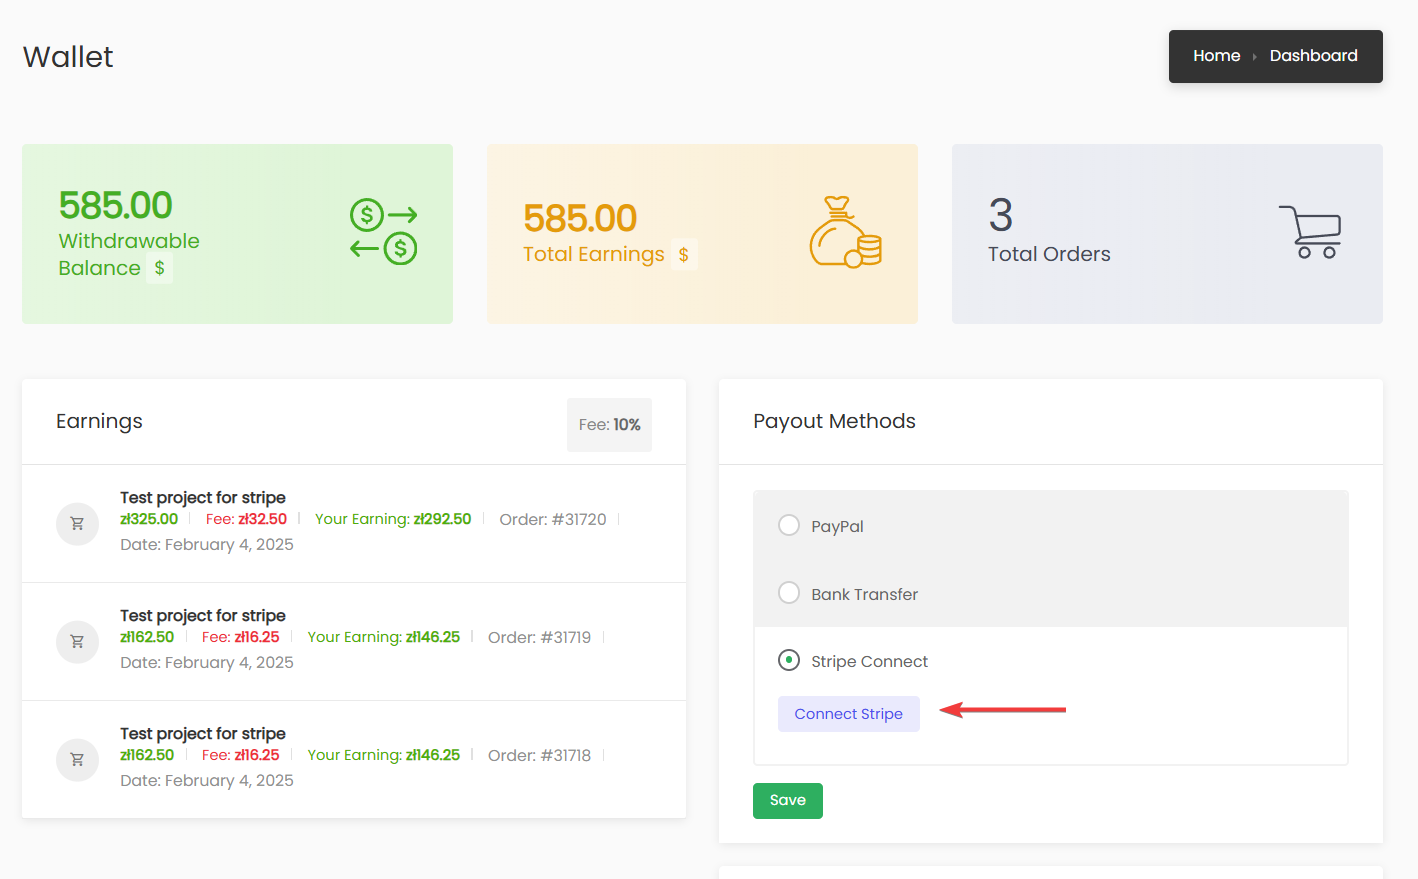
Any Freelancer who will click this button will be going through the “onboarding” process where he will set his own Stripe account and connect it to your platform. From now on every booking that will be made using WorkScout that will be paid with Stripe gateway will be automatically splitted and you as platform freelancer will get the commission and the freelancer will get his earning directly to his Stripe account. The money is then payout automatically by Stripe based on the settings or rules (it’s different based on the country)
How to configure Stripe Connect in WorkScout
Let’s get started
- Create a stripe account by visiting https://stripe.com/. You’ll be viewing a page that asks you to Activate Payments, click that button to fill out your business profile to accept payments
- Go through the whole process of onboarding https://dashboard.stripe.com/account/onboarding – make sure you haven’t skipped any field there.

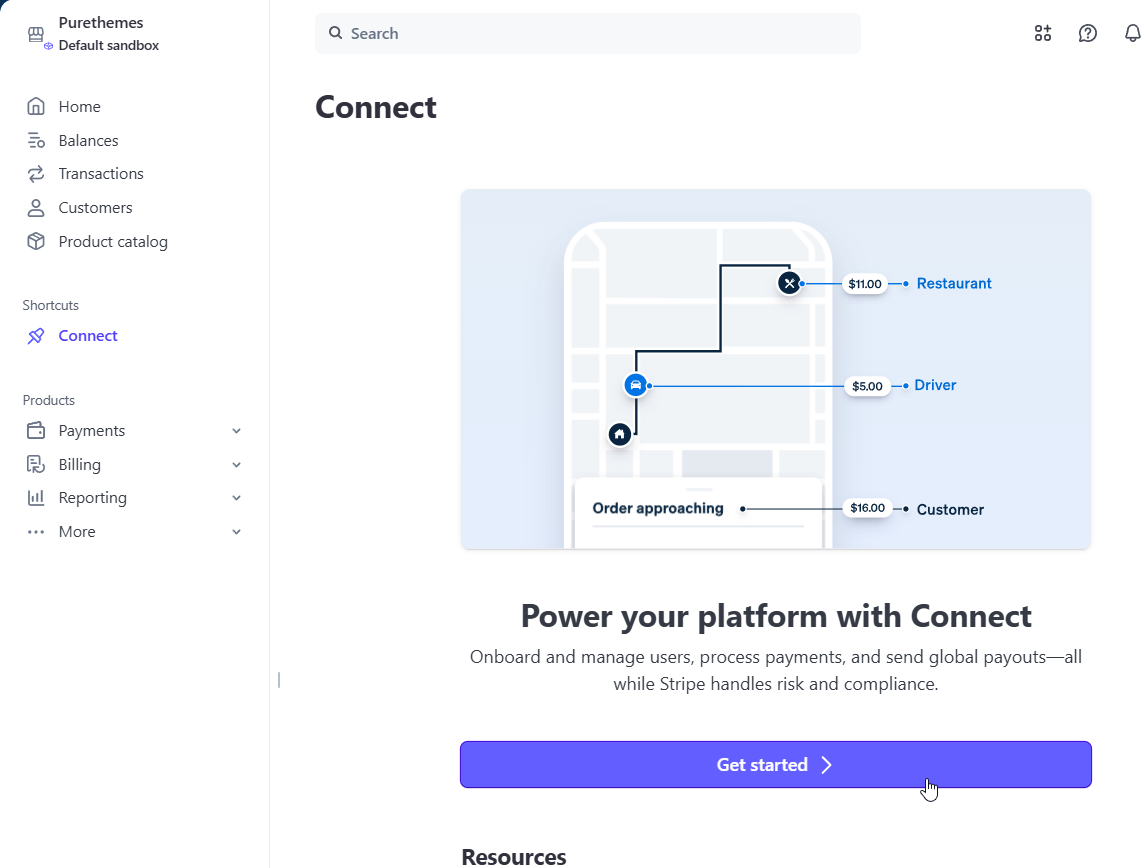
- Next step, open Stripe Dashboard go to Connect, then go to “Get started with Connect“, where you will be able to complete your platform profile and add required informations to enable payments on your account
Select “Buyers will purchase from you”
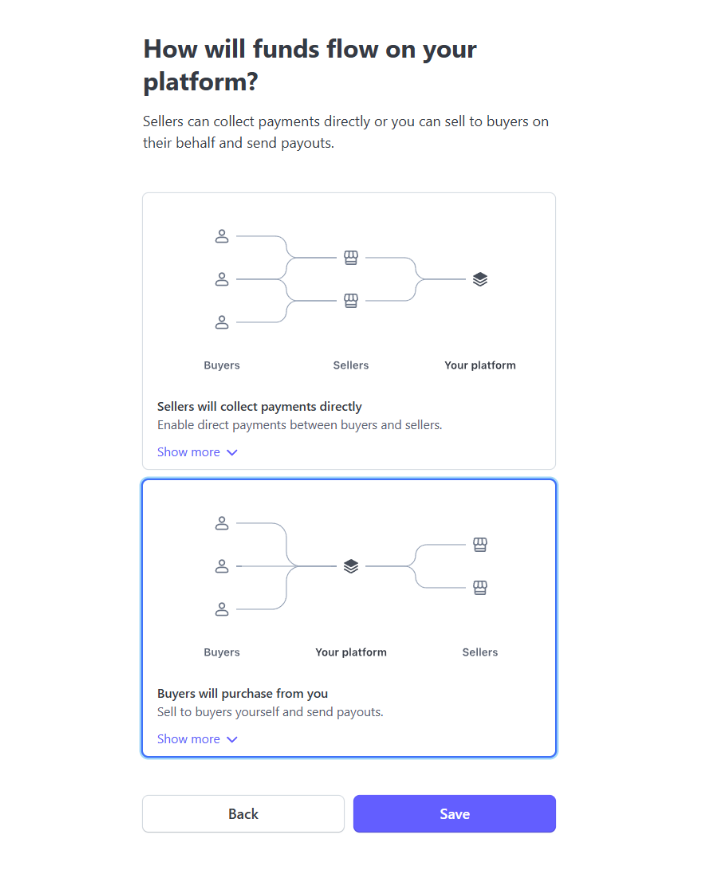
Complete your platform profile and add required informations to enable payments on your account
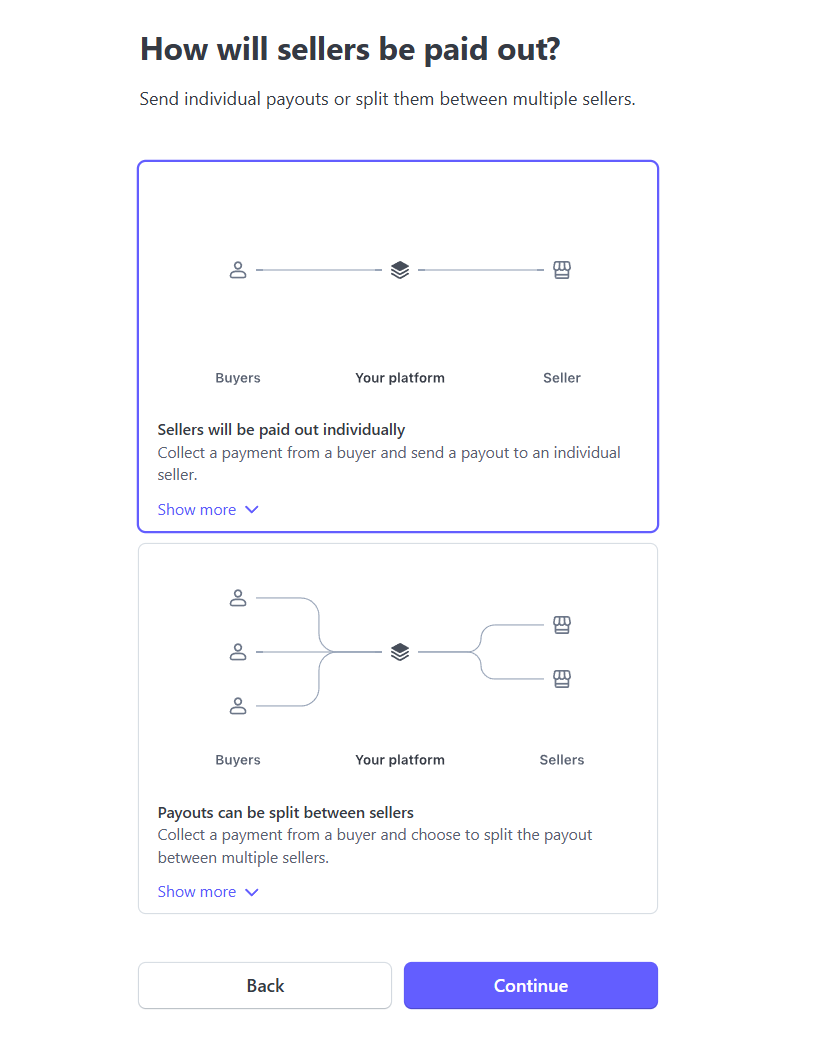
Select “Sellers will be paid out individually”
In next steps select “Onboarding hosted by Stripe” and “Express Dashboard” -
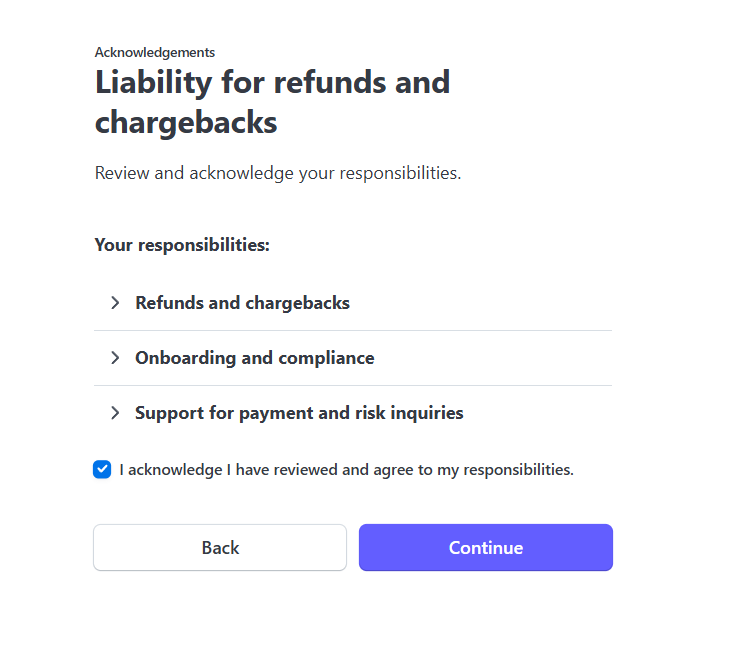
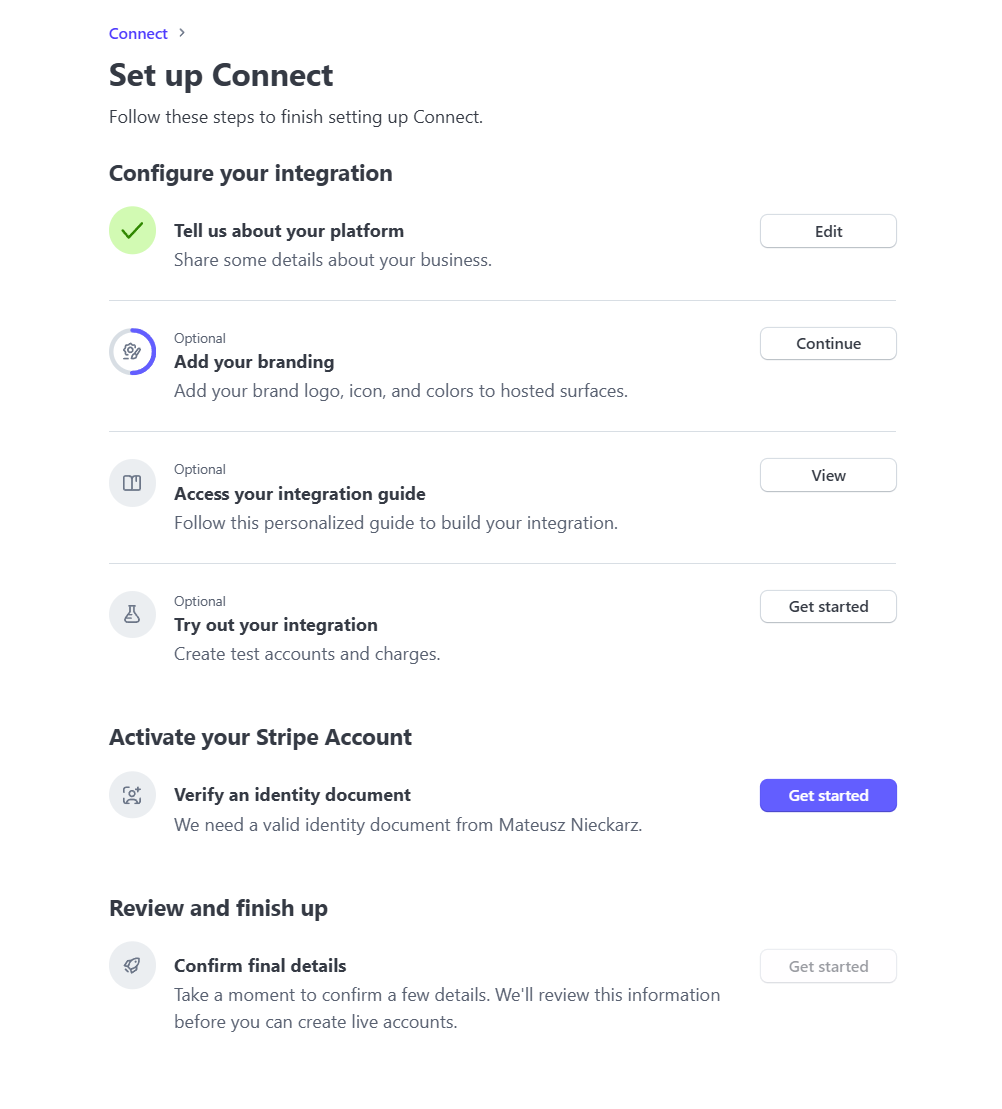
Follow next steps to finish setting up Connect.
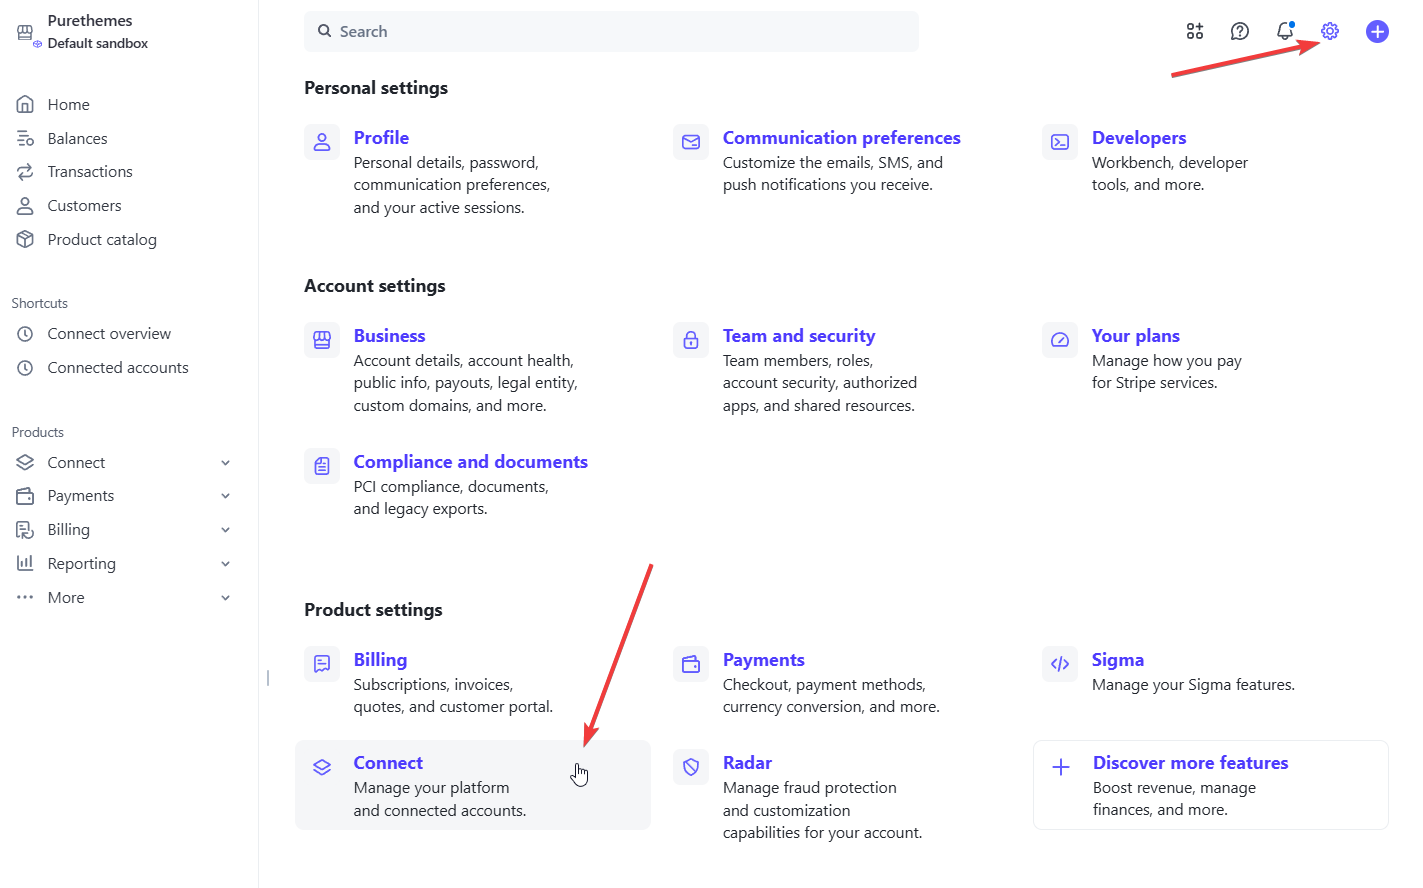
- Get Client ID. For that go to Settings scroll down to Product Settings → Connect box,
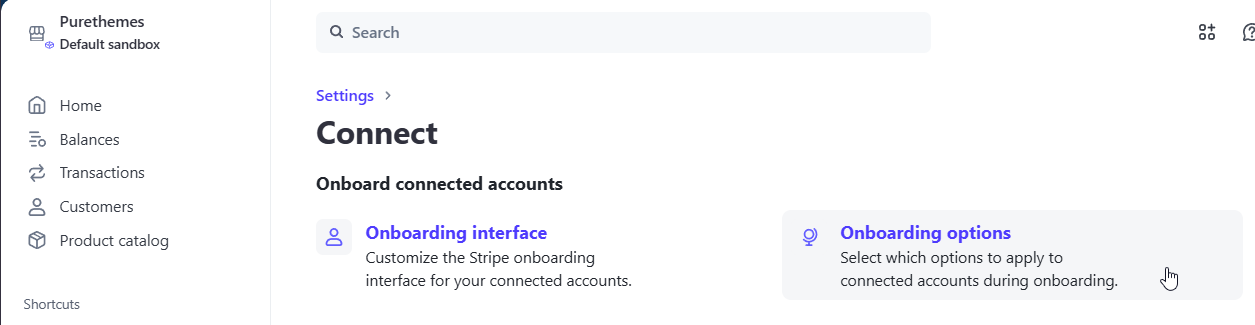
- Navigate to Onboarding Options
- Copy your Test mode client ID and paste it in WorkScout Core → Stripe Connect → Stripe Connect Test Client ID.
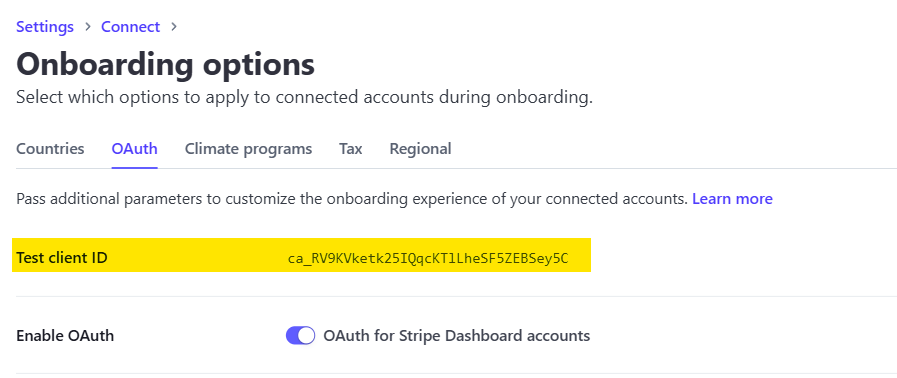
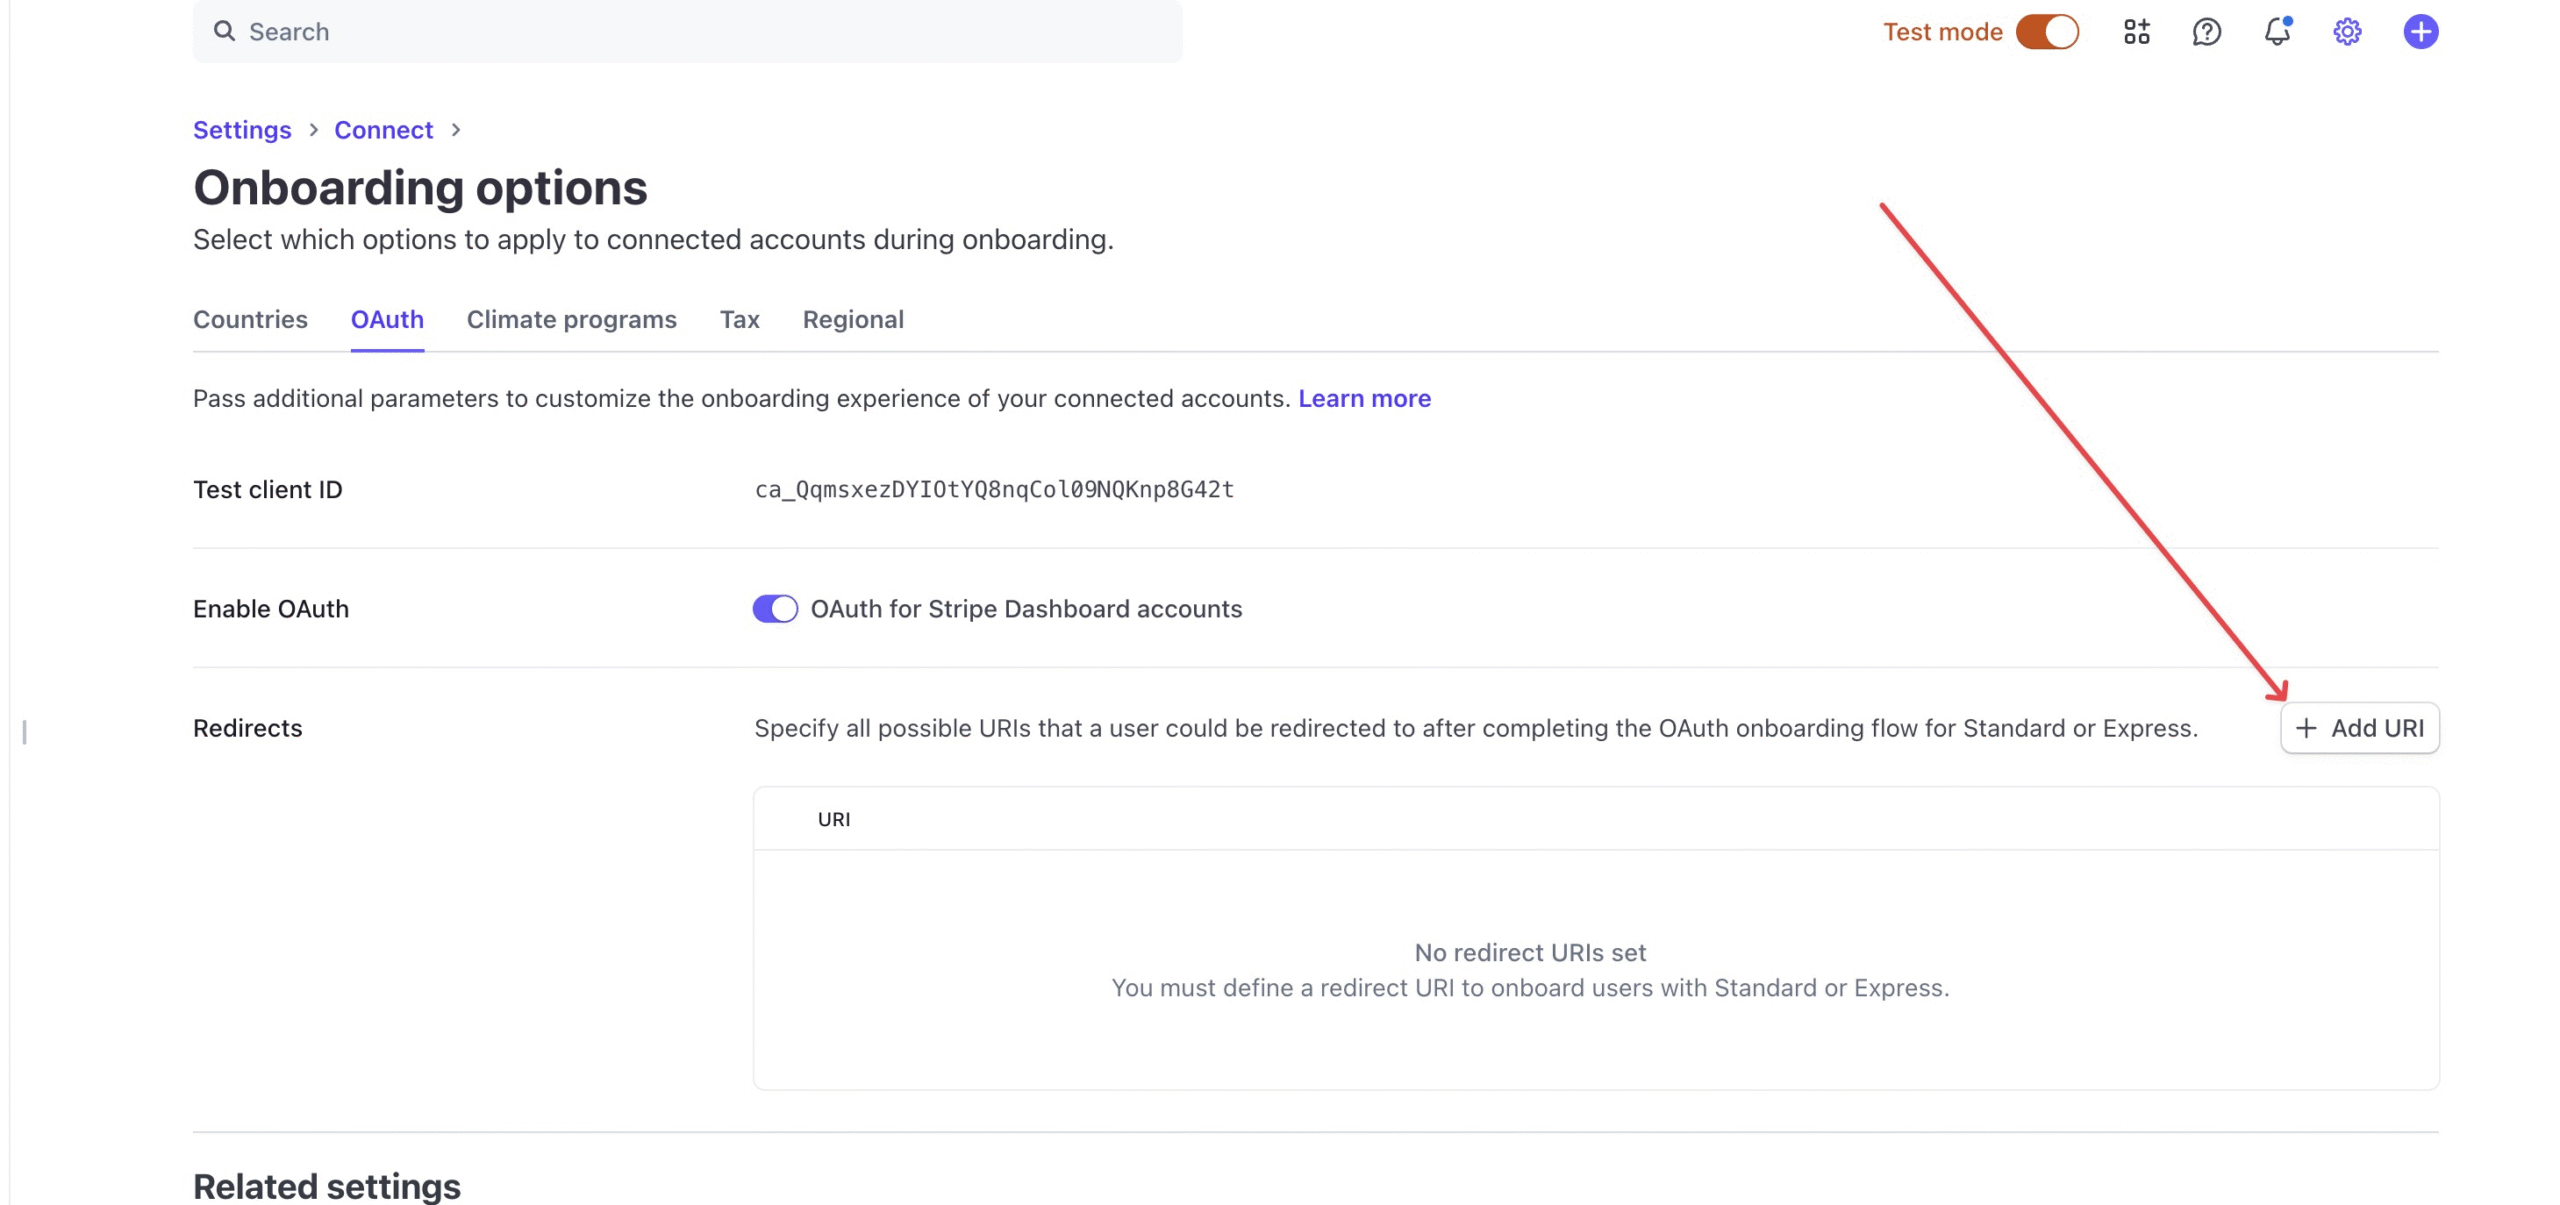
and turn on OAuth Settings - in Redirects section click +Add URL, and add there a link to your wallet page with /?stripe-setup=yes at the end, so the whole link would be
https://www.yourdomain.com/wallet/?stripe-setup=yes
- Now Switch to Live mode and repeat those steps, get the Live Client ID to set it in WorkScout Core, enable OAuth settings and add Redirect.
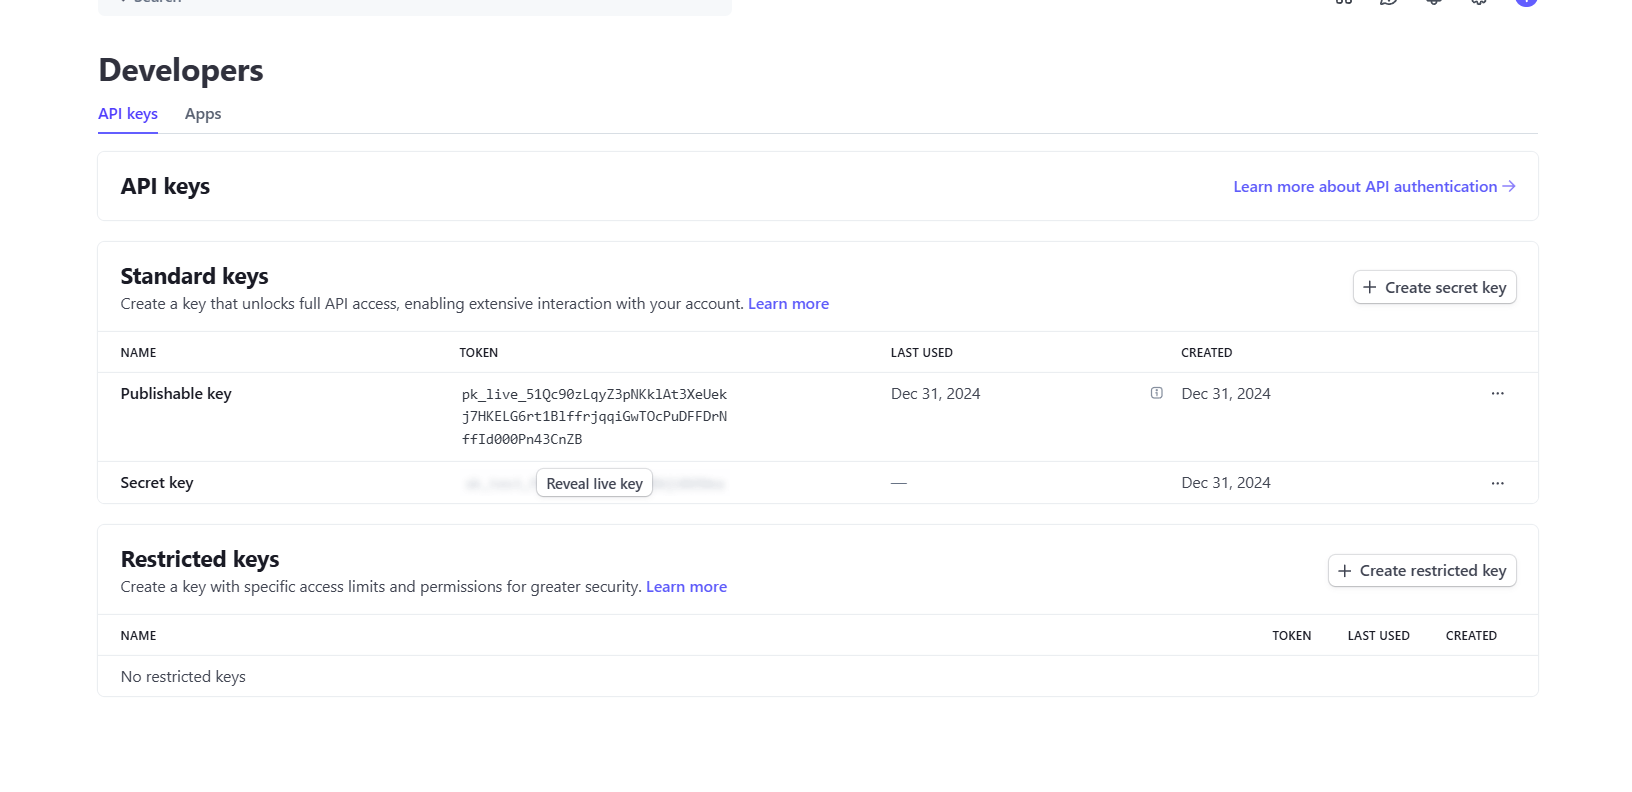
- In Stripe Dashboard →Developers you’ll find Publishable and Secret Key, copy them to WorkScout Core → Stripe Connect fields, there are inputs for both keys for test and live mode, and you need that to onboard users. If you can’t copy/reveal the Secret Key in Stripe Dashboard, you can create a new one using “Create secret key” button.
- Review all other options
Setting Up WooCommerce Payment Gateway
- Install WooCommerce Stripe Payment Gateway
- Go to WordPress Admin → WooCommerce → Settings → Payments, find Stripe on the list, go to Manage and connect to your Stripe account you’ve just created in step before.
- It should automatically get all required API keys, but to be sure go to Settings, click Edit Account Keys and make sure both test and live keys are set.
- Set the webhook in your Stripe Account Settings as it’s explained in the popup. It’s important as this webhook is what is used to get data about payment. Make sure the webhook type is set to Account, not Connect.

- It’s important to know that this feature in WorkScout is in its early stage and although we did a lot of testing we strongly encourage to run it in Test mode first to make sure everything works as expected. To do that go to wp-admin → WooCommerce → Settings → Payments → Stripe → Manage → Settings and check the “Enable test mode” checkbox

After Connecting to Stripe, users will have a new box in Wallet page with few informations about his account and option to login directly to Stripe Dashboard to see all details about the payments to his account.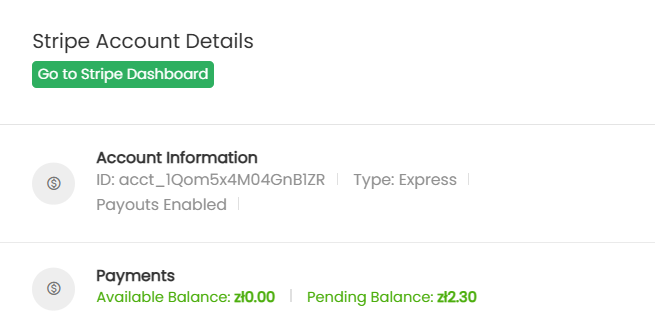
Example view of Stripe Dashboard for freelancer


