WorkScout offers drag&drop field editor for login and registration page. In this article we’ll present how to add custom field to registration form.
Adding custom fields to registration form
Step 1
First you have to create custom field. Go to WorkScout Core → User Fields. There are two tabs for Candidate and Employer as you can set those fields separately for each role.
For this guide purpose we will add VAT Number field for employers.
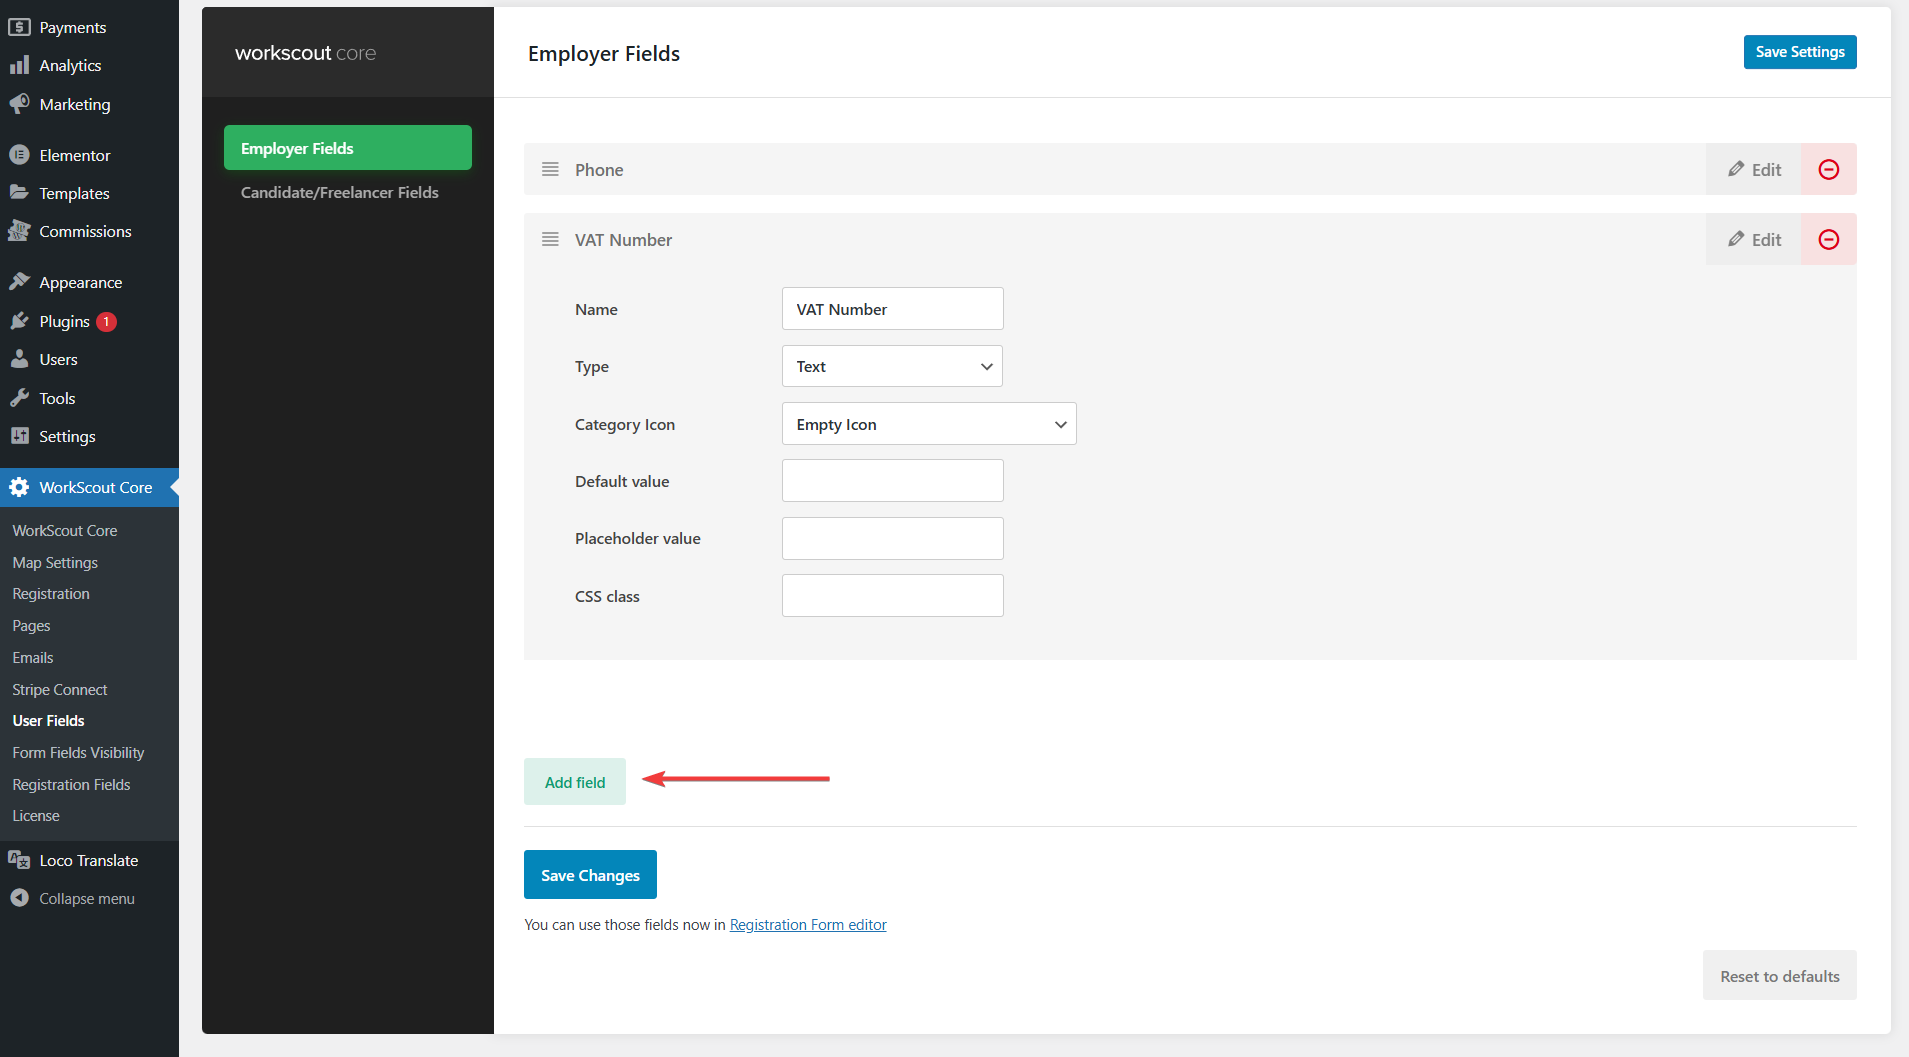
Click the green button Add field, type a name and click OK, you will see box with new field and options for that field. You can switch Type of this field to dropdown, radio, checkbox or even file upload field. You can add icon aswell.
Step 2
When you are ready click Save Changes and go to WorkScout Core → Registration Fields. Here you will see the field you’ve just created in the Available Fields section in the right side, you can simply drag&drop it to the fields area, and save.

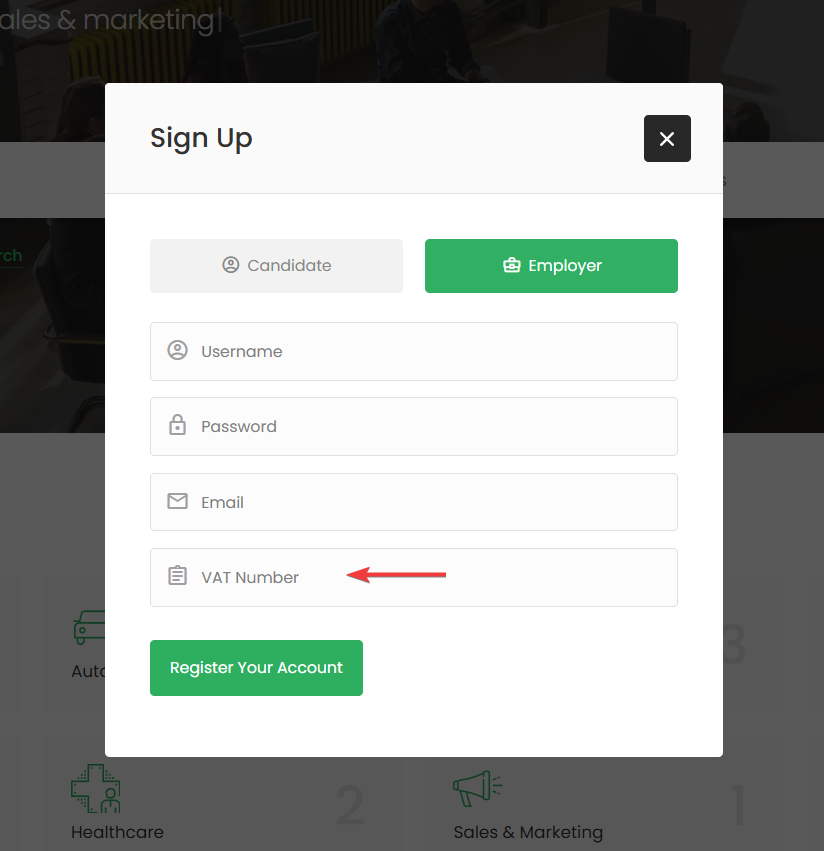
That way this field will be now added to your registration form. You can change the label or set a new icon for that field.
The field you created will also be visible in WordPress Admin → Users. For example, if you add a file upload field, you can download the file by going to Users, clicking “Edit” on the user you want to access, and finding the field with the attachment.

