Moving a directory between platforms usually means rebuilding every listing by hand. Not anymore. The Listeo Migration plugin automates the entire transformation directly in your WordPress database, in one guided process. Type mapping, attribute mapping and a read-only preview let you verify everything before a single row is changed.
If you’ve been running your directory on HivePress, ListingPro or Directorist and want Listeo’s built-in bookings, marketplace and AI-powered search (see why users switch from HivePress →), this guide walks you through the whole migration step by step.
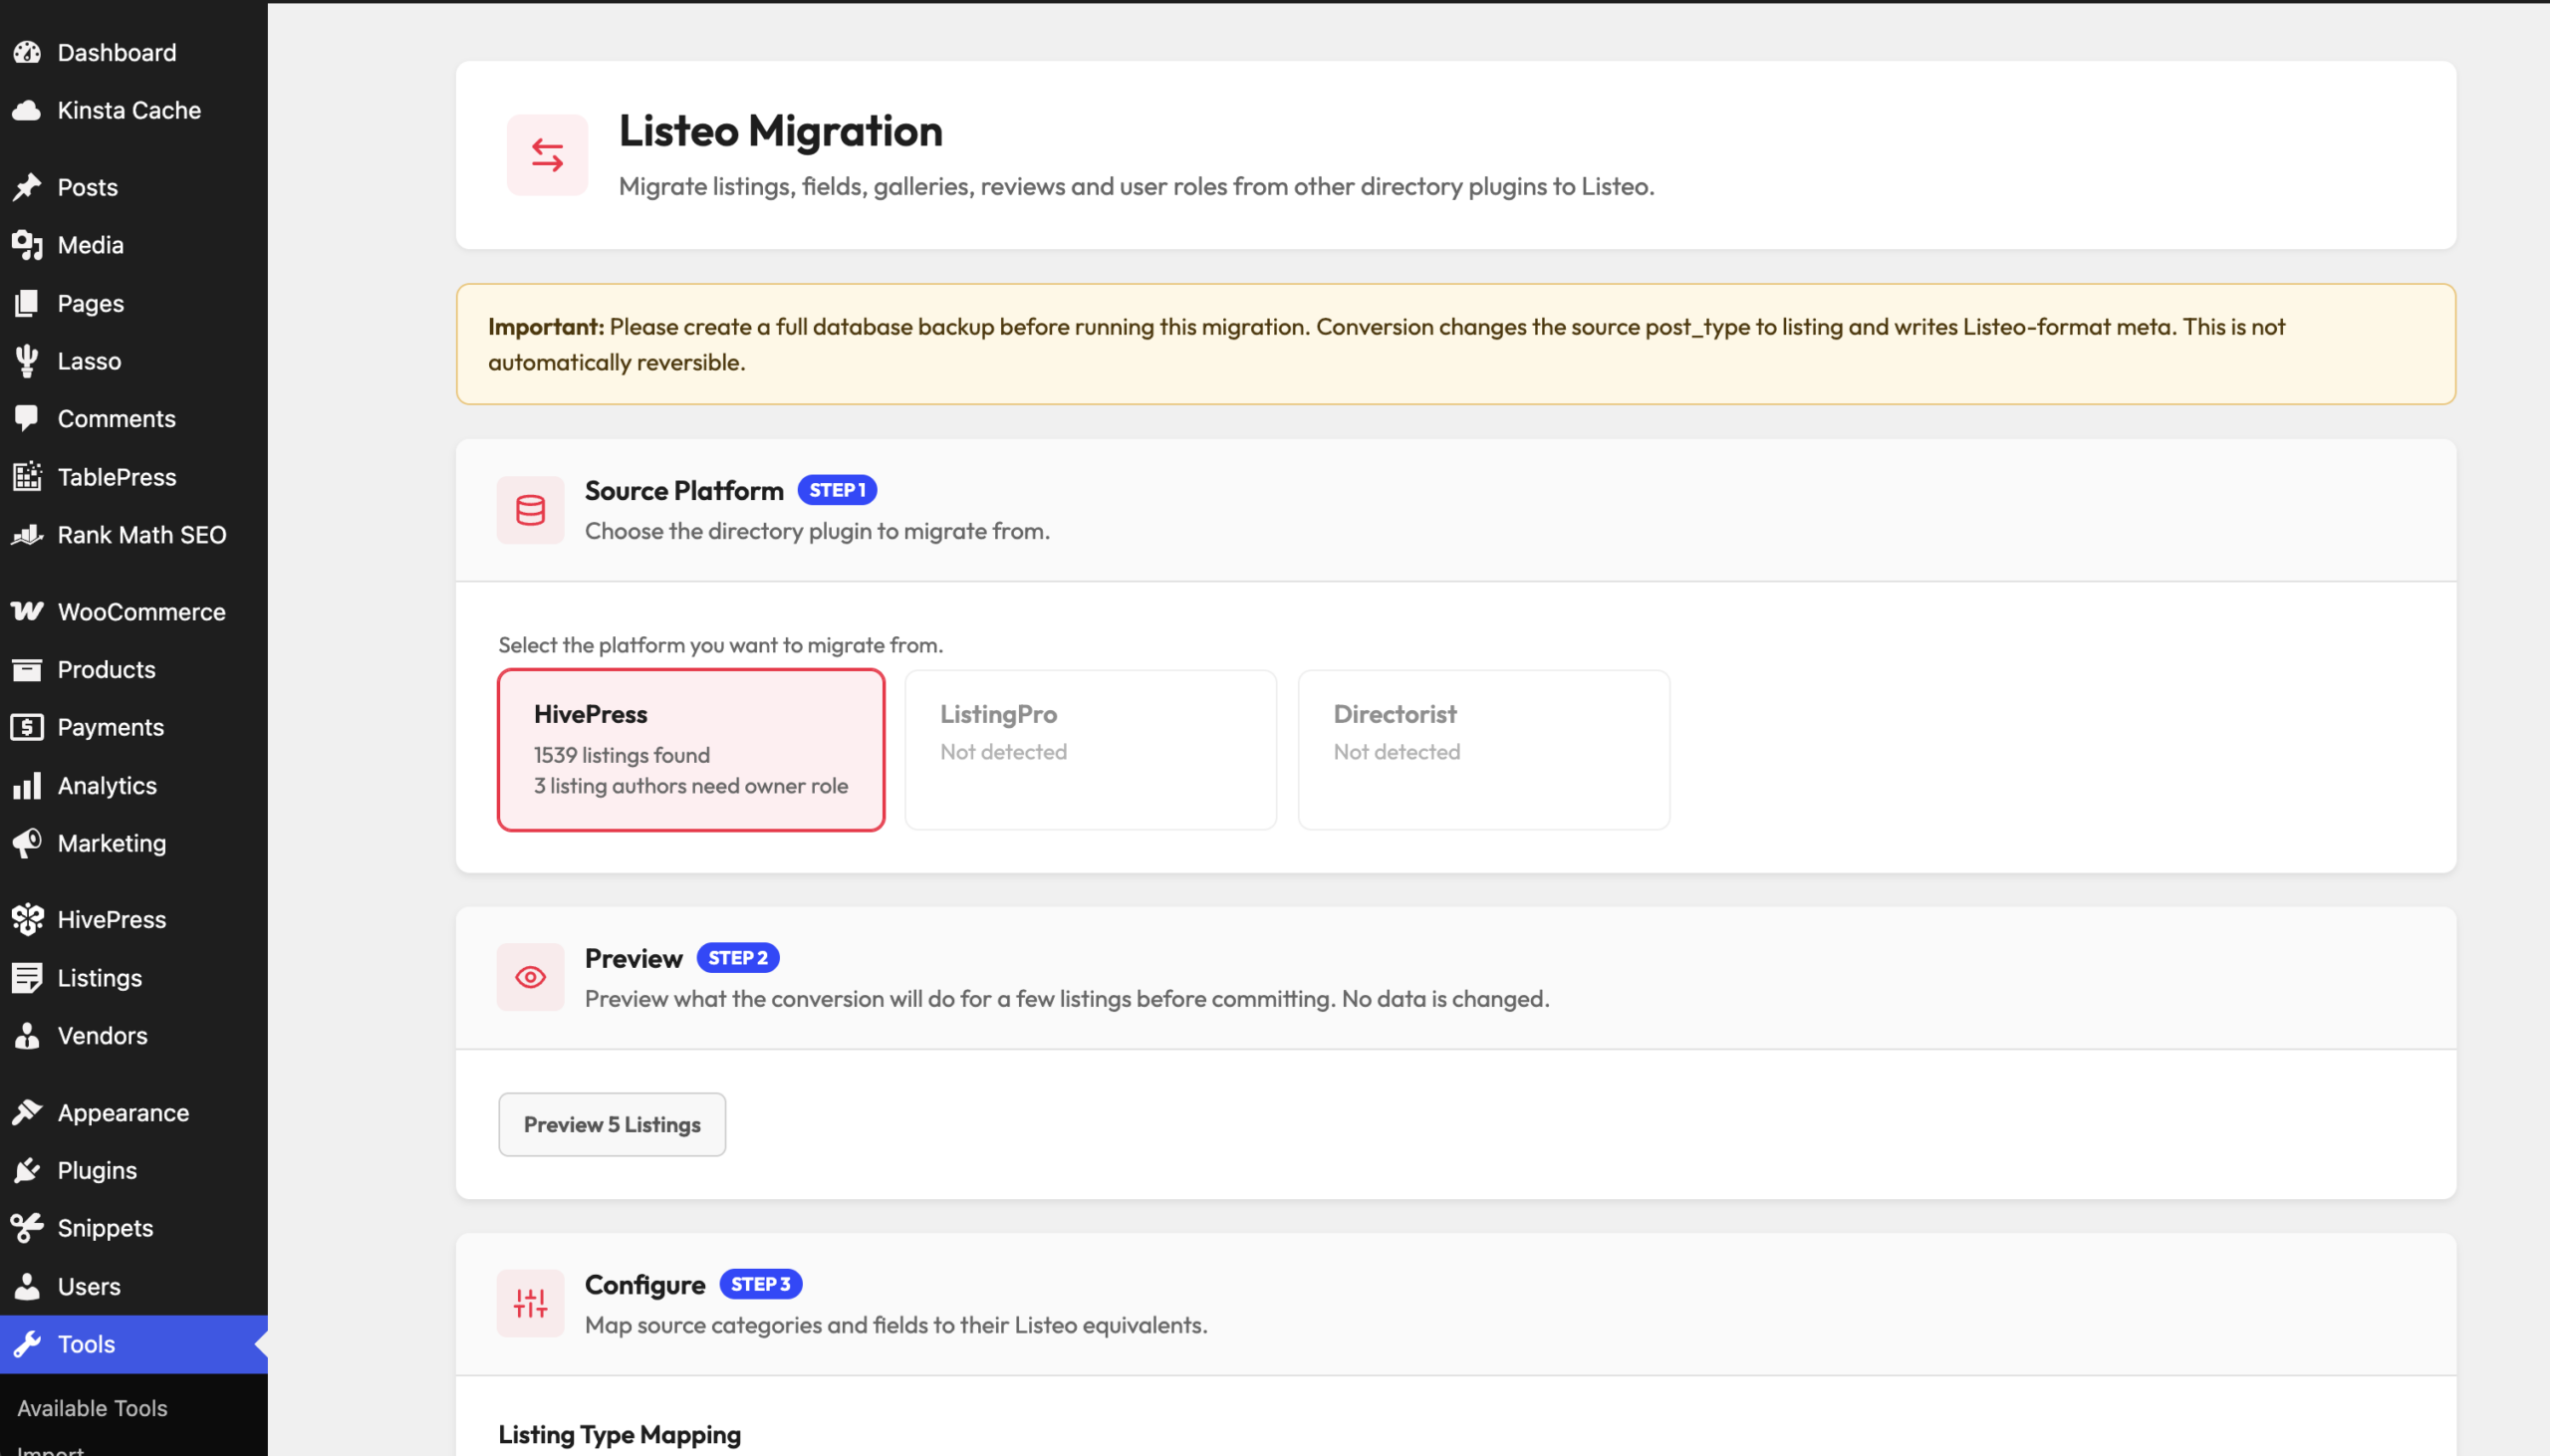
Listeo Migration plugin settings
✅ FREE add-on converts directly in your database (NO export/import round-trip):
1. Listings (published, draft, pending & private — titles, descriptions, slugs, authors)
2. Categories (mirrored to Listeo, missing ones created automatically)
3. Custom Fields / Attributes (mapped to existing Listeo fields, new fields or amenities)
4. Geolocation (Latitude & Longitude for Map Pin + Address)
5. Gallery Images (featured image kept separate — no duplicated covers)
6. Reviews & Star Ratings (with recalculated average rating per listing)
7. Listing Types (service / rental / event / classifieds — manual map or auto-detect)
8. User Roles (listing authors get Listeo’s “owner” role for dashboard access)
9. Featured & Verified badges
10. Contact Details (phone, website, email & socials pre-mapped out of the box)
Installation & How to use?
- Download .zip https://purethemes.net/listeo-migration.zip with Listeo Migration plugin
- Upload listeo-migration.zip in WP Dashboard → Plugins → Add New and install & activate. Do this on the site that still contains your HivePress, ListingPro or Directorist data — you switch the theme after conversion, not before.
- Go to Tools → Listeo Migration. The converter automatically scans your site and shows how many HivePress, ListingPro or Directorist listings were found and how many listing authors still need the Listeo owner role. If no data is detected, there’s nothing to migrate. 🙂
- Preview before you convert. Click “Preview 5 Listings” to see a read-only, field-by-field breakdown — each field, its current value, and the Listeo field it maps to. Nothing is written to the database at this stage.
- Configure the mapping. Assign a Listeo listing type (service, rental, event or classifieds) to each HivePress, ListingPro or Directorist category — or leave it on Auto-detect (a “Hotels” category becomes a rental, “Workshops” becomes an event, and so on). Then review the attribute table and decide where each custom field should go:
– map it to an existing Listeo field,
– create a brand-new custom field (added automatically to Listeo’s Forms & Fields Editor),
– merge it into the amenities/features taxonomy,
– or skip it entirely.Common attributes — phone, website, email, socials, price — are pre-mapped out of the box. You can also enable stripping of Gutenberg block markup from descriptions, since Listeo uses the classic editor for listings. Hit Save Settings when you’re happy with the mapping. - Migrate user roles. Click “Migrate Roles” to grant the Listeo owner role to every user who authored a listing, so your vendors can log into the Listeo dashboard right away. Existing accounts, passwords and profiles are untouched.
- Hit “Start Conversion” and let the magic happen. Listings are processed in small batches with a live progress bar and per-listing log, so even directories with thousands of listings convert reliably without server timeouts. When it finishes, a summary shows how many listings were converted, skipped or had errors — with direct edit links for anything that needs attention.
- Switch to the Listeo theme. Activate Listeo, run the setup wizard and open a few migrated listings to verify categories, map pins, galleries and reviews. That’s it — your directory is now running on Listeo with bookings, listing packages and all other built-in features →
FAQ
-
Is the Listeo Migration free?
-
Will I lose my reviews and ratings?
-
Do my users need to re-register?
-
What happens to my custom attributes?
-
Can I re-run the conversion?
-
Do I need WP All Import or a CSV export?
-
What about my listing photos?


 Cloudflare Markdown for Agents