Listeo User Group on Facebook
With the drag and drop editor you can add, rename and reorder the fields of the Add Listing form, separately for each listing type. You can also add fields that only one type needs, for example rooms for apartments or engine data for cars.
Go to WP Admin → Listeo Editor → Add Listing Forms. Each listing type has its own tab, for example Submit Service Form, Submit Rental Form or Submit Event Form.
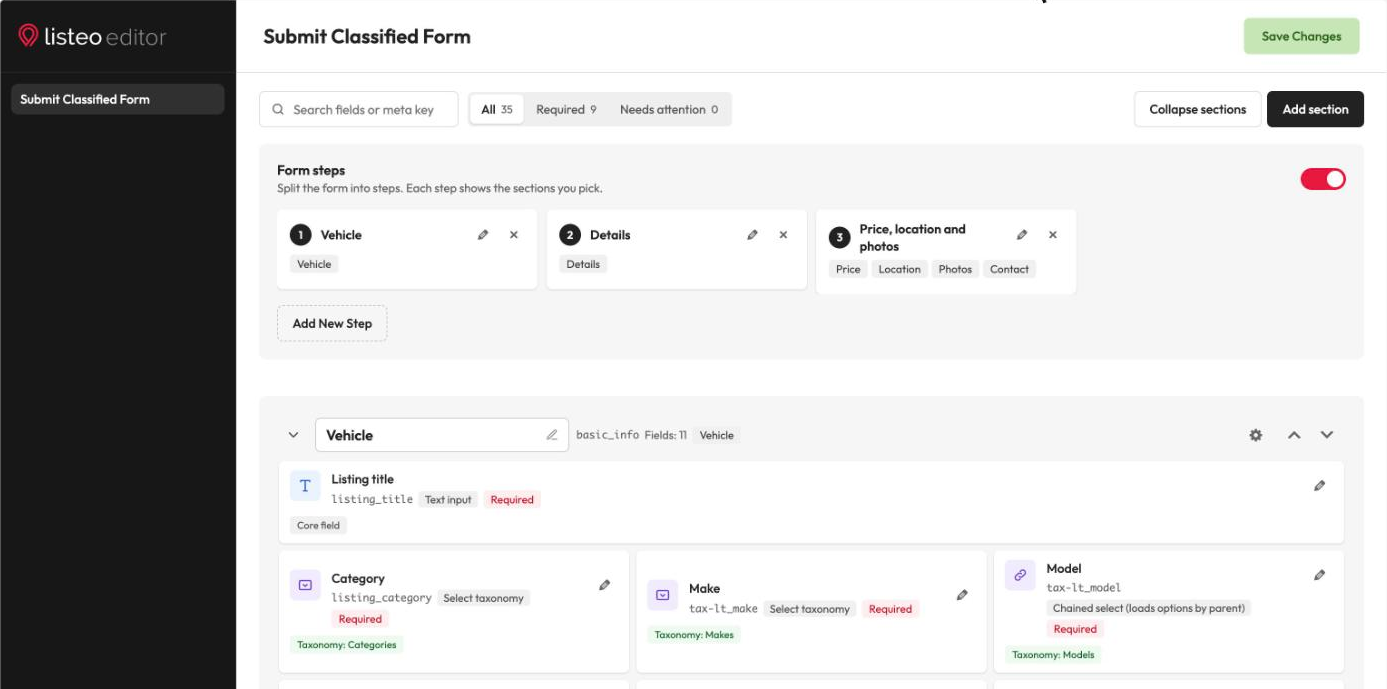
How the Screen Works
- Sections are cards (Basic Information, Location, Gallery, Details…). Click a section title to rename it, use the arrow to collapse it, or Collapse sections to fold them all. Add section creates a new one.
- Fields inside a section show their type, width and badges such as Required. Drag fields to reorder them or to move them to another section.
- Every field shows where it comes from: Listing field (a field from Listeo Editor → Listing Fields, with its type), Taxonomy (for example “Taxonomy: Makes”), Core field, Add-on or Booking.
- Search and filters: find a field by name or meta key, or show only Required fields or fields that Need attention. While the list is filtered, drag and drop is off.
- Edit a field by clicking it. Its settings open in a side panel. Click Save Field, then Save Changes to keep the change.
- Save Changes is in the header and in the save bar at the bottom, next to Reset to defaults. An Unsaved changes label shows when something is not saved yet.
Adding a Field
- Click Add new field in the section where the field should go.
- Pick the field from the list. It is grouped into Listing fields, Taxonomies, Core fields, Add-ons and Other fields. If a field has a matching taxonomy (for example a “Make” field and a “Makes” taxonomy), the list points to it as Similar taxonomy.
- Set the label, type, width and Required in the side panel, then Save Field and Save Changes.
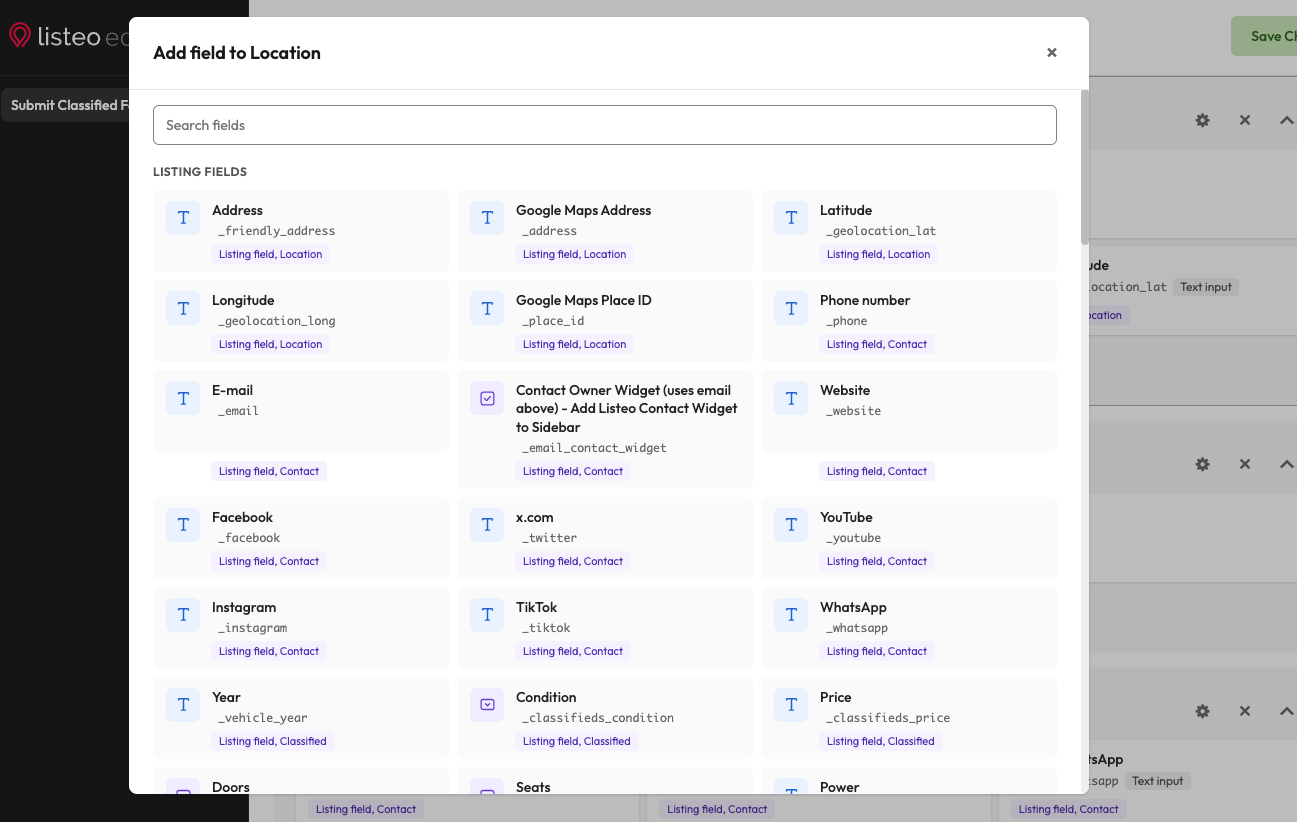
To add a field that does not exist yet, create it first in WP Admin → Listeo Editor → Listing Fields. The field types there are Text, Textarea, Select, Multi Select, Checkbox, Multi Checkbox, Date time, File upload and Repeatable. For taxonomies of your own (Fuel, Body type, Make), use Listeo Editor → Taxonomies: Custom Taxonomies.
Warnings and One-Click Repairs
The editor checks whether each element’s type fits its source. When something does not fit, a notice lists the elements with a label Problem, Check or Note. It is only a warning: you can still save. Examples:
- A field uses “Select taxonomy” but is not linked to a taxonomy. The form then lists the terms of all taxonomies and saves the term ID as plain text.
- A taxonomy element uses a type that cannot save terms, for example a text input.
- A taxonomy element is set to “Skipped input”.
- A taxonomy is not enabled for this listing type in Listeo Editor → Taxonomies, so the form neither shows nor saves it.
- A field’s type in this form differs from its type in Listing Fields.
Open the element to see the details. The side panel shows the source (Element), the Meta key and the type in Listing Fields, and may offer a repair, for example Use “Select taxonomy” or Replace with Makes. A repair changes the form only. Nothing is saved until you click Save Changes, and listing values already saved are never deleted.
Chained Select (Make → Model)
If a custom taxonomy has a parent taxonomy (for example Model with the parent Make), its element can use the type Chained select (loads options by parent). Owners first pick a make, then see only that make’s models. A model that does not belong to the chosen make is refused on submit.
Put the parent element (Make) in the same form, before the child. The editor warns you when:
- the form has no parent element, so all models are offered;
- the parent is a hidden input, so the child may stay locked;
- the parent is on a later step, or its section is not in any step.
More: Related Taxonomies Chained Select.
Multi Step Form
A multi-step form shows a few sections at a time, so owners are not overwhelmed by a long form.
- Open the form and switch on Form steps (“Split the form into steps. Each step shows the sections you pick.”).
- Click Add New Step, enter a Step title and click Add Step.
- In each step card, pick the sections that step shows.
- Click Save Changes.
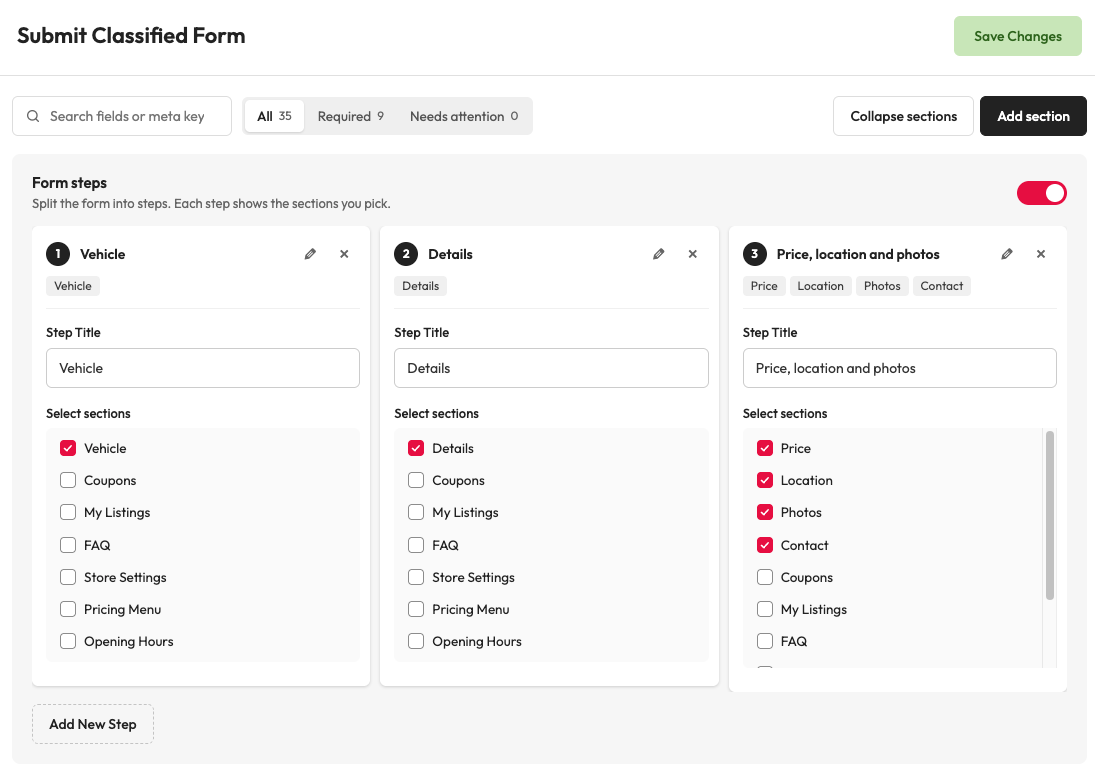
A section that is in no step is marked Not in any step and is not shown in the form.
Additional settings in Listeo Core → Submit Listing
| Setting Name | Option/Details |
|---|---|
| Form Features & Modules | |
| Disable Bookings module | By default bookings are enabled, check this checkbox to disable it and remove booking options from Submit Listing checkbox |
| Disable Submit form modules | Select specific modules to disable in the submit listing form checkbox_multi Options: FAQ section, My Other Listings section |
| Content Approval & Notifications | |
| Admin approval required for new listings | Require admin approval for any new listings added checkbox |
| Admin approval required for editing listing | Require admin approval for any edited listings checkbox |
| Notify admin by email about new listing waiting for approval | Send email about any new listings added checkbox |
-
Do I have to fix every warning?
-
A taxonomy set to Skipped input removed terms from listings. Is that fixed?
-
My new section disappeared after saving.