Live Chat availability controls when visitors and the AI can request a human. Alert settings decide how your team is notified when a handoff begins.
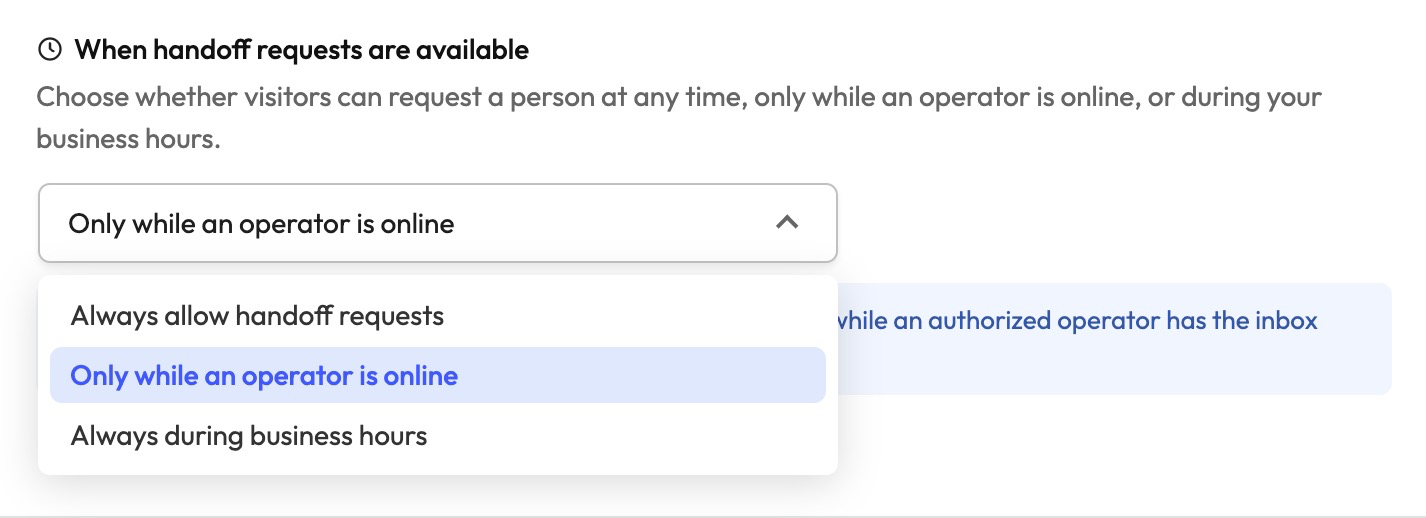
Choose when handoff requests are available
The When handoff requests are available setting controls both the visitor handoff button and the AI handoff tool.
| Mode | What happens |
|---|---|
| Always allow handoff requests | Visitors can request a person at any time. Email is sent immediately when nobody is online, or after 15 seconds when an online operator has not claimed the chat. |
| Only while an operator is online | The visitor button and AI handoff tool are available only while an authorized operator has the Live Chat inbox open. If nobody joins within 15 seconds, PurioChat sends the email fallback. |
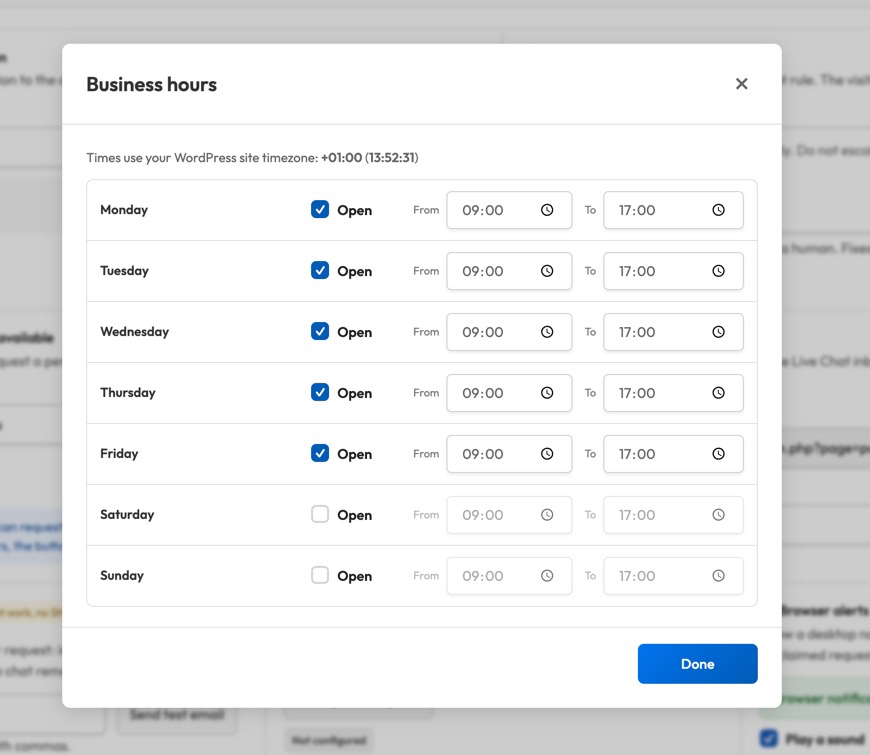
| Always during business hours | Handoff is available during the weekly schedule you configure, even if nobody currently has the inbox open. Outside those hours, the visitor button and AI handoff tool are unavailable. |
If a human request remains unclaimed for one minute, PurioChat returns the conversation to the AI so the visitor is not left waiting.
When you select Always during business hours, use Configure business hours to enable individual days and set opening and closing times. The schedule uses the timezone configured in WordPress.
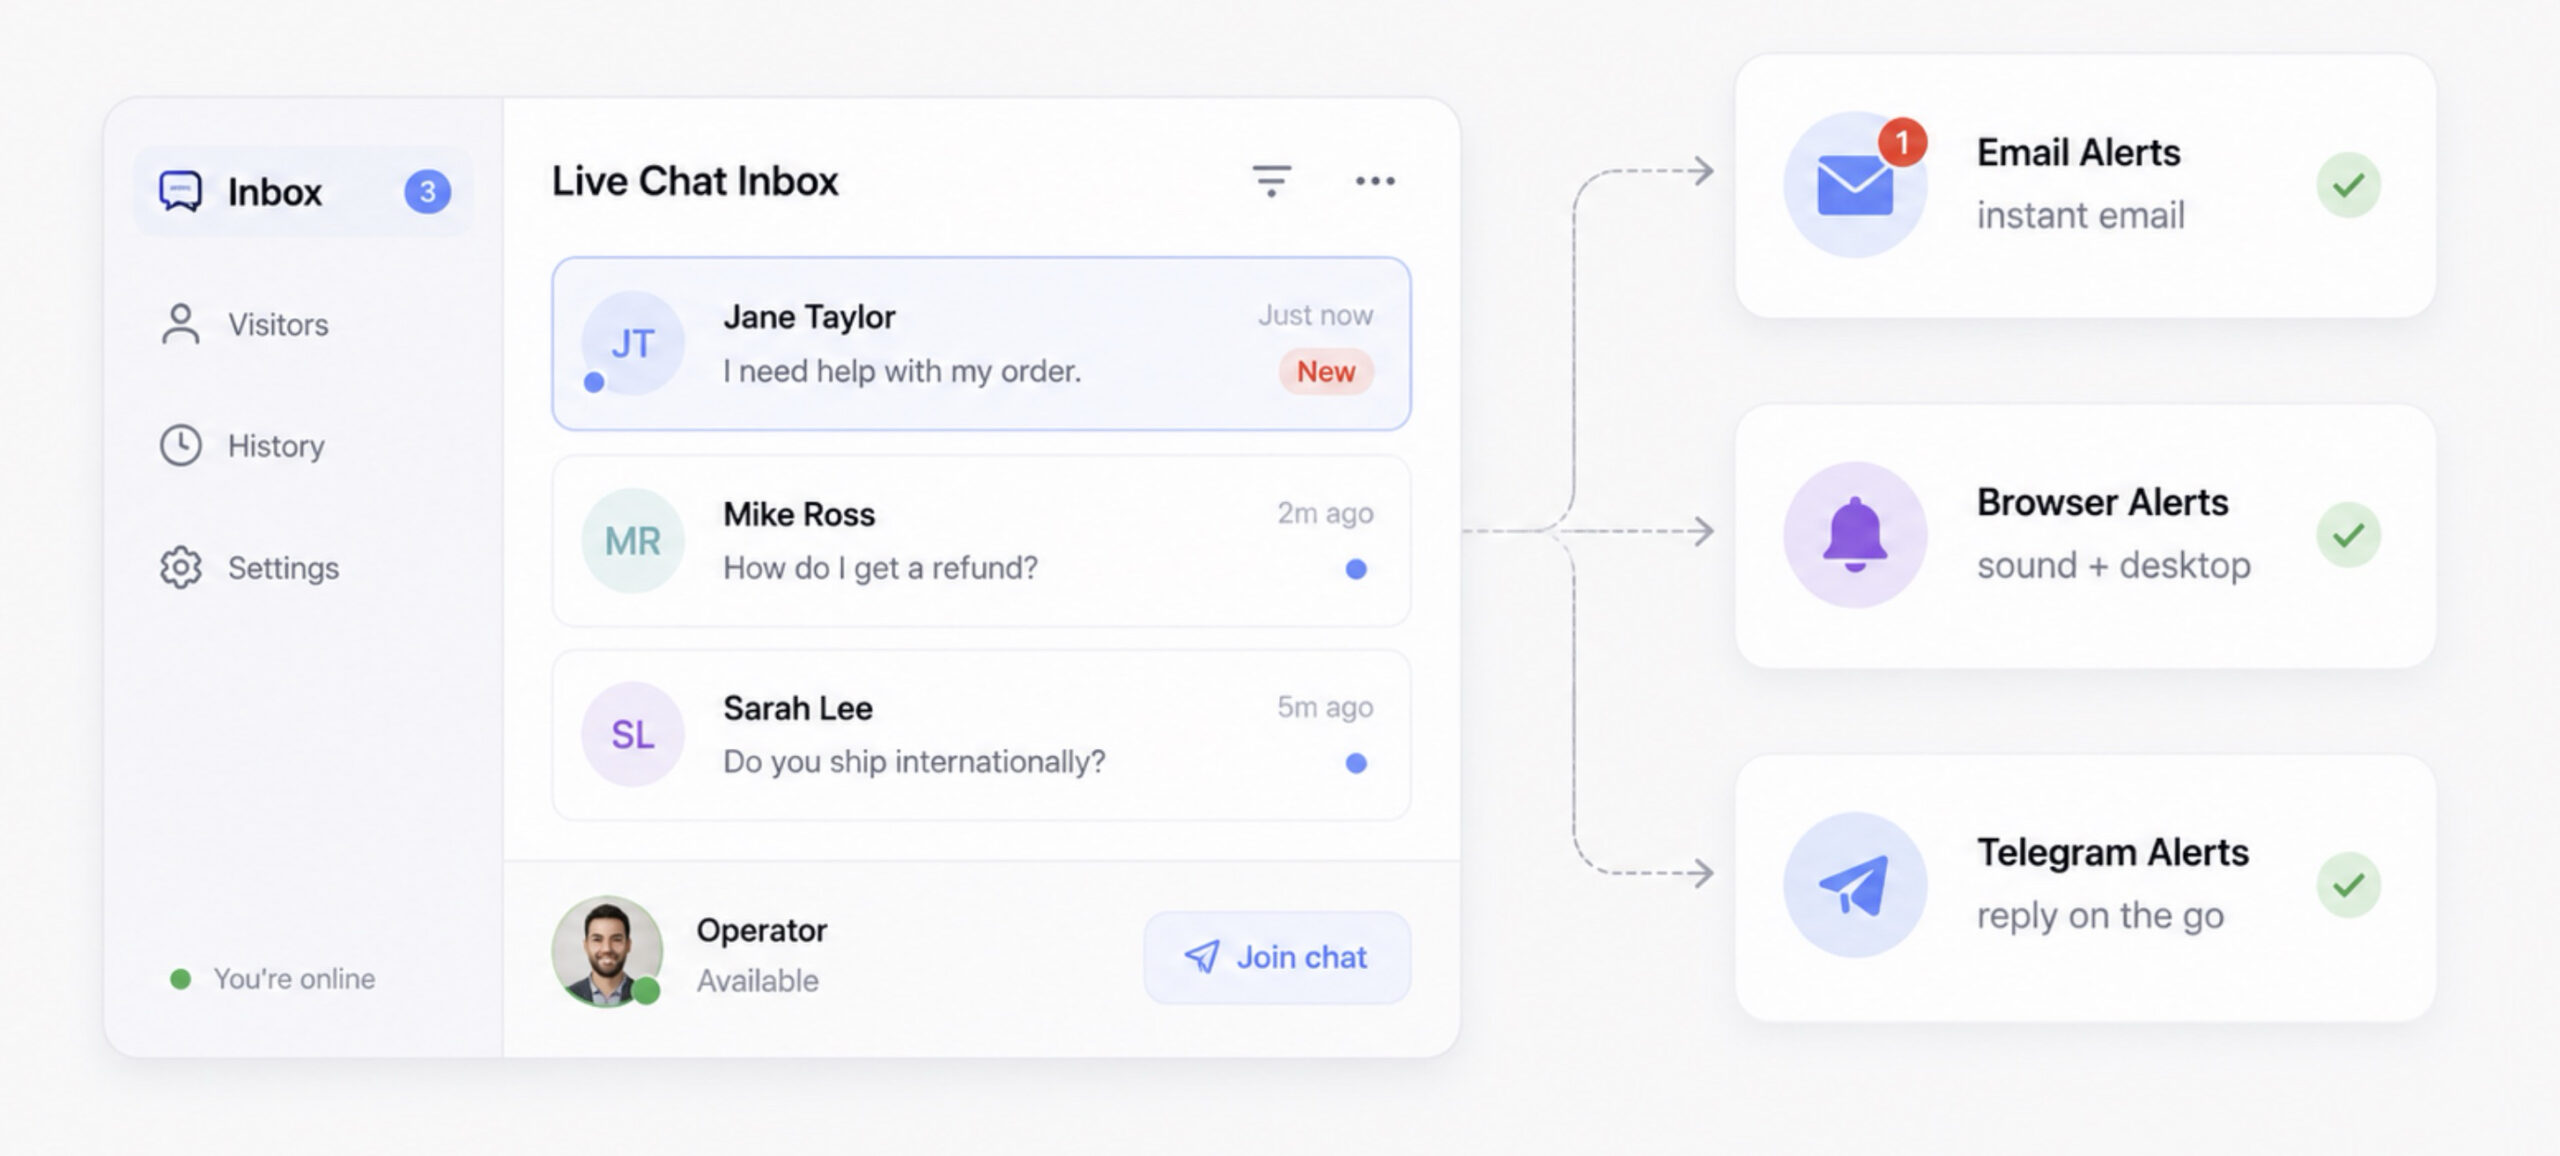
Configure Live Chat alerts
PurioChat supports three alert channels. You can use one or combine all three.
- Email alerts — sent once per request. Email is sent immediately when nobody is online, or after 15 seconds when an online operator has not claimed the chat. Separate multiple addresses with commas and use Send test email to verify delivery.
- Browser alerts — shows a desktop notification while the Live Chat inbox is open. Permission is enabled separately in each browser. You can also enable a sound and use the test button to check it.
- Telegram alerts — sends new handoff requests to a private operator bot immediately. Use a different bot from the customer-facing Telegram AI integration.
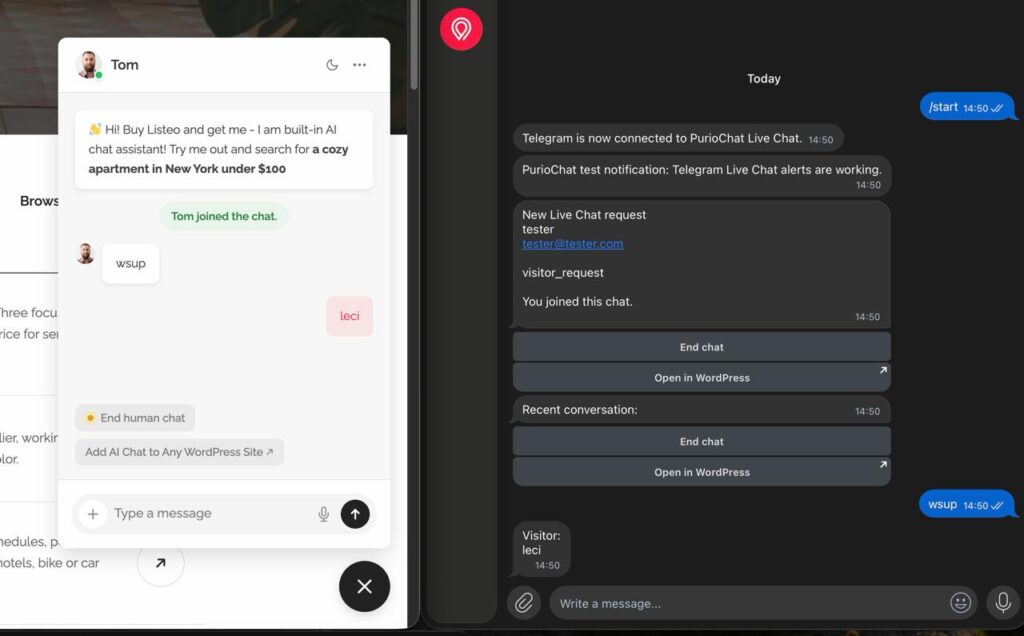
Telegram alerts + live chat

Recommended setup
For most sites, use Always during business hours, keep browser alerts enabled while your team works, connect Telegram for immediate mobile alerts, and configure email as the fallback.