Author Archive

How to create Mistral AI API key?

Mistral AI is a French artificial intelligence company headquartered in Paris and operates under EU jurisdiction with GDPR applicability by default.

Creating MistralAI API Key

  1. Create MistralAI Account

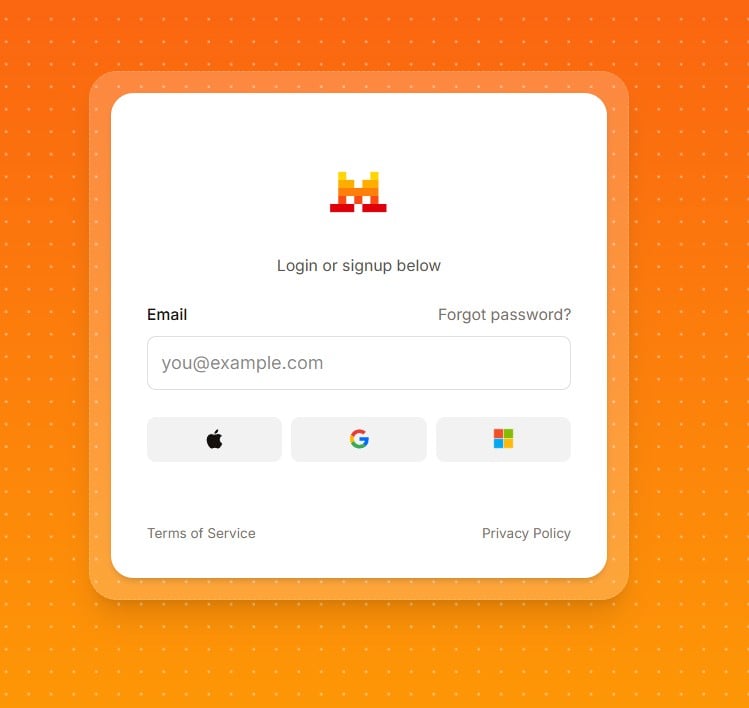
    Go to https://console.mistral.ai/ and register an account

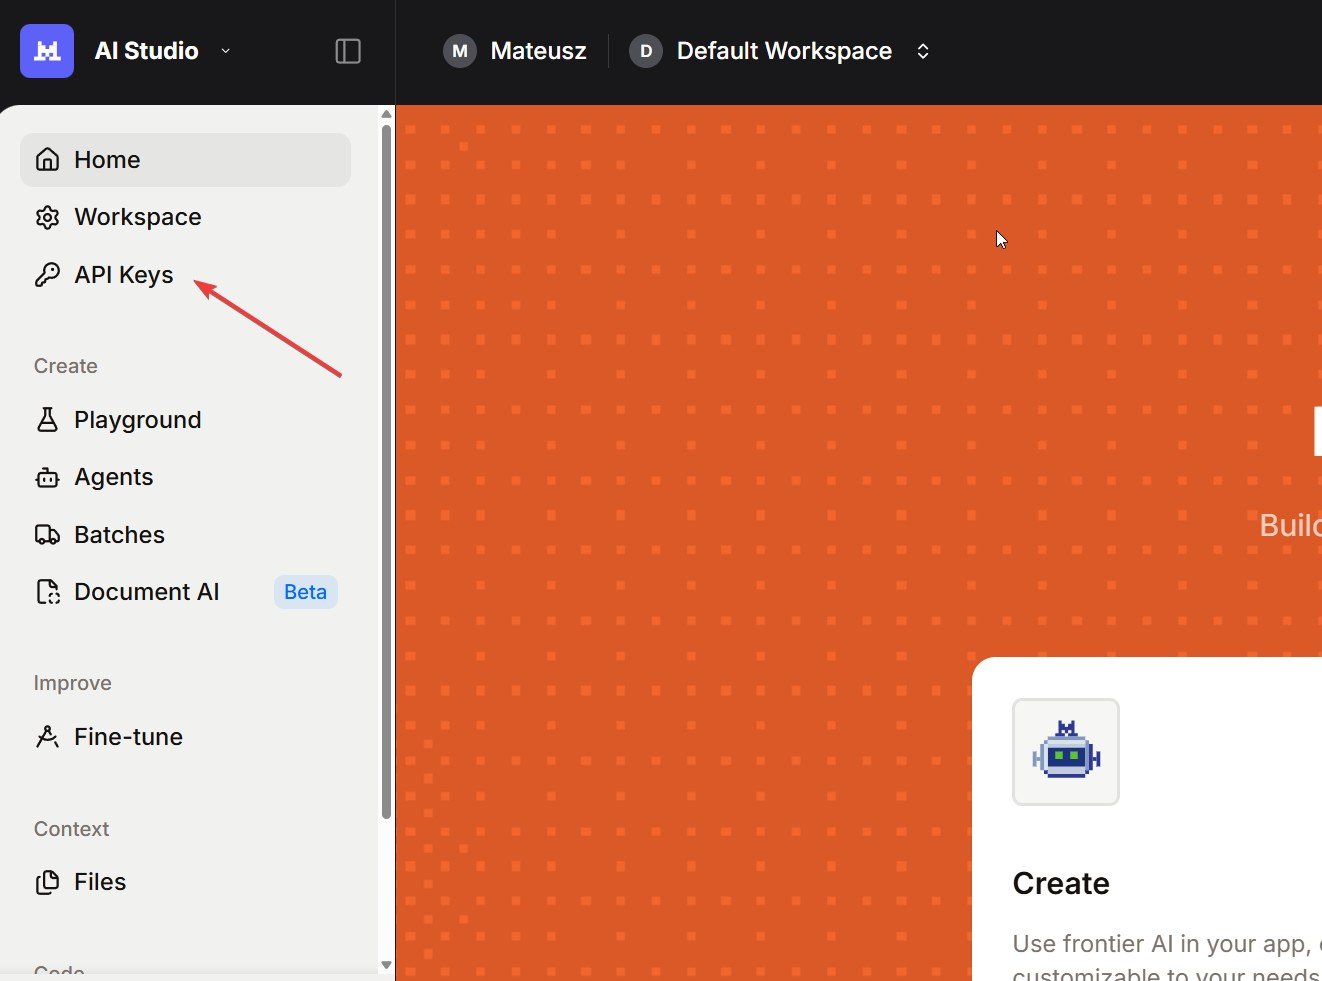
    After signing up, navigate to API Keys https://console.mistral.ai/home?workspace_dialog=apiKeys
    – Click the “Create new secret key” button.
    – This begins the setup process for your API key.

  2. Generate Your API Key

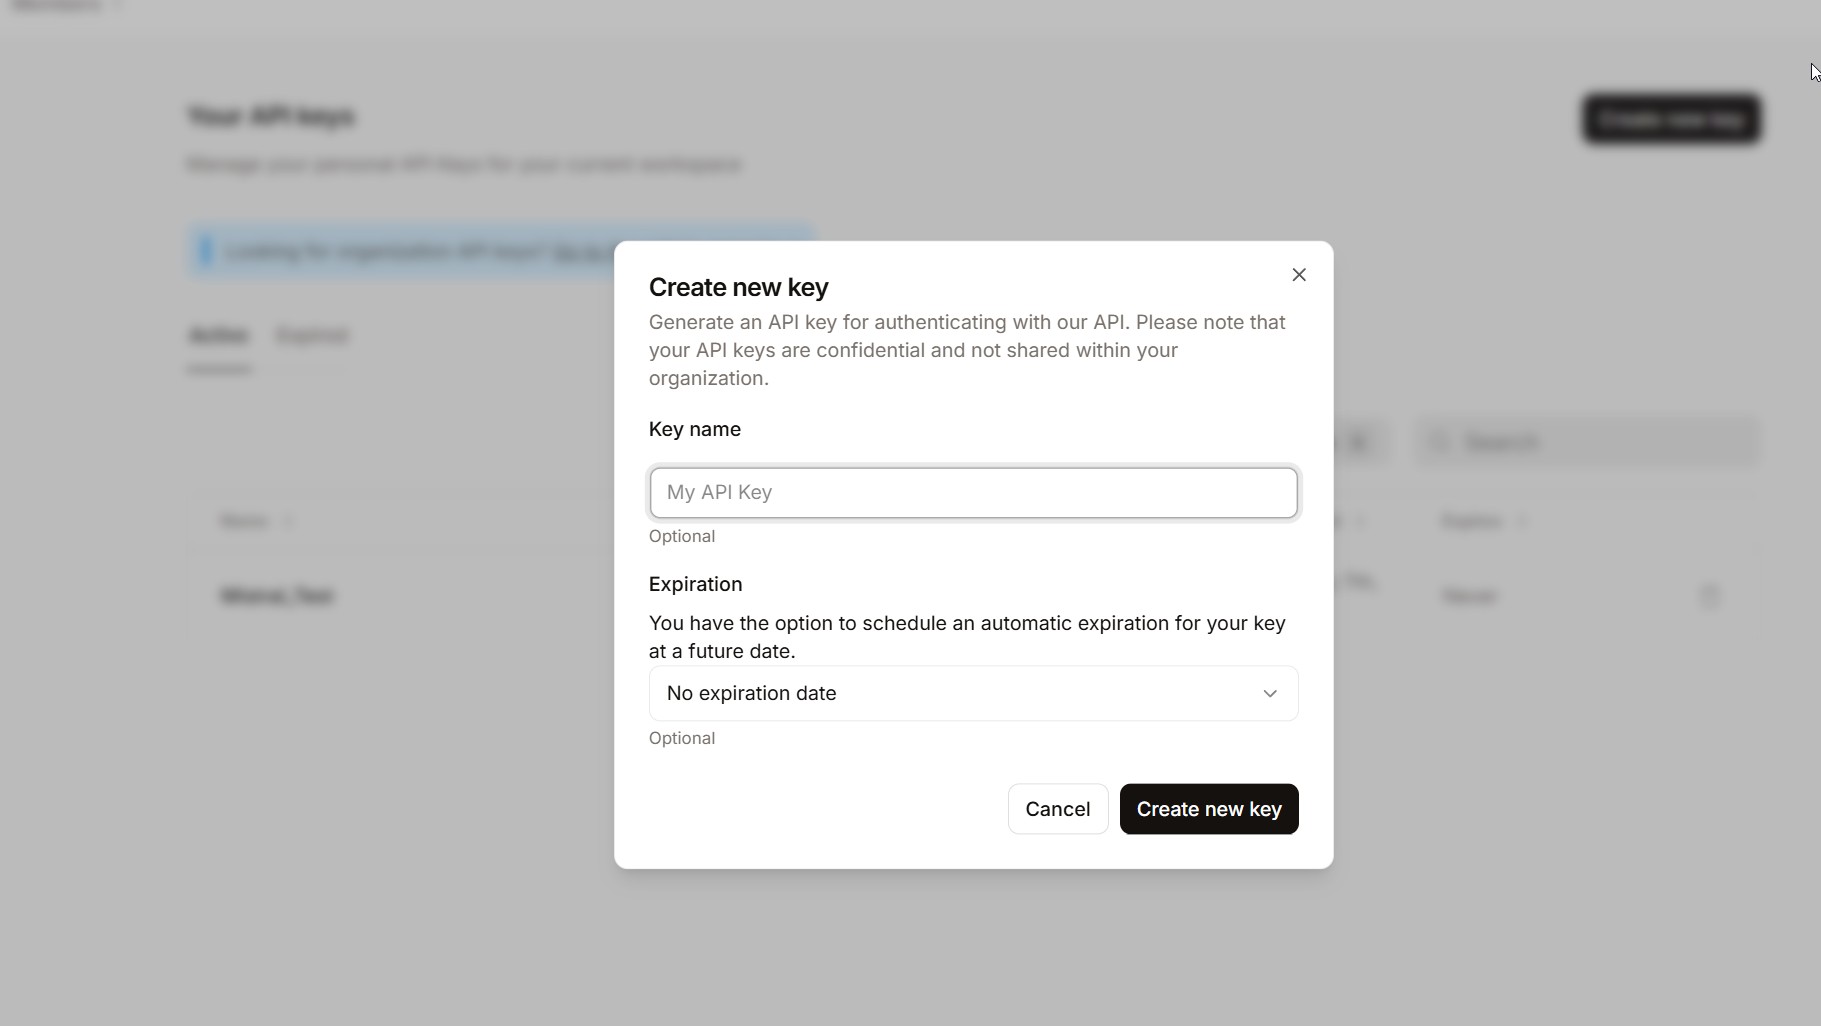
    In the “Create new key” dialog:
    – Enter a name for your key (e.g., demo API key) to identify it later.
    – Choose the project (default is fine unless you have multiple projects).
    – Click “Create new key”

    Your new key will be shown only once — copy it immediately.

    That’s it!


Free Tier Limits

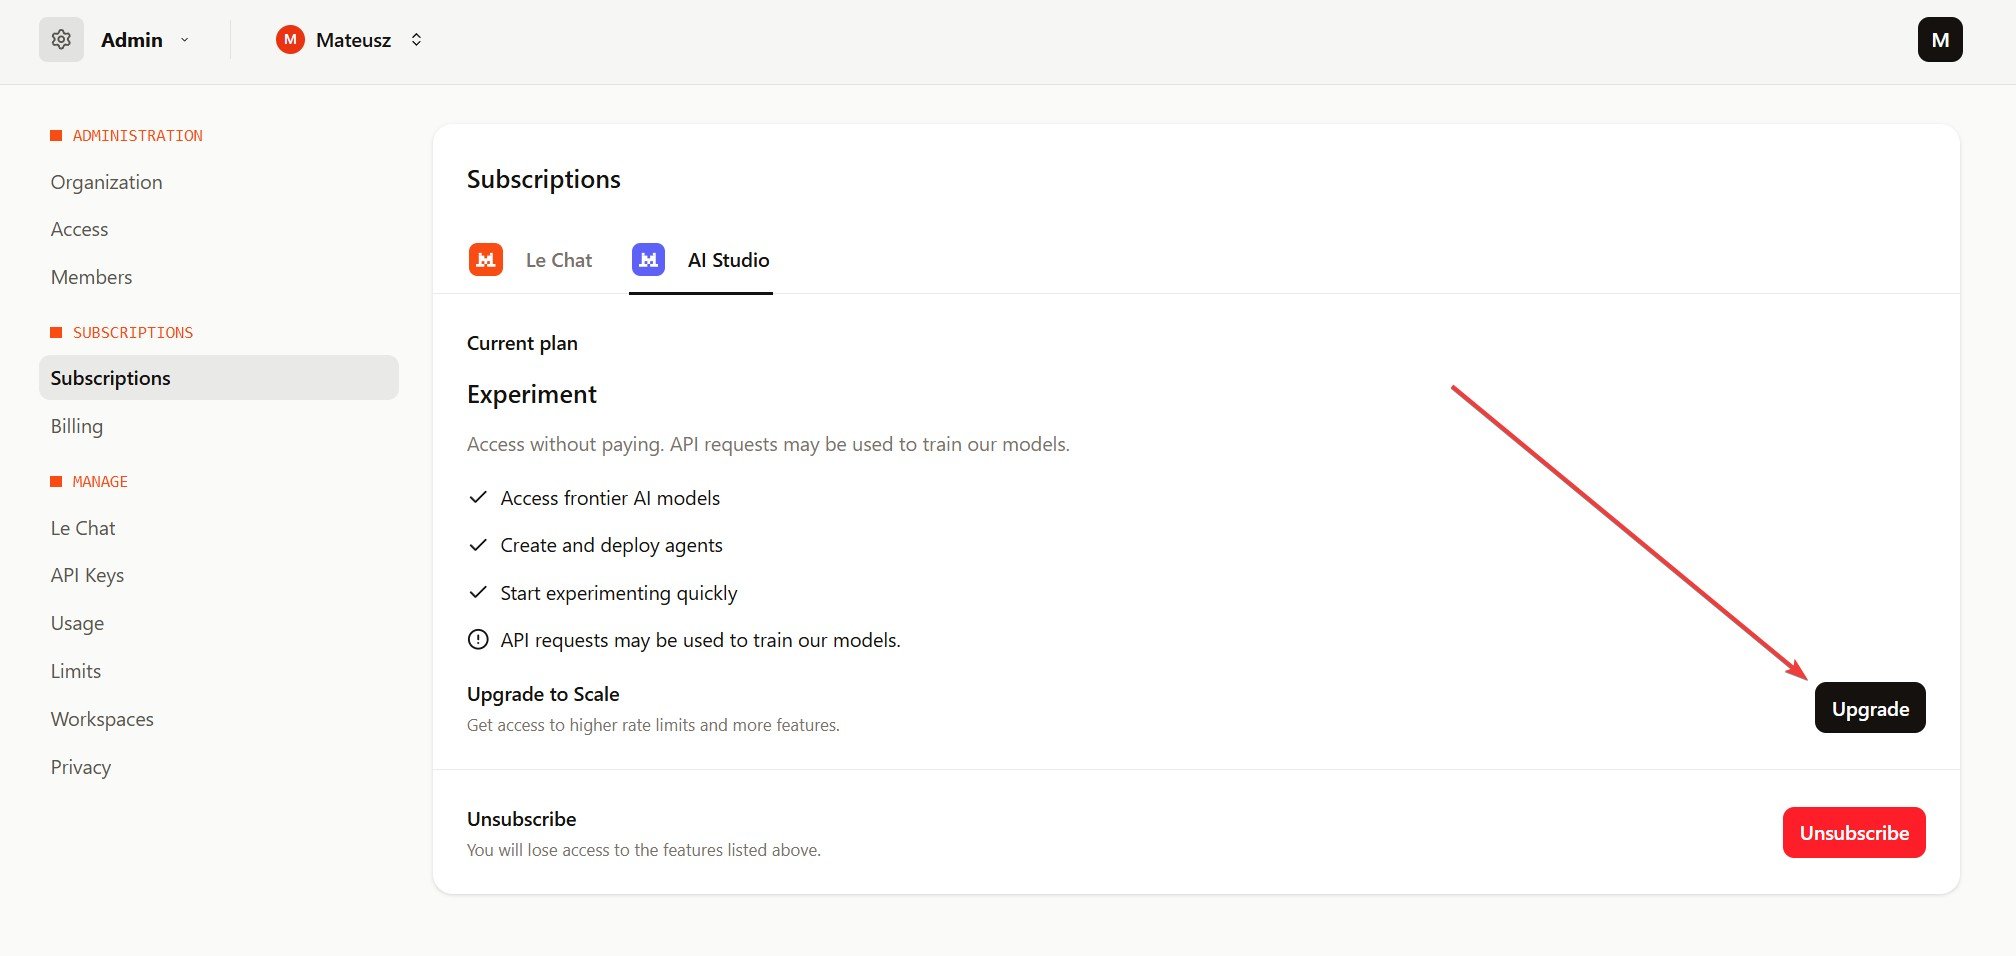
Free tier has only 1 request per second which is quite low and you might want to upgrade to “Scale” plan which is similar to Open AI and you top up credits (min 10 EUR). To do this go to Admin Settings → AI Studio https://admin.mistral.ai/subscriptions?subscription-tab=ai-studio and click Upgrade

Listeo Third-Party Plugin Development Policy

Guidelines for Third-Party Developers

1. Introduction

 This policy establishes guidelines for third-party developers who create plugins, extensions, or add-ons that integrate with or extend Listeo functionality.

These guidelines aim to:

  • Help users distinguish between official Listeo products and third-party extensions
  • Protect the Listeo brand and ensure quality standards
  • Provide clear naming conventions for the developer community
  • Prevent user confusion about product origins and support responsibilities

2. Trademark and Naming Guidelines

2.1 Core Principle

Your plugin name must not begin with “Listeo” or any variation thereof. The Listeo name should only be used to indicate compatibility, not as a primary identifier.

2.2 Naming Format

Use your distinctive product name followed by “for Listeo” or “compatible with Listeo.”

Naming Examples

NOT Allowed

Allowed

Listeo Booking Calendar

Booking Calendar for Listeo

Listeo Reviews Manager

Reviews Manager for Listeo

Listeo SMS Notifications

SMS Notifications for Listeo

ListeoPayments

Payment Gateway for Listeo

Listeo Pro Extensions

Pro Extensions compatible with Listeo

2.3 Prohibited Uses

The following uses of the Listeo trademark are strictly prohibited:

  1. Starting your plugin name with “Listeo” – This implies official affiliation
  2. Using “Listeo” in your domain name – e.g., listeo-plugins.com, listeoaddons.com
  3. Creating portmanteau names – e.g., ListeoX, ListeoPro, ListeoPlus, MyListeo
  4. Using the Listeo logo in your product branding or marketing materials
  5. Implying official endorsement or partnership without written agreement
  6. Using variations or misspellings – e.g., Listio, List-eo, L1steo

2.4 Permitted Uses

You may use the Listeo trademark in the following ways:

  • To accurately describe your product’s compatibility: “X for Listeo” or “X compatible with Listeo”
  • In product descriptions and documentation to explain functionality
  • In tags and keywords for marketplace listings (e.g., ThemeForest, CodeCanyon)
  • On your website to truthfully describe Listeo integration or support services

3. Plugin Slug Guidelines

The same naming rules apply to your plugin’s technical slug (folder name and text domain):

  • Incorrect: listeo-booking-calendar, listeo_reviews
  • Correct: booking-calendar-for-listeo, reviews-manager-listeo

4. Technical Requirements

Third-party plugins should follow these technical best practices:

  • Dependency Check: Verify Listeo theme is active before initializing your plugin
  • Version Compatibility: Clearly state which Listeo versions your plugin supports
  • Hooks and Filters: Use Listeo’s documented action hooks and filters rather than modifying core files
  • Coding Standards: Follow WordPress Coding Standards and best practices
  • Unique Prefixes: Use your own unique prefix for functions, classes, and database options

5. Support and Responsibility

Please note the following regarding support:

  1. PureThemes does not provide support for third-party plugins. Users should contact the plugin developer directly.
  2. Third-party developers are solely responsible for their plugin’s functionality, security, and compatibility.
  3. We may require disabling third-party plugins before providing support for Listeo-related issues.
  4. Third-party plugins should include clear documentation and support contact information.

6. Required Disclaimer

All third-party plugins must include a visible disclaimer in their documentation and/or plugin description stating:

“This plugin is developed and maintained by [Developer Name] and is not affiliated with, endorsed by, or officially connected to PureThemes or Listeo. For support, please contact [your support channel].”

7. Enforcement

PureThemes reserves the right to:

  • Request name changes for plugins that violate these guidelines
  • Report trademark violations to marketplace platforms (ThemeForest, CodeCanyon, WordPress.org)
  • Take legal action in cases of willful trademark infringement
  • Update these guidelines as needed with reasonable notice

8. Questions and Contact

If you have questions about these guidelines or need clarification on whether your intended use is permitted, please contact us at [email protected] before releasing your product.

Customizing the Listing Description Editor

The Listing Description field uses TinyMCE editor on the front-end submission form. By default, it includes basic formatting options, but you can extend it with additional buttons and features using the submit_listing_form_wp_editor_args filter.

Adding Custom Buttons

Add this code to your child theme’s functions.php file:

add_filter( 'submit_listing_form_wp_editor_args', 'my_full_featured_editor' );
function my_full_featured_editor( $args ) {
    $args['tinymce']['plugins'] = 'lists,paste,tabfocus,wplink,wordpress,textcolor,colorpicker,hr,charmap,table,anchor,code';
    $args['tinymce']['toolbar1'] = 'formatselect,bold,italic,underline,strikethrough,|,forecolor,backcolor,|,bullist,numlist,|,link,unlink,|,undo,redo';
    $args['tinymce']['toolbar2'] = 'alignleft,aligncenter,alignright,|,outdent,indent,|,table,|,hr,charmap,|,removeformat,code';
    $args['media_buttons'] = true;
    return $args;
}

The plugins parameter loads required TinyMCE plugins, while toolbar1 and toolbar2 define which buttons appear in each row. Use | as a separator between button groups. Setting media_buttons to true enables the Add Media button for uploading images.

Available Buttons Reference

Text Formatting: bold, italic, underline, strikethrough, formatselect, styleselect, forecolor, backcolor, removeformat

Lists & Alignment: bullist, numlist, alignleft, aligncenter, alignright, alignjustify, outdent, indent

Insert Elements: link, unlink, hr, charmap, anchor, image, media

Advanced: table, code, subscript, superscript, cut, copy, paste, undo, redo

Zoom Integration for Listeo

Listeo allows listing owners to automatically generate Zoom meeting links for service-type bookings. When a booking is paid and confirmed, a Zoom link is created automatically and sent to the customer via email.

This guide covers the setup process for both site administrators and listing owners.

Part 1: Site Administrator Setup

Step 1: Create a Zoom App

Go to the Zoom App Marketplace and sign in with your Zoom account. Click Develop in the top-right corner, then Build App. In the popup, select General App (the default option).

Important: By default, your Zoom app will be unpublished (in development mode). In this state, only users who belong to the same Zoom account/workspace as the app creator can connect their Zoom account. This means if listing owners on your site have their own separate Zoom accounts, they won’t be able to authorize the app.                  

If listing owners need to connect their own Zoom accounts, you must publish your app on the Zoom Marketplace. This requires:

  •   A privacy policy URL
  •   App description and documentation
  •   Passing Zoom’s security review

If only you (the site admin) will be hosting all meetings, an unpublished app is sufficient just connect your own Zoom account in My Profile and all meetings will be created under your account.

Who hosts the meetings?

Each listing owner who wants automatic Zoom meetings must connect their own Zoom account. Meetings are created under the connected owner’s account — they become the host.

This means:

  • Single-owner site (you run all listings yourself): Just connect your Zoom account. No app publishing needed.
  • Multi-owner site (listing owners are different people with their own Zoom accounts): Your Zoom app must be published on the Zoom Marketplace so that external Zoom users can authorize it.
Step 2: Configure App Settings

On the app configuration page:

  1. You can switch between Development and Production mode as needed
  2. In the Select how the app is managed section, choose User-managed
  3. Copy the Client ID and Client Secret values shown below that section
Step 3: Connect to Listeo
  1. Go to Listeo Core → Zoom Integration in your WordPress admin
  2. Paste the Client ID into Zoom OAuth Client ID
  3. Paste the Client Secret into Zoom OAuth Client Secret
  4. After saving, the plugin will display a Callback URL
  5. Copy this callback URL and paste it into the OAuth Redirect URL field in your Zoom app settings

Step 4: Set Required Scopes

In your Zoom app, go to the Scopes section and add the following permissions:

  • meeting:write:meeting – Create meetings
  • meeting:read:meeting – Read meeting info
  • user:read:user – Get user info

Complete the remaining steps in the Zoom app wizard. The other settings are mostly optional; the configuration above is what’s required for the integration to work.


Step 5: Add the Zoom Field to Your Listing Form
  1. Go to Listeo Editor → Submit Listing Form
  2. Edit the form for your service listing type (or any listing type using single-day bookings)
  3. Add the field Enable Zoom meetings for bookings (checkbox type)

Step 6: Configure the Email Template
  1. Go to Listeo Core → Emails
  2. Find Zoom Meeting Invitation and enable it
  3. Customize the email content as needed

Available template tags:

Tag Description
{meeting_date} Formatted date and time of the meeting
{meeting_topic} Meeting subject/title
{zoom_meeting_id} Zoom meeting ID number
{zoom_password} Meeting password
{zoom_join_url} Direct join URL for participants
{zoom_start_url} Host URL to start the meeting


Step 7. Publishing your Zoom App (required for multi-owner sites)

1. In your Zoom app settings, fill out the App Information section (name, description, company name)
2. Add a Privacy Policy URL and Terms of Use URL (can be pages on your website)
3. Add a Support URL or email
4. Upload an app icon
5. Click Submit for Review
6. Zoom’s team will review your app (typically takes a few business days)
7. Once approved, any Zoom user will be able to authorize your app

For more details, see https://developers.zoom.us/docs/distribute/app-review-process/.

Part 2: Listing Owner Setup

Each listing owner who wants to use Zoom for their bookings must connect their own Zoom account:

  1. Go to My Profile page
  2. Click the button to connect to Zoom
  3. Authorize the app when prompted

Once connected, the owner can enable Zoom meetings on individual listings by checking the Enable Zoom meetings for bookings option.

How It Works

When a customer completes a paid booking for a Zoom-enabled listing:

  1. A Zoom meeting is automatically created using the listing owner’s connected Zoom account
  2. The customer receives the Zoom Meeting Invitation email with the meeting details
  3. Both parties can view meeting information on their respective booking pages (My Bookings for guests, Bookings for owners)

How to create a Gemini AI API key?

It literally takes 30 sec to create one 😉

How to Create Gemini API Key

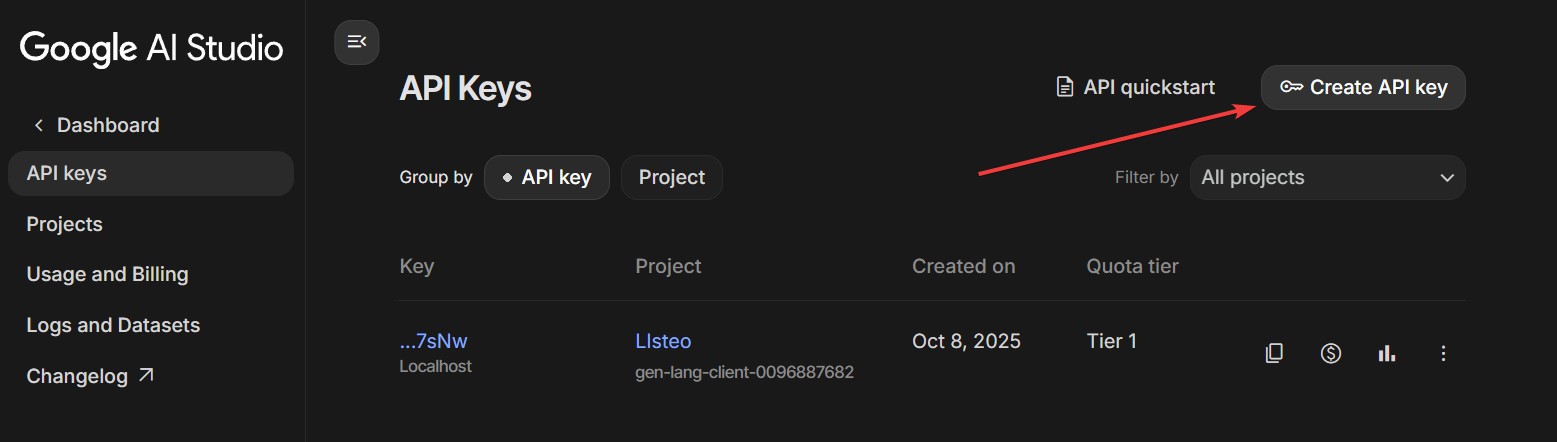
  1. Go to https://aistudio.google.com/api-keys
  2. Click “Create API Key” button
  3. Select or create a Google Cloud project
  4. Copy your API key and paste in our plugin
Be aware that Gemini free tier has very low limits and you might hit requests per minute limit with just 2 questions (5 requests to AI per minute + training only 100 items per minute) We recommend upgrading to a paid plan. 

Upgrade to Paid Tier

  1. Go to https://aistudio.google.com/api-keys
  2. Find your project
  3. Click “Set up Billing” button
  4. Link a Google Cloud billing account
FREE TIER
Model RPM TPM RPD Input Price Output Price
Gemini 3Flash 5 250k 250 Free Free
Gemini 3 Pro 2 125k 50 Free Free
Gemini Embedding 100 30k 1,000 Free Free

To avoid hitting limits enable billing in Google settings.

PAID TIER (Tier 1)
Model RPM TPM RPD Input Price Output Price
Gemini 3 Flash 1,000 1M 10k $0.30/1M $2.50/1M
Gemini 3 Pro 150 2M 10k $1.25-2.50/1M* $10-15/1M*
Gemini Embedding 3,000 1M $0.15/1M

RPM = Requests Per Minute | TPM = Tokens Per Minute | RPD = Requests Per Day


Billing

Please monitor your billing. OpenAI is safer because you prepay credits. Gemini bills you after the cycle, so costs can spike if you miss it.


How to switch from classic cart/checkout to new block-based?

Level up your store with a seamless and customizable checkout for a cart-to-checkout experience that converts more shoppers.

Follow same process for cart and checkout pages.

  1. Find checkout (or cart) page, edit it.

    Then switch to WordPress editor

  2. Delete classic shortcode [woocommerce_checkout] or [woocommerce_cart]
  3. Add block element: Checkout
  4. And that’s it. You can customize checkout/cart here using WordPress blocks editor.

AI Chat

PurioChat is our AI chatbot plugin that works with any theme but has dedicated module for Listeo allowing it to search deeply through listings.

Listeo brings AI assistant to your directory site, letting visitors find listings using natural conversation.

OpenAI
OpenAI
Gemini
Gemini
Claude
Claude
Mistral
Mistral
Grok
Grok
DeepSeek
DeepSeek
Llama
Llama

PurioChat combines semantic understanding with real-time database search making your directory easier to use and increasing visitor engagement. AI searches through listings and filters them by ✅location, ✅price, ✅rating and ✅booking availability. Supported AI Providers: ChatGPT, Gemini and Mistral AI


⚙️Installation

Plugin is automatically installed with Listeo. However if you can’t see it or have older theme version you can download it manually:

  1. Go to https://purethemes.net/license/ and download  PurioChat plugin
    You’ll need purchase key: How to find my license key?
  2. Install and activate ai-chat-search.zip in WP Dashboard → Plugin → Add New 

Configuration

  1. Navigate to PurioChat in your WordPress sidebar.
    Add your Open AI api or Gemini key and configure plugin to your needs.
    How to create Open AI API key? →
    How to create Gemini API key? →

  2. Then go to Data Training tab and click “🚀 Start Training“.

    For the listing search feature, only “Listings” data is required. Other post types are available in the Pro version and can be used by the chatbot.


    If you don’t want the chatbot to search your site content
    , skip data training and uncheck “Listings.” It will then respond only using your Custom System Prompt (see FAQ).

Features

Feature Free Pro
Search through listings
Search analytics
Gemini and ChatGPT
Custom Instructions for AI
(based on system prompt)
Chat history ✅ Access to chat stats & conversation history
Chat Insights ✅ AI analyzes conversations and highlights summaries, gaps, weaknesses, and sentiment
Posts & pages search ✅ AI can search through content from posts and pages
PDF Files as Training Source ✅ Upload PDF files and train chatbot on them
WooCommerce products ✅ Search products
✅ Filter by price, stock, sale, rating / Check order status
Custom post types ✅ Search through custom post types
Customizable Design ✅ Minimal bar, image, or animated silk wave effect. Dark and light mode.
Quick Action Buttons ✅ Buttons with link, predefined question, or contact form popup
AI Lead Capture ✅ Collect visitor data like email or phone and get notified
Image and Voice Messages ✅ Visitors can attach images or record voice messages
Telegram & WhatsApp ✅ Let users chat with your AI assistant via Telegram or WhatsApp
n8n, Zapier & Make ✅ Connect with external apps via webhooks
Remove “Powered by” Label

Pricing: https://purethemes.net/ai-chat-search-pro/


FAQ

  • 🤖 Improving chatbot replies with a Custom System Prompt

    You can add there specific instructions about your website’s focus, target audience, or special features to help the AI provide more relevant and personalized answers to your visitors.

    Example:

    IMPORTANT:
    – This is a city-wide business directory for Austin, Texas, featuring restaurants, hotels, services, and entertainment venues. We help locals and tourists discover the best spots in town.
    – If users ask how to add their business, explain that they need to click “Add Listing” in the top menu, create a free account, and fill out the listing form with their business details, photos, and contact information.
    – Paid packages offer featured placement and priority in search results.CONTACT INFO:
    – If someone asks you about how to contact us provide him [email protected] and phone +1 123 345 789
    – Our business opening hours are 9am-15pm Monday to Friday

    Another example – if your website is multilingual but listing location/names are in english language you can tell him to always translate user query before searching

    CRITICAL:
    If the user query is in another language, translate it to English before searching.
    For example: French: ‘trouve un restaurant à New York’ → translate to ‘find a restaurant in New York’

     To improve the AI chatbot’s replies to generic questions like “recommend something in New York” you need to give him an idea what your website is about

    IMPORTANT:
    This is a directory for discovering places in New York City. We help users find the best spots in the city. When asked generic questions like “what you recommend” or “what to do in NY” search for restaurants, attractions or shops or services listings from our directory.”

    In general, prompting is an art – the quality of an AIs answer depends on the prompt or instructions. Sometimes too many examples can confuse the model, but too few can also lead to poor results.

    If a user asks for “good Italian restaurant” or “good headphones,” the AI may auto-apply a rating filter (e.g. 4.5+). If items have no ratings, it may return no results. That’s why you need to tweak prompt on your own and e.g. add: “Don’t apply a rating filter unless the user asks for it.”

  • 🔍 How to fix chatbot giving irrelevant responses despite having indexed content?

    This is usually a custom instructions (system prompt) issue. The AI needs clear guidance on when to search your site content and which tool use (for listings, products or general site content).

    Add decision logic to clarify your content types. Universal decision logic is already added in built-in system prompt but you might want to extend it with samples from your website content.

    DECISION LOGIC:
    - Question about listings such as [examples] → use search_listings()
    - Generic products such as [examples] → use search_products()
    - Generic questions about website content such → use search_universal_content()

    Use GPT-5.4  instead of GPT-X-mini for better quality if you have long custom instructions. Small prompt changes can significantly impact behavior.

  • 🔍 How AI searches through site content?

  • 💰 How much does it cost in OpenAI API fees?

  • 🎯 Why search results are decent but not perfect?

  • 📄 Can I add PDF files to training data?

  • ✅ Is this right fit for my website?


Elementor Widget and Shortcode

Chatbot can be used also via shortcode [ai-chat] or Elementor Widget AI Chat (elementor widget has 2 visual settings including the one below). You can download pre-made elementor section from our demo here (upload to elementor templates).

Point of Interests

The Listeo POI plugin displays nearby points of interest (restaurants, transport, healthcare, shopping, etc.) on listing pages using Google Places API, helping visitors discover amenities around each property.

It features configurable categories with customizable search radius and result limits, intelligent caching to minimize API costs, and flexible display options for seamless integration with your listings

Points of interest can be displayed as a tabs

or toggle accordions


Installation

  1. Make sure you set your language in Dashboard → Settings → General
  2. Go to https://purethemes.net/license/ and download Listeo Points of Interest plugin
    You’ll need purchase key: How to find my license key?
  3. Upload listeo-po.zip in WP Dashboard → Plugin → Add New 

Configuration

Navigate to Listeo POI in your WordPress sidebar,. Add Google API key and configure settings to your needs

The plugin caches Google Places API responses in the database for 180 days (configurable) to minimize API costs and improve performance. Cached POI data is served on repeat visits instead of making new API calls, with options to clear or refresh cache through the admin panel.


API Rate Limit

Although the plugin itself has a “Max API Requests (24h)” setting, it’s always wise to configure quota limits directly in Google Cloud.

https://developers.google.com/maps/billing-and-pricing/manage-costs#set-caps
✅ SELECT the API in the drop-down menu (All Google Maps Platform APIs).
✅ SET requests/map loads/elements per day parameter according to what you are willing to pay each month.
✅ Click SAVE and repeat this process for any API you want to use.

Please set these limits to stay charge-free:
✅ Geocoding API → 320 requests per day
✅ Maps JavaScript API → 320 map loads per day
✅ Places API → 50 requests per day

AI Smart Search

AI Search feature in PurioChat is dedicated for Listeo and brings natural language search to your directory website with OpenAI OpenAI or Gemini Gemini or Mistral AI. Users can search using everyday phrases instead of just keywords.

Try it yourself on our demo: https://listeo.pro/

Key Benefits:
Natural Language: Users can search like they talk: cozy restaurant with outdoor seating.
AI understands context and finds businesses that meet user needs.
Analytics Insights: Track popular searches to understand your users better.
What Users Search For Standard WordPress Search Listeo AI Search
romantic dinner spot
❌ No — “romantic” rarely appears in restaurant listings ✅ Finds fine dining, intimate cafes, date-night restaurants
dog grooming services
Pet care needs
⚠️ Maybe — only if exact words “dog grooming” appear ✅ Finds pet salons, mobile groomers, veterinary services
kids birthday party venue
❌ No — exact phrase not in venue descriptions ✅ Shows party halls, entertainment centers, kid-friendly venues

The plugin creates a vector database by turning each listing into an embedding — a unique numerical representation capturing its meaning. User queries get converted the same way, then matched mathematically to find the closest results.


⚙️ Installation

Plugin is automatically installed with Listeo. However, if you can’t see it or have an older theme version, you can download it manually:

  1. Go to https://purethemes.net/license/ and download the PurioChat plugin.
    You’ll need your purchase key:
    How to find my license key?
  2. Install and activate ai-chat-search.zip in WP Dashboard → Plugins → Add New

Configuration

  1. Navigate to PurioChat in your WordPress sidebar, then go to the AI Search tab. Add your OpenAI, Gemini, or Mistral AI API key and configure the plugin to your needs.How to create OpenAI API key? →
    How to create Gemini API key? →
    How to create Mistral API key? →
  2. Then go to the Data Training tab and click 🚀 Start Training.

    For the listing search feature, you only need Listings as training data. Other post types that are locked are available in the Pro version and can be used by the chatbot feature.


    Data Training tab in PurioChat
  3. Once the database is ready, go to Listeo Editor → Search Forms and add the AI Field to your search forms.
    Adding AI Field to Listeo search form
  4. And that’s it. AI Quick Picks allows visitors to quickly get the best 3 matching listings. This is optional.
    AI Quick Picks setting in Listeo
  5. The Statistics tab provides comprehensive analytics and insights. Chat history is available in the Pro version if you use the AI chatbot.
    PurioChat statistics tab
  6. It is recommended to set Best Match as the default sorting method. With this setting, listings with the highest match score will appear first.
    Listeo Core → Browse/Search Options → By default sort listings by
    Best Match sorting option in Listeo

FAQ

  • I see not enough or no search results at all

  • Why are search results decent but not perfect?

  • What does 'Minimum Match Percentage' control?

  • Should I enable 'Query Expansion'?

  • What data is processed by OpenAI/Gemini/Mistral in AI Search?


Unlimited Listing Types

Create unlimited listing types beyond the built-in Service, Rental, Event, Classifieds.

Where to Find It: WordPress Admin → Listeo Editor → Listing Types 
✅ Visual editor: Drag-and-drop interface with conflict detection
✅ Auto-integration: Works with Forms & Fields Editor, Elementor widgets, and Custom Permalinks
✅Specialized add listing forms: Each listing type submit form can be individually modified in Listeo Editor
✅Custom booking: Different booking methods per business type

P.S. You can change order of listing types by dragging and dropping them.

🏷️ Basic Information
– Name: Display name (e.g., “Restaurant”) Required
– Plural Name: Plural form (e.g., “Restaurants”) Required
– Slug: URL-friendly identifier (auto-generated, unique) Required
– Description: Optional text description
– Icon: Upload icon/image from media library (supports SVG)

📅 Booking Configuration
– Booking Type: Choose preset (None, Single Day, Date Range, Event Tickets)
– Booking Features: Mix-and-match checkboxes:
– Time Slots Selection
– Date Range Selection
– Start/End Time Picker
– Ticket System
– Add-on Services
– Availability Calendar

⚙️ Business Settings
– Enable business hours: Toggle for opening/closing hours display
Register dedicated taxonomy: Auto-create category taxonomy (e.g., “restaurant_category”) – when checked  listing type  will be displayed in categories page and you will be able to add listing-type specific categories.

👁️ Display Settings
– Active: Make available for new listings (inactive types hidden from submission)

This is how you can hide default listing types – simply uncheck “active” state and they won’t be displayed in submit listing form.

One added you will see new listing type available during listing submission, in this example – “Test”.


Categories for listing types

Categories and Sub Categories