
Connect Polar so your customers can pay for job, resume, and task packages. This page walks you through every field, the webhook, and product mapping, step by step.
What you will need
- A Polar account and organization.
- A Polar organization access token.
- A few minutes to register a webhook endpoint and copy a signing secret.
Step 1: Choose Polar in the Settings tab
- In your WordPress admin, open the plugin’s Settings tab.
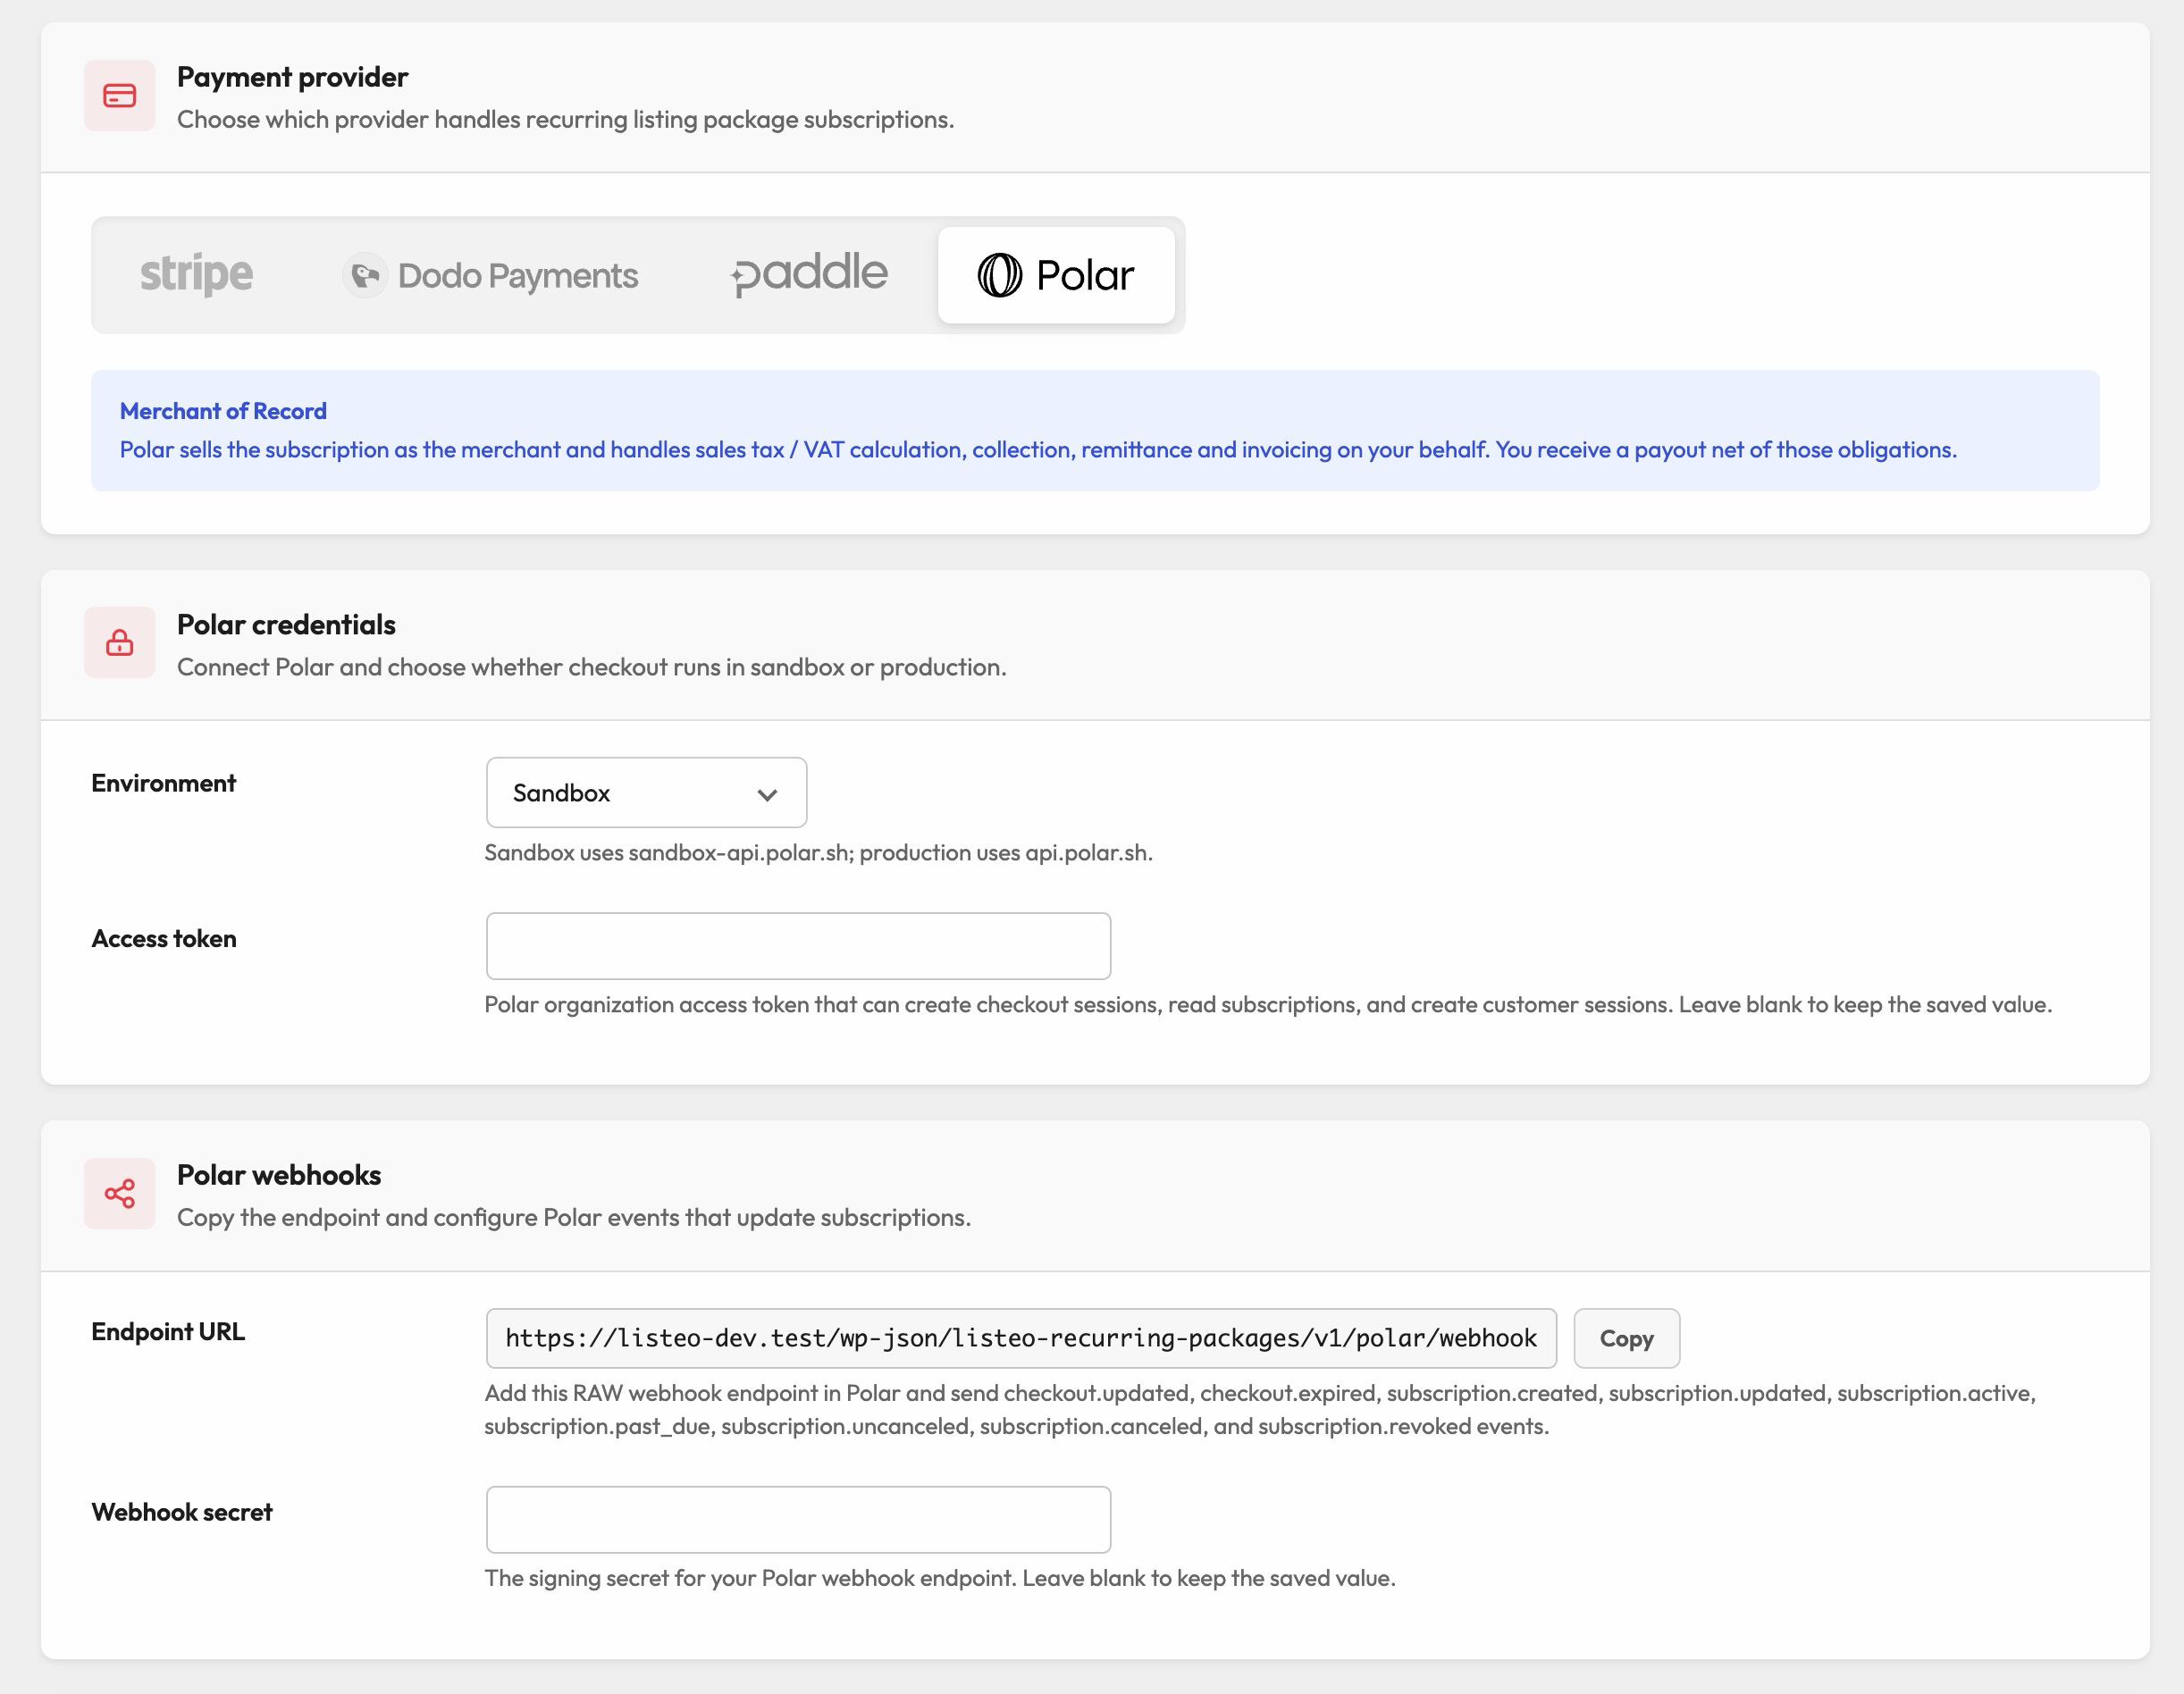
- Using the provider logo toggle, choose Polar as your active provider.
- The Polar fields appear. We fill them in over the next steps.
The Polar settings fields
- Environment – A dropdown with two choices: Sandbox (the default) and Production. Sandbox is for testing and talks to the host
sandbox-api.polar.sh. Production is for real, live sales and talks toapi.polar.sh. Choose Sandbox while you test, then switch to Production when you are ready to take real money. - Access token – A password field. This is a Polar organization access token that lets the plugin create checkout sessions, read subscriptions, and create customer sessions. One token belongs to one environment, so a sandbox token only works in Sandbox and a production token only works in Production.
- Webhook secret – The signing secret for your Polar webhook endpoint. The plugin uses it to confirm that incoming webhook messages really came from Polar. You get this value in Step 3 below.
Step 2: Create a Polar access token
- Log in to your Polar dashboard. If you are testing, use the Sandbox dashboard so your token matches your Environment setting.
- Open your organization settings and find the access tokens page
- Create a new organization access token. Make sure it can create checkout sessions, read subscriptions, and create customer sessions.
- Copy the token.
- Back in the plugin Settings tab, paste it into the Access token field.
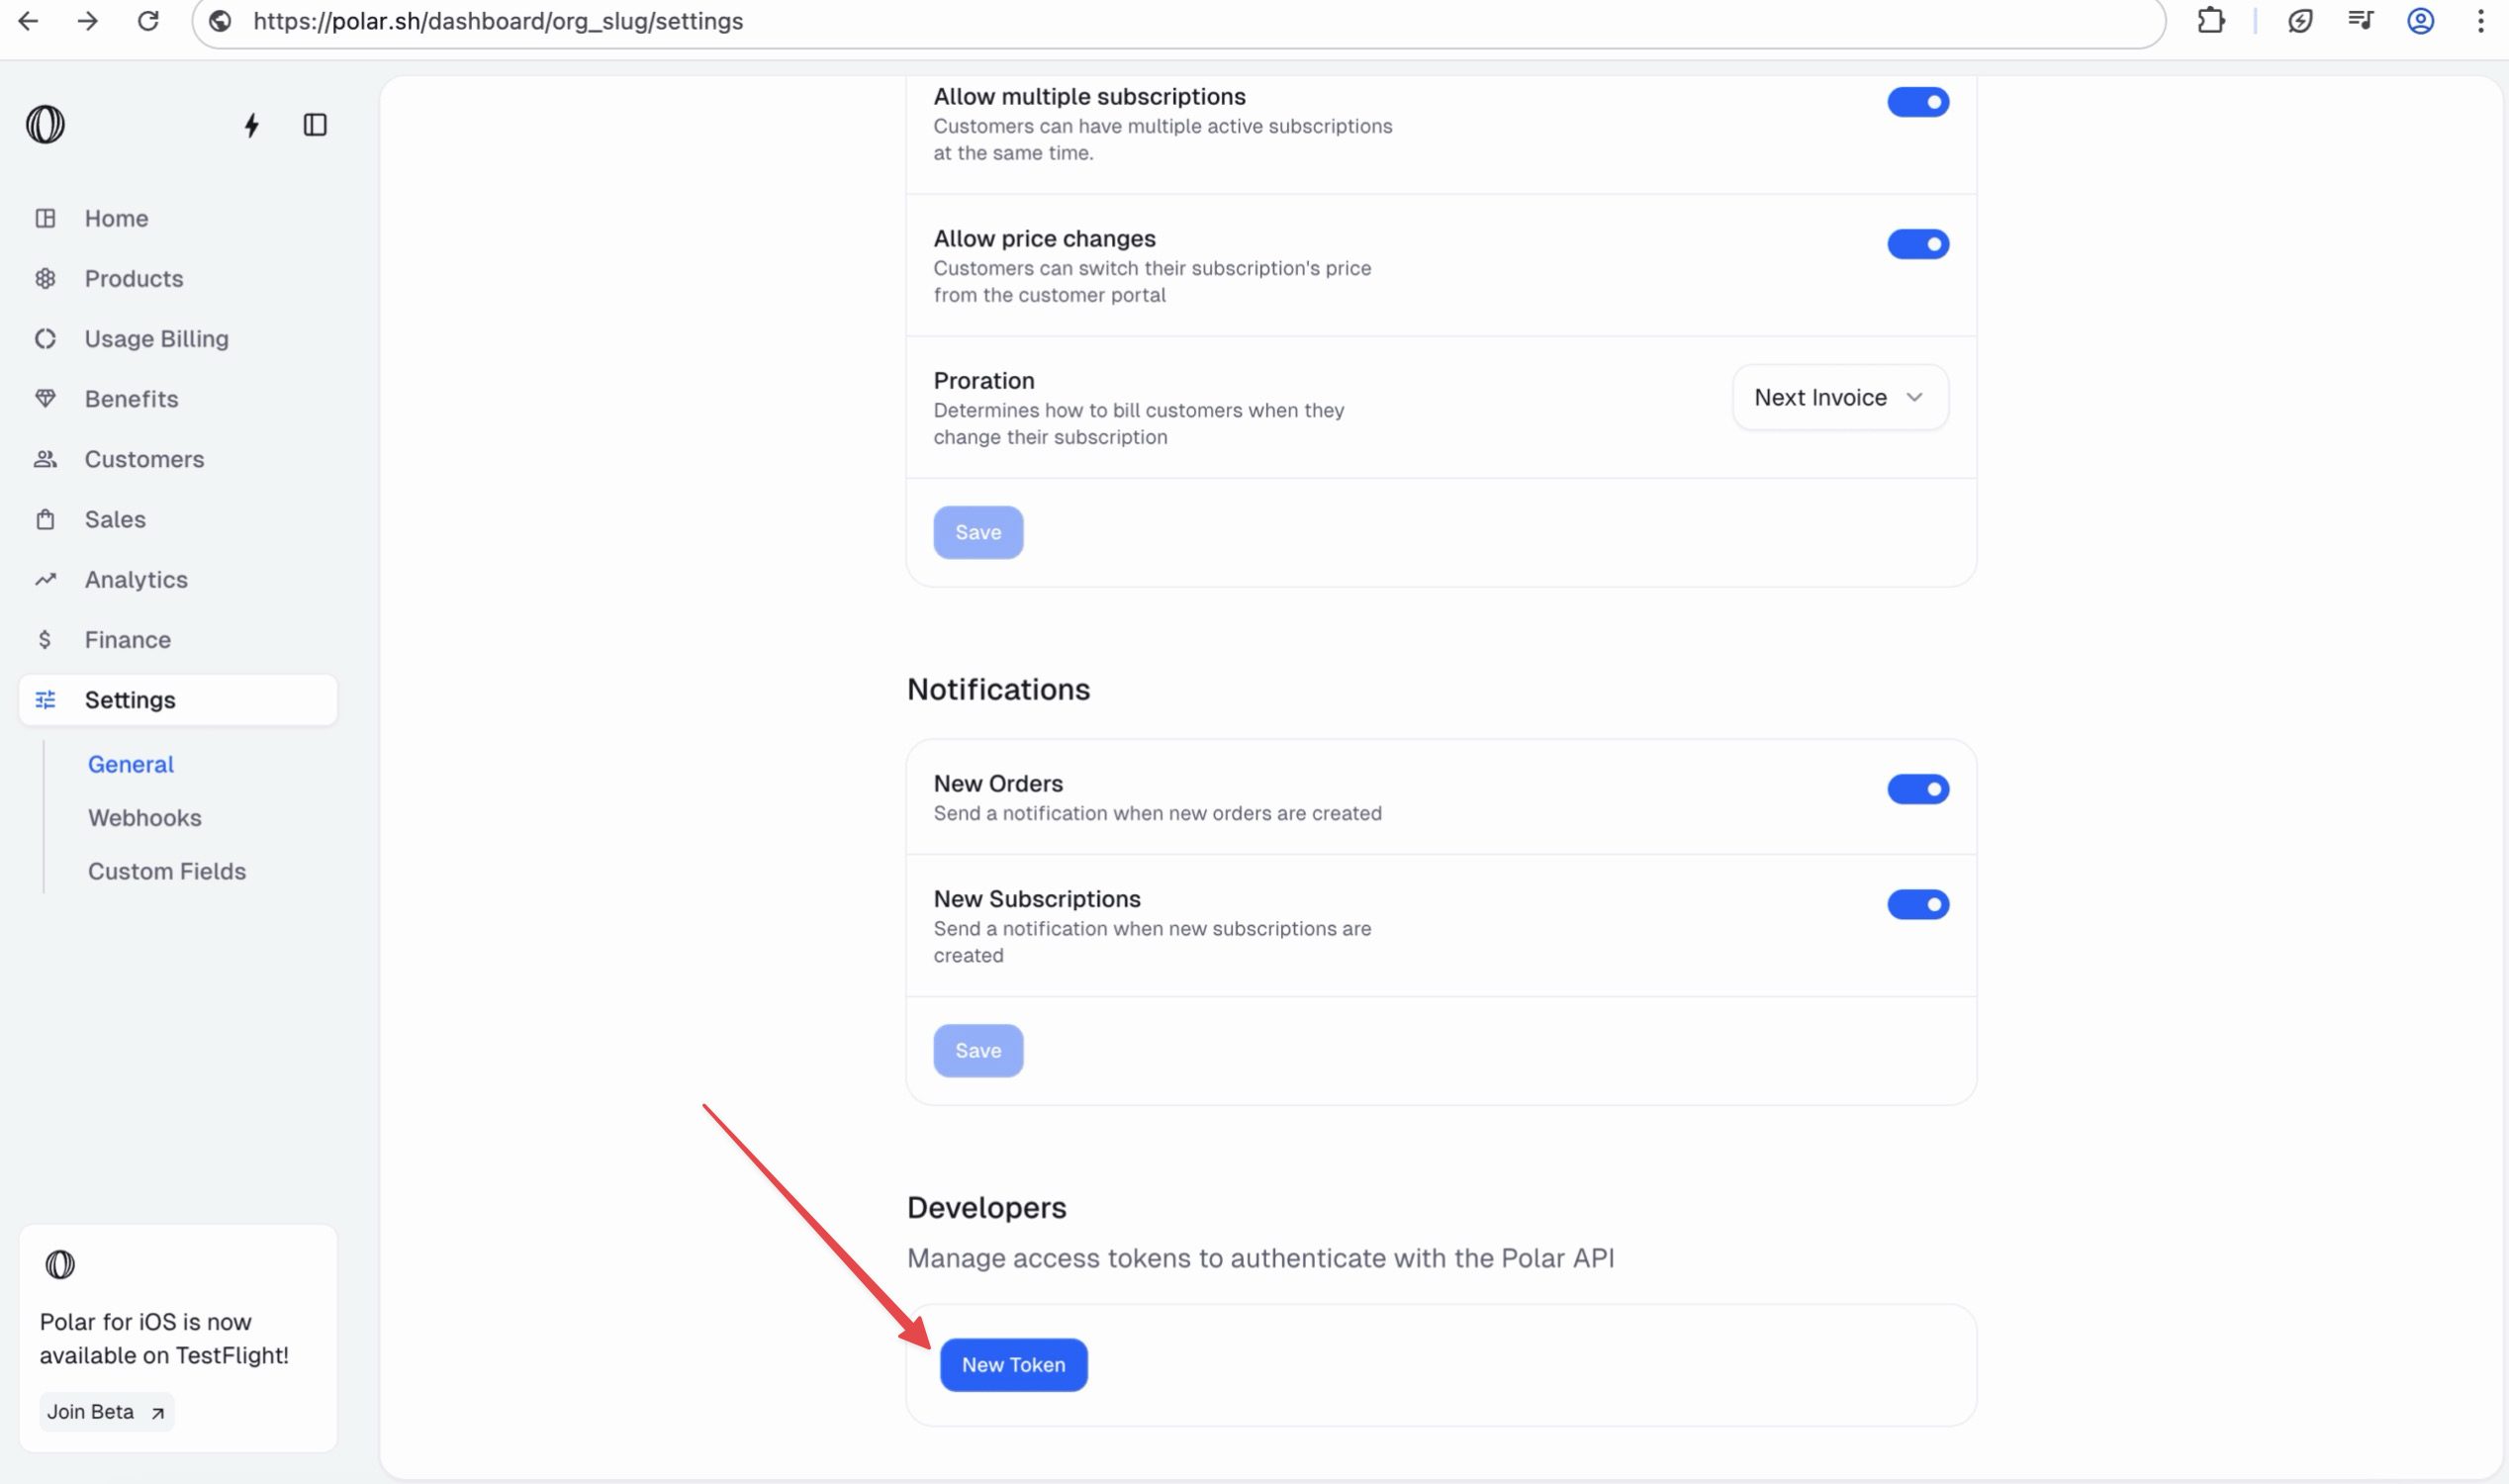
Enable also “allow multiple subscriptions” option

Step 3: Register the webhook in Polar
This is the most important step. The webhook is how Polar tells the plugin when someone subscribes, cancels, or fails a payment, which is what grants and revokes access.
The endpoint URL
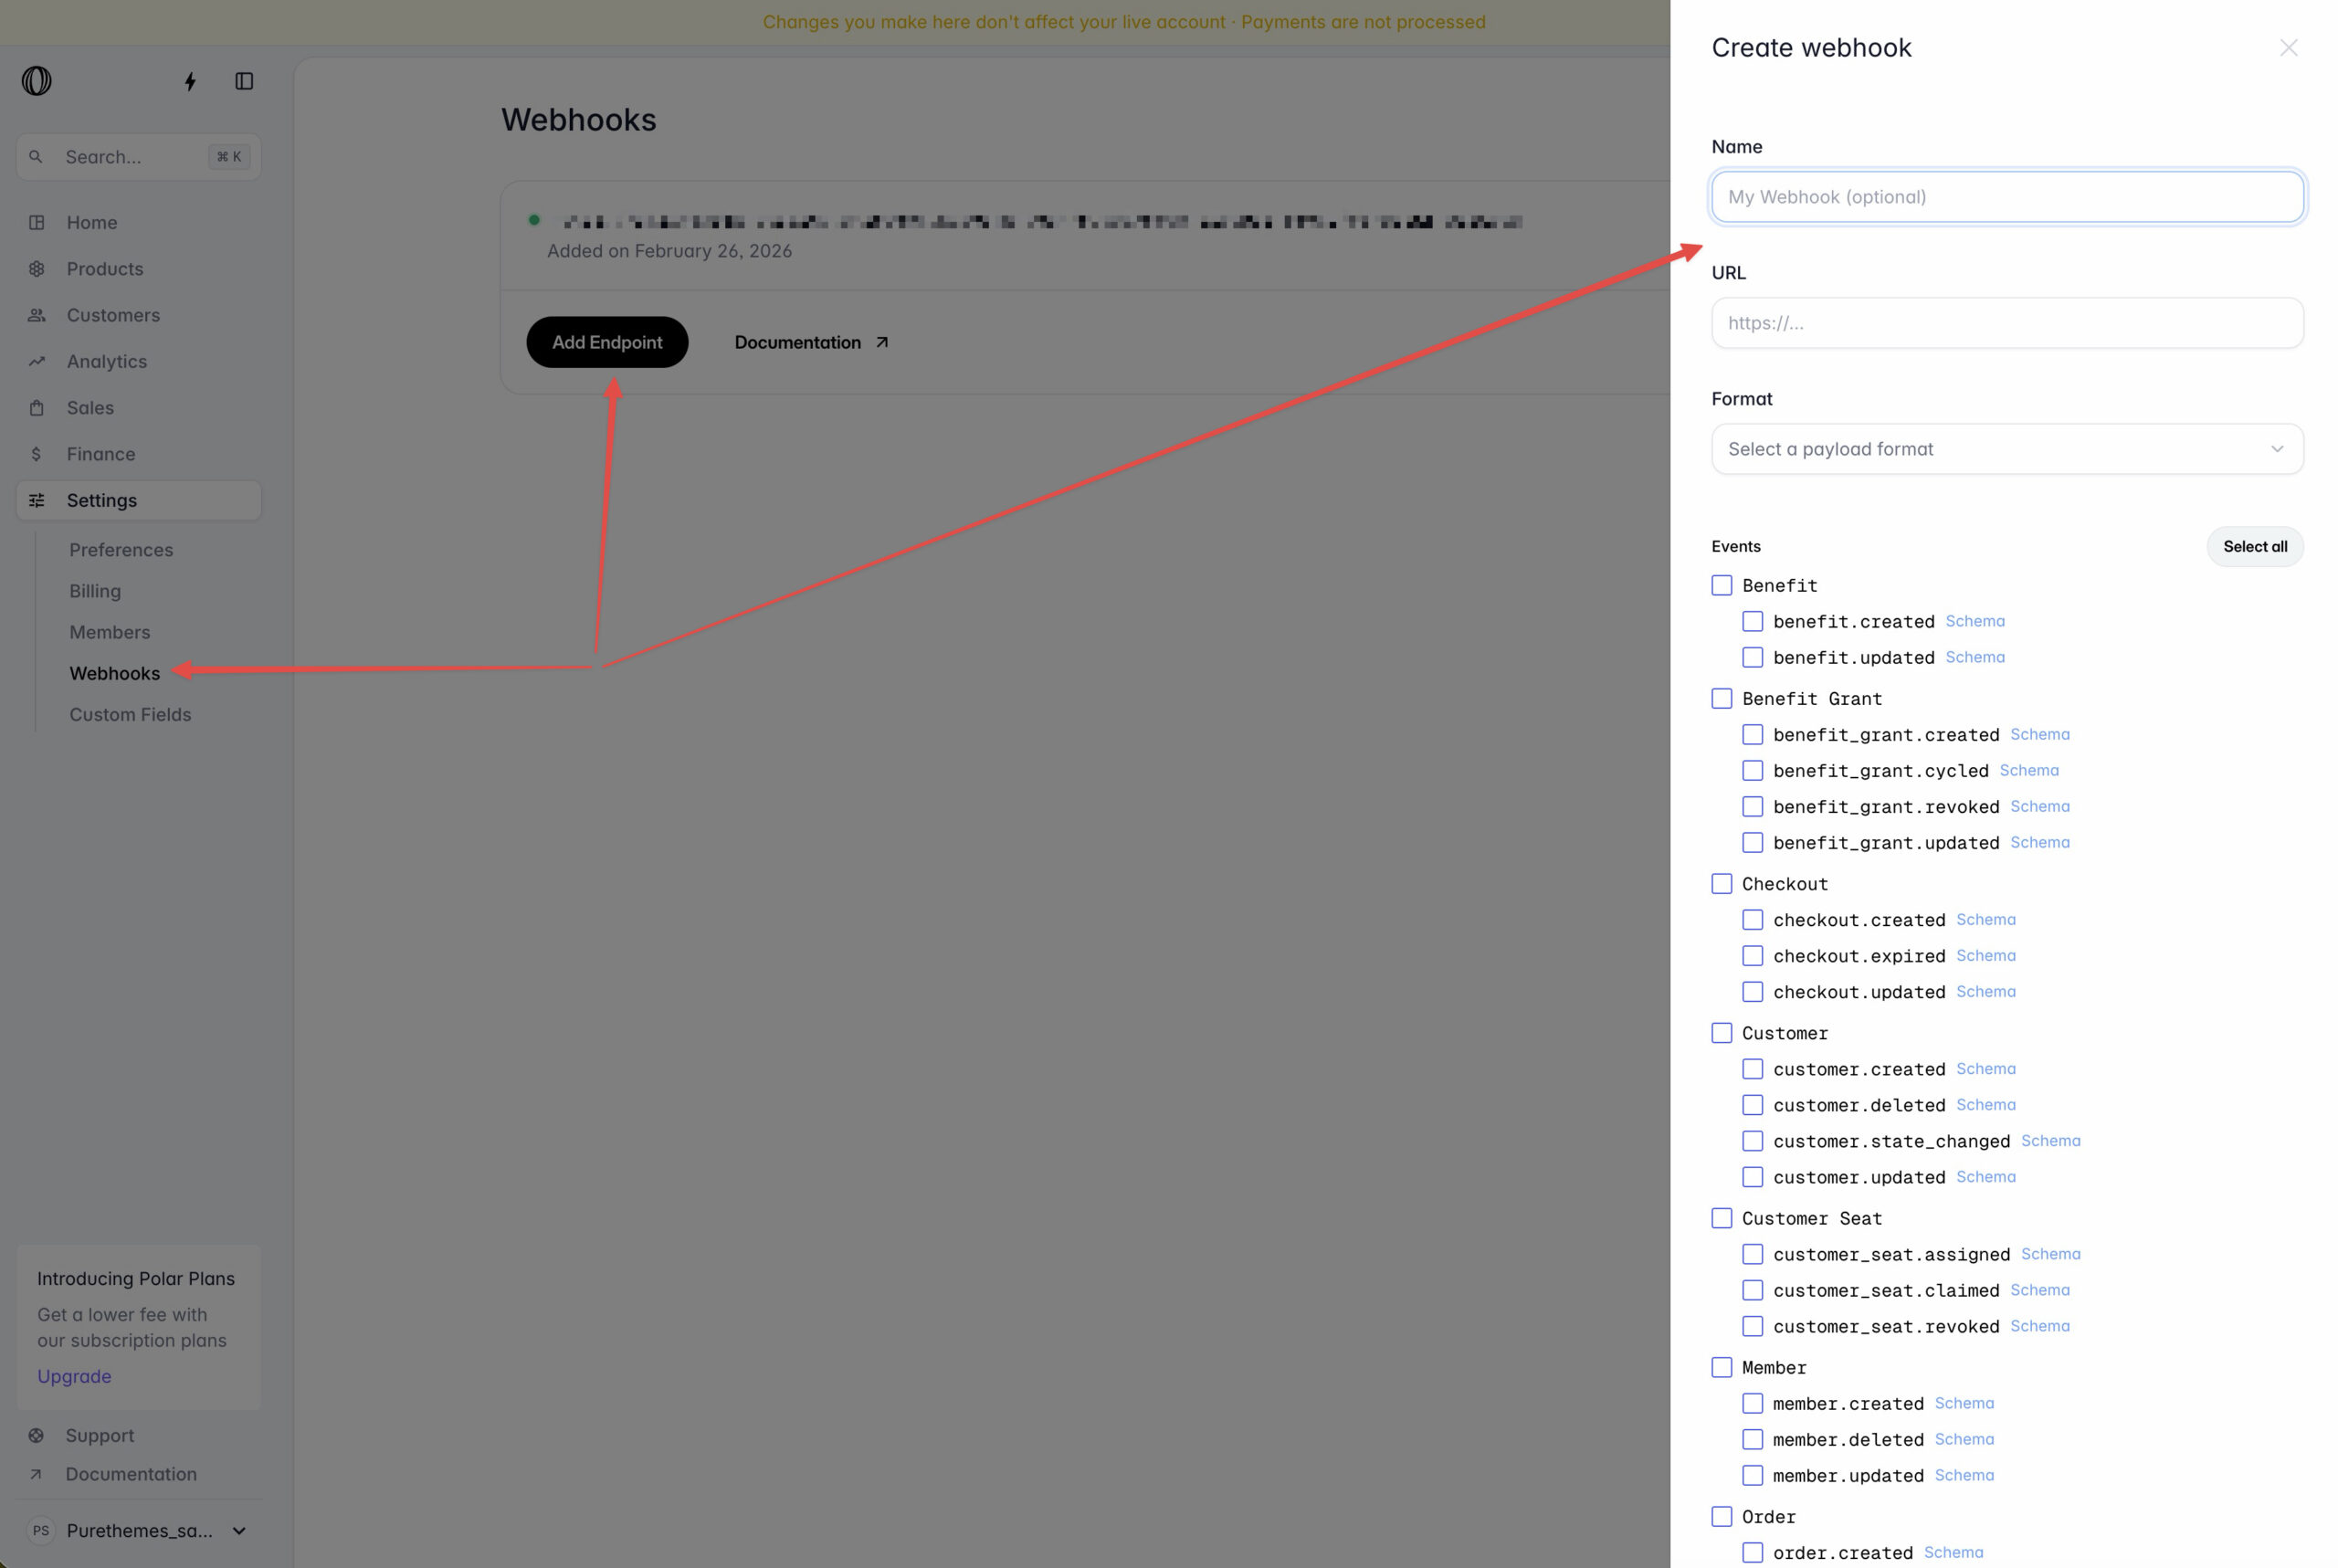
In Polar, go to Settings > Webhooks and add a new endpoint. Use this URL, replacing YOUR-SITE.com with your own site address:
the Polar Endpoint URL displayed in WorkScout Core → Monetization Plus → Settings
Subscribe to these events
Turn on each of these events for the endpoint:
checkout.updatedcheckout.expiredsubscription.createdsubscription.updatedsubscription.activesubscription.past_duesubscription.uncanceledsubscription.canceledsubscription.revoked
Copy the signing secret
- After creating the endpoint, Polar shows a webhook signing secret. It may start with
whsec_. - Copy it.
- Back in the plugin Settings tab, paste it into the Webhook secret field (
polar_webhook_secret). - Save your settings.
Step 4: Create your product and map it to a package
Polar does not let the plugin create products for you. You create the product in Polar, then paste its ID into the plugin for each package.
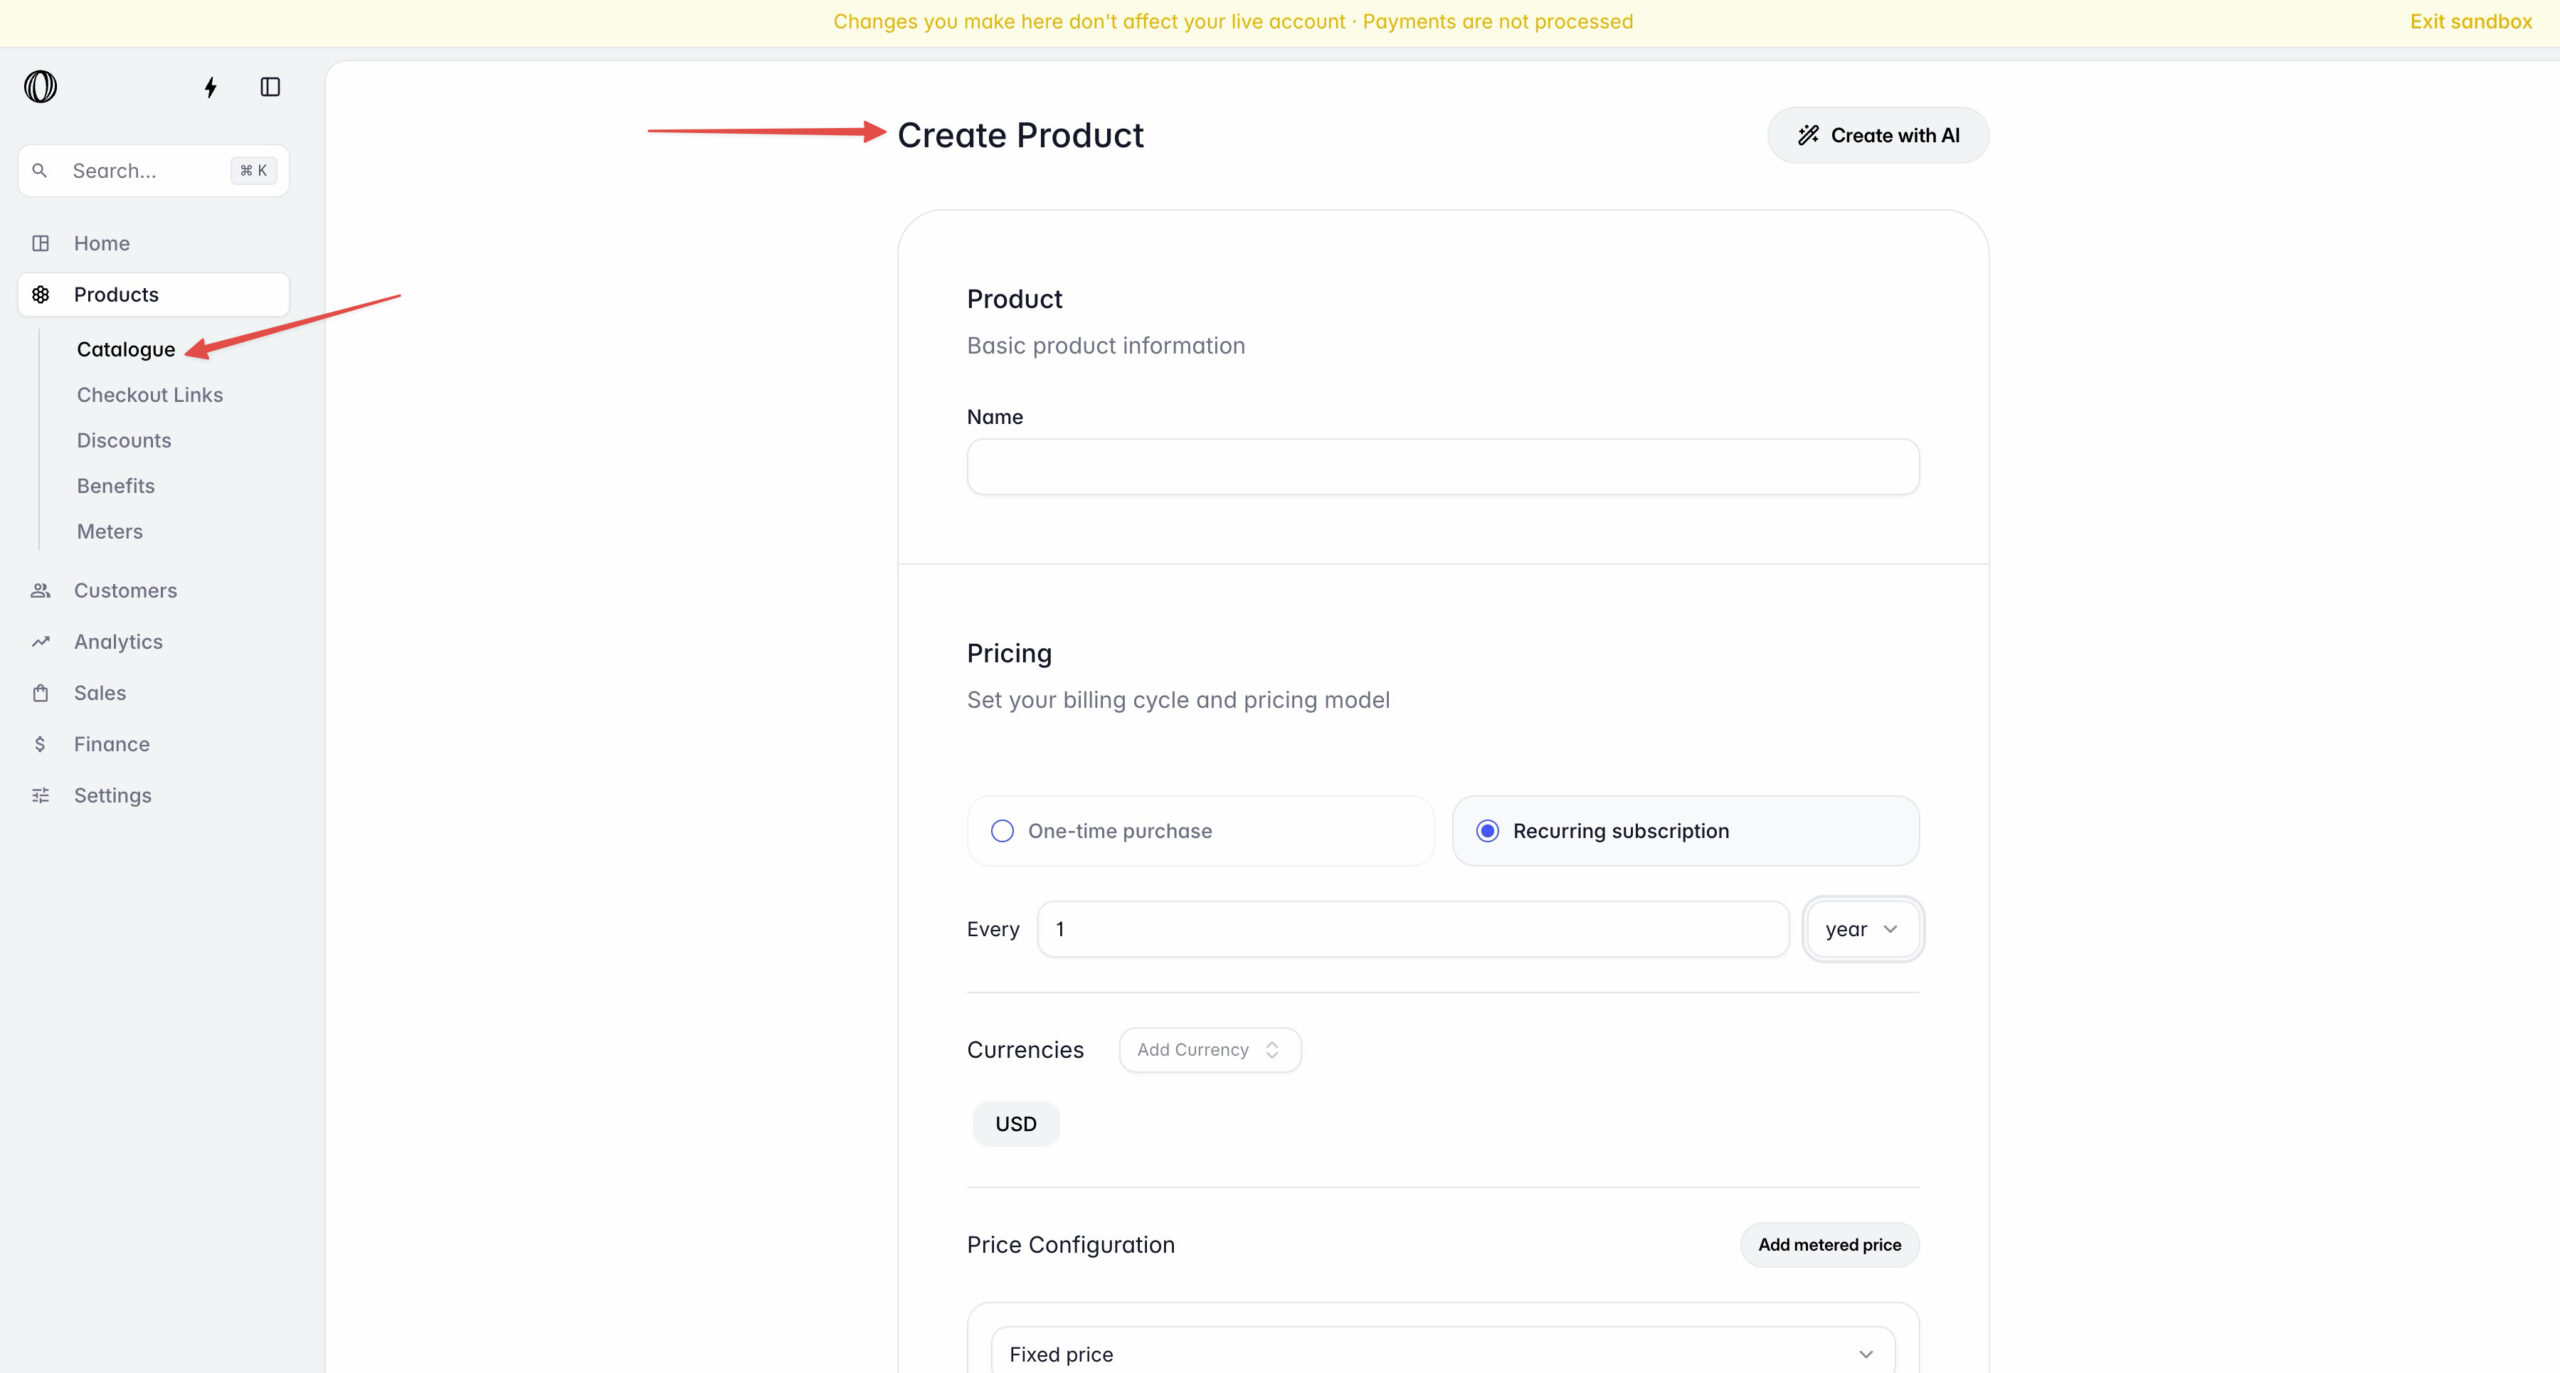
- In your Polar dashboard, create the product (with the recurring price) you want to sell.
- Open the product and copy its product ID. In Polar this is a UUID, a long id that looks like
12345678-90ab-.... - In the plugin, go to the Listing Packages tab.
- For the package you want to sell, paste the ID into Sandbox Polar product ID or Production Polar product ID, depending on which environment you are using.
- Save.
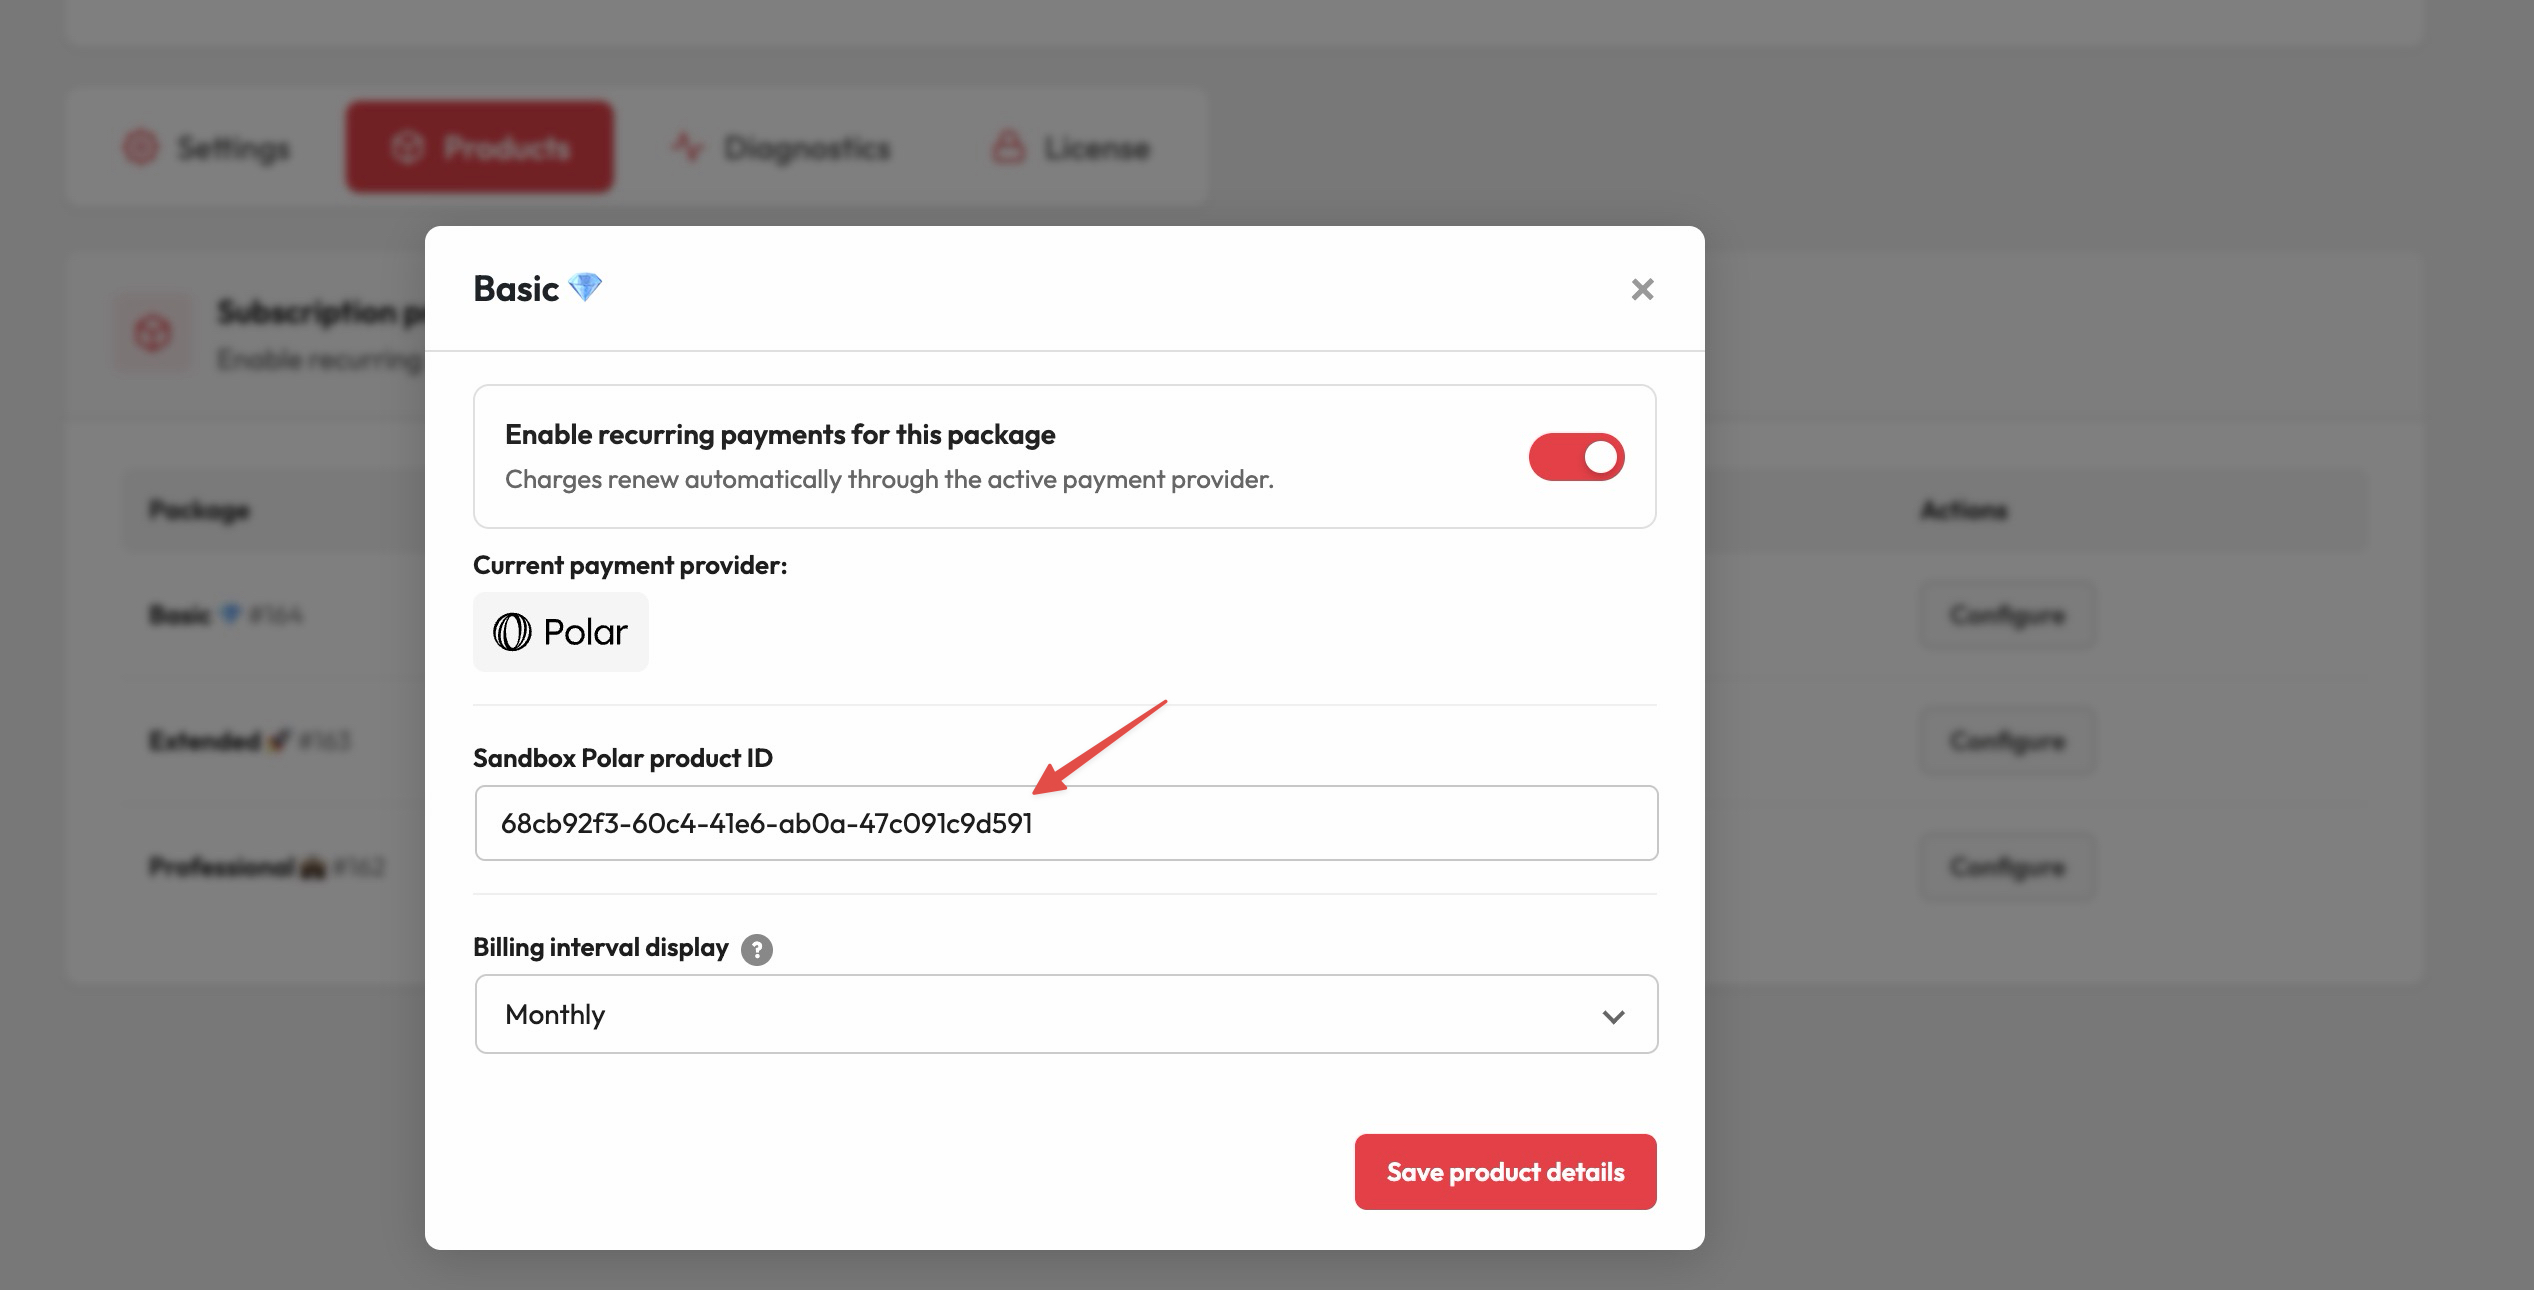
For full details on the Listing Packages tab and how packages map to products, see Job, Resume & Task Packages.
Customers can manage their own subscription
Good news: Polar has a customer billing portal. That means your customers get a working Manage button where they can update their payment method and cancel on their own, without contacting you.

