Google Gemini is one of the AI providers you can connect to PurioChat, and its generous free tier makes it a great way to try the chatbot at no cost. This guide shows you how to create a Gemini API key in Google AI Studio and paste it into PurioChat.
What you’ll need
Just a Google account. Gemini API keys are created in Google AI Studio, Google’s free developer console for its AI models. There’s nothing to install and no code to write.
Step 1: Open Google AI Studio
Go to https://aistudio.google.com/app/apikey and sign in with your Google account. This page lists any keys you’ve already made and lets you create new ones.
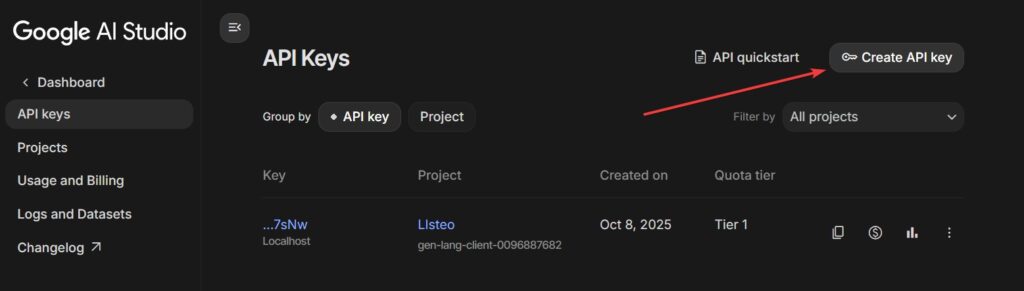
Step 2: Create your key
- Click Create API key.
- If prompted, choose (or let Google create) a project to attach the key to. Any project works for getting started.
- Google generates a key instantly. It begins with
AIzaSyfollowed by a long string of characters. - Click the copy icon to copy the whole key to your clipboard.
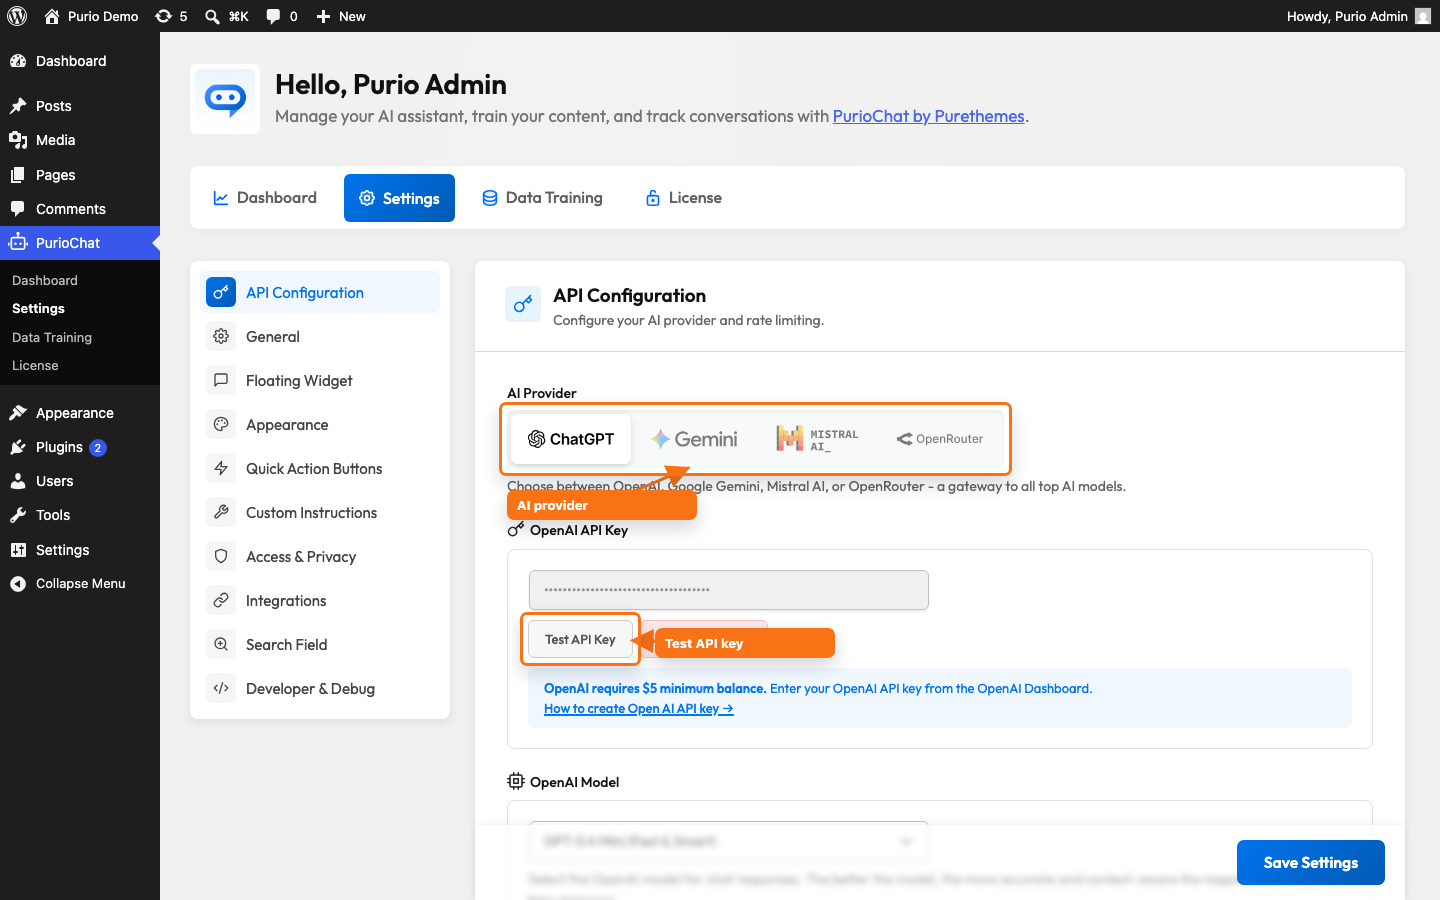
Step 3: Paste the key into PurioChat
Back in your WordPress admin, go to PurioChat → Settings → API Configuration and select Google Gemini as your provider. A Gemini-specific key field appears.
- Paste your key into the Google Gemini API Key field. The placeholder shows the expected
AIzaSy...format. - Click Test API Key. PurioChat checks with Google that the key is valid and reachable.
- When the test passes, save your settings.
PurioChat will now route its AI requests through Gemini. When you switch to Gemini, the plugin automatically selects gemini-3-flash-preview (labelled “Gemini 3 Flash — Recommended”) as your chat model — fast, capable, and available on the free tier.
About the free tier (and why you may want billing)
The free tier is great for testing, training your content, and running a low-traffic chatbot. The catch is its very low rate limits — if several visitors chat at once, or you train a lot of content quickly, you’ll hit those limits and see temporary errors.
The fix: assign a billing account to your Google project. This raises your rate limits, and you only pay for usage beyond the free allowance. For most small sites the cost stays very low.
Which models you can use:
- The Flash models (such as Gemini 3 Flash) are available on the free tier — the recommended everyday choices.
- Gemini 3.1 Pro requires billing on your Google project. If you select it without billing, requests will fail until billing is active.
Troubleshooting
- Test fails or “invalid key”: Re-copy the key from Google AI Studio — it’s easy to miss a character. Confirm it starts with
AIzaSyand that you pasted it into the Gemini field (not the OpenAI or Mistral one). - Rate-limit errors during use or training: You’ve likely hit the free-tier limits. Enable billing on your Google project, or train content in smaller batches.
- Errors only with a Pro model: If you picked Gemini 3.1 Pro, switch to a Flash model or enable billing.