Welcome to PurioChat! This guide gets a working AI chatbot live on your site in five steps: install, add an API key, pick your content, train it, and turn on the chat. It takes a few minutes, and each step links to a deeper article if you want more.
Before you start
PurioChat works on any WordPress site. The chatbot answers using your content, so the one thing to decide up front is which AI provider will power it. The free version covers everything in this guide.
Step 1 — Install and activate the plugin
Install PurioChat like any other plugin: upload it under Plugins → Add New in your WordPress admin, then click Activate. A new PurioChat menu appears in the left sidebar, opening to the Dashboard tab by default.
Step 2 — Add an API key in Settings
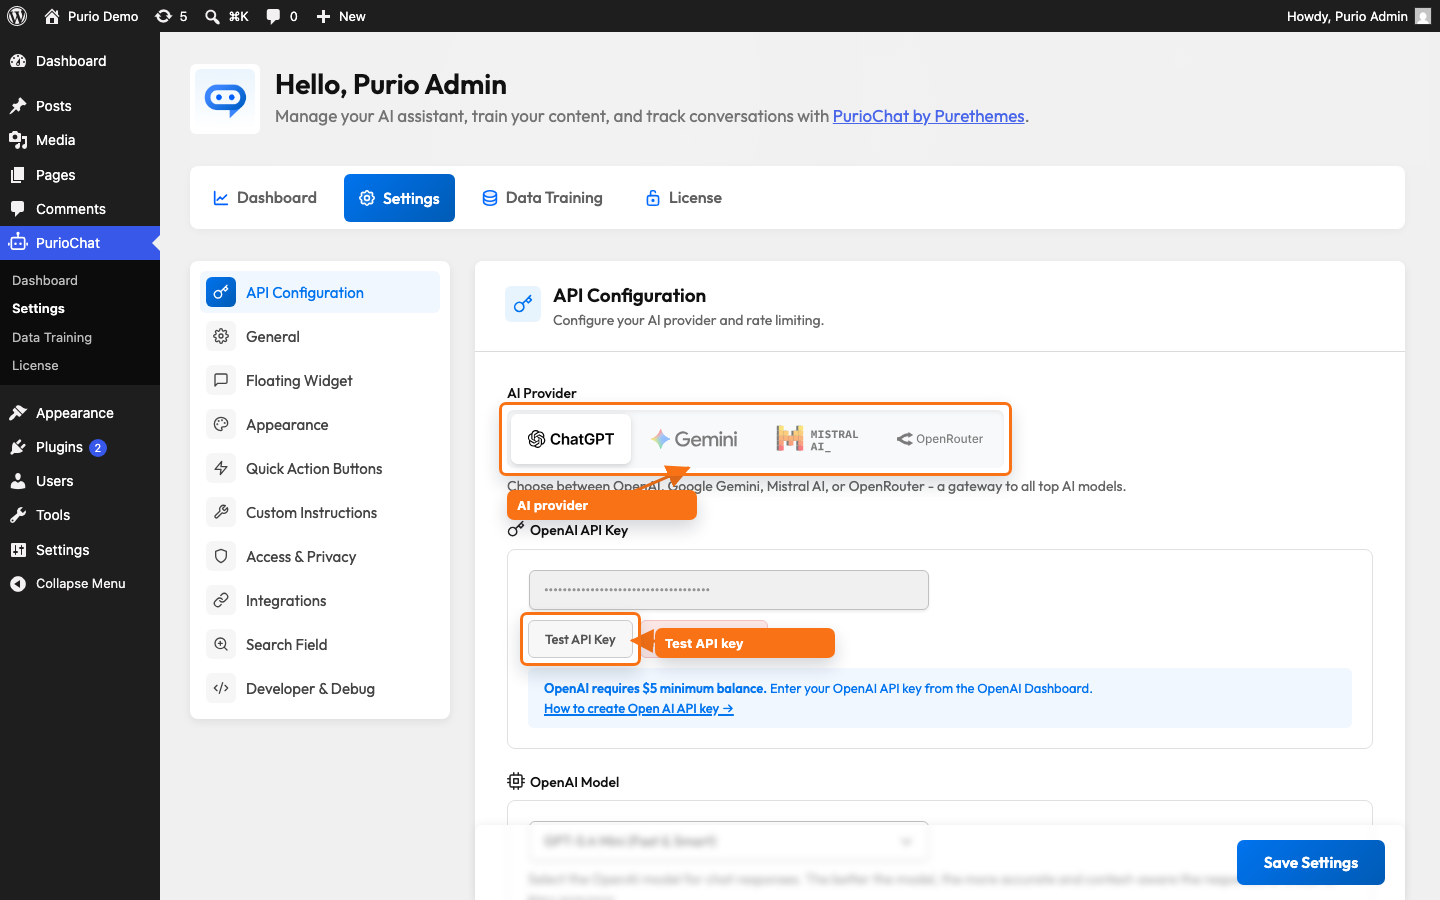
PurioChat needs an AI provider to understand your content and generate answers. Go to PurioChat → Settings → API Configuration and pick a provider with the four-way toggle: OpenAI, Google Gemini, Mistral AI, or OpenRouter (one key for many models). Each provider shows its own key field — paste your key, then click Test API Key to confirm it works.
- OpenAI and OpenRouter require a paid balance (about a $5 minimum).
- Gemini has a free tier, but its rate limits are very low — enabling billing avoids easy throttling.
- Mistral hosts data in the European Union, which is handy if GDPR matters to you.
Need help creating a key? See Choosing an AI Provider.
Step 3 — Select content types in Data Training
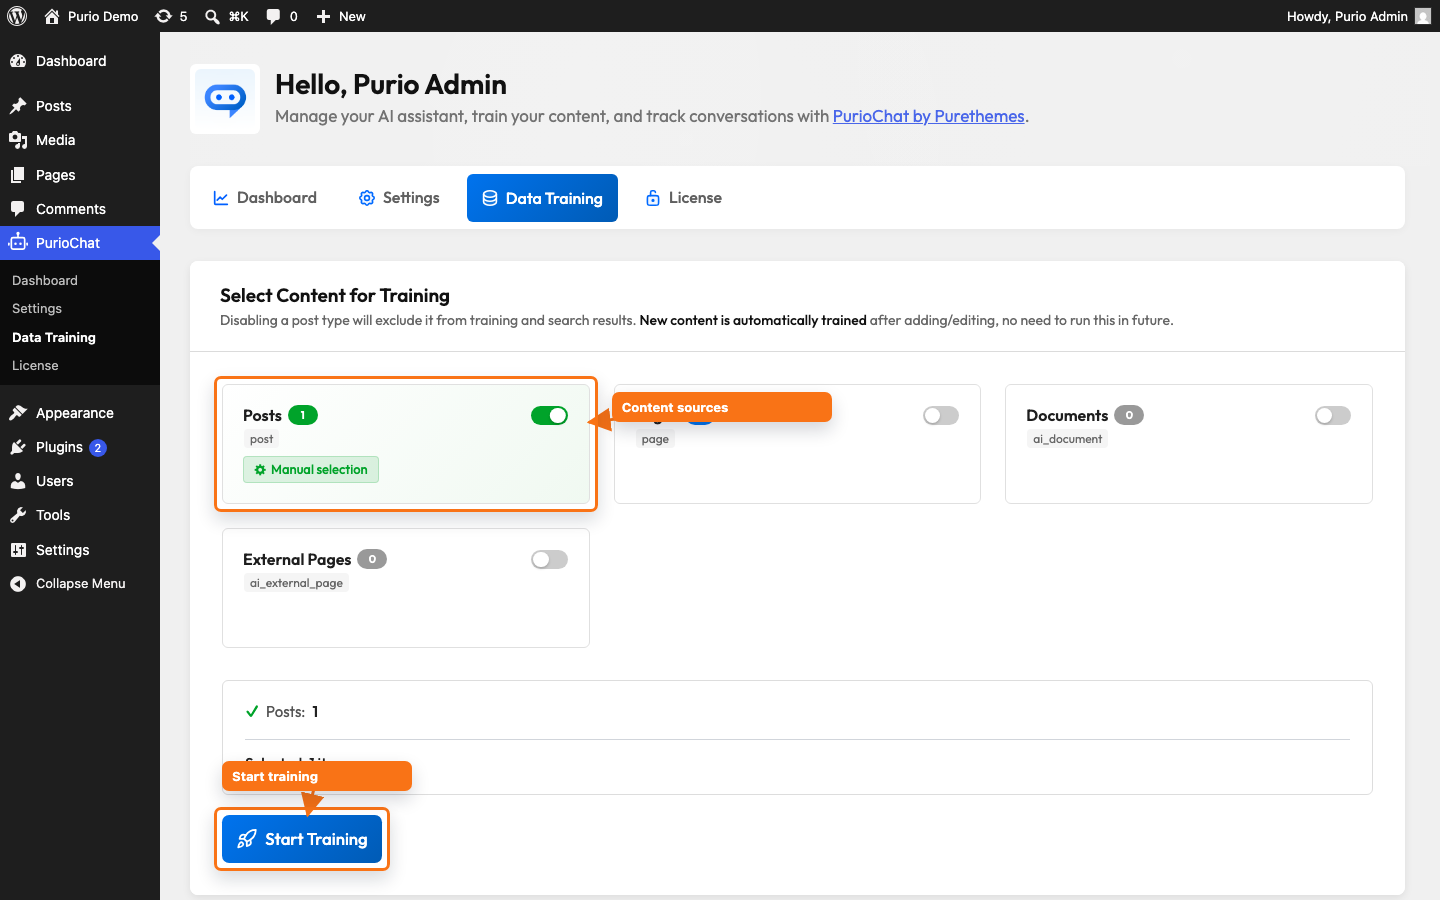
Open PurioChat → Data Training. You’ll see a card with an on/off toggle for each content source on your site. In the free version you can train Posts (on any theme) and Listings (when the Listeo theme is active). Toggle on the types you want the chatbot to learn from.
Want some items rather than all of them? Use the Manual selection link on a card to pick a subset of posts.
Step 4 — Start Training
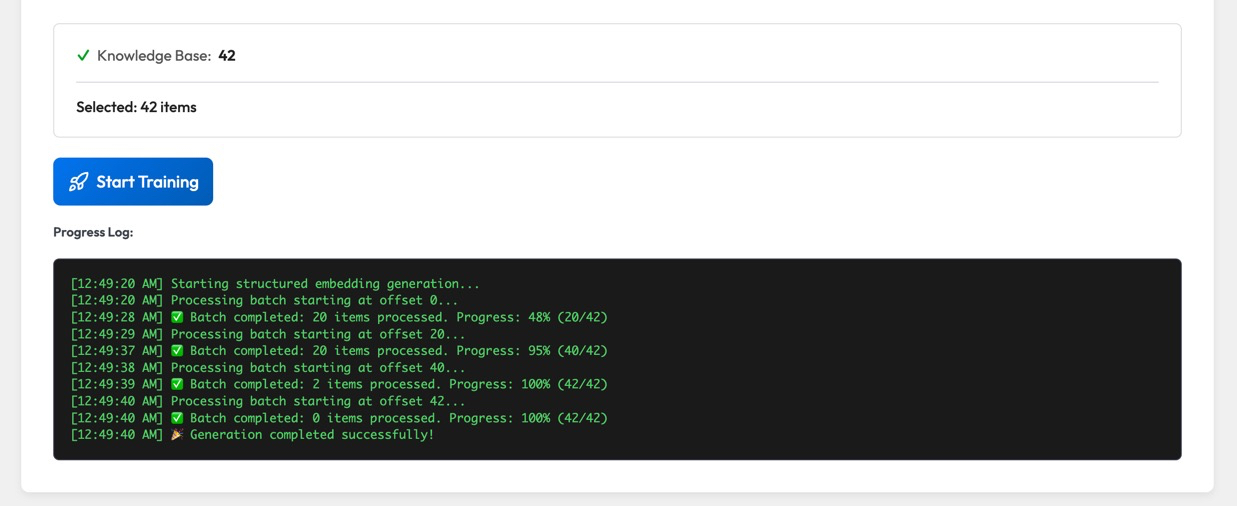
With your content types selected, click Start Training on the Data Training tab. A confirmation modal reminds you that training consumes API credits from your provider; confirm to begin. PurioChat processes your content in batches and shows a live progress log. There’s no limit on how many items you can train, and you can press Stop at any time.
This turns your content into searchable “embeddings” the AI uses to find relevant answers. When it finishes, your chatbot can respond using your real content.
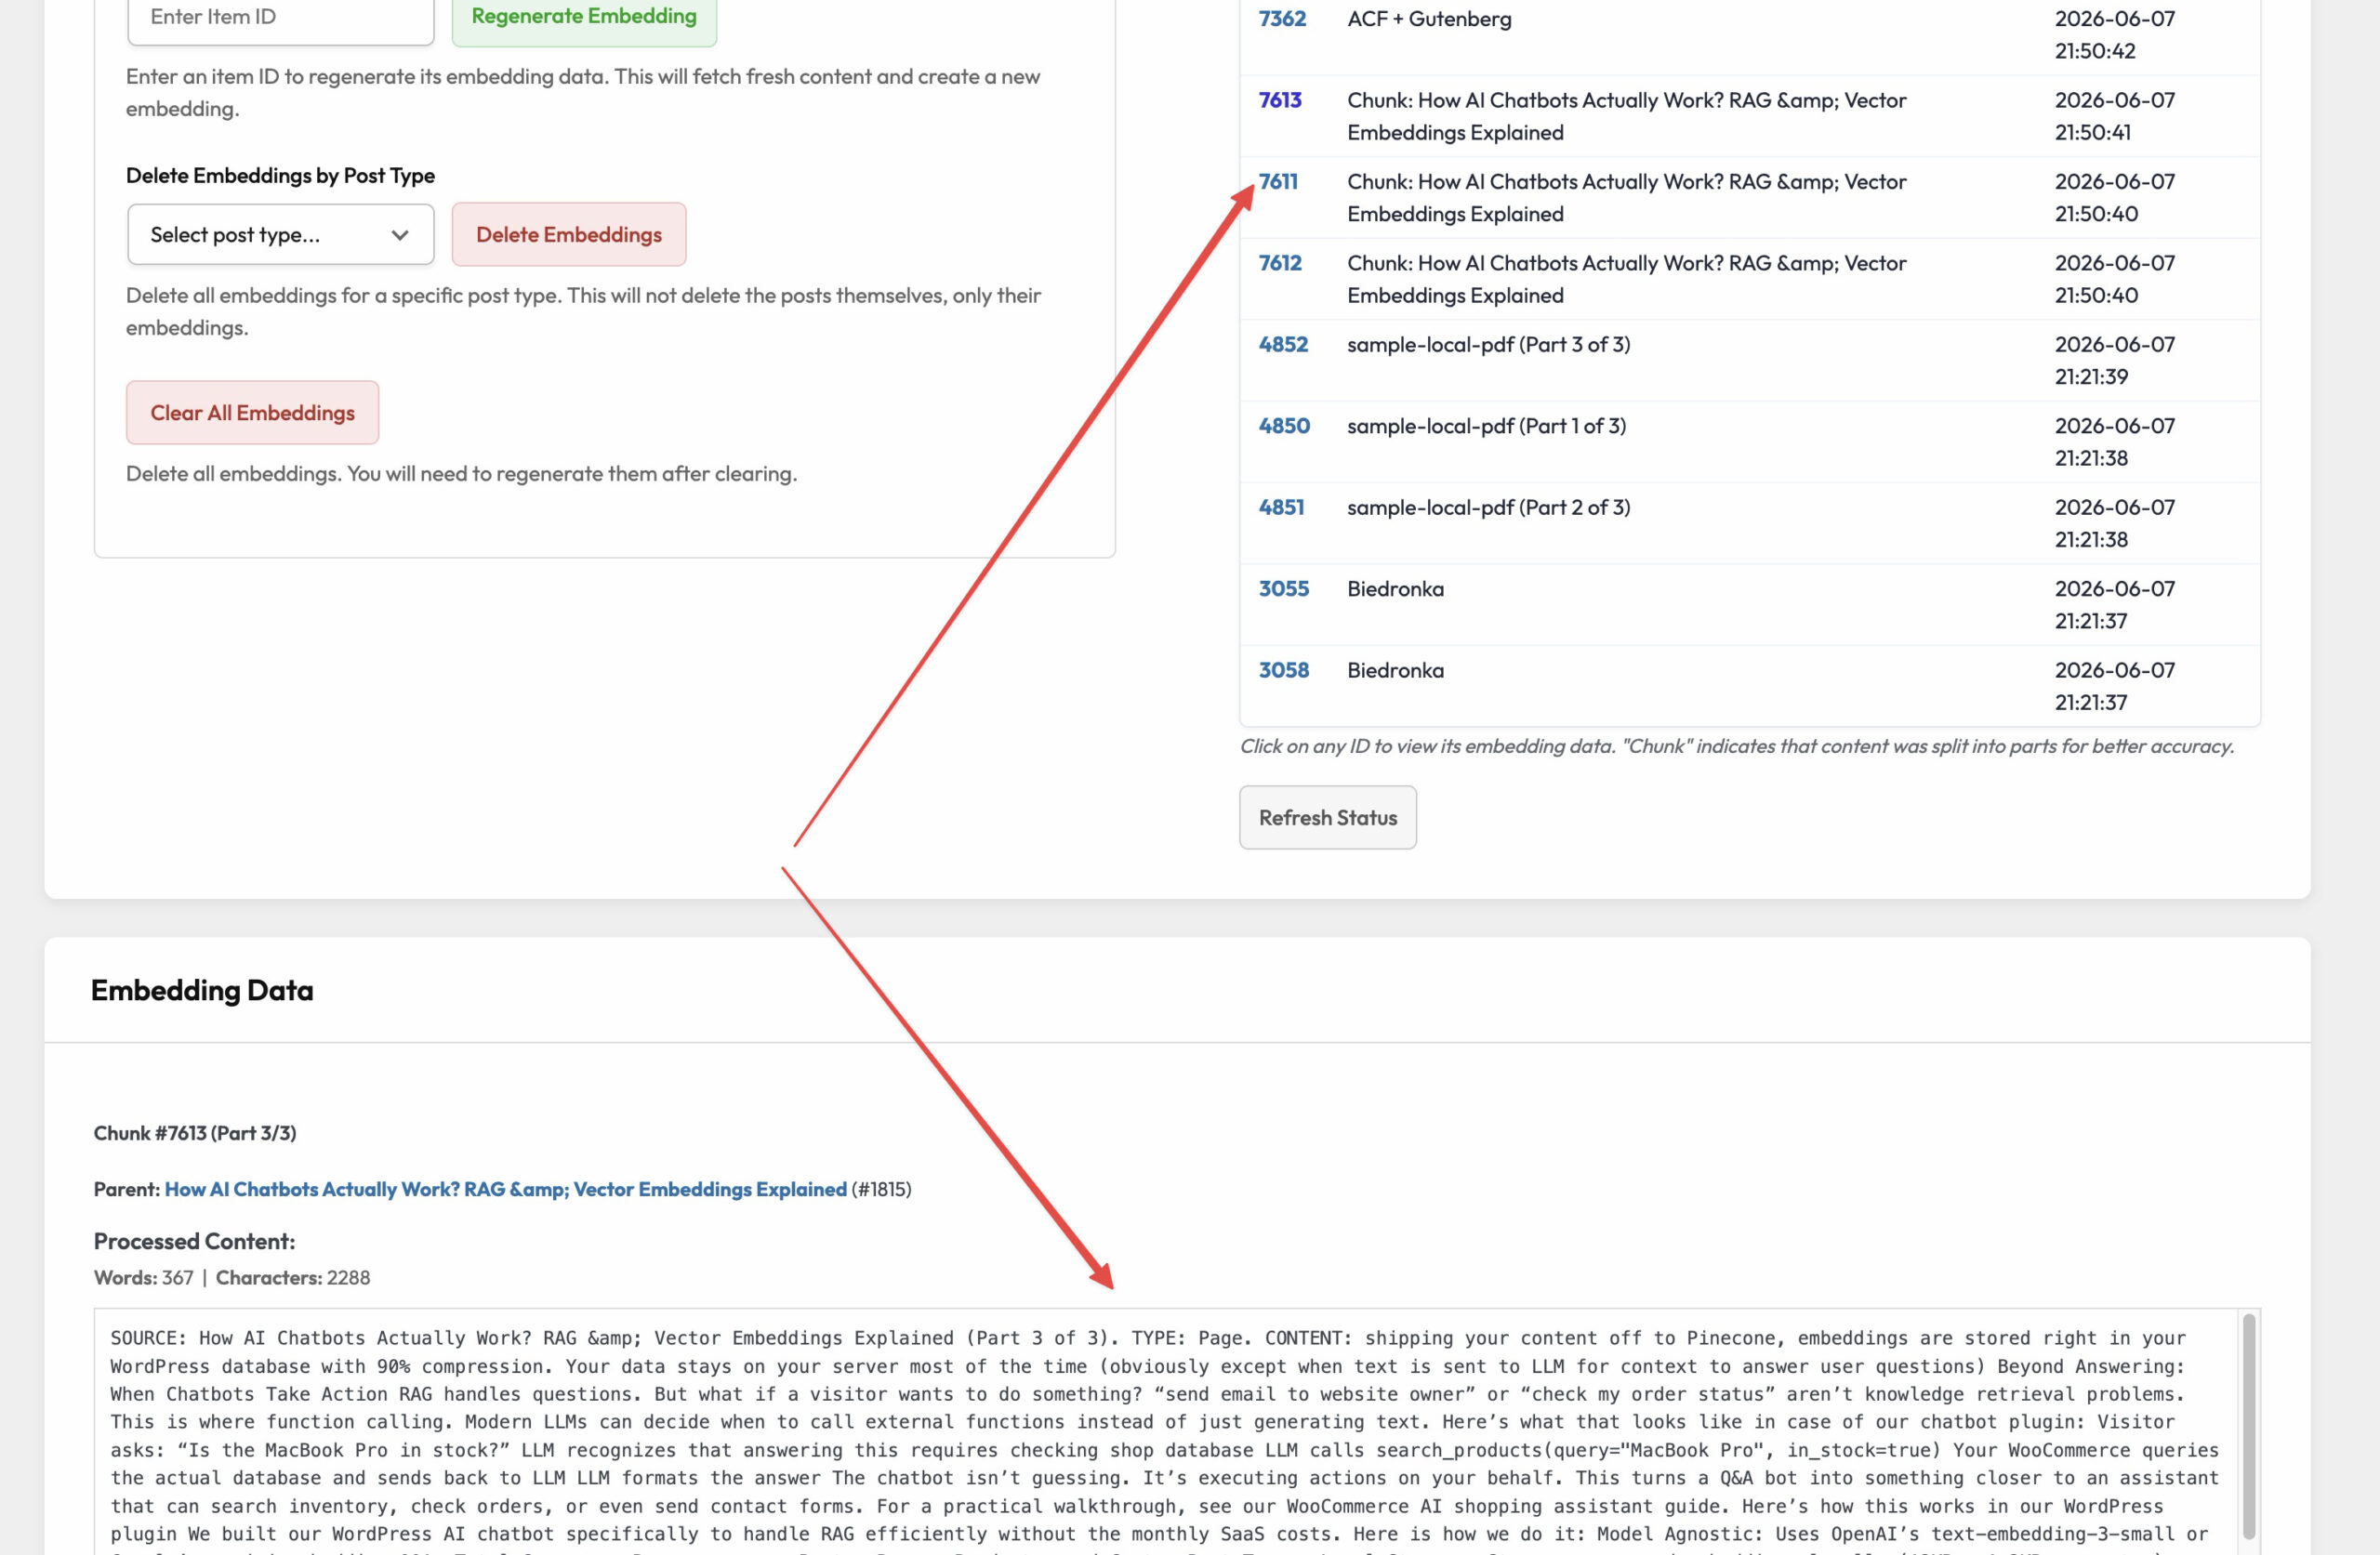
To check if all data from your post/page/product is in place after training scroll down to “Database Management” search for your post you want to check and click on embedding numer. It will reveal all processed data.
Step 5 — Turn on the chat
Now make the chatbot visible to visitors. You have two options.
Option A: Enable the floating widget
The floating widget is the chat bubble in the corner of every page. On fresh installs it’s enabled by default, so it may already be live. To check it, go to PurioChat → Settings → Floating Widget and confirm Enable Floating Chat Widget is on. The same screen sets the position (left or right), a welcome bubble, the popup size, and more.
Option B: Use the [ai_chat] shortcode
To embed the chat in a specific page or post instead, add the shortcode:
[ai_chat]
Adjust its size and layout with optional parameters, for example:
[ai_chat height="600px" style="2"]
You’re done
That’s the quick start. Visit your site, open the chat, and ask a question about your content. From here you can fine-tune the look, write a custom welcome message, and explore the guides below.