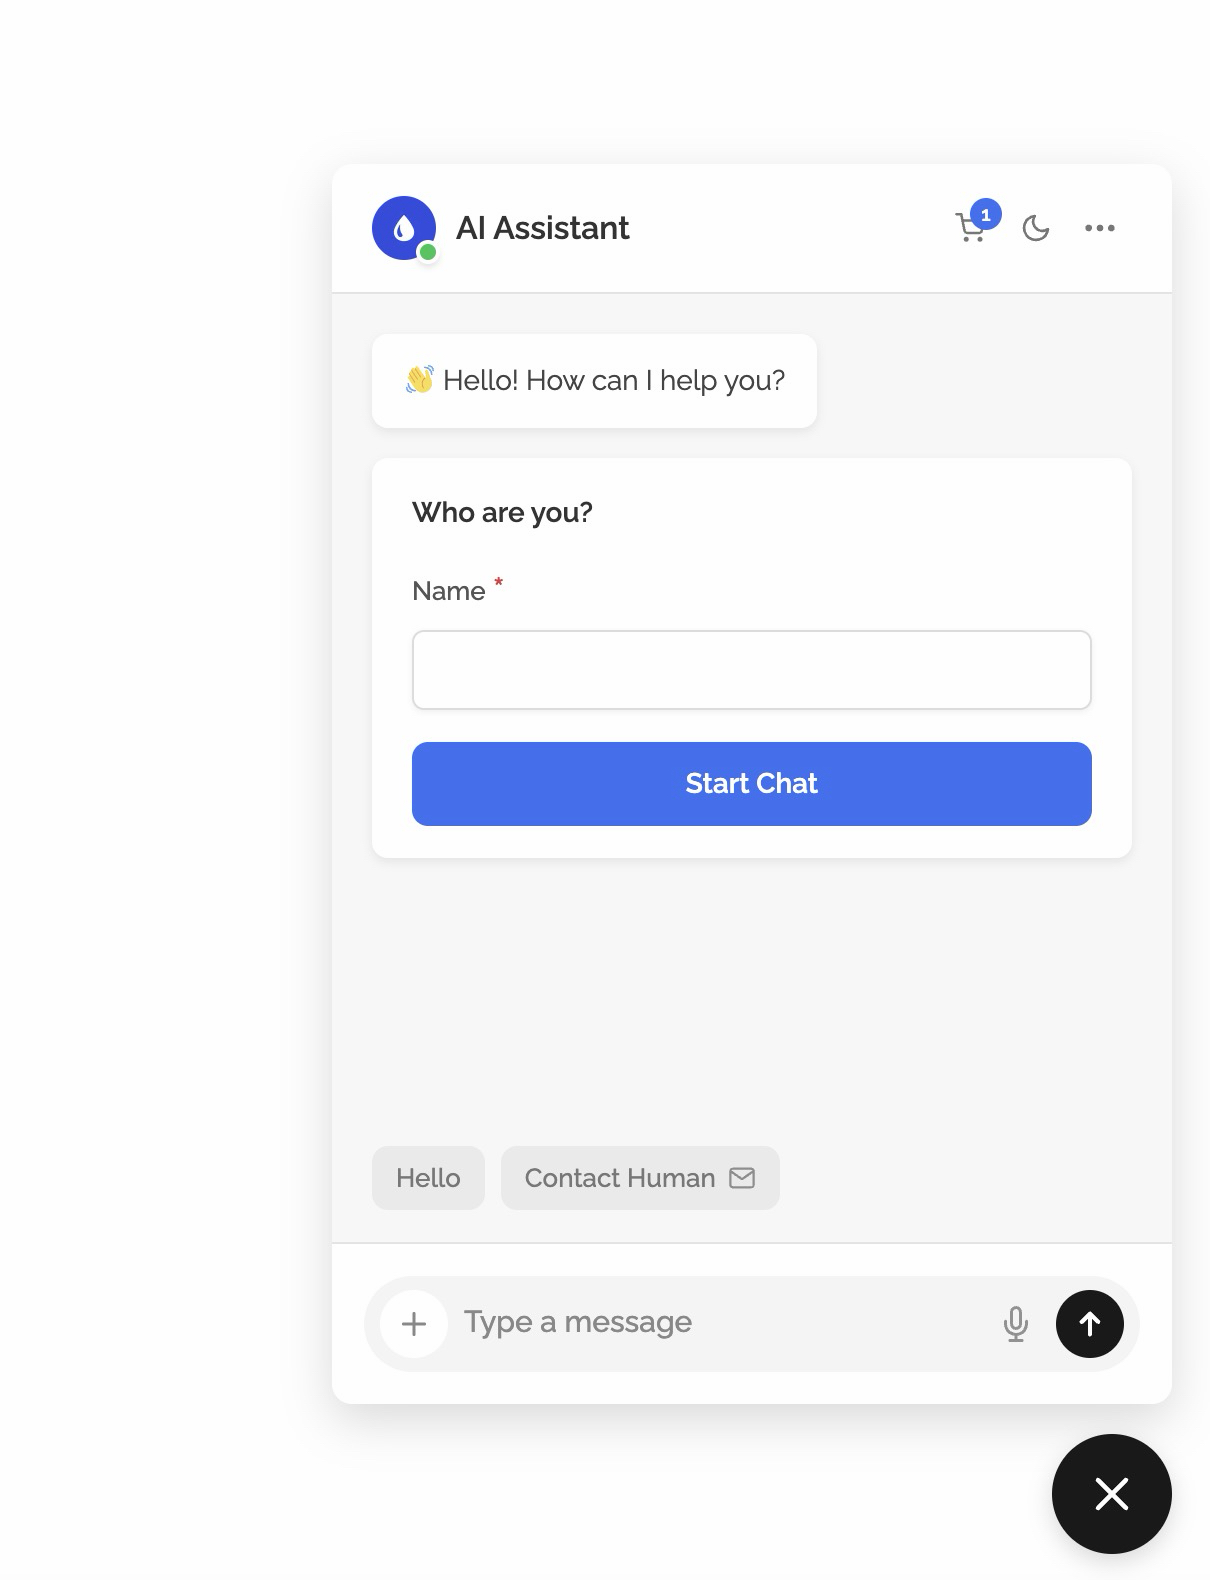
The Pre-Chat Form asks visitors for required details before they can send the first message. Use it when you want names, contact details, company names, booking references, or any other short context before the assistant starts answering.
Where to find it
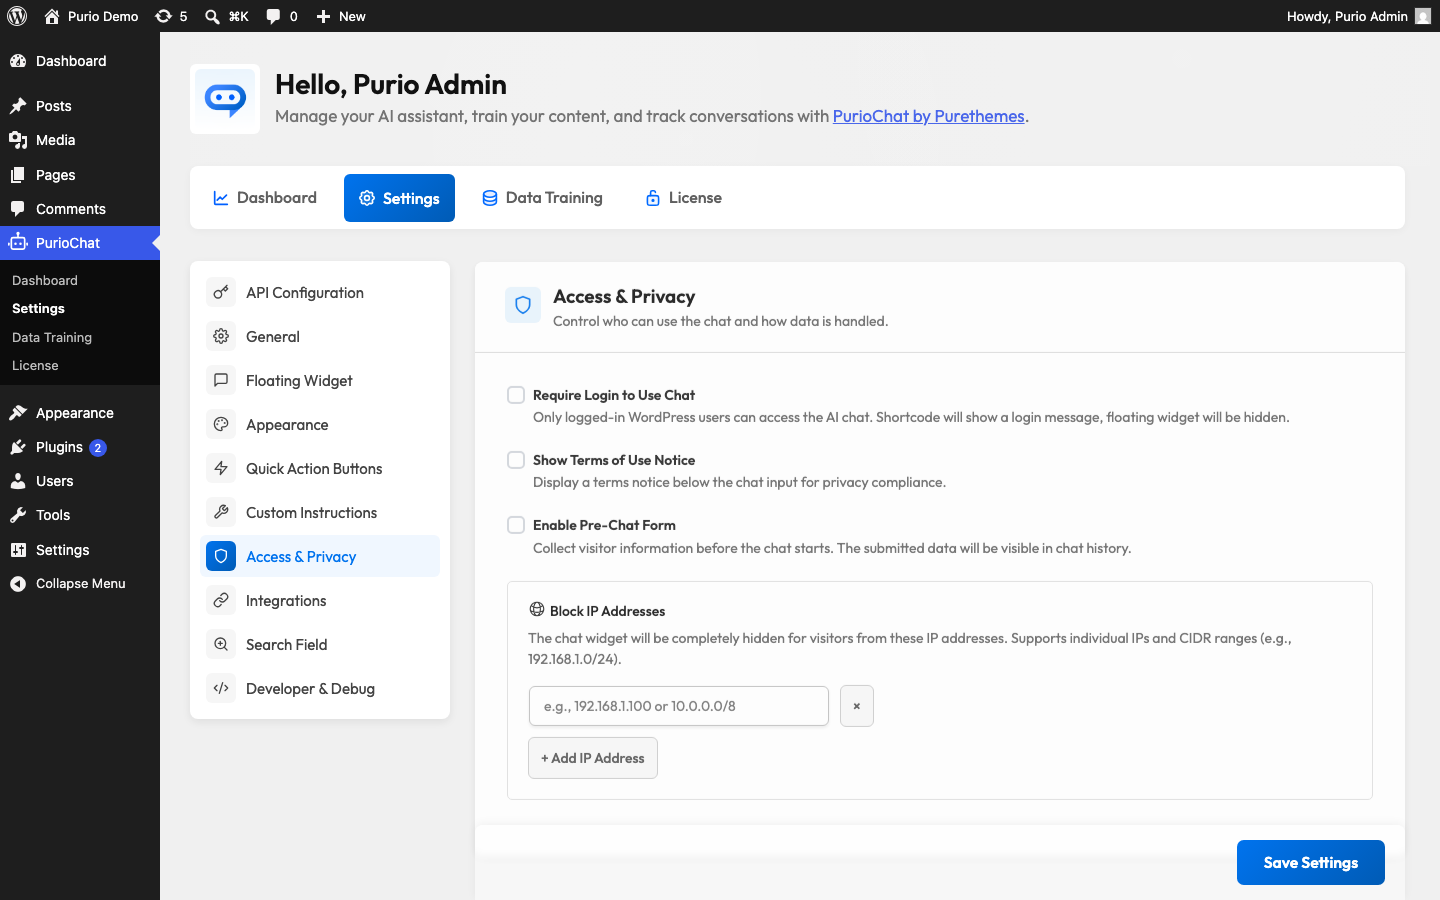
Open PurioChat → Settings → Access & Privacy and enable Pre-Chat Form.
The form is used by both the floating widget and embedded chats created with the shortcode. If the chat is disabled globally, hidden by page rules, blocked by Require Login, or blocked for an IP address, the pre-chat form will not appear because the chat itself is unavailable.
Configure the fields
After enabling the form, add the labels visitors must fill in. Each row becomes a required text field in the frontend form. Common labels are Full name, Email, Phone number, Company, or Order number.
- All configured fields are required.
- Answers must be between 2 and 200 characters.
- PurioChat stores up to 10 submitted fields with the first chat message.
- Empty field labels are ignored, so remove unused rows or leave them blank.
Use Form Headline when you want a short sentence above the fields, for example Please introduce yourself before we start. Leave it blank for no headline.
What visitors see
When the chat opens, visitors see the pre-chat form first. They must complete every visible field and click Start Chat. Only then does the normal chat input become available.
The form does not change the AI model, tools, or trained content. It only collects visitor context before the first message.
Where submitted details go
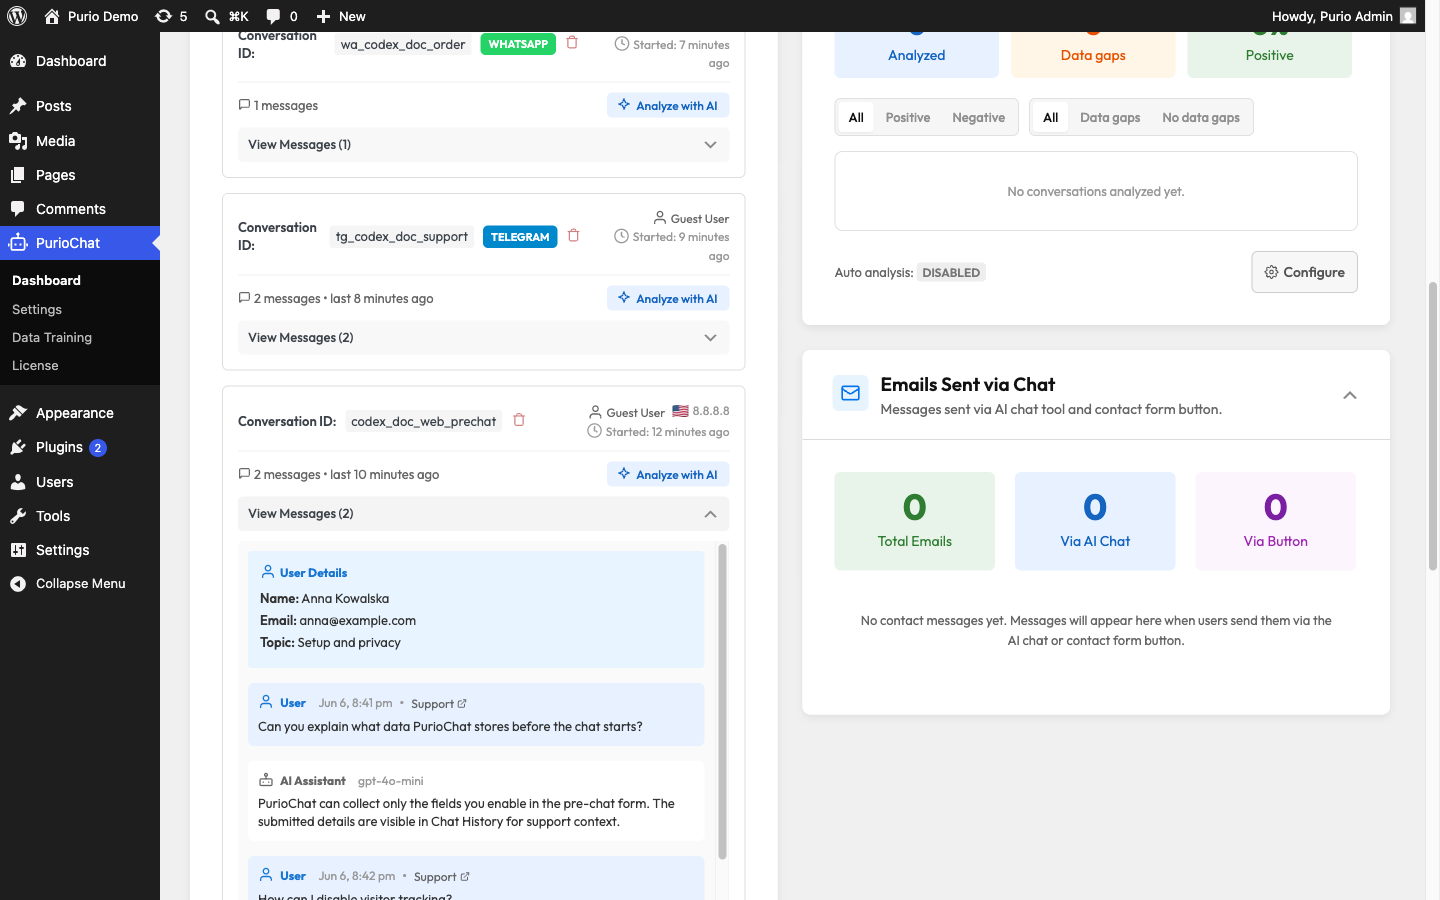
Submitted values are sent with the first message and saved with that conversation when Chat History tracking is enabled. In PurioChat → Dashboard → Chat History, the data appears in a User Details panel above the transcript.