OpenAI is the default AI provider in PurioChat, and connecting it is the fastest way to get your chatbot and semantic search working. This guide takes a few minutes: create a key, add billing credit, and paste the key into PurioChat.
Step 1: Sign in to the OpenAI platform
Go to platform.openai.com and sign in, or create an account. This is OpenAI’s developer platform, separate from the ChatGPT app you may already use.
Step 2: Add billing and a small balance
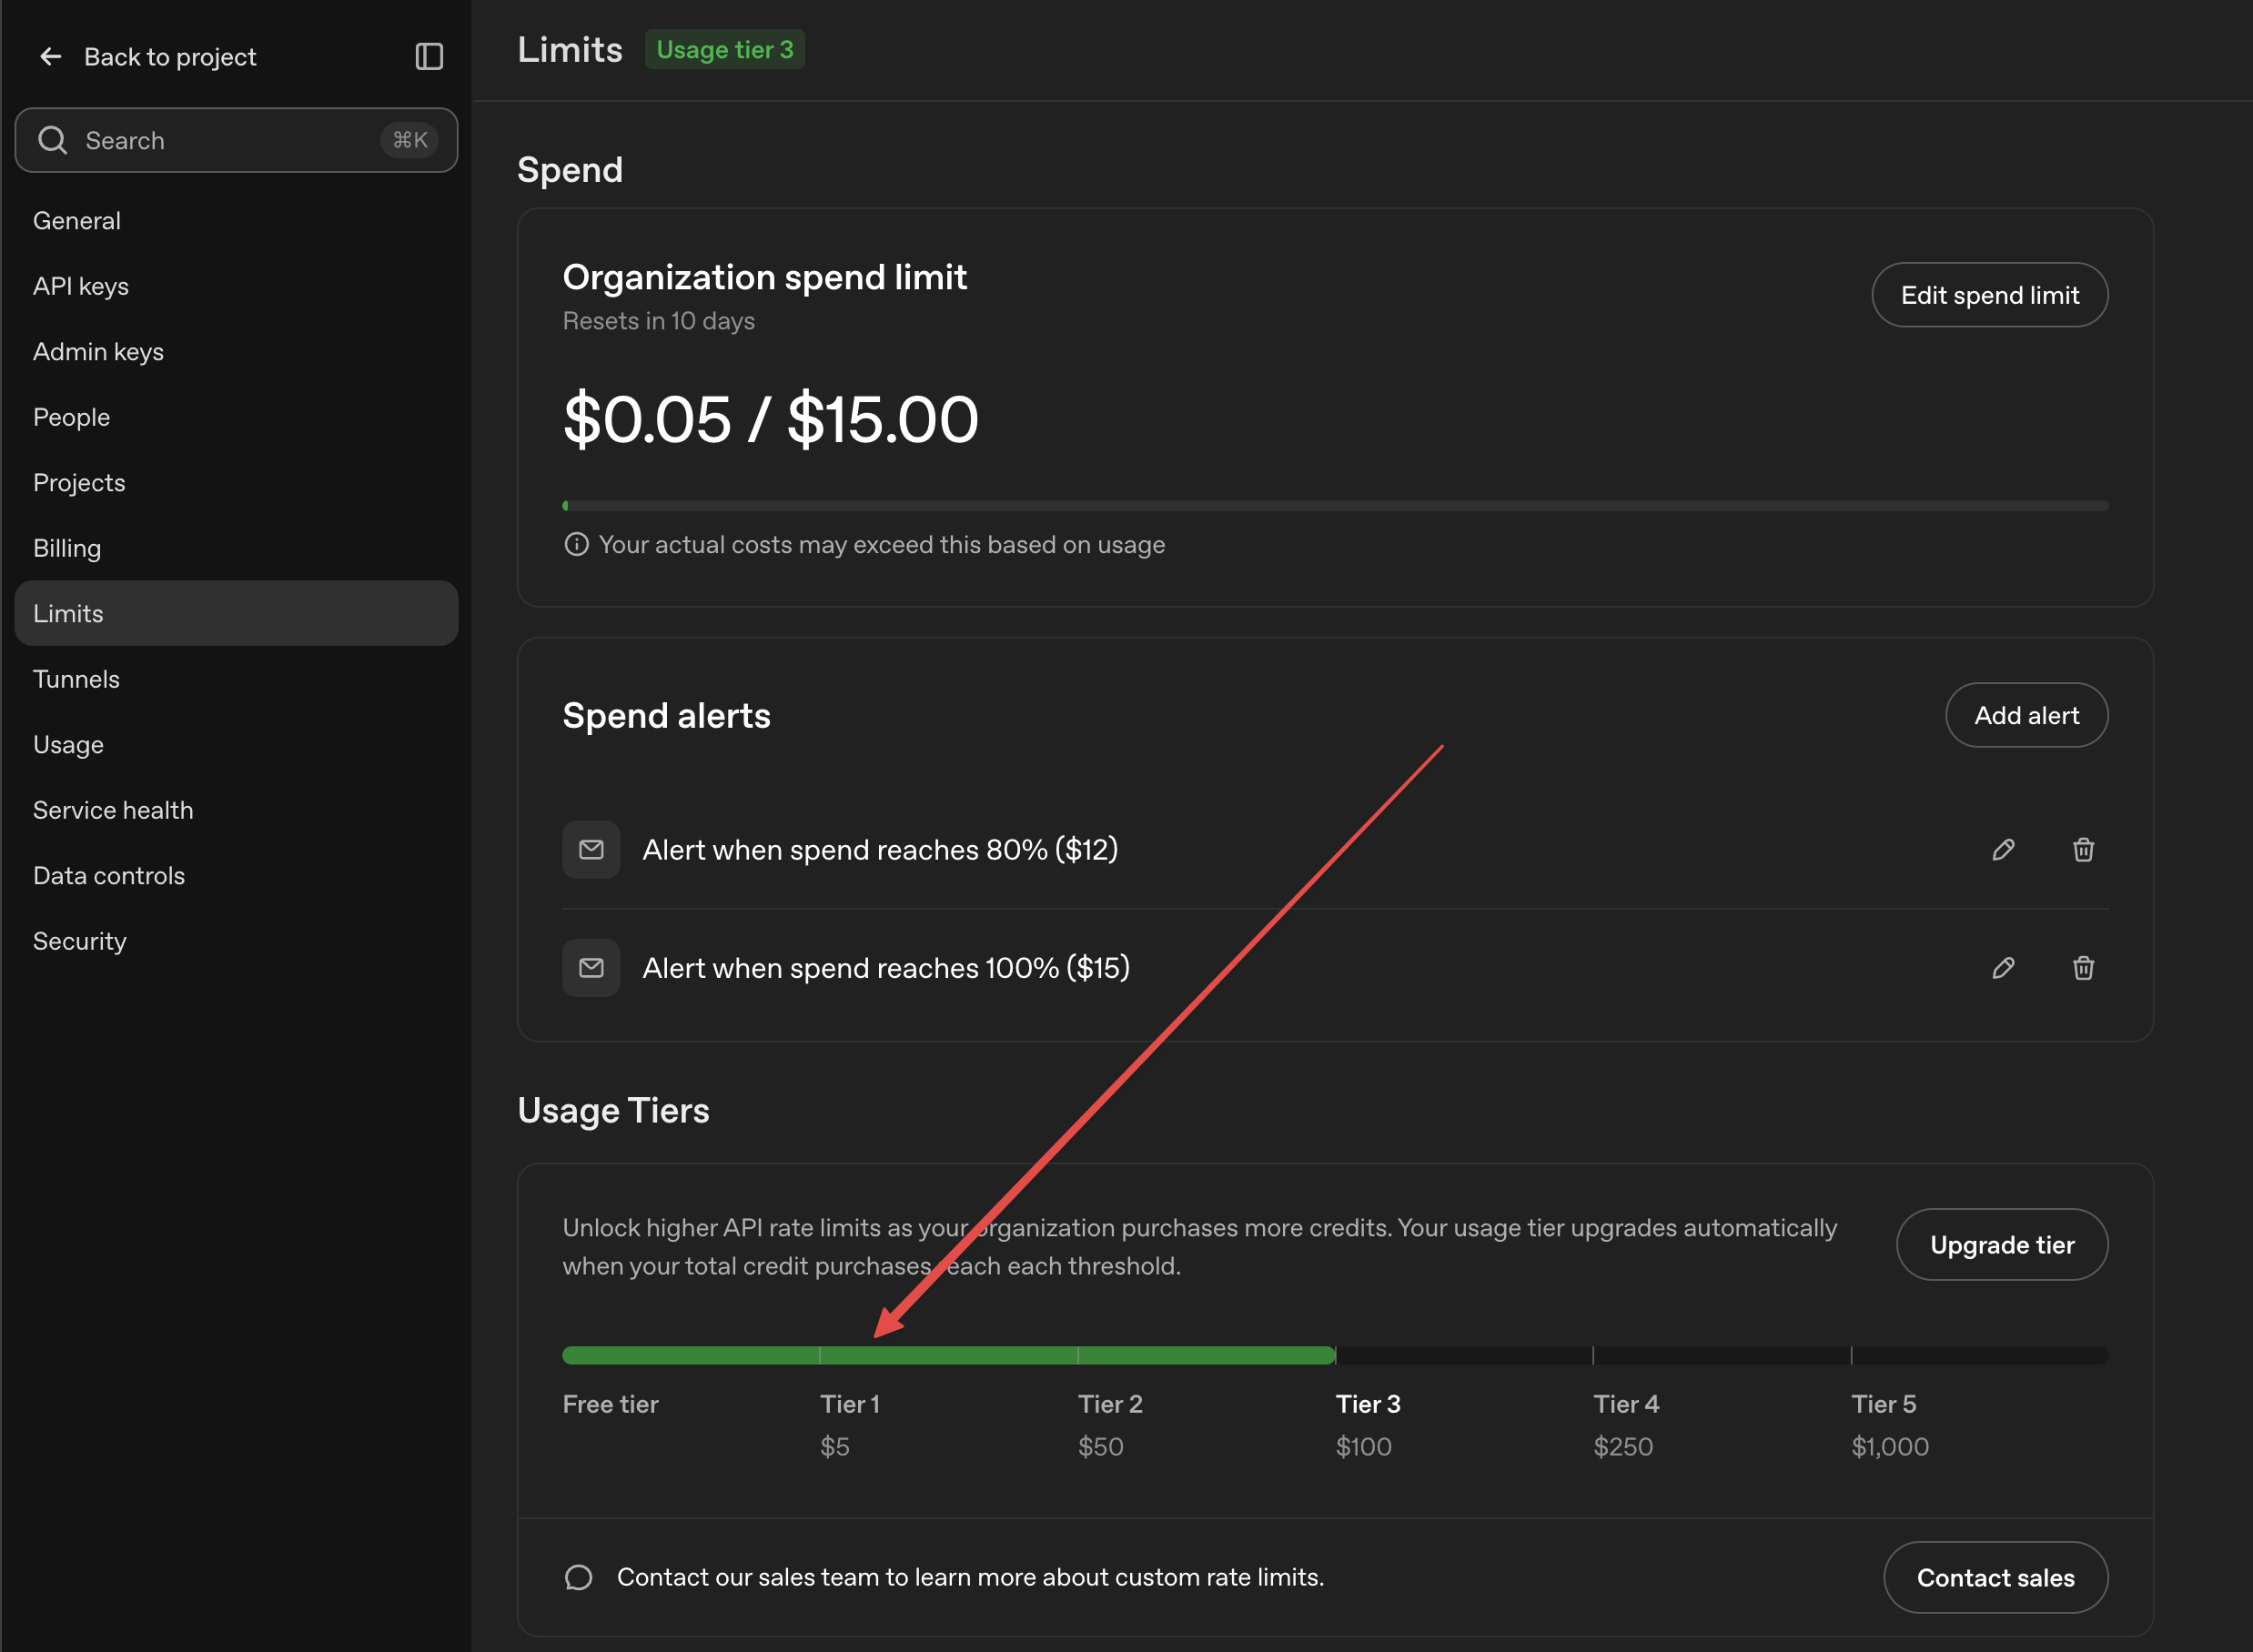
OpenAI charges per use, so a key won’t work until you’ve added a payment method and some credit. Open the Billing section, add a payment method, and top up your balance. About $5 is enough to start, which is the “$5 minimum balance” PurioChat notes next to the key field.
Make sure you are account is not at “free tier” limits.
Step 3: Create the API key
In the platform’s left-hand menu, open API keys (or go to platform.openai.com/api-keys). Click Create new secret key, give it a recognizable name like “PurioChat”, and confirm.

OpenAI shows the key once. It starts with sk- followed by a long string. Copy it now and store it somewhere safe, because OpenAI won’t show the full key again after you close the dialog. If you lose it, create a new one.
Step 4: Paste the key into PurioChat
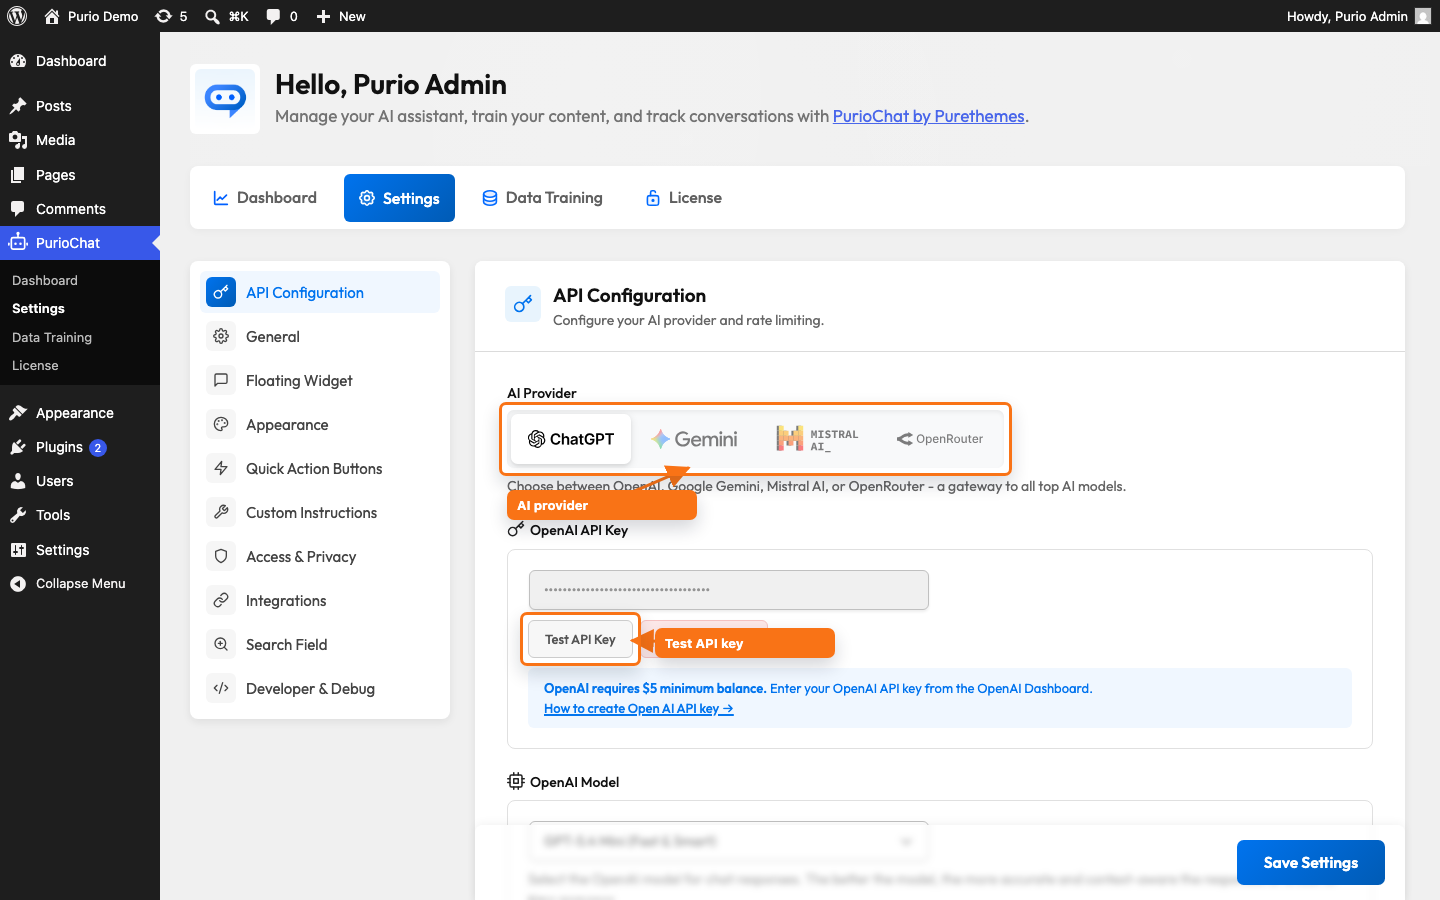
In your WordPress admin, go to PurioChat → Settings → API Configuration. Make sure OpenAI is selected as your provider (it’s the default), then paste your key into the OpenAI API Key field.
Step 5: Test the key
Click Test API Key. PurioChat sends a quick request to OpenAI to confirm the key is valid and your account can make calls. A success message means you’re ready to train content and use the chatbot.
If the test fails, check that you copied the whole key (it should begin with sk-, not sk-or-, which belongs to OpenRouter), and that your OpenAI account has billing set up with a positive balance. A new key with no credit behind it won’t pass.