Listeo User Group on Facebook
How It Works
Visitors use the compare button on listing cards or individual listing pages to build a shortlist. A floating compare bar shows their selection. Once they have selected at least two listings, they can open the comparison table.
The table displays photos, prices and listing details in matching columns. The example below uses the Listeo Cars demo.

Step 1: Enable Compare Listings
- Go to WP Admin → Listeo Core → Browse/Search Options.
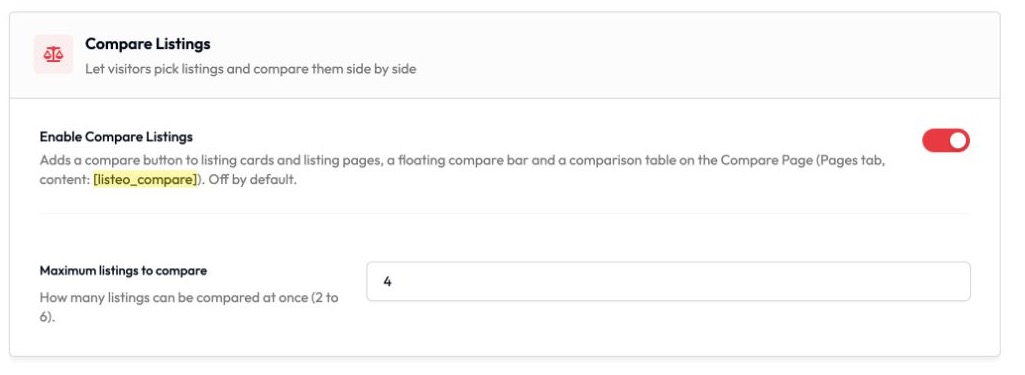
- Find the Compare Listings section and turn on Enable Compare Listings.
- Set Maximum listings to compare. The default is 4; you can choose any number from 2 to 6.
- Click Save Settings.
Step 2: Set Up the Compare Page
- Go to Pages → Add Page and name the page, for example, Compare.
- Add a Shortcode block containing
[listeo_compare]. In Elementor, use the Shortcode widget. - Publish the page.
- Go to Listeo Core → Pages, select it under Compare Page and save the settings.
This is a regular WordPress page. It does not need a dashboard template. You can also add it to your navigation menu so visitors can return to their shortlist.
Using the Comparison Table
- Select listings using their compare buttons. Use the same button again to remove a listing.
- Open the floating bar and click Compare after selecting at least two listings.
- Use View listing to open a listing, or Add a listing to return to browsing.
- Remove an individual column with its × button. Use Clear all to start a new comparison.
- On smaller screens, scroll the table sideways to see more columns.
Show Only Differences
Turn on Show only differences to hide rows whose values are the same for every selected listing. In the example below, all three cars use gasoline and automatic transmission, so those rows disappear. Rows such as year, number of seats and engine power remain visible.

Which Fields Appear?
The comparison uses the listing details already displayed on your listing pages, including custom fields and taxonomies. Manage these in Listeo Editor → Listing Fields. Field labels, section headings and configured icons are reused in the table.
A row is omitted if none of the selected listings has a value for it. If only some listings have a value, the row remains and the missing values display as a dash. There is no separate field configuration required just for comparison.
Saved Selections and Sharing
Guests can compare listings without signing in. Their selection is stored in their browser. Signed-in users also have their selection saved to their account so it can follow them across devices.
To share a comparison, copy the table page’s address after opening it from the floating bar. The URL includes the selected listing IDs, for example ?ids=208,209,207. Someone opening that link sees those listings.
Troubleshooting
-
The compare buttons do not appear
-
The Compare button in the floating bar is disabled
-
A custom field is missing from the table
-
A listing is missing from a shared comparison