What the Team Feature Does
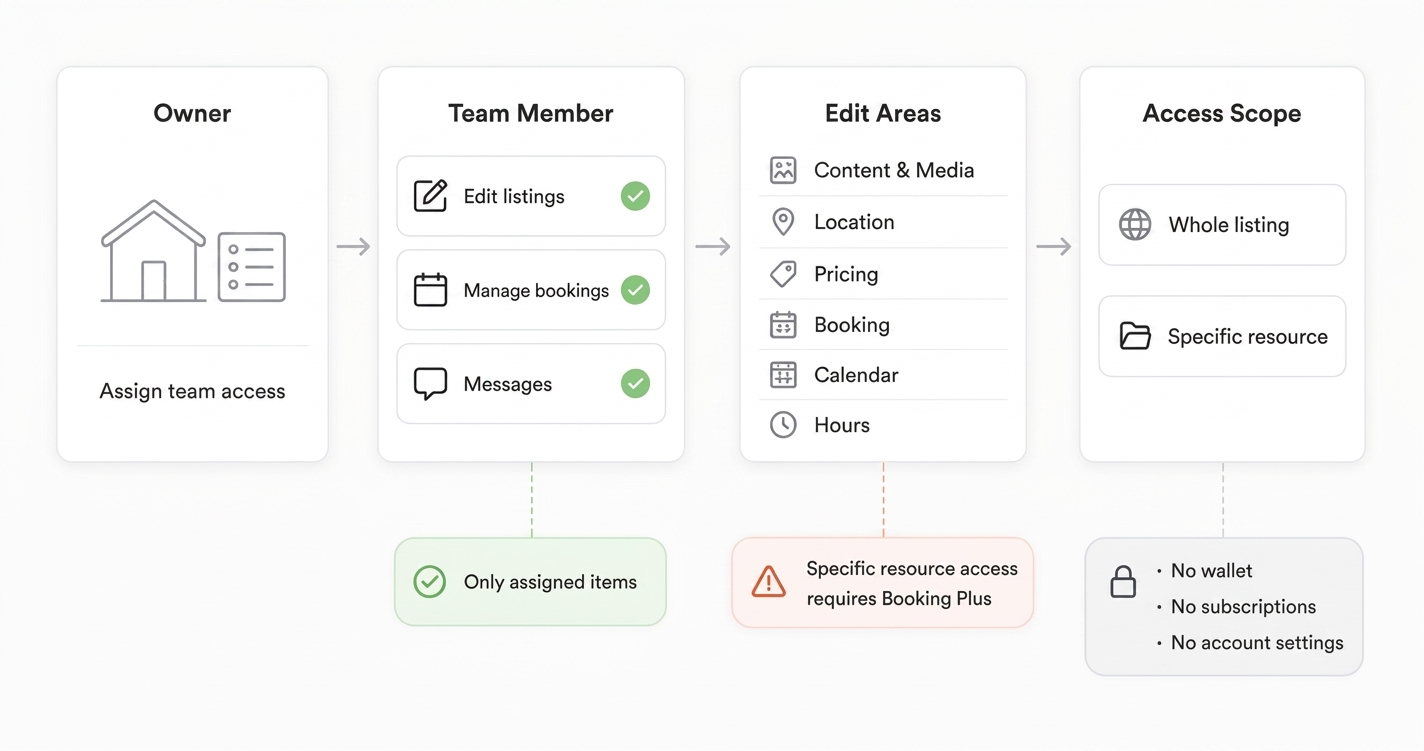
Owners can give employees one or more permissions:
- Edit listings: Edit assigned listings.
- Manage bookings: View and manage bookings for assigned listings.
- Messages: Reply to messages linked to assigned listings.
Employees use their own accounts. They cannot see the owner’s other listings, bookings, messages, wallet, subscriptions, or account settings.
Choose What Employees Can Edit
For employees with the Edit listings permission, you can allow access to specific areas:
- Content & Media
- Location
- Pricing & Coupons
- Booking Settings
- Availability Calendar
- Opening Hours
All areas are selected by default for new team members.
Listing and Resource Access
You can assign an employee to:
- A whole listing: The employee can use their granted permissions for that listing.
- A specific resource: The employee can manage only selected rooms, staff, tables, vehicles, or other resources.
Requirements
- Listeo Core 2.0.53 or newer
- Listeo Booking Plus, only for resource access
Step 1: Enable the Team Feature
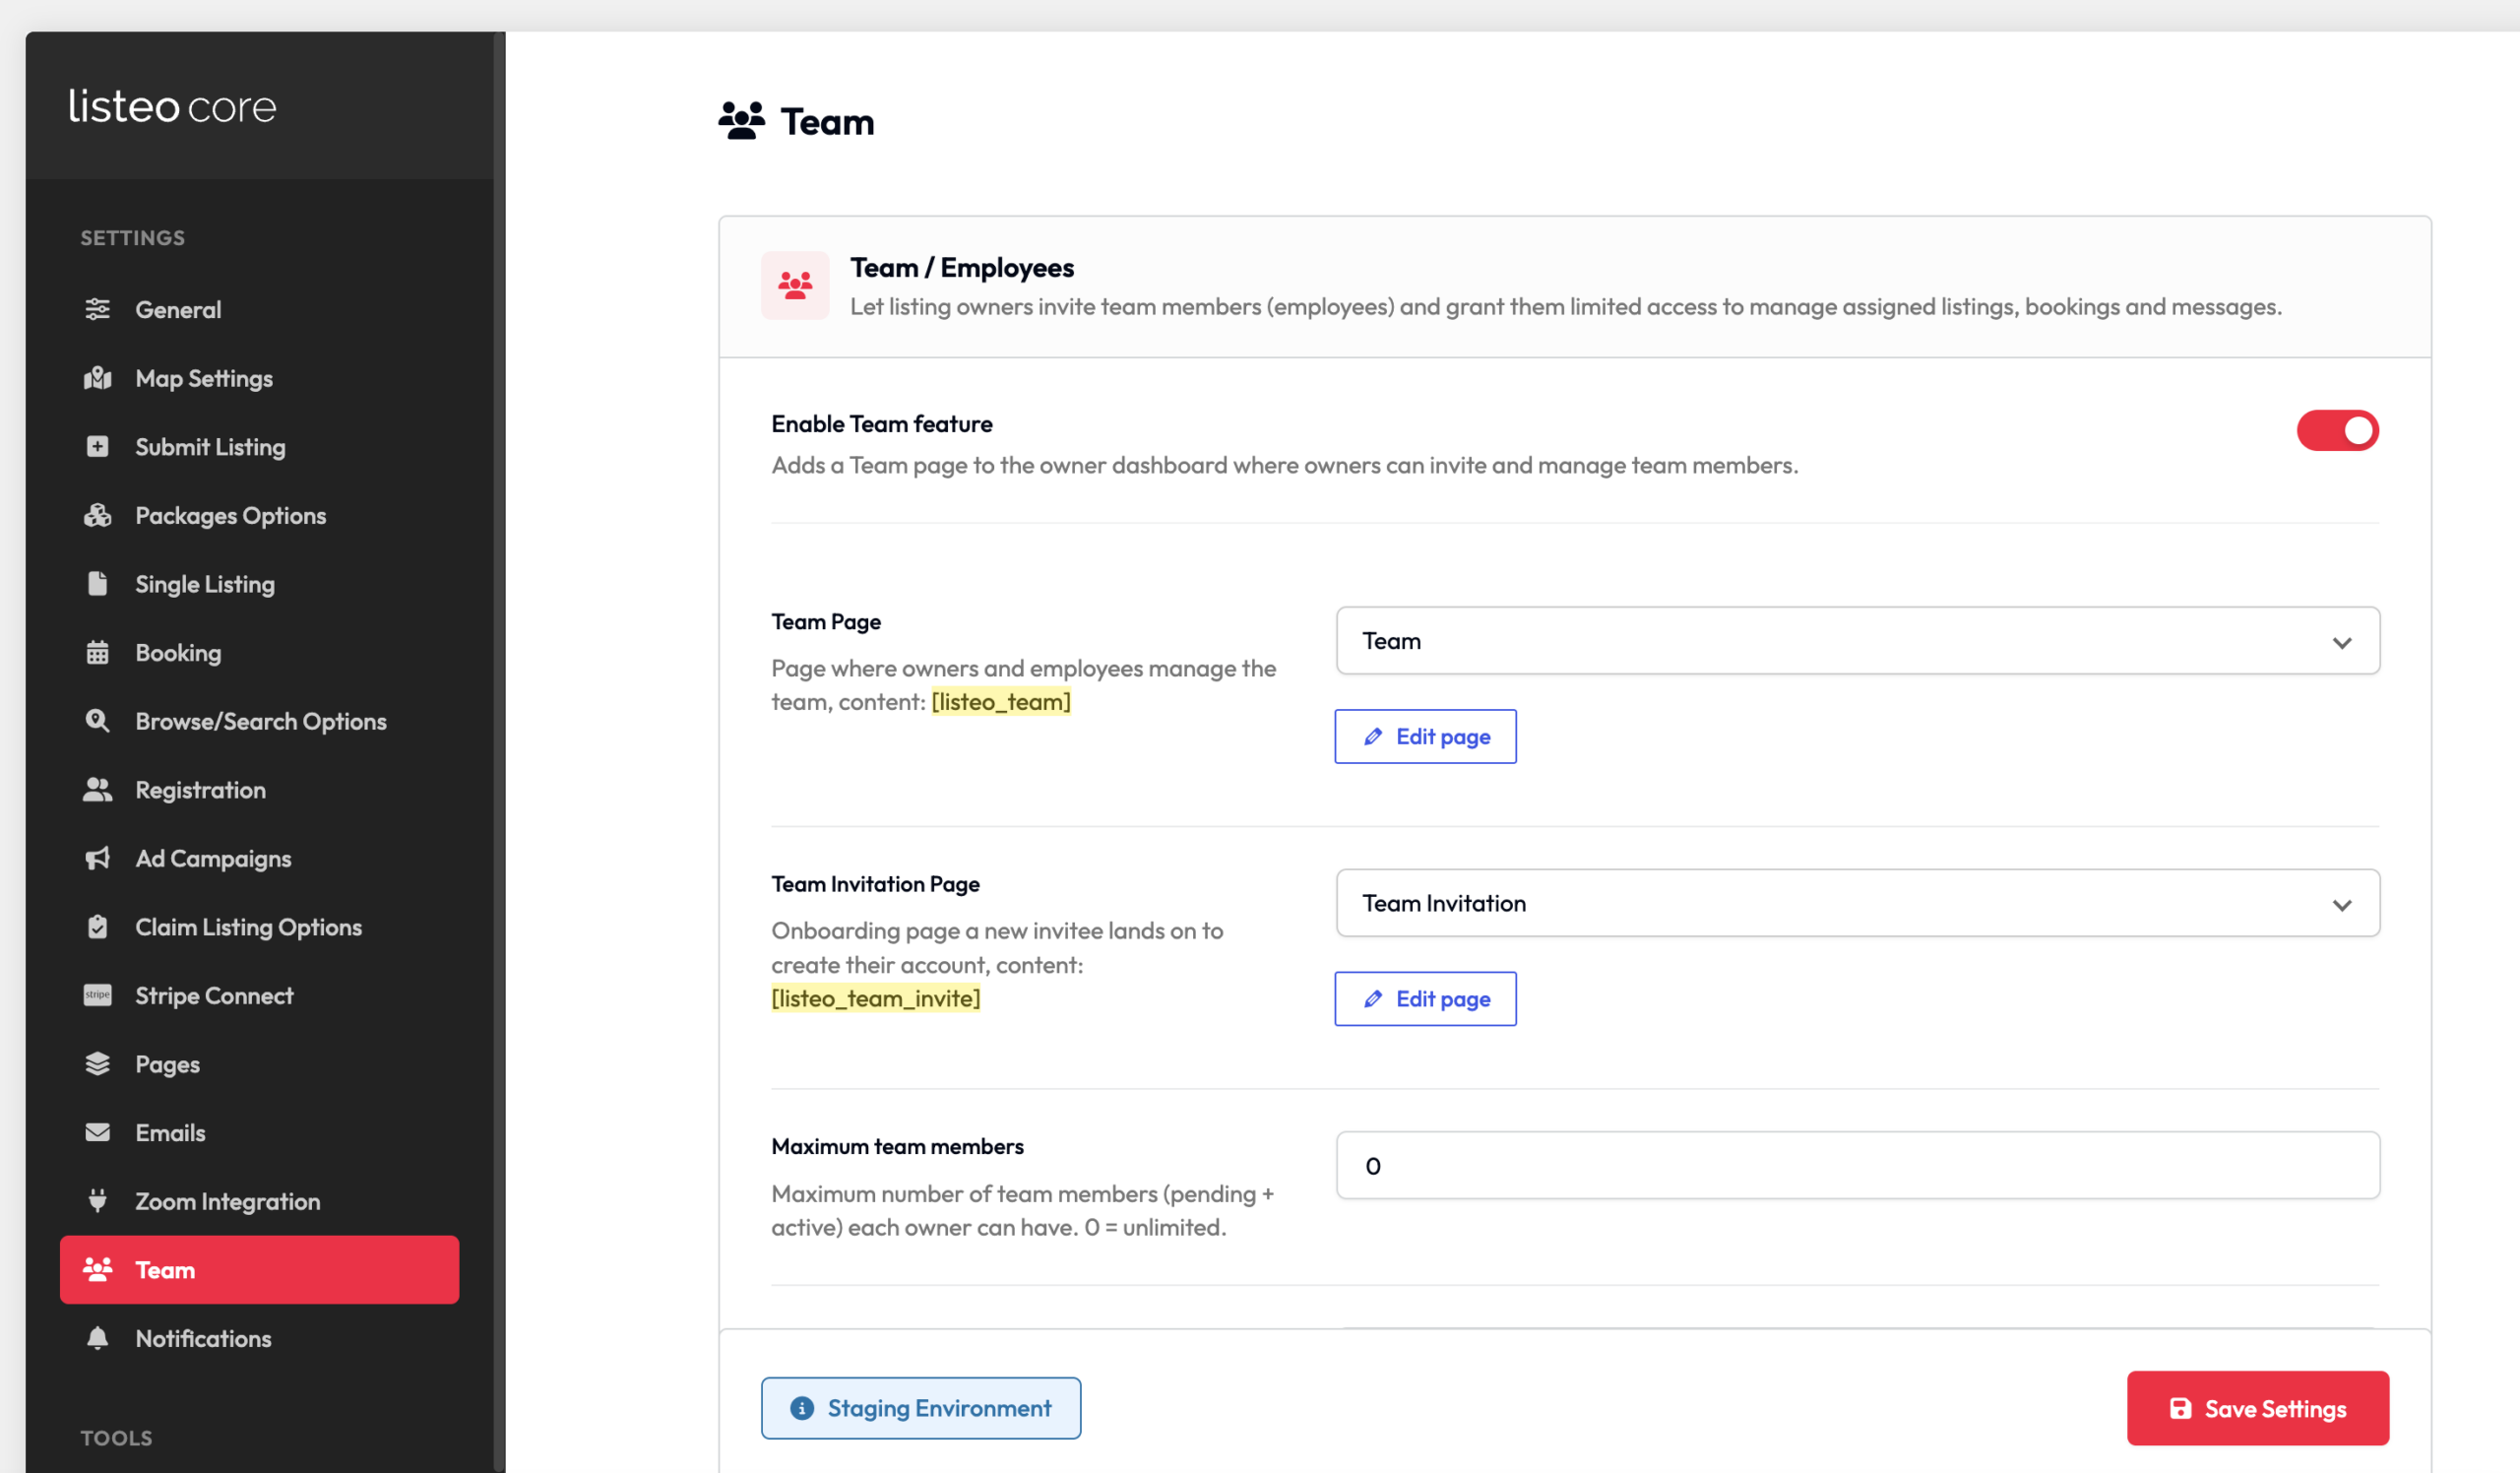
Go to WP Admin → Listeo Core → General → Team.
- Turn on Enable Team feature.
- Set the Team Page. Click Create page, or select a page that contains
[listeo_team]. - Set the Team Invitation Page. Click Create page, or select a page that contains
[listeo_team_invite]. - Set Maximum team members. Use 0 for no limit. Pending and active members both count toward the limit.
- Set Invitation expiry. The default is 7 days.
- Choose whether employees may unpublish or delete assigned listings. Both options are off by default.
- Click Save Settings.
Team Emails
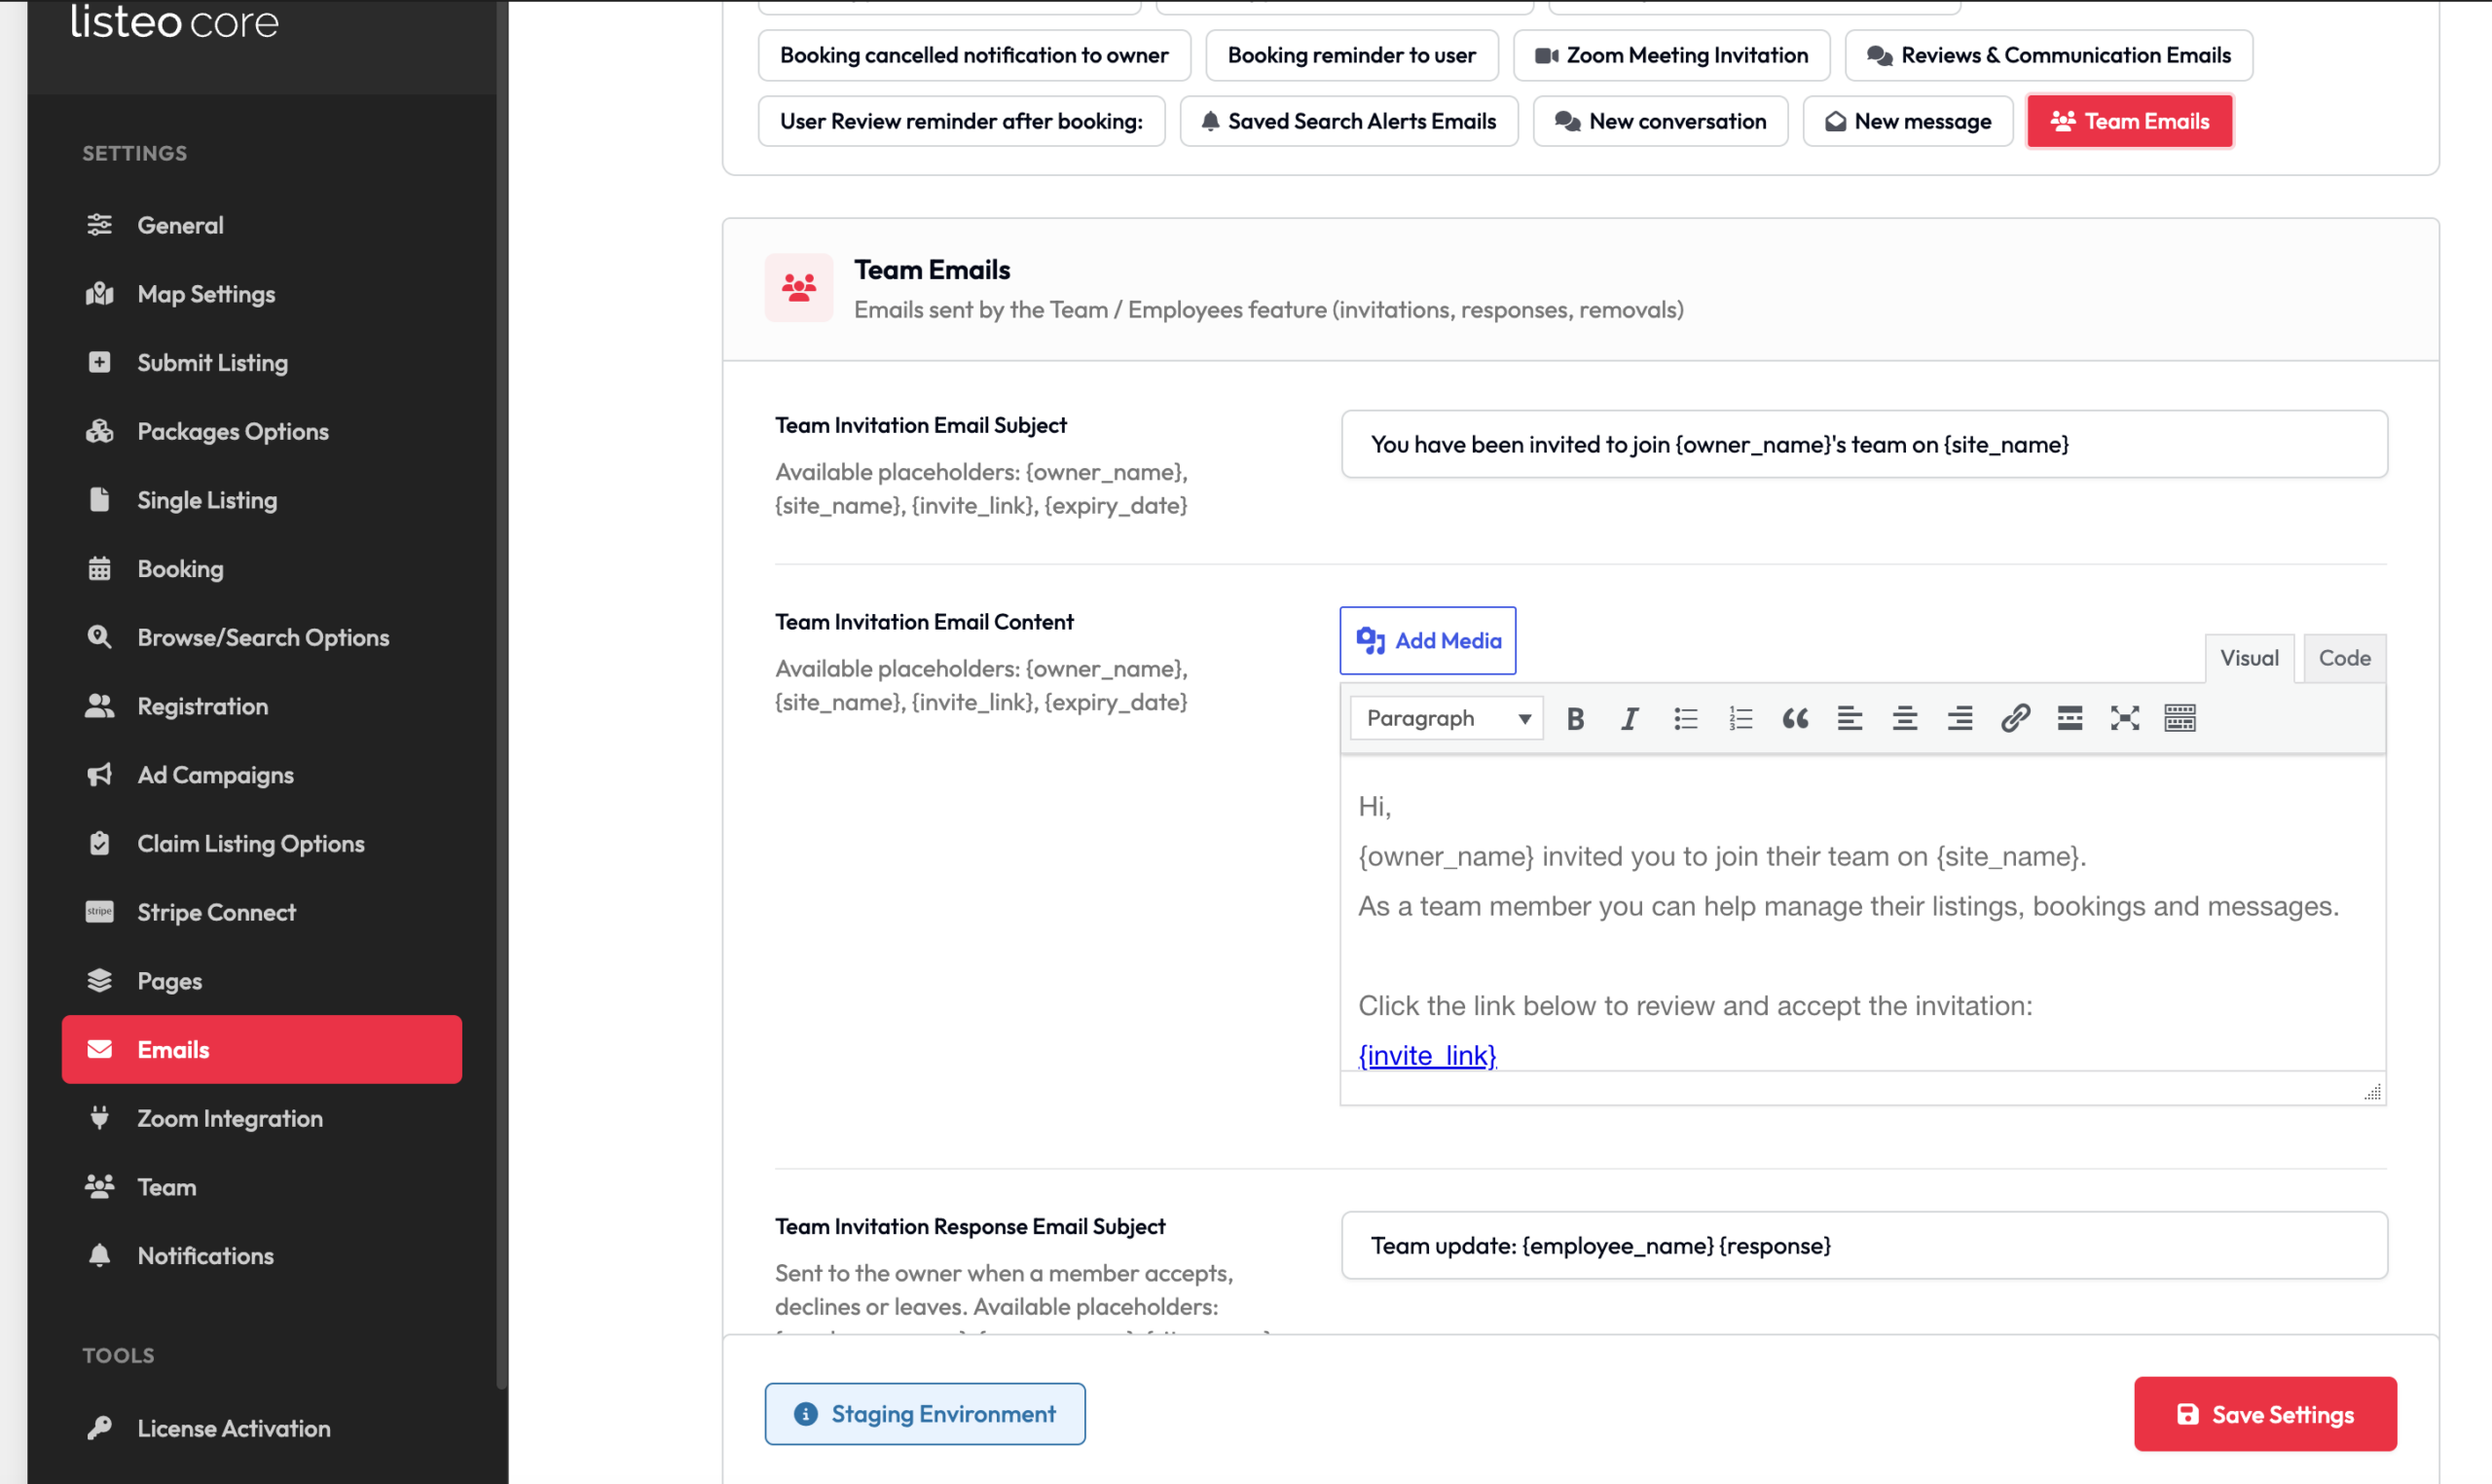
Go to WP Admin → Listeo Core → Emails → Team Emails to edit these messages:
- Team Invitation Email: Sent to the invited person. Available tags:
{owner_name},{site_name},{invite_link},{expiry_date}. - Team Invitation Response Email: Sent to the owner when someone accepts, declines, or leaves. Available tags:
{employee_name},{owner_name},{site_name},{response}. - Team Member Removed Email: Sent to an employee after access is revoked. Available tags:
{owner_name},{site_name}.
Step 2: Invite an Employee
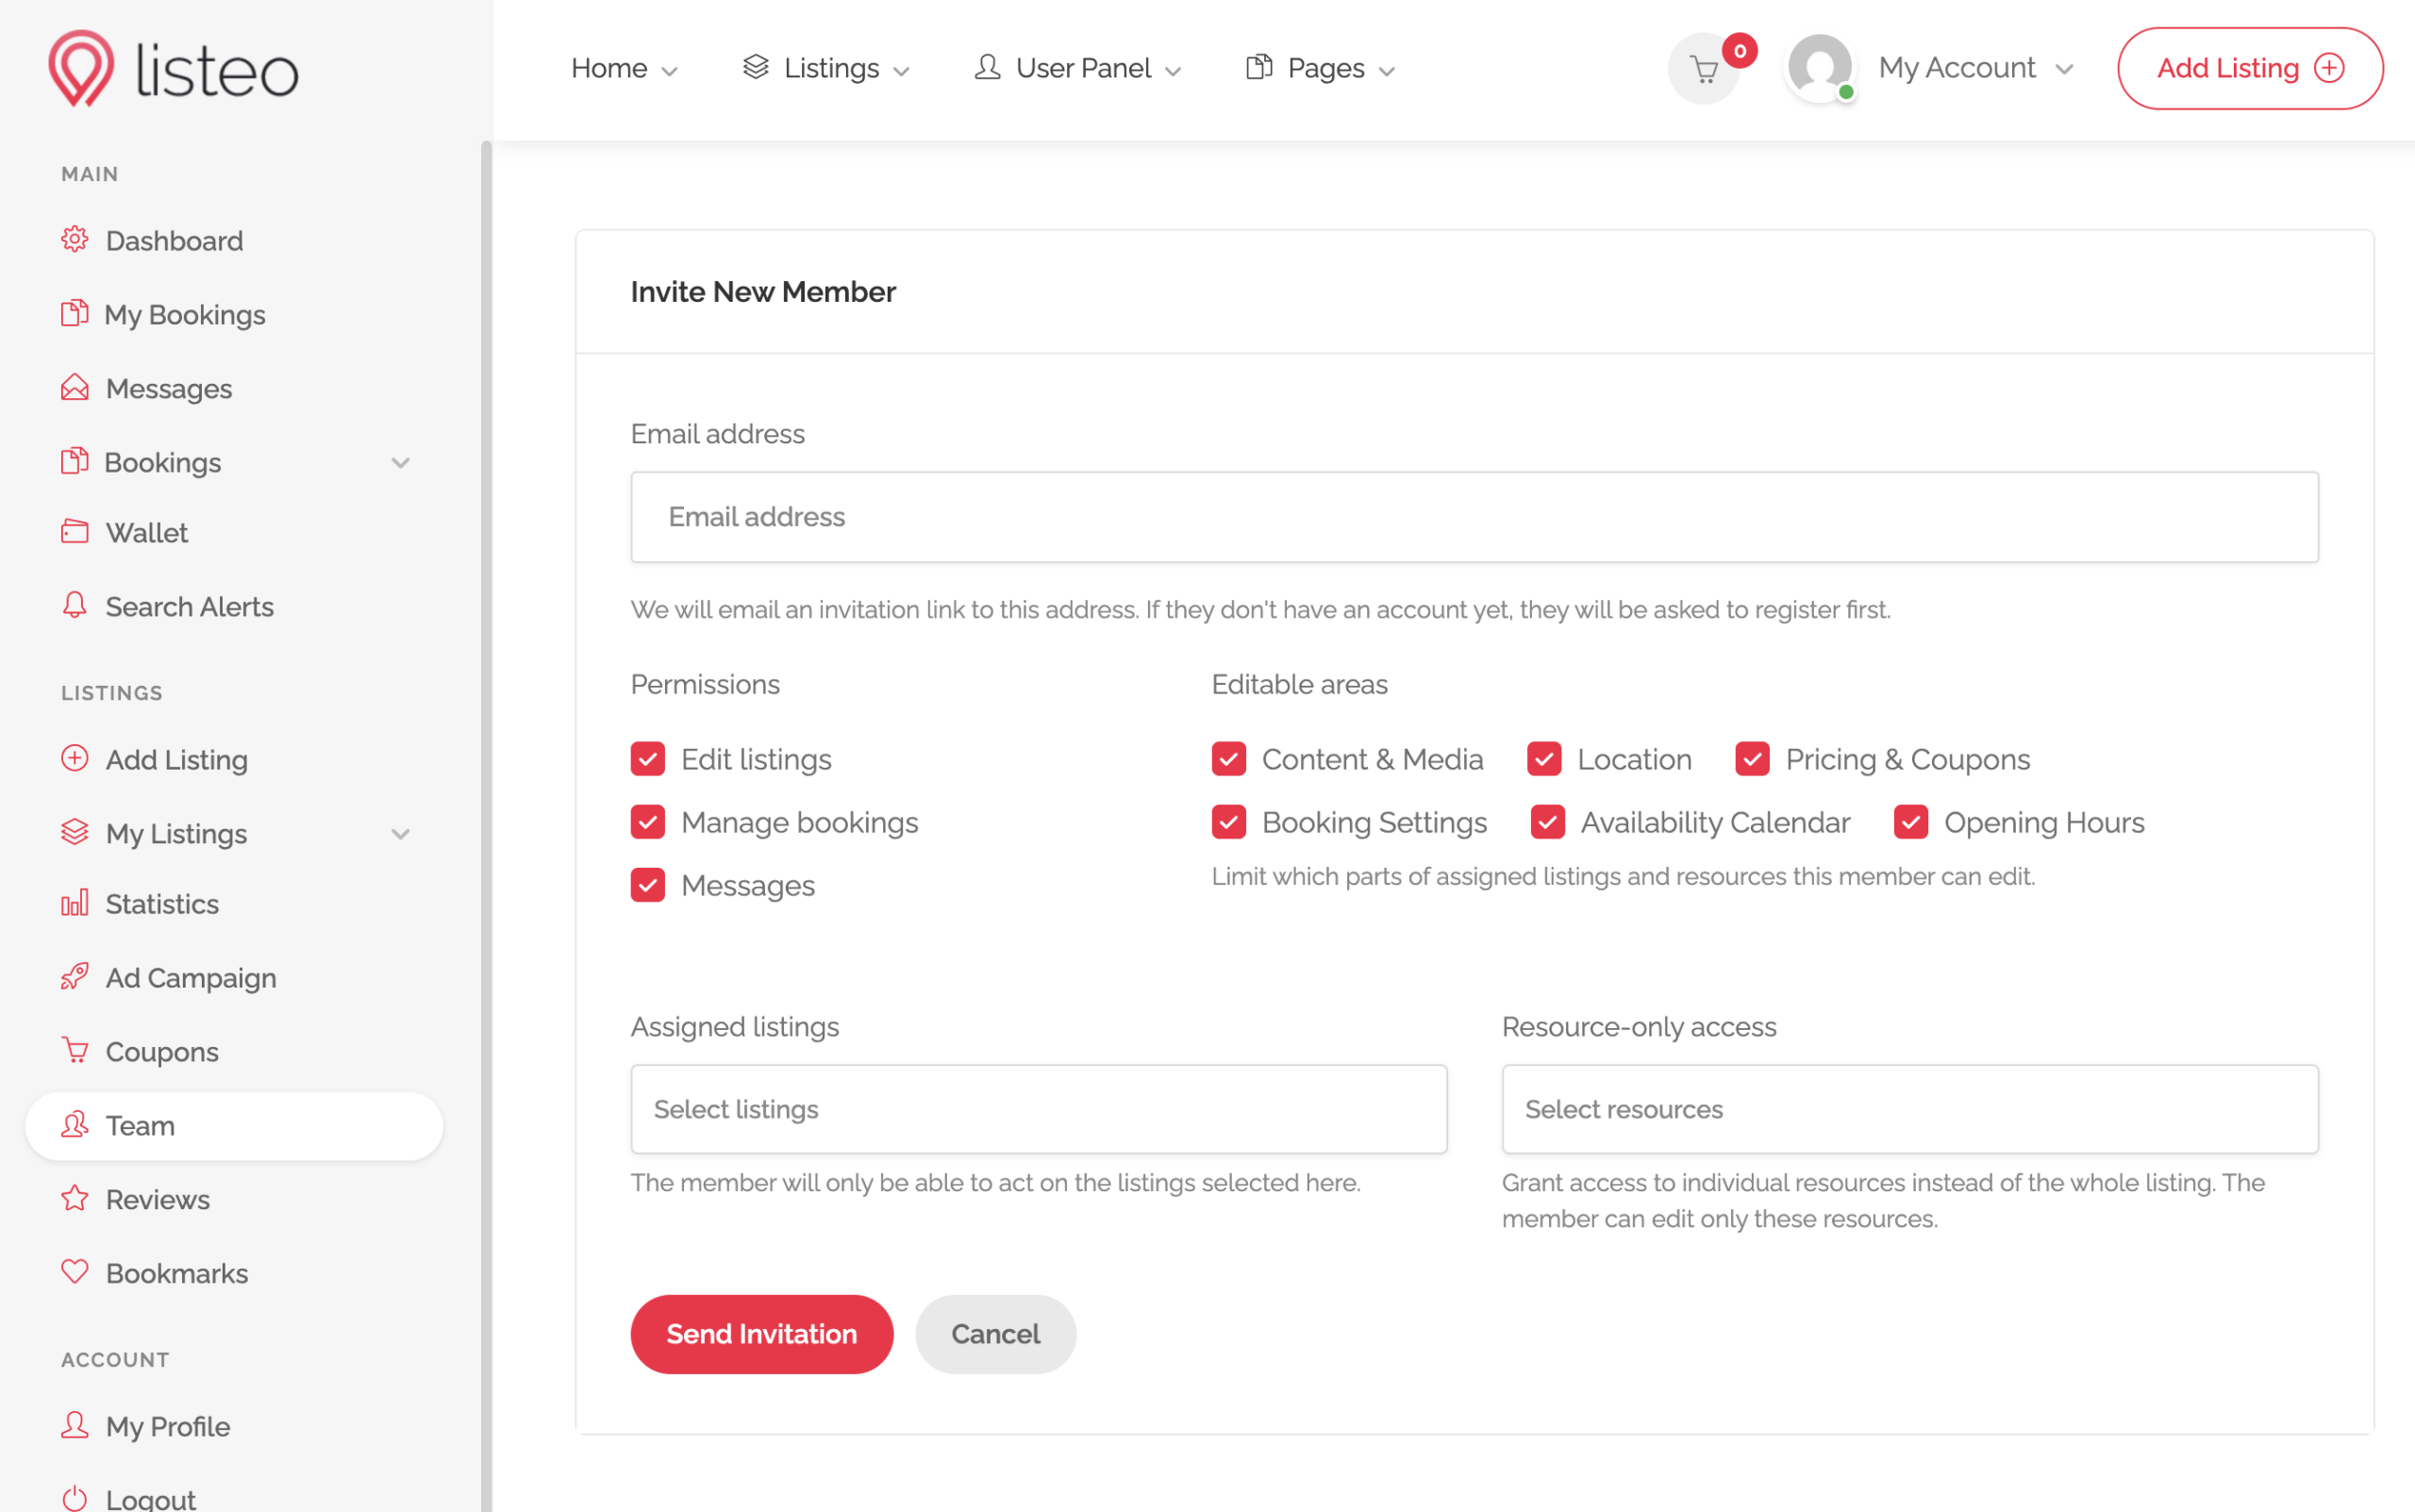
Open the Team page in the owner dashboard.
- Click Invite New Member.
- Enter the employee’s email address.
- Select at least one permission: Edit listings, Manage bookings, or Messages.
- If they can edit listings, select the areas they may change.
- Select the listings they may access.
- If Listeo Booking Plus is active, you can assign specific resources instead.
- Click Send Invitation.
You can invite someone before you have listings and assign listings later. Sites with many listings use a search field to make selection easier.
Step 3: Accept the Invitation
The process depends on whether the invited person already has an account:
- Existing user: They sign in, open the Team page, and select Accept or Decline.
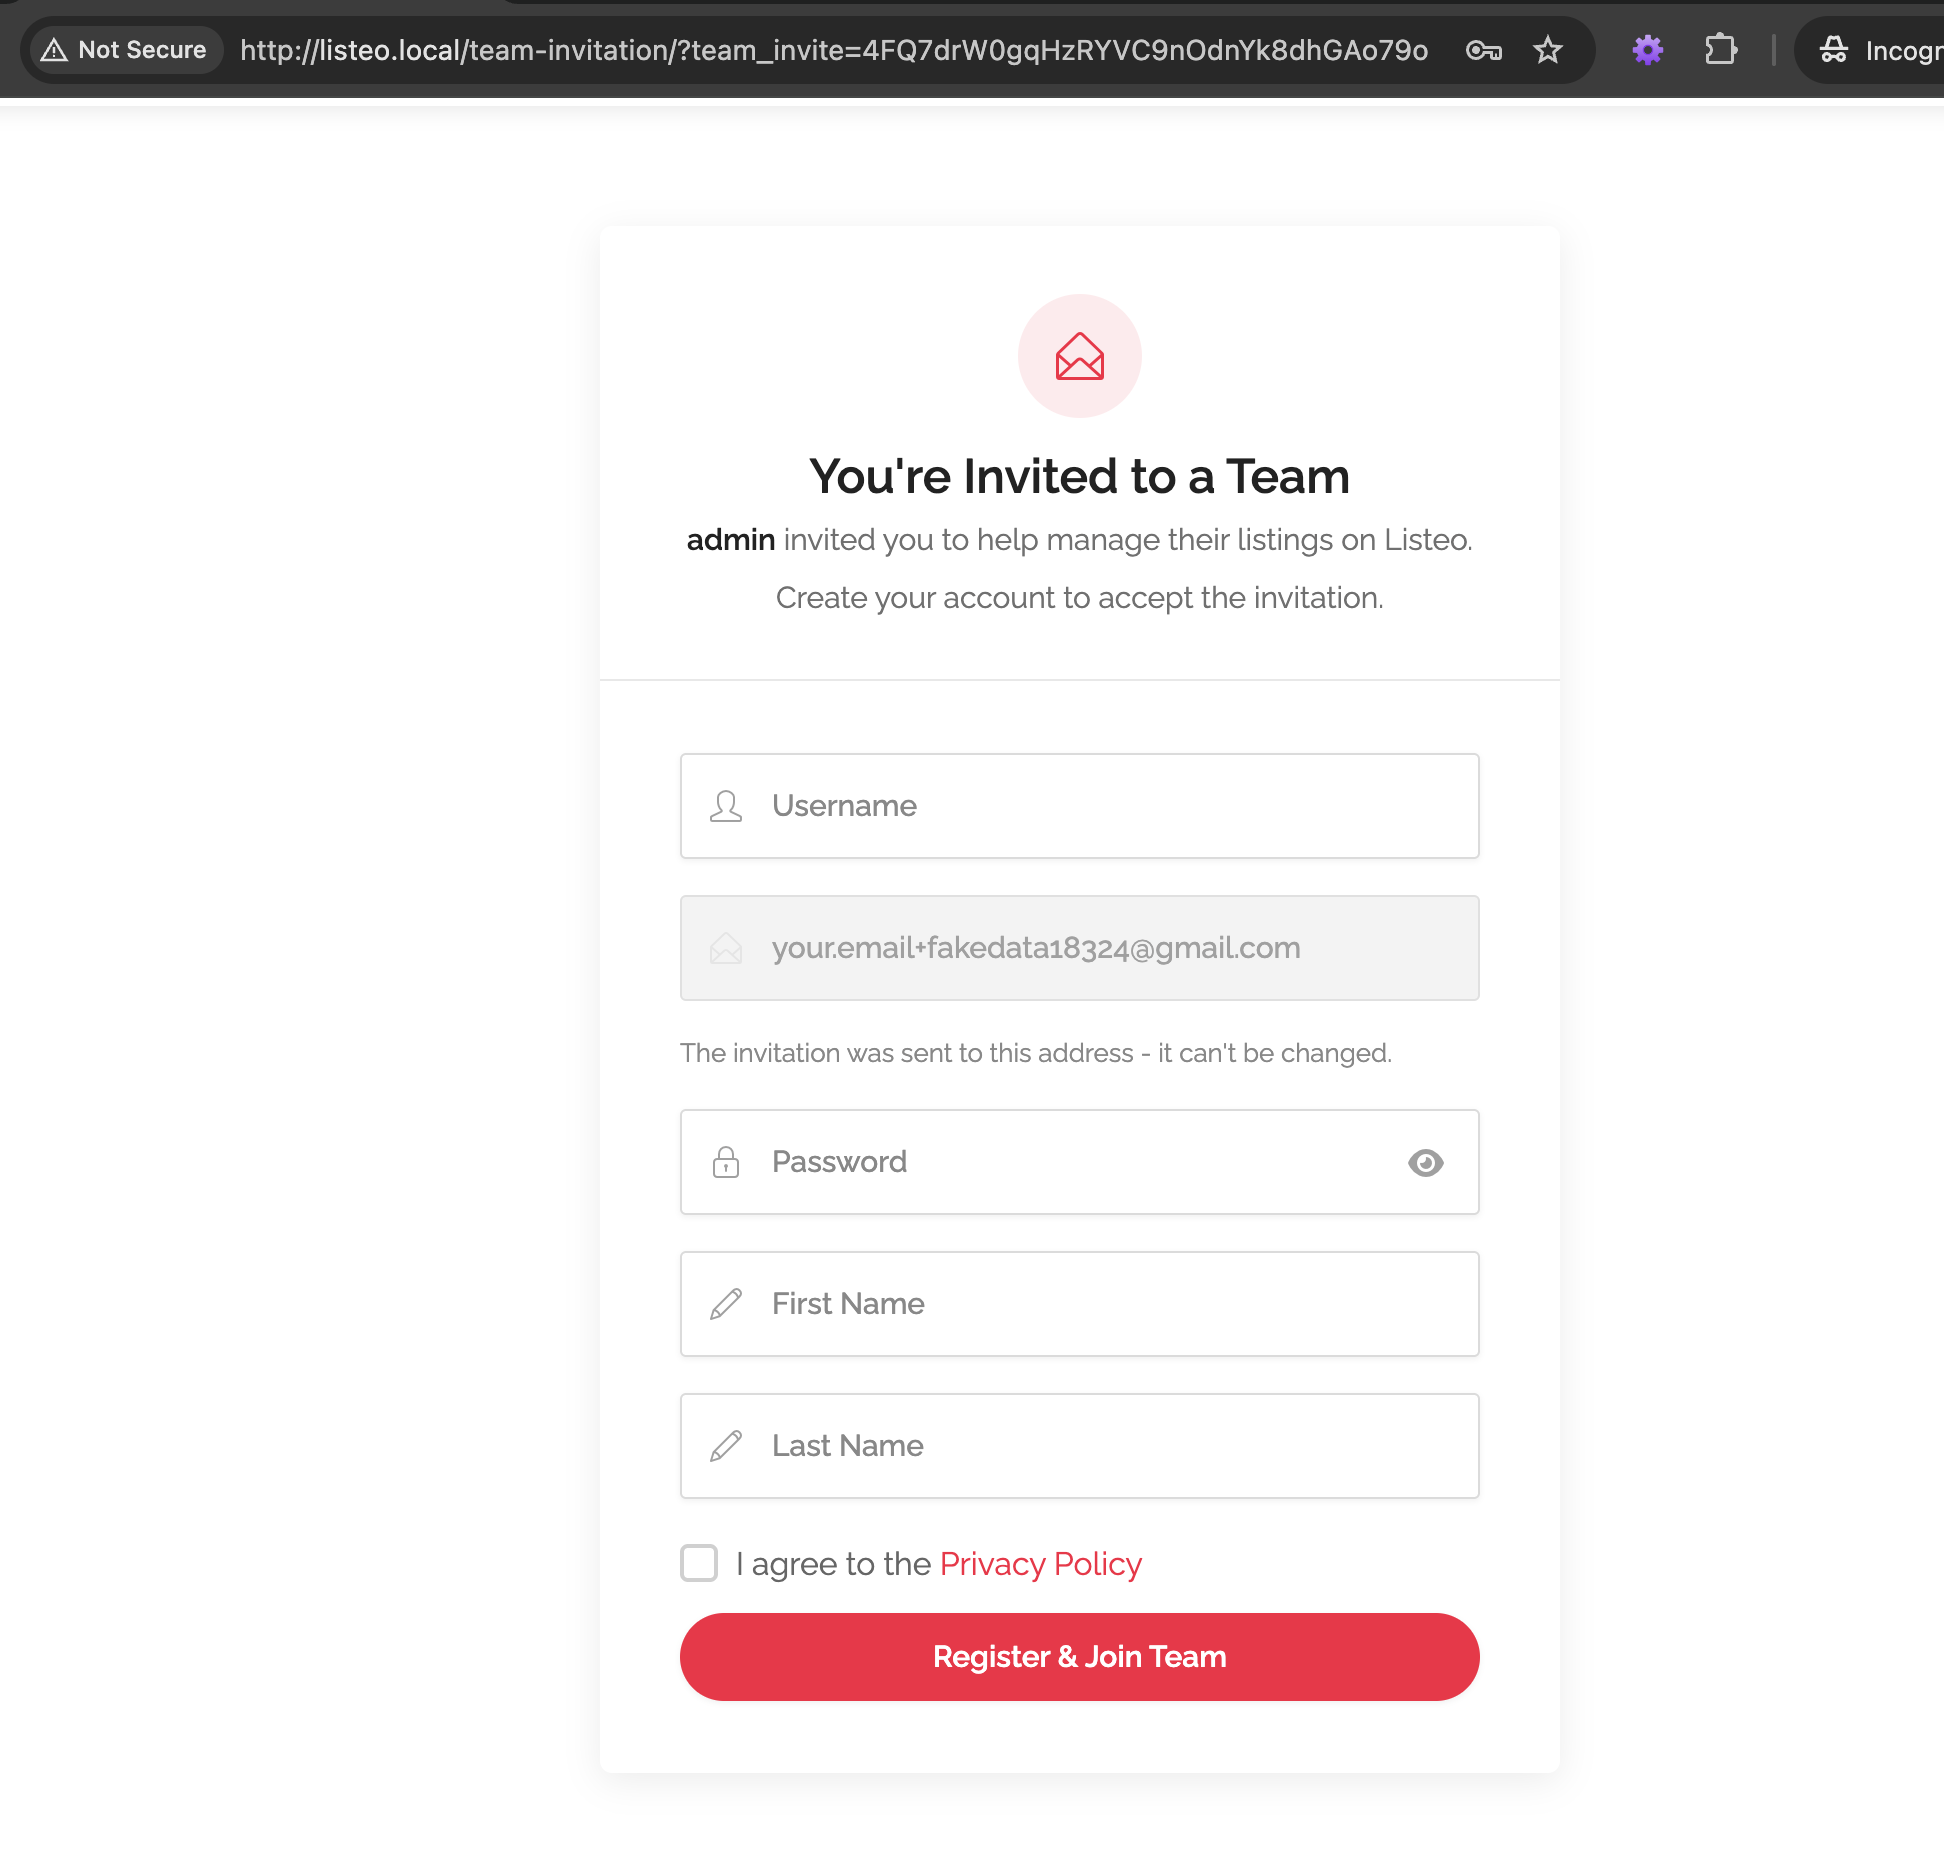
- New user: They open the Team Invitation page and register. Their email is already filled in and cannot be changed. Selecting Register & Join Team creates the account and activates access.
Invitation Statuses
| Status | Meaning |
|---|---|
| Pending | Sent but not answered |
| Active | Accepted and ready to use |
| Declined | Declined by the invited person |
| Revoked | Removed by the owner, or the employee left |
| Expired | The pending invitation is too old |
After an Employee Joins
What Owners Can Do
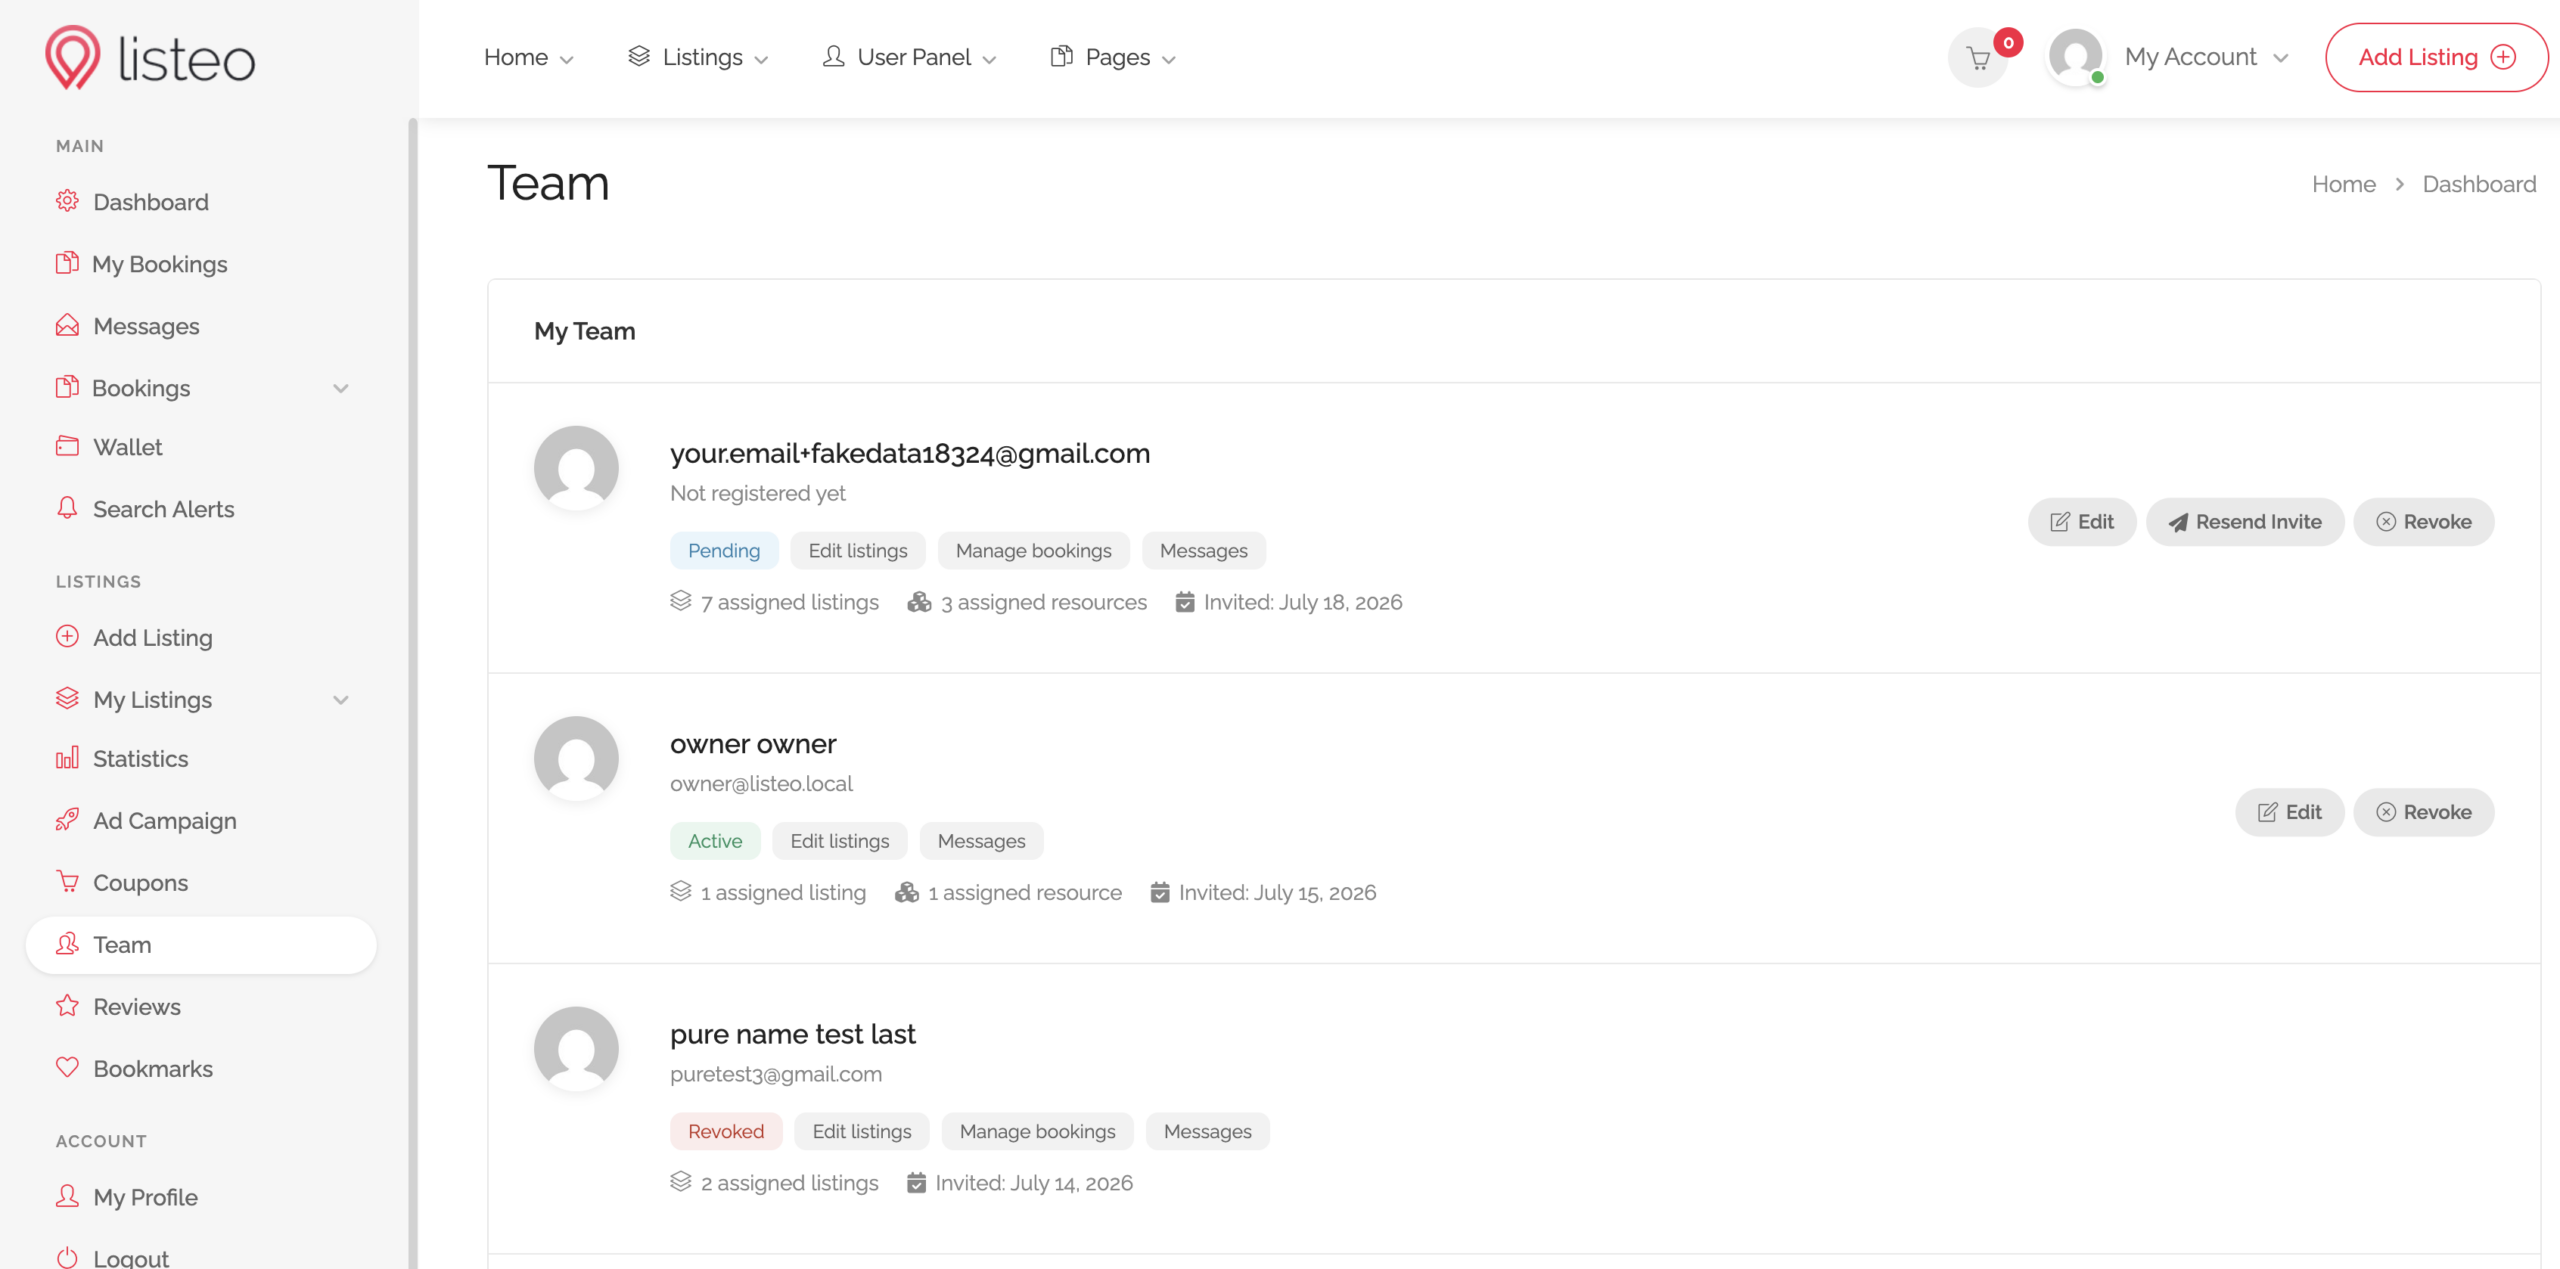
The Team page shows each employee’s status, permissions, assigned listings or resources, and invitation date. Owners can:
- Edit permissions and assignments.
- Resend Invite for pending or declined invitations.
- Revoke access for pending or active members.
What Employees See
The dashboard shows only the pages allowed by their permissions:
- My Listings: Requires Edit listings.
- Bookings: Requires Manage bookings.
- Messages: Requires Messages.
- My Teams: Shows their team memberships and includes a Leave Team action.
Owner tools such as Add Listing, Coupons, Ad Campaigns, Wallet, Statistics, and Subscriptions stay hidden. Dedicated employee accounts also do not see Reviews or Bookmarks. Existing owner or guest accounts keep those menu items.
Resource Access with Listeo Booking Plus
Resource access lets an employee manage selected rooms, staff, tables, vehicles, or other resources without access to the full listing.
The employee must also have the Edit listings permission. Without it, the resource assignment will not work.
A resource employee can:
- Edit assigned resources within the allowed areas.
- Pause or resume assigned resources.
- Manage bookings for assigned resources.
They cannot create, delete, or reassign resources. Listing owners and admins keep those controls. An employee with whole-listing access may create or duplicate resources, but cannot delete or reassign them.
Employees open assigned resources from the Resources dashboard page. Make sure Listeo Core → Pages → Manage Resources Page points to a published page containing [lbp_manage_resources].
FAQ
-
Can employees see the owner's other content?
-
Can I limit how many employees an owner can invite?
-
Can an employee unpublish or delete a listing?
-
What happens when I revoke an employee?
-
Can an employee manage resource bookings without the Manage bookings permission?
Troubleshooting
-
The invitation link is invalid, expired, or already used
-
A new employee is asked to sign in with a different account
-
An employee cannot see a conversation
-
An employee cannot unpublish or delete a listing
-
You have reached the maximum number of team members
-
A resource-only employee cannot open their resource
-
Please wait a moment before resending this invitation
-
You have sent too many invitations. Please try again later.
For Developers
Team / Employees includes a permission API, filters, and actions for access checks, editable areas, resource assignments, and revoking access. See the Developer Hooks Reference for the full list.